はじめに
EventHubsに連携するなら初めからAPIManagementなんか使わずにAMQPでEventHubsに送ればよいですが、連携元の都合でHTTPSしかおしゃべりできないケースに出くわした。
こんな場合APIM-Functions-DataStoreという方法もあるだろうが、連携してくるデータが大量だとFunctionsのスケールが上手くいくのか。スロットリングするんじゃないかとか心配事が増えるのでAPIManagementから直接EventHubsに投げられればうれしいのでは?と考えました。
こういうユースケースに対応しているわけではないのだが、APIMから直接EventHubsに流し込む手段がありました。
ただ、Loggerを作る部分はコンソールからは作れずコマンドラインを使う必要がありまして、マニュアルがとても不親切だったのでこのへんの手順を書き残しておこうと思います。
リソースの作成
APIManagementの作成
適当な名前で作っておいてください。30分~くらい時間がかかるので先に作っておこう。
EventHubsの作成
名前空間とエンティティそれぞれ作っておく。
Loggerの作成
Loggerの作成はPowershellで作っていきます。今回はCloudShellからやってしまいます。
$rg = "リソースグループ名"
$ehnamespace = "EventHubs 名前空間"
$ehname = "EventHubs 名前"
$ehauthrulename = "EventHubsの共有アクセスポリシー(なんでもOK)"
$logger = "Loggerの名前(なんでもOK)"
$apimCtx = New-AzApiManagementContext -ResourceGroupName ${rg} -ServiceName "phr-api-service-tisrwd"
EventHubs共有アクセスポリシーを作ります(これはコンソールからでも作れます)
New-AzEventHubAuthorizationRule -ResourceGroupName ${rg} -NamespaceName ${ehnamespace} -AuthorizationRuleName ${ehauthrulename} -Rights @("Listen", "Send")
EventHubsへの接続文字列を取得します。
$ehConnection = (Get-AzEventHubKey -ResourceGroupName ${rg} -NamespaceName ${ehnamespace} -AuthorizationRuleName ${ehauthrulename}).PrimaryConnectionString
APIManagementにLoggerの設定を行います。
New-AzApiManagementLogger -Context ${apimCtx} -LoggerId ${logger} -Name ${logger} -ConnectionString "$ehConnection;EntityPath=${ehname}"
これでAPIManagementにLoggerが仕込めましたので、あとはどのAPIでこれを動かすかを指定します。
APIManagementの設定
APIのインポート
今回はサンプルなので適当なswaggerの定義を持ってきます
Import-AzApiManagementApi -Context ${apimCtx} -SpecificationFormat "Swagger" -SpecificationUrl "https://conferenceapi.azurewebsites.net?format=json" -Path "conf" -ApiId "confapi"
Loggerの設定
API → All operations → InboundのPoliciesを開いてポリシーを設定します。特定のAPIで設定することも可能です。
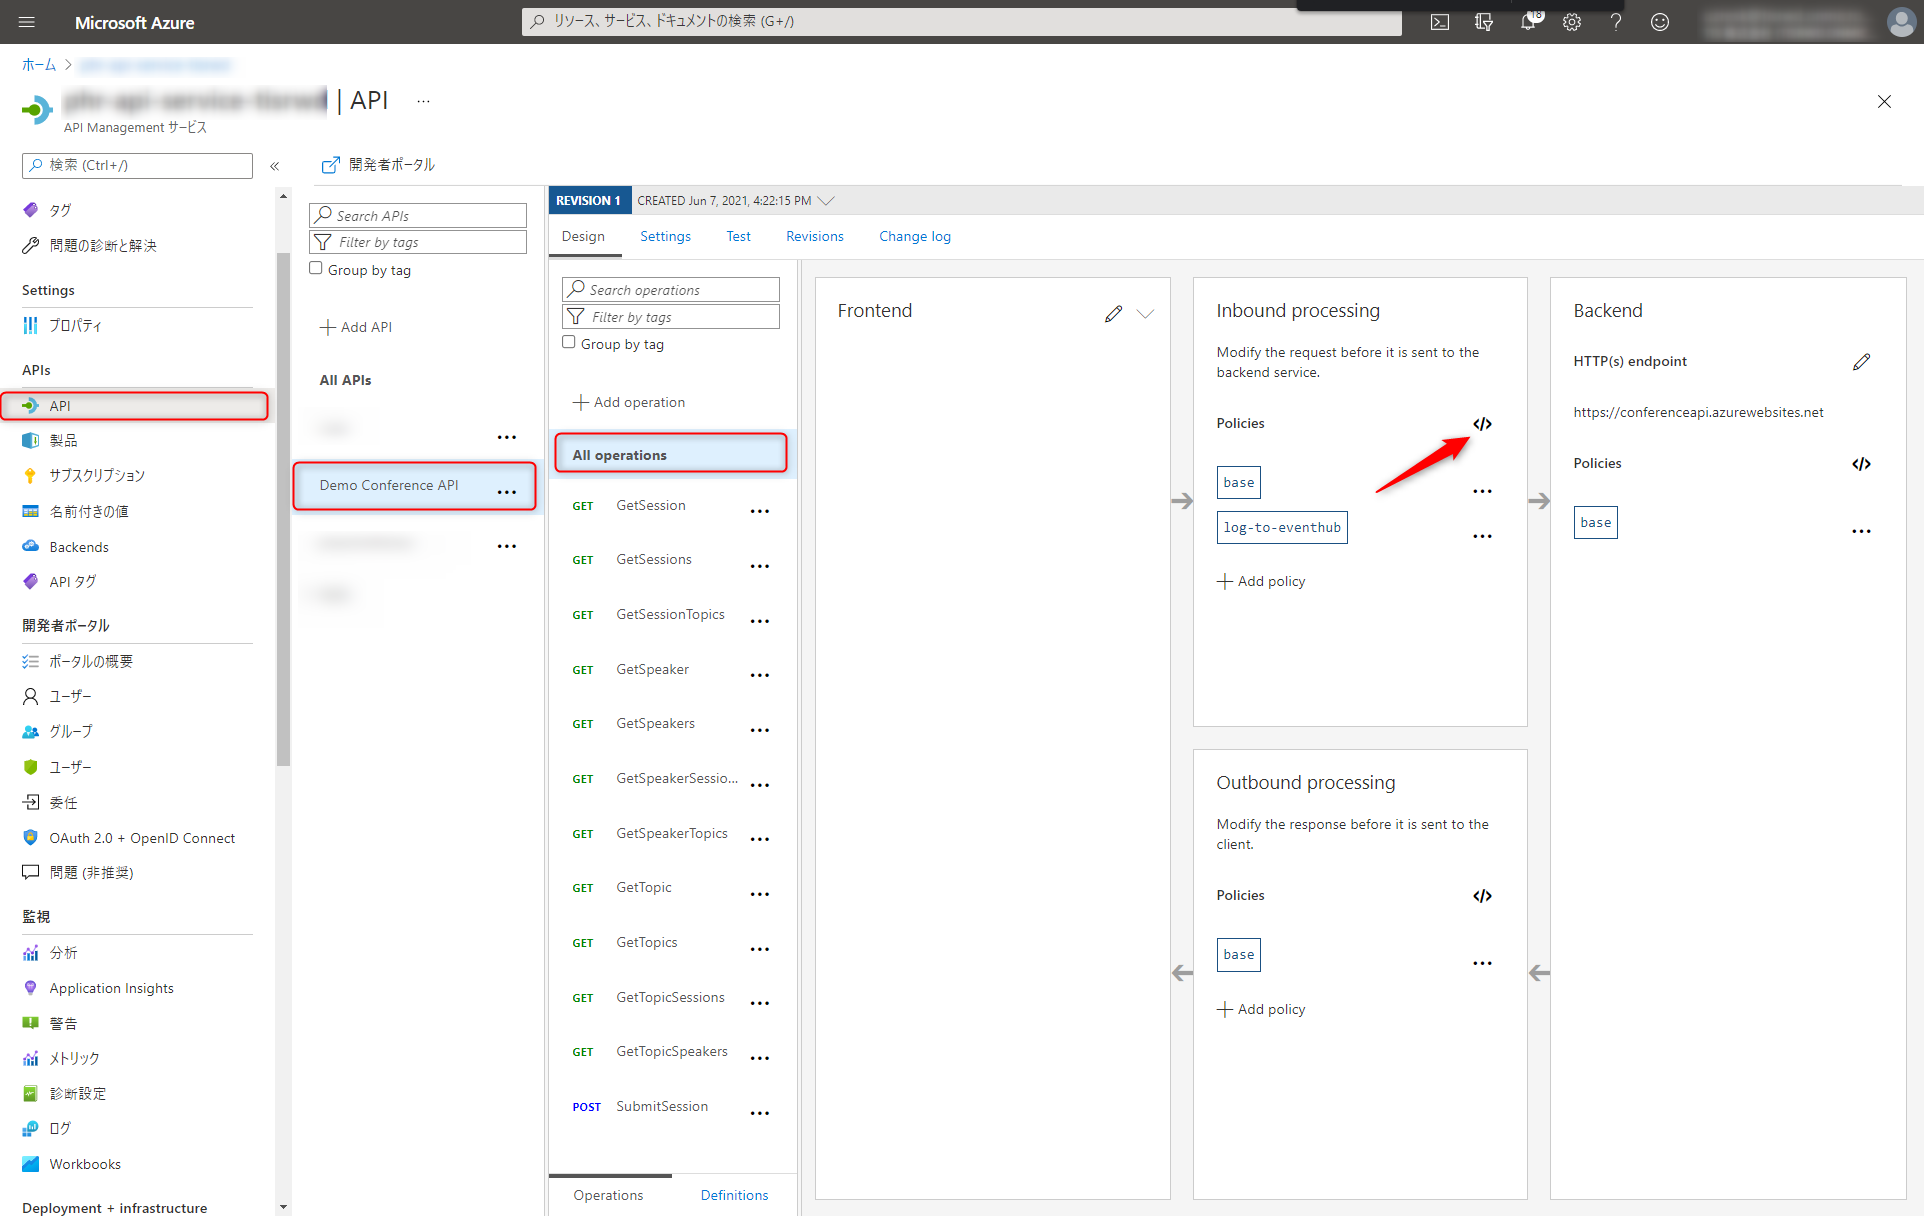
コピペします。以下の設定ではリクエストURLやQueryString、Bodyの内容をJSONで出力しています。
<!--
    IMPORTANT:
    - Policy elements can appear only within the <inbound>, <outbound>, <backend> section elements.
    - To apply a policy to the incoming request (before it is forwarded to the backend service), place a corresponding policy element within the <inbound> section element.
    - To apply a policy to the outgoing response (before it is sent back to the caller), place a corresponding policy element within the <outbound> section element.
    - To add a policy, place the cursor at the desired insertion point and select a policy from the sidebar.
    - To remove a policy, delete the corresponding policy statement from the policy document.
    - Position the <base> element within a section element to inherit all policies from the corresponding section element in the enclosing scope.
    - Remove the <base> element to prevent inheriting policies from the corresponding section element in the enclosing scope.
    - Policies are applied in the order of their appearance, from the top down.
    - Comments within policy elements are not supported and may disappear. Place your comments between policy elements or at a higher level scope.
-->
<policies>
    <inbound>
        <base />
        <log-to-eventhub logger-id="phr-api-logger">@{
                var requestLine = string.Format("{0} {1} HTTP/1.1\r\n",
                                                context.Request.Method,
                                                context.Request.Url.Path + context.Request.Url.QueryString);
                var body = context.Request.Body?.As<string>(true);
                return new JObject(
                    new JProperty("EventTime", DateTime.UtcNow.ToString()),
                    new JProperty("ServiceName", context.Deployment.ServiceName),
                    new JProperty("RequestId", context.RequestId),
                    new JProperty("RequestIp", context.Request.IpAddress),
                    new JProperty("OperationName", context.Operation.Name),
                    new JProperty("Request", requestLine),
                    new JProperty("Body", body)
                ).ToString();
            }</log-to-eventhub>
    </inbound>
    <backend>
        <base />
    </backend>
    <outbound>
        <base />
    </outbound>
    <on-error>
        <base />
    </on-error>
</policies>
動作確認
EventHub Explorer
EventHubに入ったデータの中身はVSCodeのEventHub Explorerで見るのが簡単です。セットアップしておきましょう。
https://marketplace.visualstudio.com/items?itemName=Summer.azure-event-hub-explorer
API Management上でAPIを実行
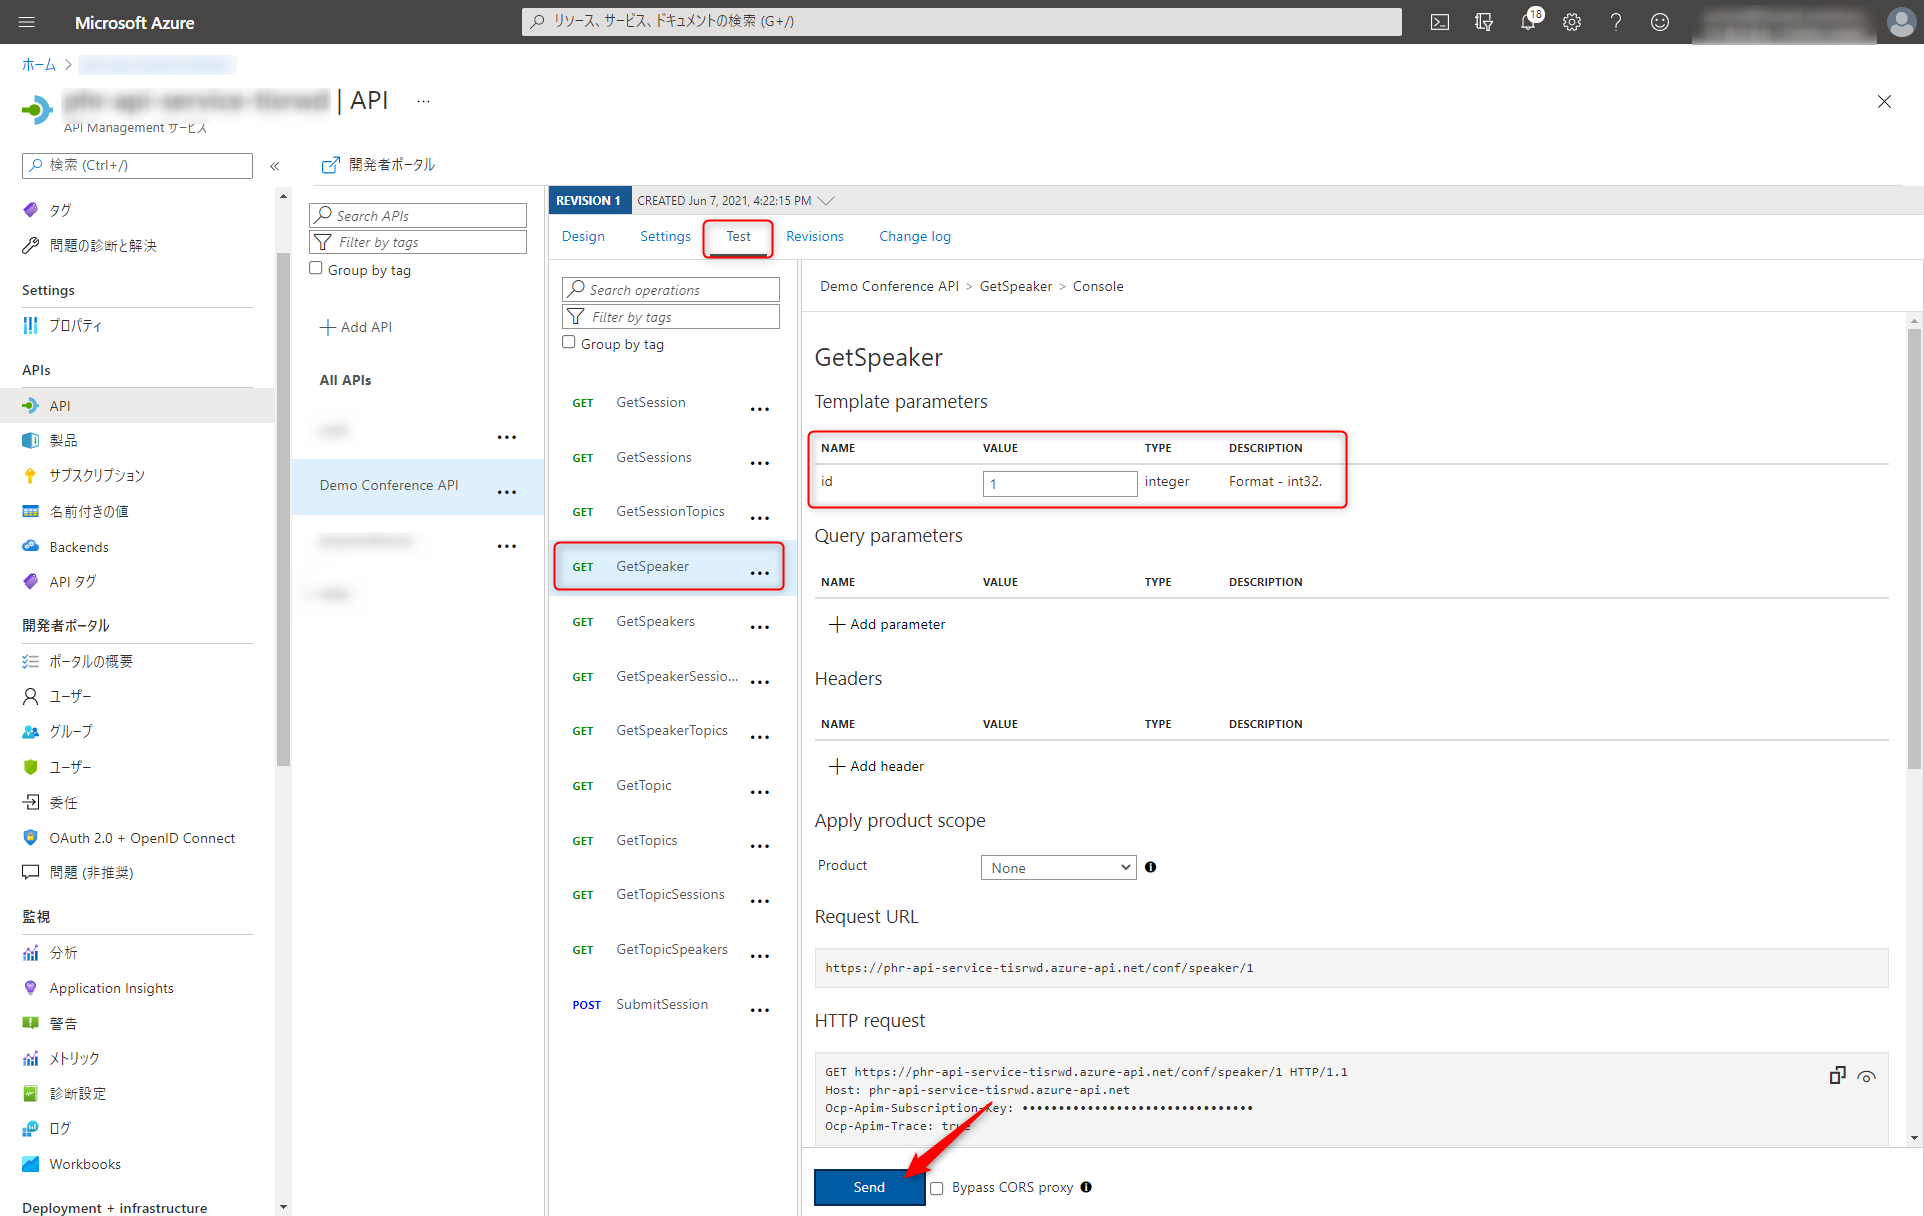
EventHubsExplorerでこんな感じのログが出力されればOKです
Azure Event Hub Explorer > Message Received:
{
  "EventTime": "6/8/2021 4:51:08 AM",
  "ServiceName": "xxxxxxxxxxxxxxxxx.azure-api.net",
  "RequestId": "b180929e-784d-4552-9085-xxxxxxxxxxxxx",
  "RequestIp": "xx.xx.xx.xx",
  "OperationName": "GetSpeaker",
  "Request": "GET /speaker/1 HTTP/1.1\r\n",
  "Body": null
}
jsonをPOST した場合は以下のような感じでログ出力されます
Azure Event Hub Explorer > Message Received:
{
  "EventTime": "6/8/2021 4:28:56 AM",
  "ServiceName": "xxxxxxxxxxxxxxxxx.azure-api.net",
  "RequestId": "9045b72e-cdd8-4caf-842e-xxxxxxxxxxxxx",
  "RequestIp": "xx.xx.xx.xx",
  "OperationName": "SubmitSession",
  "Request": "POST /session/111/feedback HTTP/1.1\r\n",
  "Body": "{\"foo\":\"bar\"}"
}
ということであとはStreamAnalyticsとかで煮るなり焼くなりしてください。