はじめに
パブリッククラウドでIaaSを利用するとき、「自分(たち)が絶対にやる設定」ってありますよね。
例えば、
・タイムゾーン、言語設定を変更
・監視用にエージェントインストール(Zabbix、Datadogなど)
・秘伝のスクリプトを配置しcronで動くようにする
などなど。
そういった設定を行う際に、
- VM作成
- 作成したVMの情報をAnsibleのInventoryに記載
- Ansible Playbookで設定実行
とするのも面倒なので、Ansibleのダイナミックインベントリ機能を利用していっぺんにやってしまおう、という内容です。
作成する環境
Azure上で以下の図のような構成を、AWX 15.0.1にて作成します。
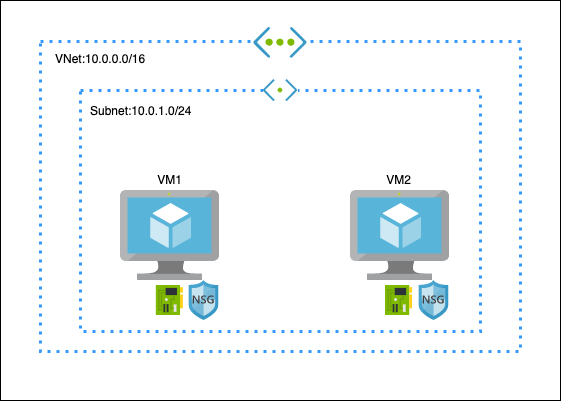
作成したVMには以下のような設定をします。
【共通】
タイムゾーンをAsia/Tokyoに設定
【VM1のみ】
nginxをインストールして起動
【VM2のみ】
Apacheをインストールして起動
(2台ともWebサーバをインストールするのは意味ないけど、気の利いたPlaybookを準備する時間が無かったんです…)
サービスプリンシパル作成
AWXからAzureを操作するためにサービスプリンシルを作成します。
以下コマンドでは「AWX」という名前でサービスプリンシパルを作成しています。
passwordは作成時にしか表示されないので、出力結果はちゃんと控えておきましょう。(再発行は可能)
$ az ad sp create-for-rbac --name AWX
Changing "AWX" to a valid URI of "http://AWX", which is the required format used for service principal names
Creating a role assignment under the scope of "/subscriptions/<SubscriptionID>"
{
  "appId": "<AppID>",
  "displayName": "AWX",
  "name": "http://AWX",
  "password": "<Secret>",
  "tenant": "<TenantID>"
}
次に、作成したサービスプリンシパルをAWXの認証情報として登録します。
ここでは「Azure Service Principal」という名前で登録します。
「認証情報タイプ」に『Microsoft Azure Resource Manager』を選択し、以下の情報を入力していきます。
・サブスクリプション ID … 「az account show | jq .id」で取得可能。
・クライアント ID … サービスプリンシパル作成時に出力されたappIdの値
・クライアントシークレット … サービスプリンシパル作成時に出力されたpasswordの値
・テナント ID … サービスプリンシパル作成時に出力されたtenantの値
ユーザー名・パスワード・AZUREクラウド環境のテキストボックスは空白で構いません。
(Azure StackユーザーはAZUREクラウド環境の入力がいるのかも。環境ないので試せません…)
ダイナミックインベントリの設定
AWX上でダイナミックインベントリの設定を行います。
新規インベントリを「Azure Inventory」という名前で作成しいったん保存、
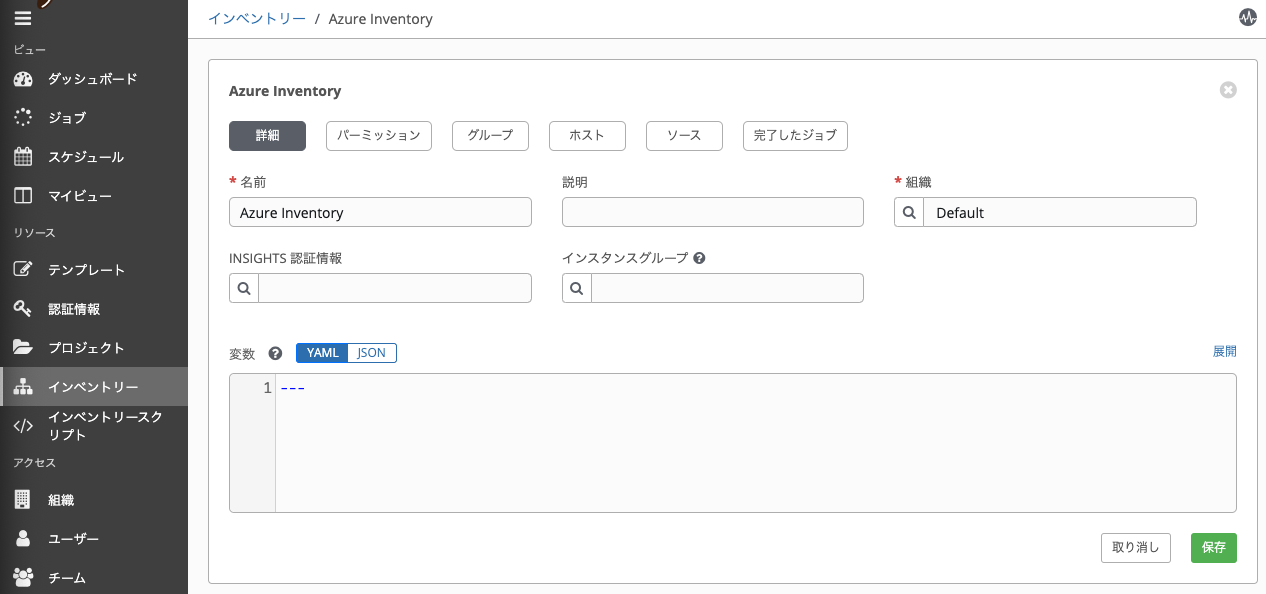
その後、「ソース」から新規ソースの追加を行います。

ソースに「Microsoft Azure Resource Manager」を選択、
認証情報に先ほど作成した認証情報をセットします。
また、「起動時の更新」にチェックを付けることで、このインベントリを利用したジョブを動かした時にインベントリを更新するようにします。
ソース変数は今回以下のように設定しました。
---
include_vm_resource_groups:
- AWX-rg
keyed_groups:
- key: tags.Ansible
  separator: ''
「AWX-rg」という名前のリソースグループをダイナミックインベントリの収集対象とし、「Ansible」というタグの値でグループを作成する、という内容です。
他のオプションは以下を参照ください。
azure.azcollection.azure_rm – Azure Resource Manager inventory plugin
AWXプロジェクト作成
下記の2つのPlaybookを含んだプロジェクトを作成します。
Azureリソース作成用
---
- name: Create Azure VM
  hosts: localhost
  connection: local
  tasks:
  - name: Create resource group
    azure_rm_resourcegroup:
      name: AWX-rg
      location: japaneast
  - name: Create virtual network
    azure_rm_virtualnetwork:
      resource_group: AWX-rg
      name: AWX-vnet
      address_prefixes: "10.0.0.0/16"
  - name: Add subnet
    azure_rm_subnet:
      resource_group: AWX-rg
      name: AWX-subnet
      address_prefix: "10.0.1.0/24"
      virtual_network: AWX-vnet
  - name: Create public IP address for VM1
    azure_rm_publicipaddress:
      resource_group: AWX-rg
      allocation_method: Static
      name: PublicIP1
  - name: Create public IP address for VM2
    azure_rm_publicipaddress:
      resource_group: AWX-rg
      allocation_method: Static
      name: PublicIP2
  - name: Create Network Security Group for VM1
    azure_rm_securitygroup:
      resource_group: AWX-rg
      name: VM1-sg
      rules:
        - name: SSH
          protocol: Tcp
          destination_port_range: 22
          access: Allow
          priority: 1001
          direction: Inbound
        - name: HTTP
          protocol: Tcp
          destination_port_range: 80
          access: Allow
          priority: 1011
          direction: Inbound
  - name: Create Network Security Group for VM2
    azure_rm_securitygroup:
      resource_group: AWX-rg
      name: VM2-sg
      rules:
        - name: SSH
          protocol: Tcp
          destination_port_range: 22
          access: Allow
          priority: 1001
          direction: Inbound
        - name: HTTP
          protocol: Tcp
          destination_port_range: 80
          access: Allow
          priority: 1011
          direction: Inbound
  - name: Create virtual network interface card for VM1
    azure_rm_networkinterface:
      resource_group: AWX-rg
      name: NIC1
      virtual_network: AWX-vnet
      subnet: AWX-subnet
      security_group: VM1-sg
      ip_configurations:
        - name: default
          public_ip_address_name: PublicIP1
          primary: yes
  - name: Create virtual network interface card for VM2
    azure_rm_networkinterface:
      resource_group: AWX-rg
      name: NIC2
      virtual_network: AWX-vnet
      subnet: AWX-subnet
      security_group: VM2-sg
      ip_configurations:
        - name: default
          public_ip_address_name: PublicIP2
          primary: yes
  - name: Get SSH Authorized key
    uri:
      url: https://gitlab.com/ussvgr.keys
      return_content: yes
    register: ssh_key
  - name: Dump SSH Authorized key
    debug:
      msg: "SSH Public key is {{ ssh_key.content }}"
  - name: Create VM1
    no_log: yes
    azure_rm_virtualmachine:
      resource_group: AWX-rg
      name: VM1
      tags:
        - Ansible: nginx
      vm_size: Standard_B1ls
      admin_username: ussvgr
      ssh_password_enabled: false
      ssh_public_keys:
        - path: /home/ussvgr/.ssh/authorized_keys
          key_data: "{{ ssh_key.content }}"
      network_interfaces: NIC1
      image:
        offer: UbuntuServer
        publisher: Canonical
        sku: '18.04-LTS'
        version: latest
      managed_disk_type: Standard_LRS
  - name: Create VM2
    no_log: yes
    azure_rm_virtualmachine:
      resource_group: AWX-rg
      name: VM2
      tags:
        - Ansible: apache
      vm_size: Standard_B1ls
      admin_username: ussvgr
      ssh_password_enabled: false
      ssh_public_keys:
        - path: /home/ussvgr/.ssh/authorized_keys
          key_data: "{{ ssh_key.content }}"
      network_interfaces: NIC2
      image:
        offer: UbuntuServer
        publisher: Canonical
        sku: '18.04-LTS'
        version: latest
      managed_disk_type: Standard_LRS
前述のダイナミックインベントリの設定に合わせタグを設定しています。
・VM1: nginxグループ
・VM2: apacheグループ
とするようにしました。
VM設定用
- name: Common Settings
  hosts: all
  become: yes
  tasks:
    - name: Set Timezone
      timezone: name=Asia/Tokyo

- name: nginx Setup
  hosts: nginx
  become: yes
  tasks:
    - name: Install nginx
      apt:
        name: nginx
        update_cache: yes
    - name: Start nginx
      systemd:
        name: nginx
        state: restarted
        daemon_reload: yes
        enabled: yes

- name: Apache Setup
  hosts: apache
  become: yes
  tasks:
    - name: Install Apache
      apt:
        name: apache2
        update_cache: yes
    - name: Start Apache
      systemd:
        name: apache2
        state: restarted
        daemon_reload: yes
        enabled: yes
何の工夫もないPlaybookですが、全ホスト対象の処理とグループ別の処理を定義しています。
AWXテンプレート
Azureリソース作成ジョブ
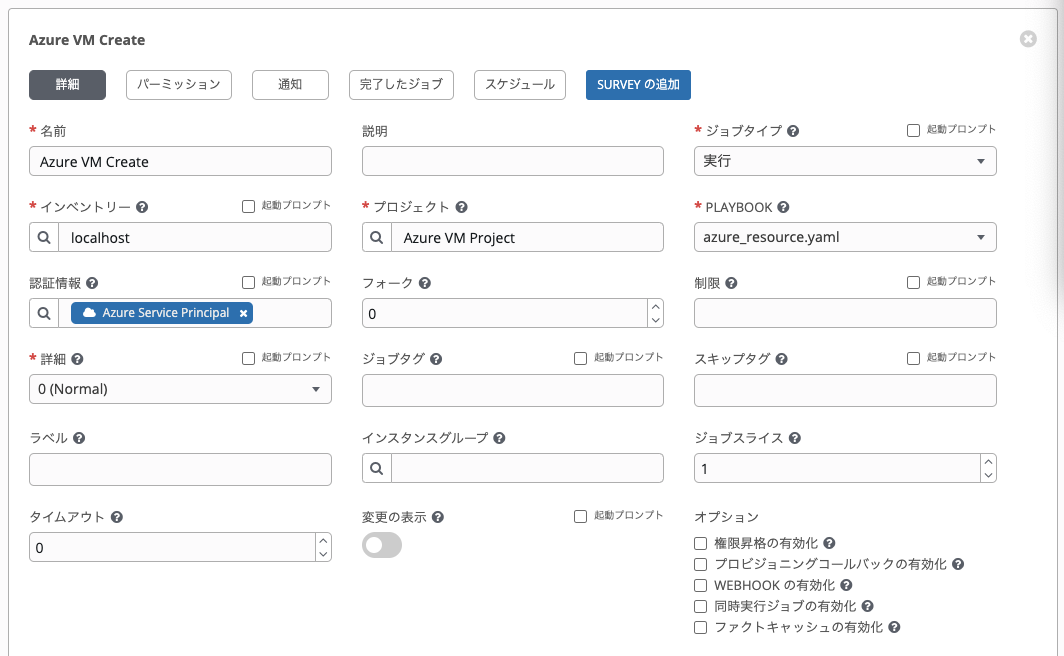
PLAYBOOKにAzureリソース作成用のPlaybookを、
認証情報に上記で作成した「Azure Service Principal」を指定します。
インベントリーはPlaybookでlocalhostを指定しているのでなんでもよさそうですが、ここではlocalhostだけを含んだインベントリーを作成して指定しています。
VM設定用ジョブ
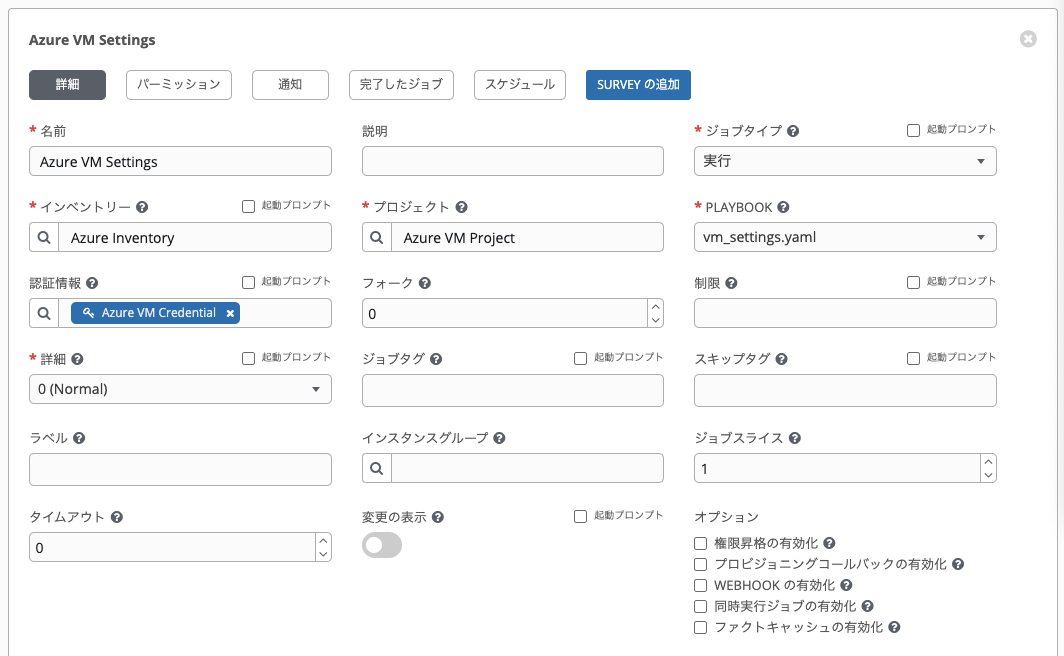
インベントリーに作成した「Azure Inventory」を、
PLAYBOOKにVM設定用Playbookを指定します。
VMにログイン可能な認証情報は予め作成しておきましょう。
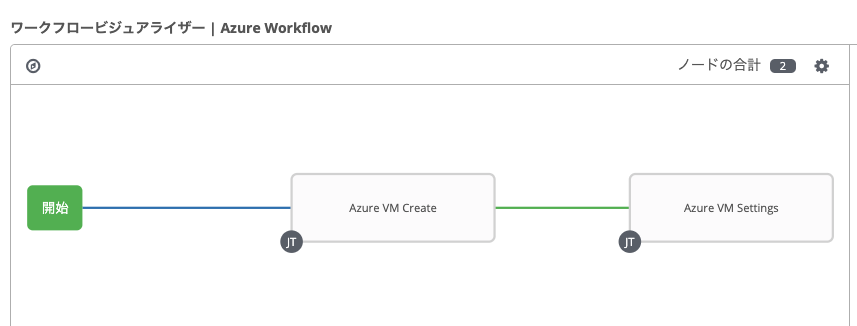
ワークフロー
実行
作成したワークフローを実行します。
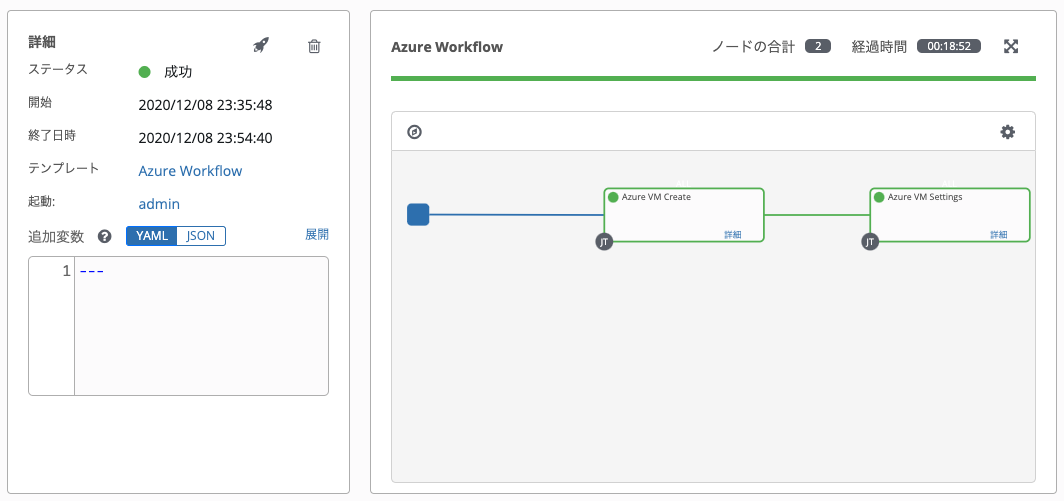
問題なく完了すれば、上記のようにジョブが2つとも緑色の表示になります。
確認
それぞれのVMのパブリックIPをブラウザから開くと、
【VM1】
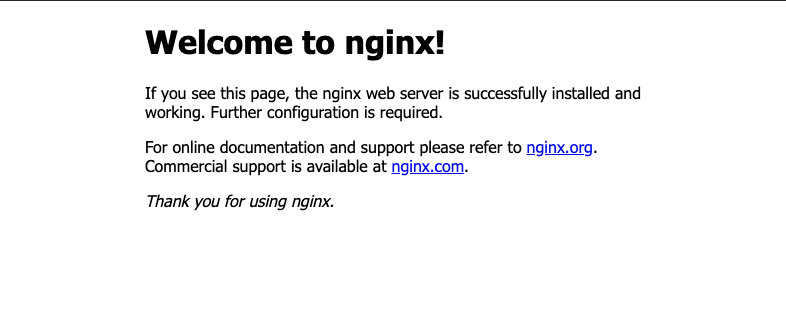
【VM2】

とそれぞれnginx・Apacheが稼働していることが確認できます。
また、SSHでログインしてみて
ussvgr@VM1:~$ date
Wed Dec  9 00:01:33 JST 2020
---
ussvgr@VM2:~$ date
Wed Dec  9 00:02:14 JST 2020
とそれぞれタイムゾーンが変更されたことも確認できました。
おわりに
同じようなことを実現しようと思うと、TerraformとAnsibleを組み合わせるパターンの紹介が多いように思いますが、Ansibleだけでもできますよ、という内容でした。
参考にしたサイト
Azure公式ドキュメント
クイック スタート:Ansible を使用して Azure で Linux 仮想マシンを構成する
Ansible公式サイト(AWS EC2で同様の事を行っているデモ)
Ansible + AWS - Automate EC2 Provisioning with Red Hat Ansible Engine and Red Hat Ansible Tower

