コード
require 'rubyXL'
require 'rubyXL/convenience_methods'

workbook = RubyXL::Workbook.new
sheet = workbook.first

sheet.add_cell(0, 0, 'ID')
sheet.add_cell(0, 1, '名称')
sheet.add_cell(0, 2, '状態')
sheet.add_cell(1, 0, 1)
sheet.add_cell(1, 1, 'foo')
sheet.add_cell(1, 2, '済')
sheet.add_cell(2, 0, 2)
sheet.add_cell(2, 1, 'bar')
sheet.add_cell(2, 2, '未')

# 上から1行と左から2列を固定表示
view = RubyXL::WorksheetView.new
view.pane = RubyXL::Pane.new(
  top_left_cell: RubyXL::Reference.new(1, 2),
  y_split: 1,
  x_split: 2,
  state: 'frozenSplit',
  activePane: 'bottomRight'
)
views = RubyXL::WorksheetViews.new
views << view
sheet.sheet_views = views

# 入力規則を設定
formula = RubyXL::Formula.new(expression: "\"未,済\"")
range = RubyXL::Reference.new(1, 1048575, 2, 2) # 入力規則を設定する範囲。R2C3:R1048576C3
validation = RubyXL::DataValidation.new(
  sqref: range,
  formula1: formula,
  type: 'list',             # 他に none, whole, decimal, date, time, textLength, custom。デフォルトはnone(すべての値)
  error_style: 'stop',      # 他に warning, information。デフォルトはstop(停止)
  allow_blank: true,        # trueで「空白を無視する」がオン。デフォルトはfalse
  show_error_message: true, # trueで「無効なデータが入力されたらエラーメッセージを表示する」がオン。デフォルトはfalse
  show_drop_down: false     # 何故かfalseで「ドロップダウンリストから選択する」がオン。デフォルトはfalse
)
validations = RubyXL::DataValidations.new
validations << validation
sheet.data_validations = validations

workbook.write('out.xlsx')
show_drop_down のtrue/falseが何故か意味的に逆なので注意。
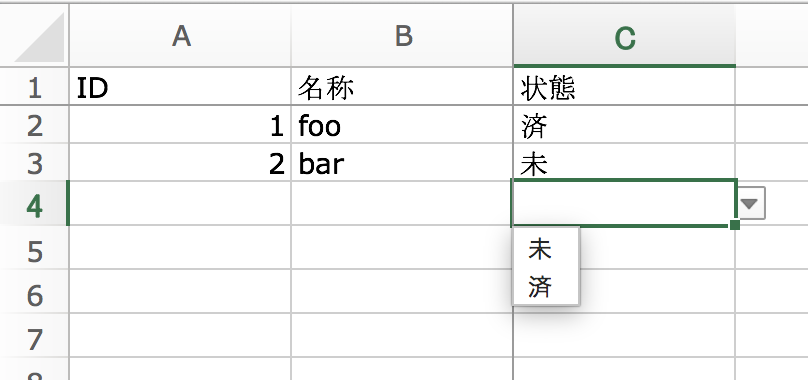
結果
画像は Microsoft Excel for Mac での結果。
参照
- rubyXL公式wiki
- https://github.com/weshatheleopard/rubyXL/issues/224#issuecomment-287355611
-
http://www.datypic.com/sc/ooxml/e-ssml_dataValidation-1.html
- その他の項目(エラー時のメッセージなど)の設定方法もここを読めば分かります。
