はじめに
Alamofire 4.0を使って、multipart/form-data のPOSTリクエストを行う方法です。
ライブラリの導入方法は割愛します。
サンプルコード
let requestUrl = "http://localhost:8080/"

let filePath = ... // 送信データのファイルパス

let dataA = "hogehoge".data(using: .utf8)!
let dataB = "fugafuga".data(using: .utf8)!
let dataC = URL(fileURLWithPath: filePath)

Alamofire.upload(multipartFormData: { (multipartFormData) in
    // 送信データを設定
    multipartFormData.append(dataA, withName: "dataA", mimeType: "text/plain")
    multipartFormData.append(dataB, withName: "dataB", mimeType: "text/plain")
    multipartFormData.append(dataC, withName: "dataC", fileName: "send.png", mimeType: "image/png")
}, to: requestUrl) { (encodingResult) in
    switch encodingResult {
    case .success(let upload, _, _):
        upload.responseJSON { response in // ← JSON形式で受け取る
            if !response.result.isSuccess {
                print("# ERROR")
            } else {
                print("# SUCCESS")
                print(response)
            }
        }
    case .failure(let encodingError):
        print(encodingError)
    }
}
POST結果
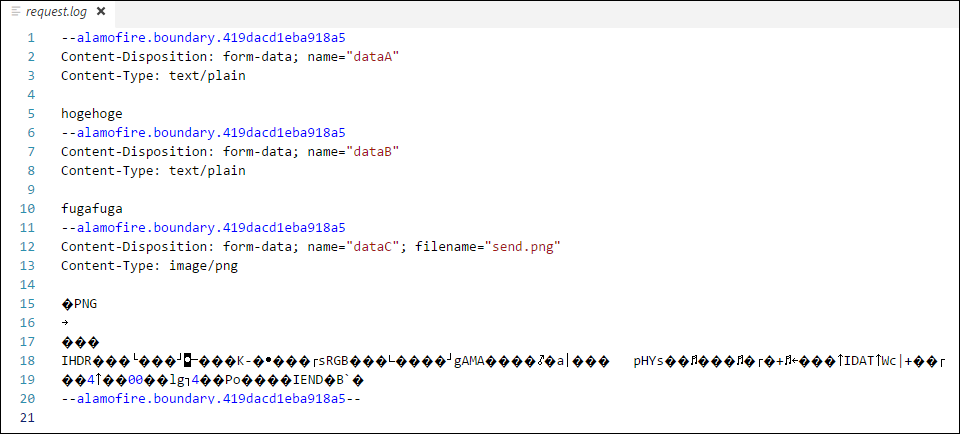
上記のログは node.js を使って出力しました。
post.js
var express = require('express');
var fs = require('fs');
var app = express();

app.listen(8080);
console.log('Server is online.');

app.post('/', function (req, res) {
    var body = '';
    req.on('data', function (data) {
        body += data;
    });
    req.on('end', function () {
        fs.writeFile("request.log", body, () => {});
    });
    res.json('{"result":"OK"}');
})