先日、弊社(heathrow, Inc)の自社サービスFAVRICA - あらゆるファッション通販サイトをまとめて検索のAndroid版を無事リリースすることが出来ました。
公開を記念して、開発で得たノウハウなどをまとめて公開しております.
FAVRICA Android版公開記念、いろんなノウハウ公開 - Qiita
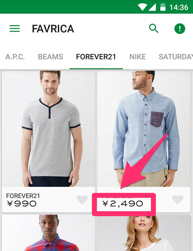
FAVRICAでは要所、要所にカスタムフォントを導入した、下のようなかっこいいデザインになってます.
さて、Androidでのカスタムフォントですが、
Calligraphyというライブラリを使うと、すごく簡単に導入できます.
こんな感じです.
<TextView
    fontPath="fonts/SackersGothicStd-Medium.ttf"
    android:layout_width="match_parent"
    android:layout_height="wrap_content" />
以下、導入方法.
導入方法
1. build.gradleに追加
app/build.gradle
dependencies {
    compile 'uk.co.chrisjenx:calligraphy:2.1.0'
}
2. Applicationで初期化処理
Application.java
public class MyApplication extends Application {

    @override
    public void onCreate() {
        CalligraphyConfig.initDefault(new CalligraphyConfig.Builder()
                .setFontAttrId(R.attr.fontPath)
                .build());
  }
}
3. Activityで設定
Activity.java
public class MyActivity extends Activity {

    @Override
    protected void attachBaseContext(Context newBase) {
        super.attachBaseContext(CalligraphyContextWrapper.wrap(newBase));
    }
}
4. カスタムフォントを配置
app/src/main/assetsに配置します.
ちなみにFAVRICAではSackersGothicなるかっこいいフォントを使ってます.
app/src/main/assets/fonts
└── SackersGothicStd-Medium.ttf
5. Viewで設定
<TextView
    fontPath="fonts/SackersGothicStd-Medium.ttf"
    android:layout_width="match_parent"
    android:layout_height="wrap_content" />
