概要
この人、誰だっけ・・・?

サム・・・エリオット?

スマホをスッ
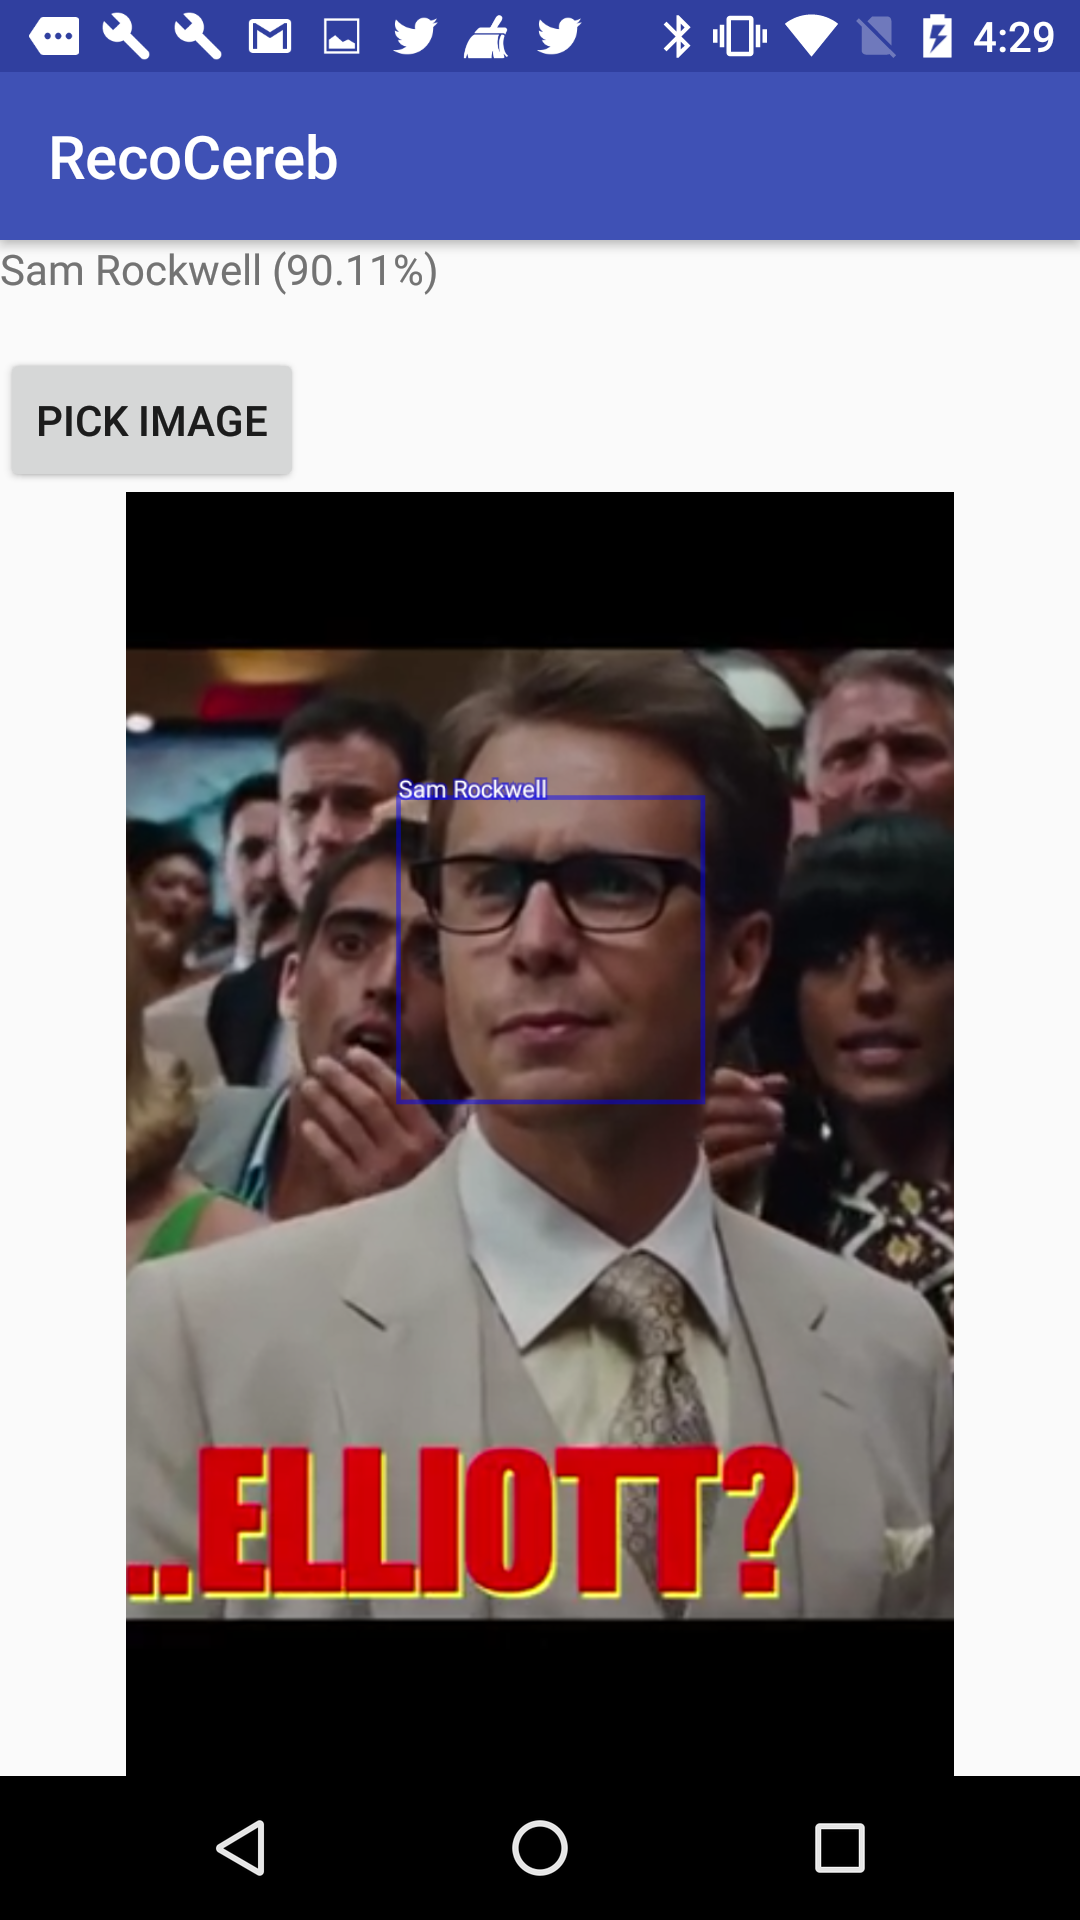
サム・ロックウェルだ!

てな感じのアプリが欲しかったので作りました。というお話です。
使用するAPI
Microsoft Azure の Cognitive Services の Computer Vision API の Recognize celebrities and landmarks を使います。
Microsoft Azure編
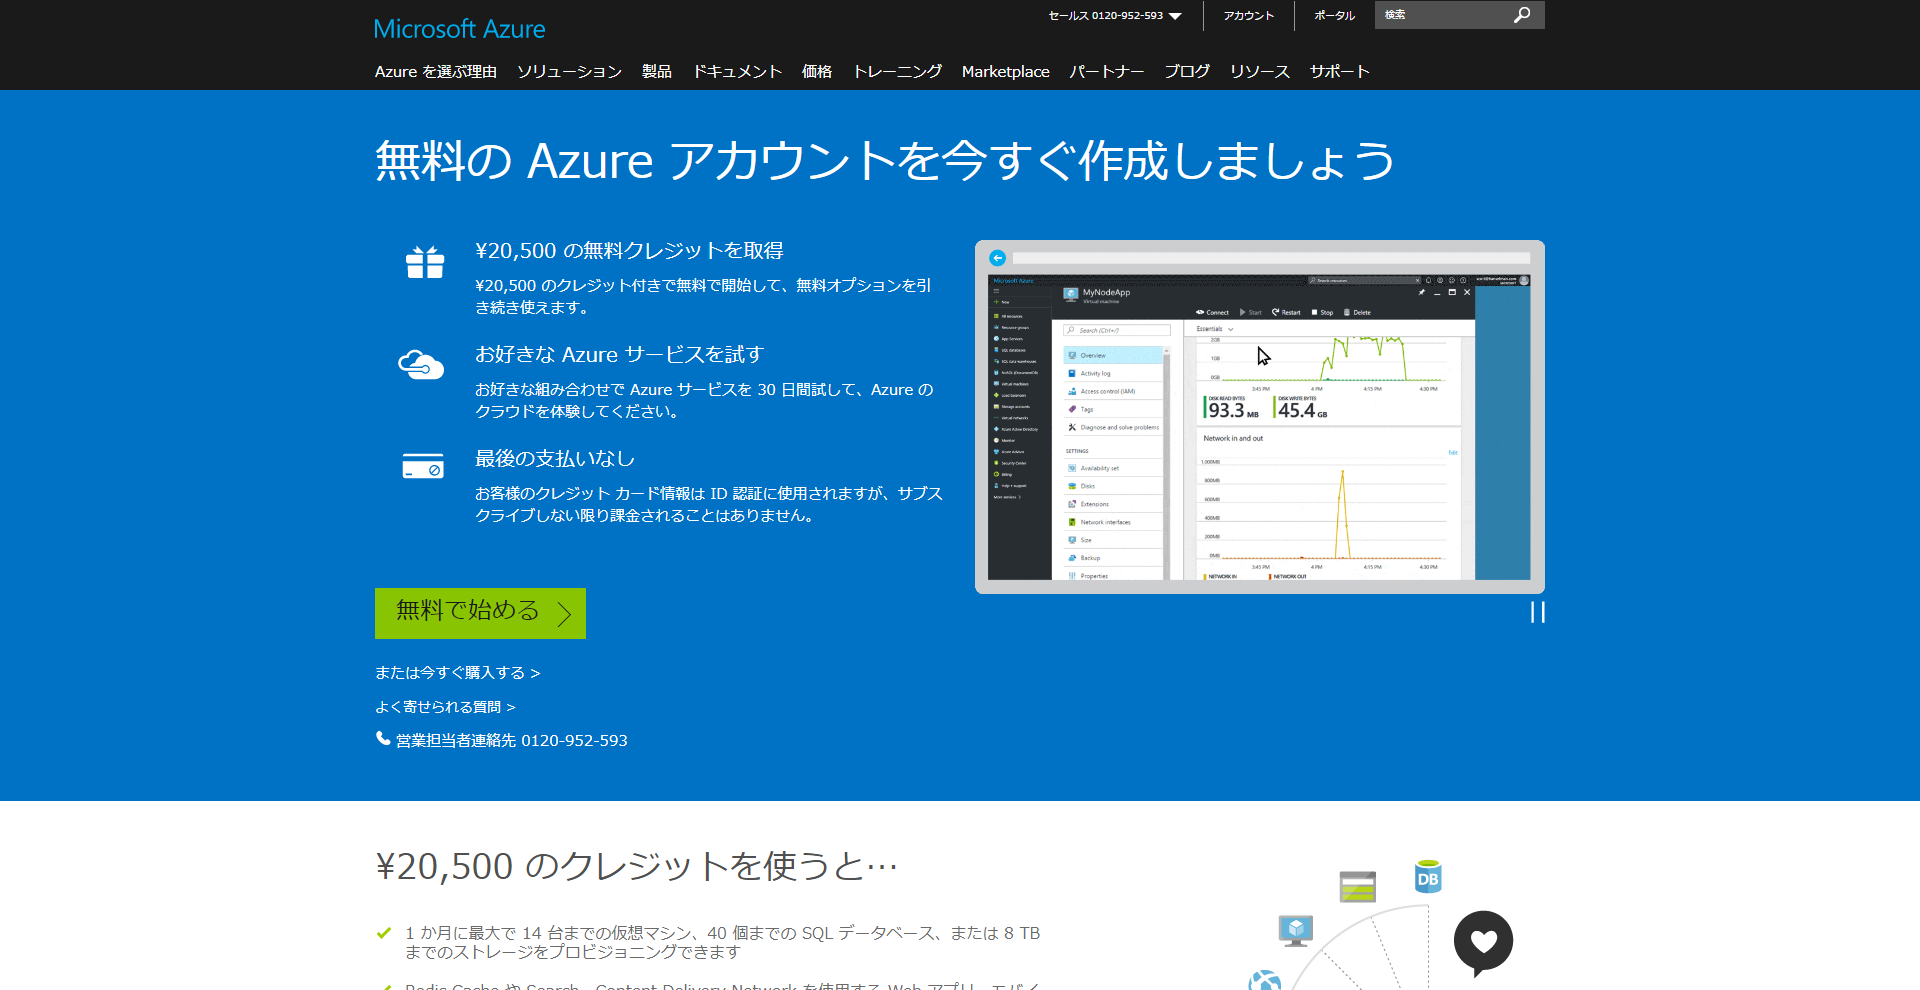
1.Microsoft Azure アカウントを作成します。
Microsoft Azureでアカウントを作成します。
※無料でアカウント作成できますが、登録時に認証用の携帯電話番号とクレジットカード番号が必要です。
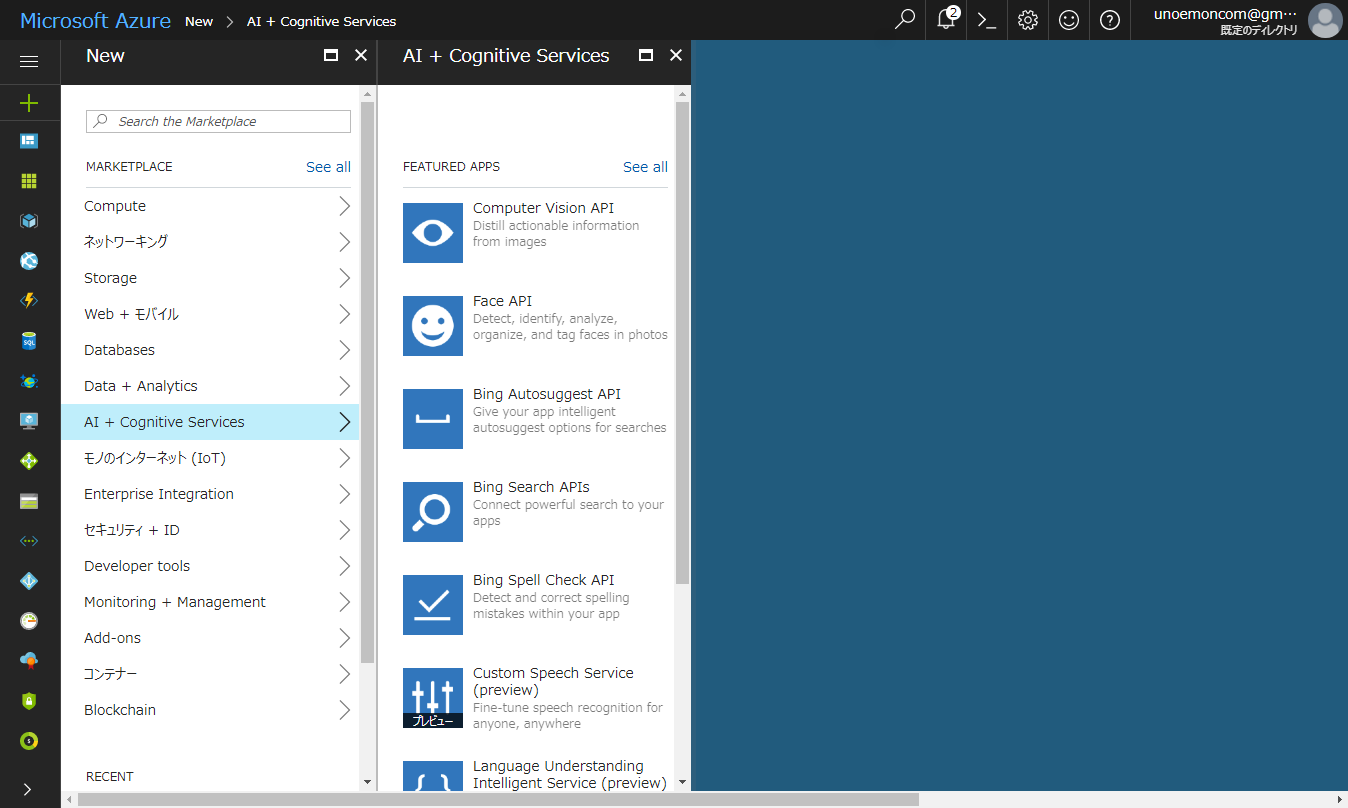
2.Computer Vision APIを選択します。
New -> AI + Cognitive Services -> Computer Vision API
※Face APIではないので注意
3.Computer Vision APIを新規作成します。
場所:東南アジア
価格レベル:F0(無料)
をとりあえず選択しましょう。

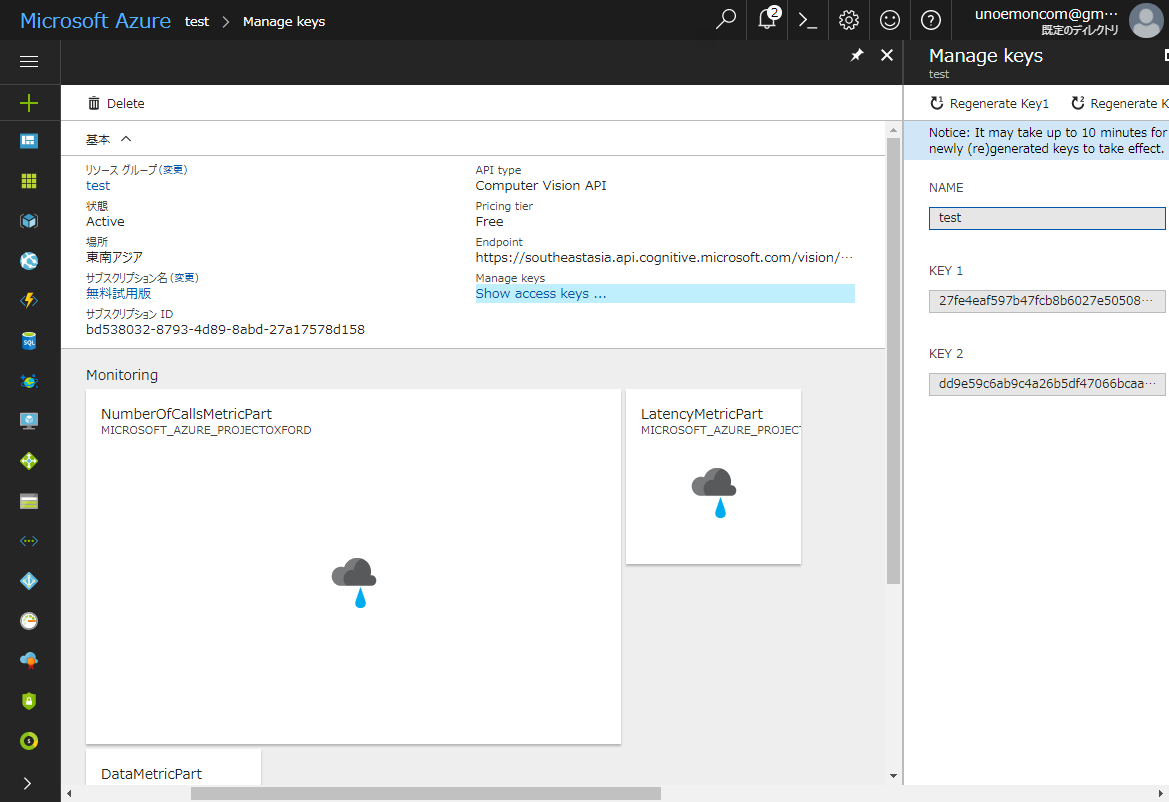
4.作成したAPIのEndpointをコピーします。
後で使うのでメモ帳にコピーしておきます。
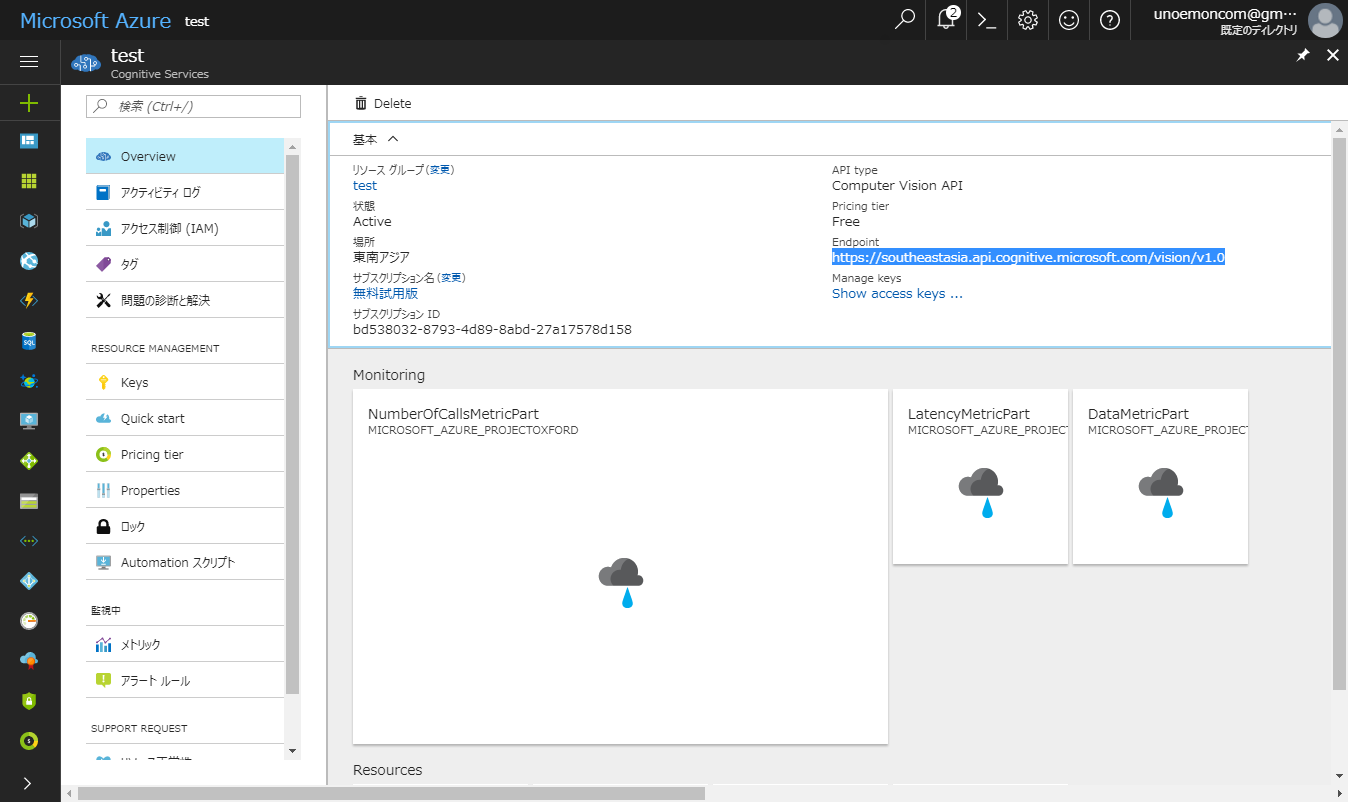
5.作成したAPIのKeyをコピーします。
後で使うのでメモ帳にコピーしておきます。
KEY1とKEY2はどちらでもOKです。
Androidアプリ編
1.SDKの追加
適宜こんな感じで追加します。
buildscript {
    repositories {
        jcenter()
        mavenCentral()
    }
}
dependencies {
    compile 'com.microsoft.projectoxford:vision:1.0.393'
}
2.画像の選択
ギャラリーから画像を選択します。
    @OnClick(R.id.button_pick)
    void button_pick() {
        Log.d("MaiActivity", "button_pick");

        RxPermissions rxPermissions = new RxPermissions(this);
        rxPermissions
                .request(Manifest.permission.WRITE_EXTERNAL_STORAGE)
                .subscribe(granted -> {
                    if (granted) { // Always true pre-M
                        // I can control the camera now
                        Log.d("MaiActivity", "button_pick:granted");
                        Intent intent = new Intent();
                        intent.setType("image/*");
                        intent.setAction(Intent.ACTION_GET_CONTENT);
                        startActivityForResult(Intent.createChooser(intent, "Select Picture"), PICK_IMAGE);
                    } else {
                        // Camera permission denied
                        Log.d("MaiActivity", "button_pick:else");
                    }
                });
    }

    @Override
    public void onActivityResult(int requestCode, int resultCode, Intent data) {
        super.onActivityResult(requestCode, resultCode, data);
        if (requestCode == PICK_IMAGE && resultCode == Activity.RESULT_OK) {
            if (data == null) {
                //Display an error
                return;
            }
            bitmap = resizeBitmap(data);
            getDomain(bitmap);
        }
    }
3.画像のリサイズ
画像がデカすぎるとエラーになるので適当な大きさにリサイズします。
    private Bitmap resizeBitmap(Intent data) {
        InputStream inputStream = null;
        Bitmap bitmap = null;

        try {
            inputStream = getContentResolver().openInputStream(data.getData());

            BitmapFactory.Options imageOptions = new BitmapFactory.Options();
            imageOptions.inJustDecodeBounds = true;
            imageOptions.inMutable = true;
            BitmapFactory.decodeStream(inputStream, null, imageOptions);
            Log.v("image", "Original Image Size: " + imageOptions.outWidth + " x " + imageOptions.outHeight);

            inputStream.close();

            int imageSizeMax = 500;
            inputStream = getContentResolver().openInputStream(data.getData());
            float imageScaleWidth = (float) imageOptions.outWidth / imageSizeMax;
            float imageScaleHeight = (float) imageOptions.outHeight / imageSizeMax;

            if (imageScaleWidth > 2 && imageScaleHeight > 2) {
                BitmapFactory.Options imageOptions2 = new BitmapFactory.Options();

                int imageScale = (int) Math.floor((imageScaleWidth > imageScaleHeight ? imageScaleHeight : imageScaleWidth));

                for (int i = 2; i <= imageScale; i *= 2) {
                    imageOptions2.inSampleSize = i;
                }

                bitmap = BitmapFactory.decodeStream(inputStream, null, imageOptions2);
                Log.v("image", "Sample Size: 1/" + imageOptions2.inSampleSize);
            } else {
                bitmap = BitmapFactory.decodeStream(inputStream);
            }

            inputStream.close();

        } catch (FileNotFoundException e) {
            e.printStackTrace();
        } catch (IOException e) {
            e.printStackTrace();
        }
        return  bitmap;
    }
4.APIリクエストの作成
APIに解析したい画像を渡し、戻り値を取得します。
API_ROOT:前編(4)で取得したendpointを代入します。
API_SUBSCRIPT_KEY:前編(5)で取得したKeyを代入します。
    private void getDomain(Bitmap bitmap) {
            Disposable disposable = getDomainObservable(bitmap)
                    .subscribeOn(Schedulers.io())
                    .observeOn(AndroidSchedulers.mainThread())
                    .subscribe(strResult -> {
                        Log.d("MaiActivity", "strResult:" + strResult);
                        setViews(strResult);
                    }, e -> {
                        Log.d("MaiActivity", "error:" + e.toString());
                       Toast.makeText(this, e.toString(), Toast.LENGTH_LONG).show();
                    });
            DisposableManager.add(disposable);

    }

    private Observable<String> getDomainObservable(Bitmap bitmap) {
        return Observable.create(subscriber -> {

            org.apache.commons.io.output.ByteArrayOutputStream outputStream = new org.apache.commons.io.output.ByteArrayOutputStream();
            bitmap.compress(Bitmap.CompressFormat.JPEG, 100, outputStream);
            final ByteArrayInputStream inputStream = new ByteArrayInputStream(outputStream.toByteArray());

            VisionServiceClient visionServiceClient = new VisionServiceRestClient(API_SUBSCRIPT_KEY, API_ROOT);
            AnalysisInDomainResult analysisInDomainResult = visionServiceClient.analyzeImageInDomain(inputStream, API_MODEL);
            String strResult = new Gson().toJson(analysisInDomainResult);
            visionServiceClient = null;
            subscriber.onNext(strResult);
            subscriber.onComplete();
        });
    }
5.ビューへの反映
APIの戻り値をビューに反映させます。
・検出した顔の位置にレクタングルを表示する
・レクタングルの上に名前を表示する
てなことをやっています。
   private void setViews(String strResult) {
        textView.setText("");
        Gson gson = new Gson();
        StringBuffer list = new StringBuffer();
        AnalysisInDomainResult result = gson.fromJson(strResult, AnalysisInDomainResult.class);
        JsonArray detectedCelebs = result.result.get(API_MODEL).getAsJsonArray();
        Log.d("MaiActivity", "detectedCelebs:" + detectedCelebs.toString());

        for (JsonElement element : detectedCelebs) {
            JsonObject celeb = element.getAsJsonObject();
            String name = celeb.get("name").getAsString();
            double confidence = +celeb.get("confidence").getAsDouble() * 100;
            String confidenceStr = String.format("%.2f", confidence);
            list.append(name + " (" + confidenceStr + "%)\n");
            JsonObject faceRectangle = celeb.get("faceRectangle").getAsJsonObject();
            Log.d("MaiActivity", "faceRectangle:" + faceRectangle.toString());
            float left = faceRectangle.get("left").getAsFloat();
            float top = faceRectangle.get("top").getAsFloat();
            float width = faceRectangle.get("width").getAsFloat();
            float height = faceRectangle.get("height").getAsFloat();
            Log.d("MaiActivity", "left:" + left);
            drawFace(name, left, top, width, height);
        }

        textView.setText(list);
        imageView.setImageBitmap(bitmap);
    }


    private void drawFace(String name, float left, float top, float width, float height) {
        Bitmap bitmap = this.bitmap.copy(Bitmap.Config.ARGB_8888, true);
        Canvas canvas = new Canvas(bitmap);
        Paint paint = new Paint();
        paint.setAntiAlias(true);
        paint.setStyle(Paint.Style.STROKE);
        paint.setColor(Color.BLUE);
        paint.setAlpha(0x77);
        paint.setTextSize(20);
        paint.setStrokeWidth(4);
        canvas.drawRect(left, top, left + width, top + height, paint);
        canvas.drawText(name, left, top, paint);

        Paint paint2 = new Paint();
        paint2.setAntiAlias(true);
        paint2.setStrokeWidth(0);
        paint2.setColor(Color.WHITE);
        paint2.setTextSize(20);
        paint2.setStyle(Paint.Style.FILL);
        canvas.drawText(name, left, top, paint2);
        this.bitmap = bitmap;
    }
6.完成
有名人の名前を教えてくれるAndroidアプリが出来ました。
7.おわり
TVを観ながら「この人誰だっけ?」という不毛な会話を行う人生に終止符が打てるでしょう。
失顔症(相貌失認)や認知症の方々の助けになるかもしれません。
今回作成したデモアプリ(に色々追加したもの)は下記からダウンロード可能です。
WhoCamera - Android Apps on Google Play
Githubでソースの全文を公開しているので、よろしければこちらもご参照ください。
API_SUBSCRIPT_KEYの部分を置き換えるだけで、簡単に有名人検出アプリを作ることが出来ます。
unoemon/RecoCeleb