概要
UnrealEngine5 の EnhancedInput についてのメモ。
基本的な使い方は省略。処理のバインドやマッピングの変更など。
更新履歴
| 日付 | 内容 |
|---|---|
| 2023/09/05 | 初版 |
| 2023/10/19 | 複数IMC登録時の注意点を追記 |
| 2024/02/19 | ゲームパッドキー定義の対応表追加 |
| 2024/03/14 | 入力処理関連のC++メソッドの追記 |
参考
以下の記事を参考にいたしました、ありがとうございます。
UE公式:Enhanced Input プラグインの概要
【UE5】Enhanced Input
【C++】EnhancedInput
UE公式:UEnhancedInputComponent
UE公式:UInputComponent
[UE5][C++]EnhancedInputで独自のInputTriggerを作る~UIカーソル高速移動編~
【UE5】Enhanced Input で利用できる他の関数
【UE】EnhancedInputについて:Trigger編
環境
Windows10
Visual Studio 2022
UnrealEngine 5.2
関連ソース
"\Engine\Plugins\EnhancedInput\Source\EnhancedInput\Public\EnhancedInputComponent.h"
"\Engine\Plugins\EnhancedInput\Source\EnhancedInput\Public\EnhancedPlayerInput.h"
"Engine\Plugins\EnhancedInput\Source\EnhancedInput\Public\InputAction.h"
"\Engine\Source\Runtime\InputCore\Classes\InputCoreTypes.h"
関連クラスの差し替え
UEnhancedPlayerInput と UEnhancedInputComponent を継承して自前のクラスに差し替えることができます。
[プロジェクト設定]->[エンジン]->[インプット]->[Default Classes] に設定があります。

入力イベントに処理をバインドする
入力時の各イベント(Started, Triggered, Completed等)に処理をバインドします。InputAction の Triggersによってイベントの発生の仕方が変わります。
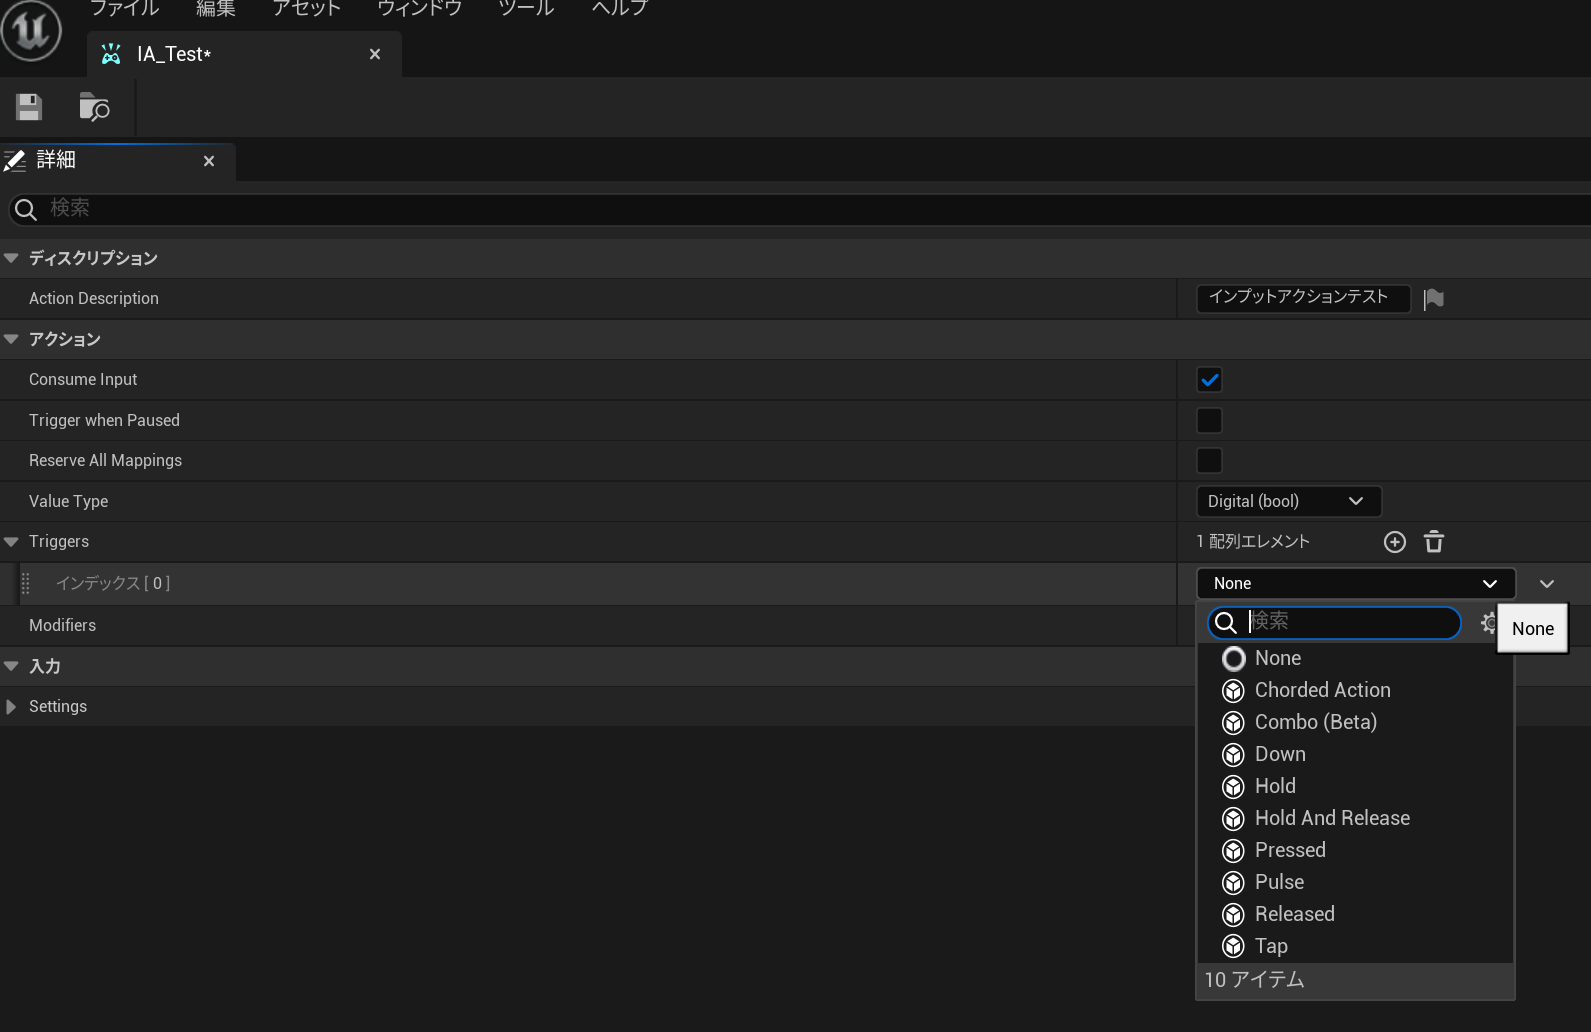
指定なし(None)時は
| ボタンアクション | イベント |
|---|---|
| ボタン押した時 | Started, Triggered |
| ボタン押している間 | Triggered |
| ボタンを離した時 | Completed |
という感じでイベントが実行されるようです。
イベントバインド
UEnhancedInputComponent の BindAction()で処理を登録できます。
以下コード例。
UCLASS()
class MYPROJECT_API APlayerCharacter : public ACharacter
{
	GENERATED_BODY()

public:
// ..省略..

	// インプットアクション
	UPROPERTY(BlueprintReadOnly, EditAnywhere, Category = "Input")
		const UInputAction*	InputAction;
	// バインドする関数
	void Input_TestT(const FInputActionInstance& InputActionInst);
	void Input_TestS(const FInputActionInstance& InputActionInst);
	void Input_TestC(const FInputActionInstance& InputActionInst);
};
#include "APlayerCharacter.h"
#include "EnhancedInputSubsystems.h"
#include "EnhancedInputComponent.h"
#include "InputAction.h"

// インプットに処理をバインド
void APlayerCharacter::SetupPlayerInputComponent(UInputComponent* PlayerInputComponent)
{
	Super::SetupPlayerInputComponent(PlayerInputComponent);

	UEnhancedInputComponent* _EIC = CastChecked<UEnhancedInputComponent>(PlayerInputComponent);
	if(_EIC){
		// インプットアクションに関数をバインド
		_EIC->BindAction(InputAction, ETriggerEvent::Triggered, this, &ThisClass::Input_TestT);
		_EIC->BindAction(InputAction, ETriggerEvent::Started, this, &ThisClass::Input_TestS);
		_EIC->BindAction(InputAction, ETriggerEvent::Completed, this, &ThisClass::Input_TestC);
	}
}

void APlayerCharacter::Input_TestT(const FInputActionInstance& InputActionInst)
{
	// Triggered時に呼ばれる(ボタンを押した時、ボタンを押している間)
}

void APlayerCharacter::Input_TestS(const FInputActionInstance& InputActionInst)
{
	// Started時に呼ばれる(ボタンを押した時)
}
void APlayerCharacter::Input_TestC(const FInputActionInstance& InputActionInst)
{
	// Completed時に呼ばれる(ボタンを離した時)
}
バインド解除
UEnhancedInputComponent の RemoveBinding()でバインドを解除できます。
登録時にインプットハンドルを保持する必要があります。以下コード例。
	// ハンドル
	FInputBindingHandle*	InputBindHandle1;
	// 登録時にハンドルを保持しておく
	InputBindHandle1 = &_EIC->BindAction(_IA, ETriggerEvent::Triggered, this, &ThisClass::Input_TestT);


	// バインド解除
	auto _PC = Cast<APlayerController>(GetController());
	UEnhancedInputComponent* _EIC = CastChecked<UEnhancedInputComponent>(_IC);
	if( _EIC ){
		_EIC->RemoveBinding(*InputBindHandle1);
	}
キーマッピングの変更
インプットマッピングコンテキストから直接キーマッピングの変更ができます。
以下のようなインプットアクションを定義してある場合、

このキーを別なキーに変更してみます。以下コード例。
#include "EnhancedInputSubsystems.h"
#include "EnhancedInputComponent.h"
#include "InputAction.h"

// 	インプットマッピングコンテキスト は.hで定義
//	UPROPERTY(EditAnywhere, Category="Input")
//	TSoftObjectPtr<UInputMappingContext> InputMapping;


	for (auto& _KeyMap : InputMapping->GetMappings()) {
		auto _IA = _KeyMap.Action;
		if (_IA.GetFName() == FName("IA_Test") && _KeyMap.Key.IsGamepadKey() ){
			// 修正するキー定義
			FKey _OldKey = _KeyMap.Key;
			FKey _NewKey = FKey(FName("Gamepad_DPad_Up"));

			// キーマッピング削除
			InputMapping->UnmapKey(_IA, _OldKey);
			// キーマッピング追加
			InputMapping->MapKey(_IA, _NewKey);
		}
	}
結果として以下の様にキーが修正されます。

UEエディタでの実行後にIMCを見ると保存されているように思えますが、再起動すると最初の定義に戻っています。(スタンドアロン起動だとよくわかります)
実際にキーコンフィグを作成する場合は、インプットアクションに対し変更するキー定義を全て保存し、起動時に再度設定してあげる必要があります。
キーの定義名は以下のようになっています。
List of Key/Gamepad Input Names
[参考]ゲームパッドキー定義表
| 定義名 | XInputパッドキー |
|---|---|
| Gamepad_FaceButton_Bottom | A |
| Gamepad_FaceButton_Right | B |
| Gamepad_FaceButton_Left | X |
| Gamepad_FaceButton_Top | Y |
| Gamepad_LeftShoulder | LB |
| Gamepad_RightShoulder | RB |
| Gamepad_LeftTrigger | LT |
| Gamepad_RightTrigger | RT |
| Gamepad_Special_Left | back |
| Gamepad_Special_Right | start |
| Gamepad_DPad_Up | 方向キー上 |
| Gamepad_DPad_Down | 方向キー下 |
| Gamepad_DPad_Right | 方向キー右 |
| Gamepad_DPad_Left | 方向キー左 |
| Gamepad_LeftThumbstick | 左サムスティックボタン |
| Gamepad_RightThumbstick | 右サムスティックボタン |
入力アクション値の作成/変更
InputTrigger
トリガー処理を作成するには UInputTrigger を継承してクラスを作成します。時間経過で挙動が変わるようなケースは UInputTriggerTimedBase を継承すると良いみたいです。
ダブルタップでトリガーを返すようなコードは以下のようになるかと思います。
成功(Interval時間以内)なら Triggered、Completed 失敗なら Canceled を返します。
時間経過を見ていないので、余計なイベントが発生しているかもしれません。
pragma once

#include "CoreMinimal.h"
#include "EnhancedPlayerInput.h"
#include "InputTriggerDoubleTap.generated.h"

UCLASS(NotBlueprintable, Config = Input, meta = (DisplayName = "Double Tap"))
class UInputTriggerDoubleTap final : public UInputTrigger
{
	GENERATED_BODY()

protected:
	virtual ETriggerState UpdateState_Implementation(const UEnhancedPlayerInput* PlayerInput, FInputActionValue ModifiedValue, float DeltaTime) override;

public:
	UPROPERTY(EditInstanceOnly, BlueprintReadWrite, Category = "Trigger Settings", meta = (DisplayThumbnail = "false"))
	float IntervalTime = 0.5f;

private:
	float LastTappedTime = 0.0f;
};
#include "./InputTriggerDoubleTap.h"
#include "EnhancedPlayerInput.h"

ETriggerState UInputTriggerDoubleTap::UpdateState_Implementation(const UEnhancedPlayerInput* PlayerInput, FInputActionValue ModifiedValue, float DeltaTime)
{
	if( IsActuated(ModifiedValue) && !IsActuated(LastValue) ){
		const float CurrentTime = PlayerInput->GetOuterAPlayerController()->GetWorld()->GetRealTimeSeconds();

		// タップ間隔を調べる
		if( (CurrentTime - LastTappedTime) < IntervalTime){
			LastTappedTime = 0.0f;
			return(ETriggerState::Triggered);
		}
		else{
			LastTappedTime = CurrentTime;
			return(ETriggerState::Ongoing);
		}
	}
	return(ETriggerState::None);
}
InputModifier
モディファイア処理も UInputModifier を継承することで作成できます。Lyraのデモなどで使われているようです。
その他
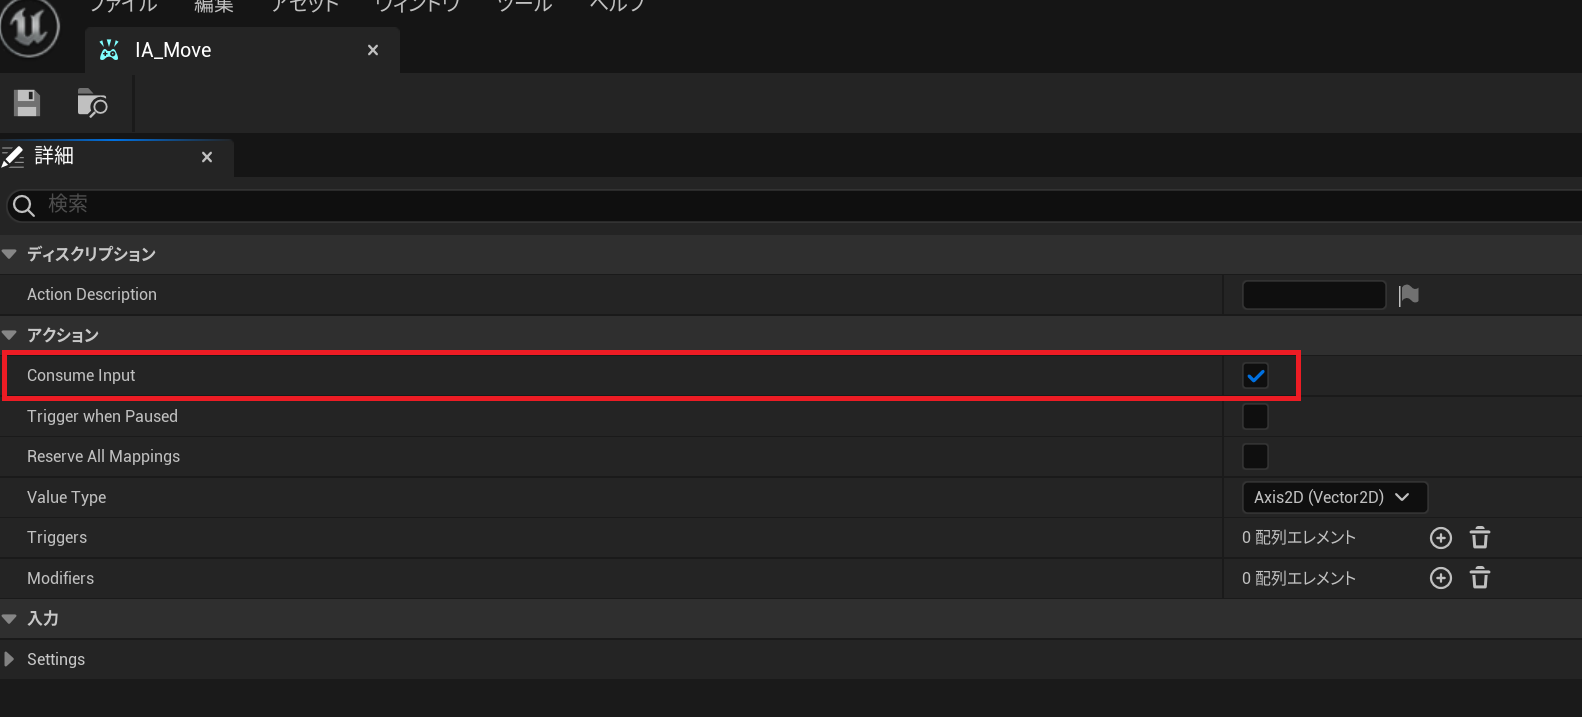
複数IMC登録時の注意点
複数IMCを登録した時でキーバインドが被っている場合、プライオリティに従って処理されるようですが、インプットアクションの bConsumeInputを false にしないとプライオリティが低い方に入力がこないようです。
特定ポーンの入力を停止するには以下のメソッドなどが使えるようです。
// プレイヤーコントローラーで処理開始
UFUNCTION(BlueprintCallable, Category="Input")
ENGINE_API virtual void EnableInput(class APlayerController* PlayerController);

// プレイヤーコントローラーで処理停止
UFUNCTION(BlueprintCallable, Category="Input")
ENGINE_API virtual void DisableInput(class APlayerController* PlayerController);
入力処理が有効かどうかのメソッドは Pawn.h にあります。
// このポーンの入力処理が有効かどうか。 これが true であっても、入力を取得するにはポーンが所有されている必要があります。
bool InputEnabled() const;
まとめ
EnhancedInput は機能が多く柔軟性が高いシステムです。ただ GameplayAbility の入力バインド処理などは従来のインプットシステムが前提となったままです(Lyraデモはいろいろ処理をして対応していますが)。他にもこういった従来のシステムが前提となっている処理があると思いますので注意が必要です。