最初に
SwipeCellKitを使用する際の説明記事になります。
記事閲覧の対象者は、tableviewのcellをカスタマイズしたい人です。
私自身、cellをスワイプした際に画像と文言を表示したくて使用しました。
補足説明として、Appleの公式でもswipecellkitみたいな機能が提供されているのですが、
画像と文言を表示した際に、表示位置がずれて私の期待通りになりませんでした。。。
公式の機能だと期待通りにならないといった人も対象とした記事になっています。
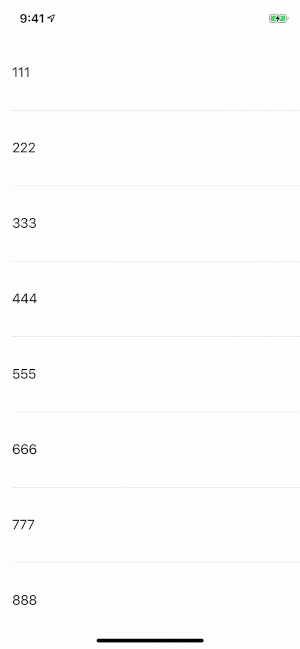
完成画面
SwipeCellKitの公式で一度カスタマイズ性能を確認するのがおすすめです。
SwipeCellKit公式サイト
開発環境
- XCode 10.3
- Swift 5
- SwipeCellKit 2.7.1
利用までの流れ
- tableviewを用意
- cocoapodでSwipeCellKitをダウンロード
- SwipeCellKitをimportして利用
- 動作確認
1. tableviewを用意
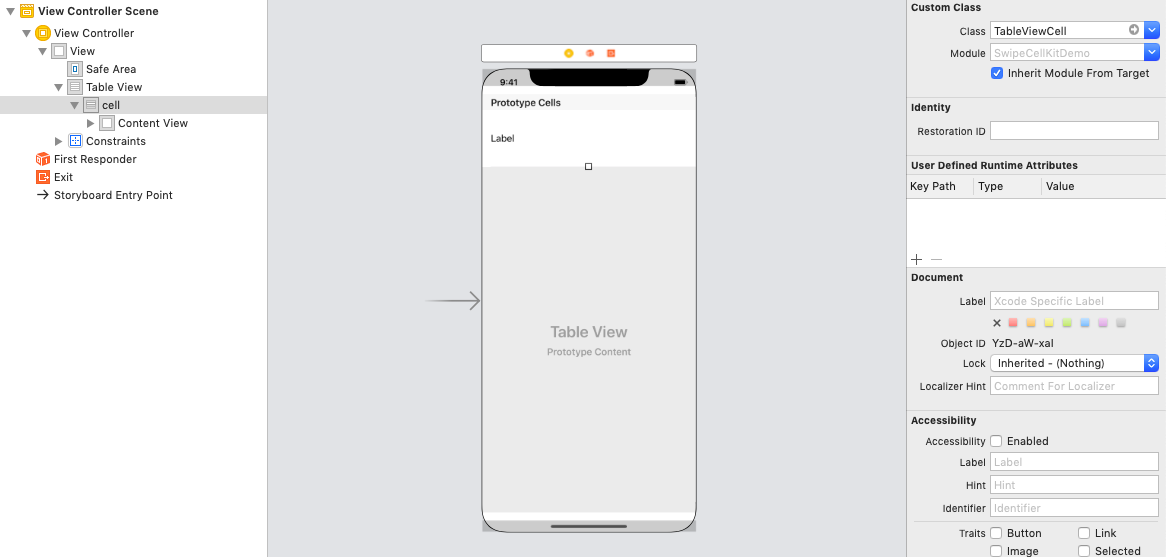
tableviewとtableviewcellをviewcontrollerに貼ります。
cellの設定欄のIdentifierには「cell」と設定します。
適当にUILabelも設置します。

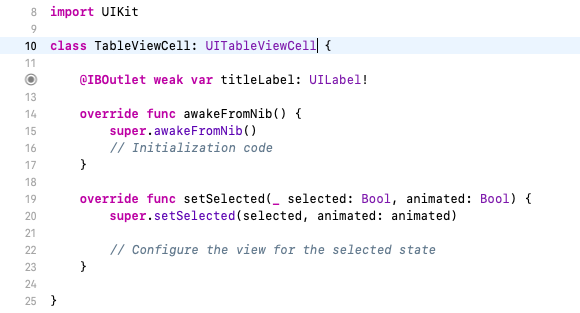
次にUITableViewCellのファイルを作成します。
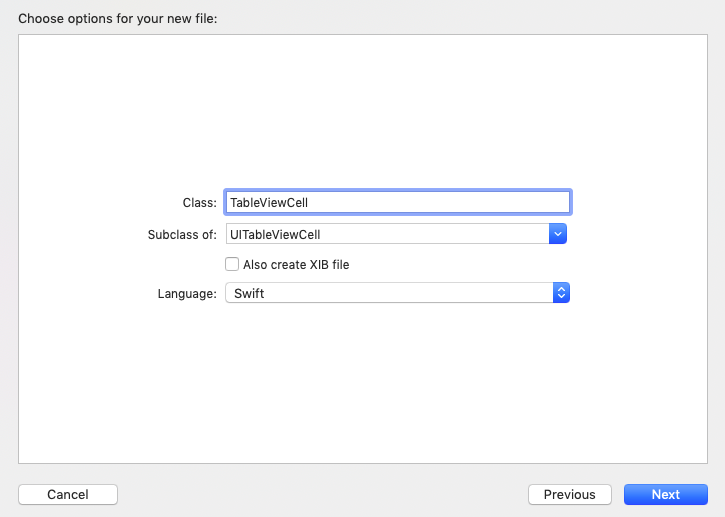
ファイルを作成したら、StoryBoard上でCellにクラスを設定します。
最後にtableviewとtableviewcellをプログラムと紐づけます。
ViewController
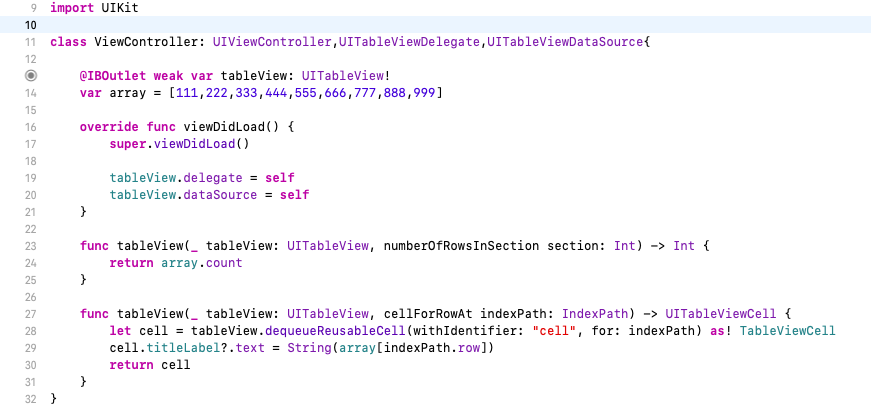
TableViewCell
tableviewの用意は終了です。
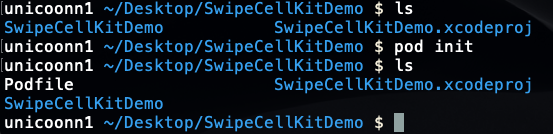
2. cocoapodでSwipeCellKitをダウンロード
ターミナルでプロジェクトの階層まで移動し、pod initコマンドでpodfileを作成します。
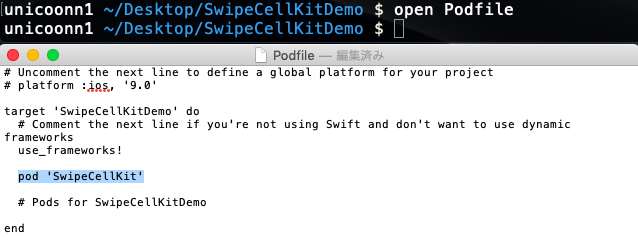
podfileには使いたいOSSを記入します。
今回はSwipeCellKitなので「pod 'SwipeCellKit'」と記入します。
記入が済んだら、pod installコマンドでSwipeCellKitをダウンロードします。
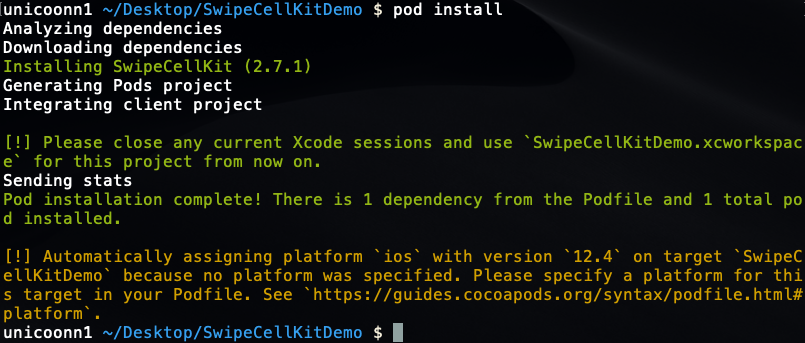
最後に、プロジェクトフォルダを開き、拡張子がxcworkspaceのものを開きます。

これでcocoapodでSwipeCellKitをダウンロードは終了です。
3. SwipeCellKitをimport
次に、以下のようにプログラムを記述します。
プログラム内にコメントを書き込んだので、内容を読んで理解できると思います。
import UIKit
import SwipeCellKit

//SwipeTableViewCellDelegateを追加。
class ViewController: UIViewController,UITableViewDelegate,UITableViewDataSource,SwipeTableViewCellDelegate {

    @IBOutlet weak var tableView: UITableView!
    //cellのlabelに表示する値の配列
    var array = [111,222,333,444,555,666,777,888,999]

    override func viewDidLoad() {
        super.viewDidLoad()

        tableView.delegate = self
        tableView.dataSource = self
    }

    func tableView(_ tableView: UITableView, numberOfRowsInSection section: Int) -> Int {
        return array.count
    }

    func tableView(_ tableView: UITableView, cellForRowAt indexPath: IndexPath) -> UITableViewCell {
        let cell = tableView.dequeueReusableCell(withIdentifier: "cell", for: indexPath) as! TableViewCell
        //cell.delegateはswipecellkitを使う際に必須の処理。
        cell.delegate = self
        cell.titleLabel?.text = String(array[indexPath.row])
        return cell
    }

    //swipecellkit swipetableviewdelegateのメソッド
    //スワイプした際に表示される文字や画像を設定。またタップした際の処理も設定
    func tableView(_ tableView: UITableView, editActionsForRowAt indexPath: IndexPath, for orientation: SwipeActionsOrientation) -> [SwipeAction]? {
        //右スワイプをした際の処理。今回は何も処理を行わない。
        guard orientation == .right else { return nil }

        //左スワイプした際の処理。
        let deleteAction = SwipeAction(style: .destructive, title: "削除") { action, indexPath in
            //cellの状態を解除する処理。必須の処理。
            action.fulfill(with: .reset)

            /*********************************/
            let alert: UIAlertController = UIAlertController(title: "Cellを削除", message: "削除してもよろしいでしょうか?", preferredStyle:  UIAlertController.Style.alert)

            let defaultAction: UIAlertAction = UIAlertAction(title: "OK", style: UIAlertAction.Style.default, handler:{
                (action: UIAlertAction!) -> Void in
                print("OK")
                self.array.remove(at: indexPath.row)
                tableView.deleteRows(at: [indexPath], with: .fade)
            })

            let cancelAction: UIAlertAction = UIAlertAction(title: "キャンセル", style: UIAlertAction.Style.cancel, handler:{
                (action: UIAlertAction!) -> Void in
                print("Cancel")
            })
            alert.addAction(cancelAction)
            alert.addAction(defaultAction)
            self.present(alert, animated: true, completion: nil)
            /*********************************/

        }
        //スワイプした際に表示される画像の設定。
        deleteAction.image = UIImage(named: "delete")

        return [deleteAction]
    }

    //スワイプ時の表示形式の設定。SwipeCellKitの公式サイトを見ると一発でわかる。
    func tableView(_ tableView: UITableView, editActionsOptionsForRowAt indexPath: IndexPath, for orientation: SwipeActionsOrientation) -> SwipeOptions {
        var options = SwipeOptions()
        options.expansionStyle = .destructive
        options.transitionStyle = .border
        return options
    }

}
import UIKit
import SwipeCellKit

//UITableViewCellからSwipeTableViewCellにする
class TableViewCell: SwipeTableViewCell {

    @IBOutlet weak var titleLabel: UILabel!

    override func awakeFromNib() {
        super.awakeFromNib()
        // Initialization code
    }

    override func setSelected(_ selected: Bool, animated: Bool) {
        super.setSelected(selected, animated: animated)

        // Configure the view for the selected state
    }

}
画像には、いつもお世話になっているicons8のサイトで取得した画像を使いました。
icons8を使う際は利用規約を見てお使いください。
4. 動作確認
実際にビルドして利用してみると、一番上の完成画面のようなものができていると思います。