流行り物に触れてみた。
みなさまのアウトプットに支えられてのまとめのようなもの。
感謝です。
成果物
- https://registry.hub.docker.com/u/ume3/docker-ubuntu-monit-log/dockerfile/
- https://github.com/ume3/docker-ubuntu-monit-log
起動
docker login
docker pull ume3/docker-ubuntu-monit-log
docker images
docker run -dt -p 2812:2812 ume3/docker-ubuntu-monit-log
docker ps
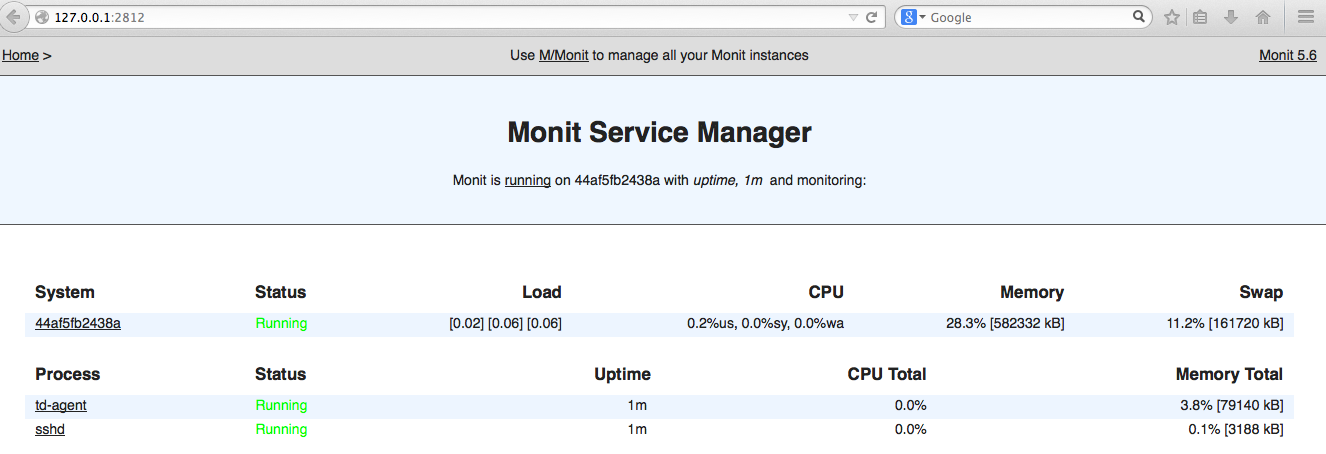
- DockerHub経由でDLして立ち上げるとMonit経由で以下が閲覧できる
- ex)
http://127.0.0.1:2812
つくりかた
- 必要なもの
- GitHub
- DockerHub
- Dockerを立ち上げる環境
- 今回は、Mac(homebrew利用)
- boot2docker
- VirtulaBox
- Dockerを立ち上げる環境その2
- 作ったイメージを別のDocker環境で用意したい場合
- 適当に:AWSでUbuntuでもたちあげればいいんじゃないでしょうか(雑)
GitHubにDockerfileを管理したいリポジトリを作成する
- Dokcerfileをおく用意をする
git clone git@github.com:ume3/docker-ubuntu-monit-log.git- 該当ディレクトリで作業する
boot2docker (Macの場合)
- Dockerコンテナを立ち上げる環境を用意する
- MacでDockerを扱いたいのでhomebrewを使う
- refs: https://docs.docker.com/installation/mac/
- refs: http://qiita.com/AH_korikori/items/8a165c081e8eb699deb3
brew update
brew tap homebrew/binary
brew install docker
brew install boot2docker
brew cask install virtualbox
- boot2dockerは
1.3以上がよいです -
brew info boot2dockerで確認
boot2dockr のセットアップ
- boot2dockerをセットアップする
boot2docker init
boot2docker start
- セットアップ時に以下のようにdocker操作する際の環境変数を設定する
- そのままコピペ(or
.zshenv,.bashenvなどに設定する)
---snip
To connect the Docker client to the Docker daemon, please set:
    export DOCKER_HOST=tcp://192.168.59.103:2376
    export DOCKER_CERT_PATH=/Users/hoge/.boot2docker/certs/boot2docker-vm
    export DOCKER_TLS_VERIFY=1
- Dockerコマンドを使えることを確認
% docker ps
CONTAINER ID        IMAGE               COMMAND             CREATED             STATUS              PORTS
ここまでで準備はOK
Dockerfileを用意してビルドする
-
Dockerfileを書く - ex) Ubuntuでdocker:dockerでsshログインする環境
# Latest Ubuntu LTS
FROM ubuntu:14.04
MAINTAINER ume3

ENV USER_NAME docker
ENV USER_PASSWORD docker

## install
RUN apt-get update
RUN apt-get upgrade -y
RUN apt-get install sudo passwd openssh-server -y

## setup
# ssh
RUN sed -ri 's/^#PermitRootLogin yes$/PermitRootLogin no/' /etc/ssh/sshd_config

# useradd
RUN useradd $USER_NAME
RUN echo "$USER_NAME:$USER_PASSWORD" | chpasswd
RUN echo "$USER_NAME ALL=(ALL) NOPASSWD:ALL" >> /etc/sudoers.d/$USER_NAME
RUN mkdir /var/run/sshd
RUN mkdir /home/${USER_NAME}

## service
# ssh
EXPOSE 22

ENTRYPOINT [ "/usr/sbin/sshd", "-D" ]
- Dockerイメージの作成
# build
% docker build -t ubuntu .
# imagesの確認
% docker images
Dockerコンテナの起動
- 10000番ポートでフォワーディングする設定を記載する(後述)
% docker run -dt -p 10000:22 ubuntu
bac4eb2001b2f6618a6c3b5b5b4b3e712b968ce403418059d15b92df4ca799b6
% docker ps
CONTAINER ID        IMAGE               COMMAND               CREATED             STATUS              PORTS                   NAMES
bac4eb2001b2        ubuntu:latest       "/usr/sbin/sshd -D"   6 days ago          Up 12 seconds       0.0.0.0:10000->22/tcp   hungry_pasteur
virtualbox経由でsshログインする
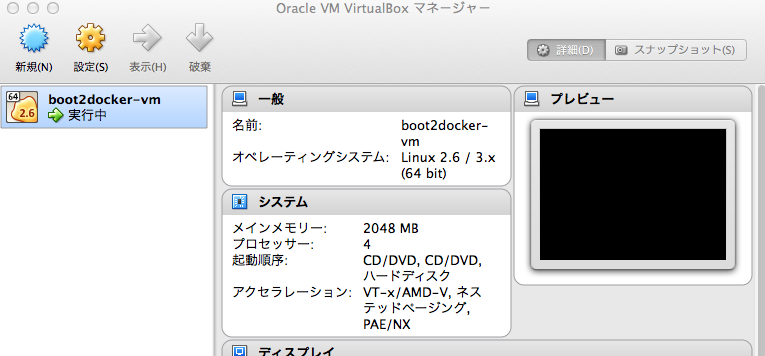
- boot2dockerを立ち上げると、VirtualBoxのイメージが立ち上がっている
- virutalbox起動より
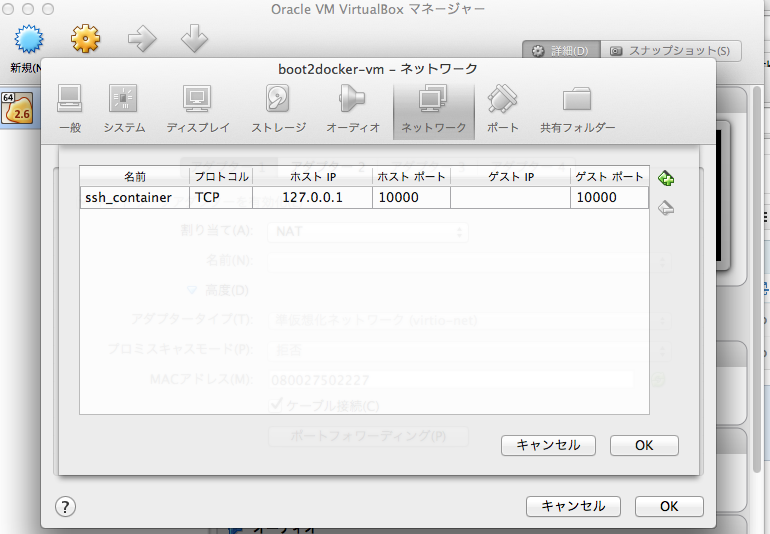
VirtualBoxでポートフォワーディング
ポートフォワーディングをして、以下の関係をつくってあげる。
今回は10000番とする。
[ssh:10000] -> [boot2docker-vm:10000] -> [docker-container:22]
-
GUI操作でもいいがコマンドだと以下
-
before
% VBoxManage showvminfo boot2docker-vm | grep ^NIC
NIC 1:           MAC: 080027502227, Attachment: NAT, Cable connected: on, Trace: off (file: none), Type: virtio, Reported speed: 0 Mbps, Boot priority: 0, Promisc Policy: deny, Bandwidth group: none
NIC 1 Settings:  MTU: 0, Socket (send: 64, receive: 64), TCP Window (send:64, receive: 64)
NIC 2:           MAC: 0800276ADD18, Attachment: Host-only Interface 'vboxnet0', Cable connected: on, Trace: off (file: none), Type: virtio, Reported speed: 0 Mbps, Boot priority: 0, Promisc Policy: deny, Bandwidth group: none
NIC 3:           disabled
NIC 4:           disabled
NIC 5:           disabled
NIC 6:           disabled
NIC 7:           disabled
NIC 8:           disabled
- after
% VBoxManage controlvm "boot2docker-vm" natpf1 "ssh_container,tcp,127.0.0.1,10000,,10000"

%  VBoxManage showvminfo boot2docker-vm | grep Rule
NIC 1 Rule(0):   name = ssh_container, protocol = tcp, host ip = 127.0.0.1, host port = 10000, guest ip = , guest port = 10000
VirtualBox(GUI)確認
sshログイン確認
% ssh -p 10000 docker@127.0.0.1
docker@127.0.0.1's password:
Welcome to Ubuntu 14.04 LTS (GNU/Linux 3.2.0-54-generic x86_64)
---snip
OK
削除・整理コマンド
- このあたり
docker stop <CONTAINER>
docker ps
docker ps -q
docker stop `docker ps -q`
docker images
docker rmi <IMAGE>
GitHub+DockerHub
- refs: http://qiita.com/jagaximo/items/4cbda778a10fd37f68e6
- refs: http://ameblo.jp/tech-cz/entry-11886401333.html
- refs: http://sawara.me/docker/2055/
GitHub
- 動作確認のとれた
DockerfileをCommitして、GitHubへpushしておく
DockerHub
- ログイン後
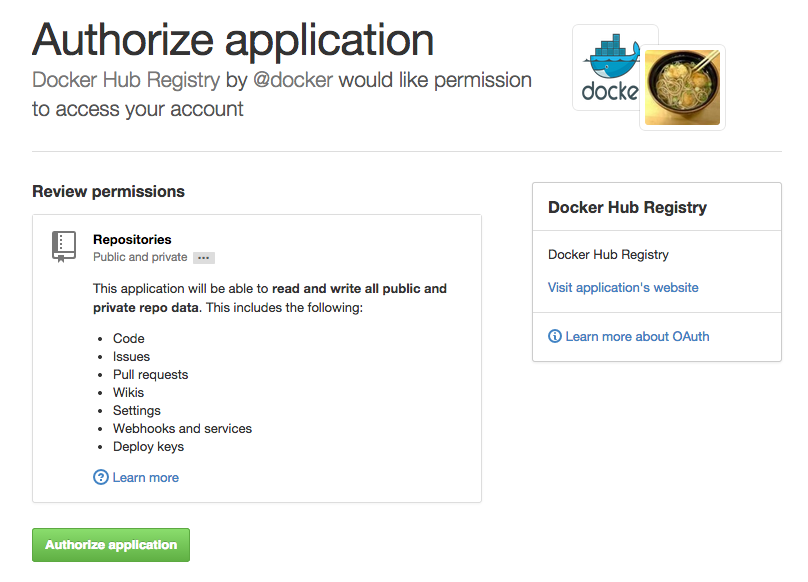
- [settings] - [Linked Accounts]
- GitHubとの認証を先に済ませておく
- 認証後
Automated Build
- refs: http://qiita.com/jagaximo/items/4cbda778a10fd37f68e6
- 連携開始。
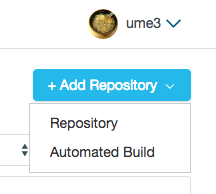
Automated Buildを選択する
- 画面遷移しつつ、 用意したGitHubのリポジトリ を参照させる
- とくに迷わない
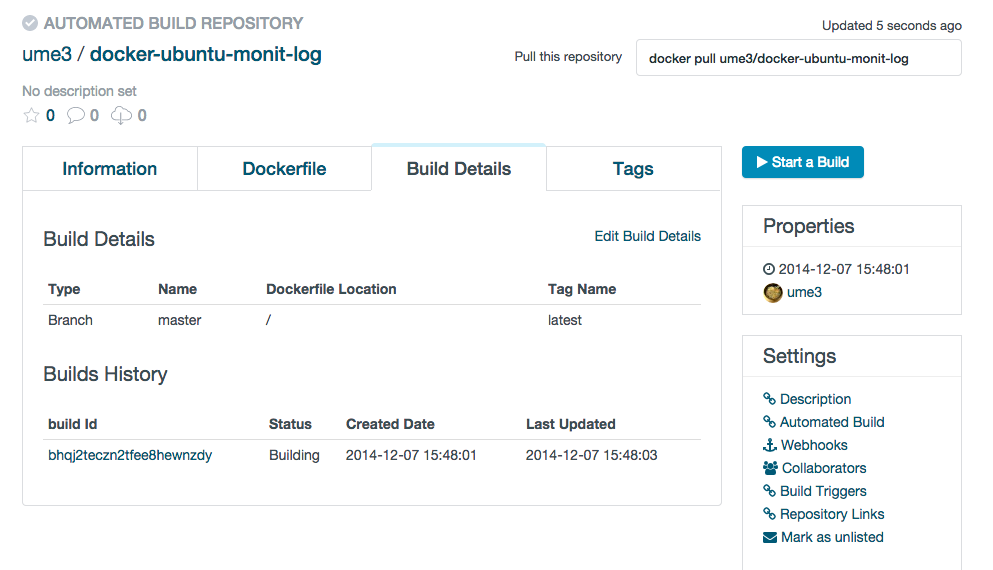
連携結果
GitHubへPushするとDockerHubへBuildが走ることを確認する
- 今回のポイント
更新してみる
- refs: http://qiita.com/mykysyk@github/items/7553e8fef2948de10844
- Monitをいれてみよう
- Dockerfileをいじって
Monit+sshd環境を用意 - Monitは2812ポートでweb閲覧できる設定にしているので以下
% docker build -t ubuntu:monit .
% docker run -dt -p 10000:22 -p 2812:2812 ubuntu:monit
% VBoxManage controlvm "boot2docker-vm" natpf1 "monit_contaner,tcp,127.0.0.1,2812,,2812"
- 上記コマンドで
http://127.0.0.1;2812を確認できる
DockerHubの更新確認
- 自身の
GitHubのリポジトリへgit push origin masterする - すると、
DockerHubでBuildが走る(連携したので) - https://registry.hub.docker.com/u/ume3/docker-ubuntu-monit-log/builds_history/94617/
-
Build Histroyの履歴はそのまま、GitHubのCommitログと同様ということ
これで、連携更新が可能となった。
UbuntuでFluetnd
- おまけのように
- 公式のとおり:http://docs.fluentd.org/ja/articles/install-by-deb
-
Dockerfileに記載してげればよい - moduleいれるときも以下とかで
RUN /usr/lib/fluent/ruby/bin/fluent-gem install fluent-plugin-twitter- こうなってくるとDockerfile以外のファイル管理をしたくなるのでGithub連携がいきてくる
DockerHubから自作のDockerイメージを使う
- このイメージを
pullすれば、どのDocker環境でも使える - 別の環境で起動してみよう
AWS(Ubuntu) + Docker + DockerHubイメージ
- AWSで適当に作成(ざっくり省略)
- 今だとVPCでしか作成できない(クラシックモードじゃないなら)
- 気にせず、
t2.microあたりでも使う(VPC限定だが) -
ec2-userじゃなくてubuntuなのは注意
Ubuntu + docker
- 公式より:https://docs.docker.com/installation/ubuntulinux/
- このとおりやれば動く動く
- 今回は、
Ubuntu Trusty 14.04 (LTS) (64-bit)にした。
Docker起動後、DockerHubへアクセス
- refs: http://qiita.com/zembutsu/items/b0fbb1ca1a759eff31e4
- DockerHubのログイン情報をコンソールでたたく
- ログイン
ubuntu@ip-172-30-0-10:~$ sudo docker login
Username: ume3
Password: ******
Email: <mail@mail.com>
Login Succeeded
自作イメージをpullする
- ポイント
- これがやりたいこと
docker pull <自作イメージ>
ubuntu@ip-172-30-0-10:~$ sudo docker pull ume3/docker-ubuntu-monit-log
Pulling repository ume3/docker-ubuntu-monit-log
dab621726aea: Pulling dependent layers
511136ea3c5a: Download complete
01bf15a18638: Download complete
30541f8f3062: Download complete

---snip

194a6d0fae98: Download complete
Status: Downloaded newer image for ume3/docker-ubuntu-monit-log:latest
確認と起動
## イメージ確認
ubuntu@ip-172-30-0-10:~$ sudo docker images | grep docker-ubuntu-monit-log
ume3/docker-ubuntu-monit-log   latest              dab621726aea        16 minutes ago      257 MB
## 起動
ubuntu@ip-172-30-0-10:~$ sudo docker run -dt ume3/docker-ubuntu-monit-log
ce36f0cf42c7e31b4864da3f862e0937711e27bba697579b144b3146005c7be6

## 起動確認
ubuntu@ip-172-30-0-10:~$ sudo docker ps
CONTAINER ID        IMAGE                                 COMMAND                CREATED             STATUS              PORTS               NAMES
ce36f0cf42c7        ume3/docker-ubuntu-monit-log:latest   "/bin/sh -c '/usr/bi   27 seconds ago      Up 27 seconds       22/tcp, 2812/tcp    sick_mccarthy
# コンテナのipを知りたいなら以下
ubuntu@ip-172-30-0-10:~$ sudo sh -c 'docker inspect --format="{{ .NetworkSettings.IPAddress }}" `docker ps -q`'
172.17.0.82

## SSH OK
ubuntu@ip-172-30-0-10:~$ ssh docker@172.17.0.82
The authenticity of host '172.17.0.82 (172.17.0.82)' can't be established.
ECDSA key fingerprint is 6a:aa:ad:15:21:f2:0b:b8:1a:95:0a:5d:6c:71:a6:b4.
Are you sure you want to continue connecting (yes/no)? yes
Warning: Permanently added '172.17.0.82' (ECDSA) to the list of known hosts.
docker@172.17.0.82's password:
Welcome to Ubuntu 14.04 LTS (GNU/Linux 3.2.0-54-generic x86_64)

 * Documentation:  https://help.ubuntu.com/
---snip
- ログイン後、起動確認すれば無事にたちあがっている。あとはよしなに。
$ bash
docker@f255f6f58ca6:~$ sudo netstat -lntp
Active Internet connections (only servers)
Proto Recv-Q Send-Q Local Address           Foreign Address         State       PID/Program name
tcp        0      0 0.0.0.0:24224           0.0.0.0:*               LISTEN      -
tcp        0      0 127.0.0.1:24230         0.0.0.0:*               LISTEN      -
tcp        0      0 0.0.0.0:22              0.0.0.0:*               LISTEN      -
tcp        0      0 0.0.0.0:8888            0.0.0.0:*               LISTEN      -
tcp        0      0 0.0.0.0:2812            0.0.0.0:*               LISTEN      -
tcp6       0      0 :::22                   :::*                    LISTEN      -
参考情報
- 説明途中に参照すべき情報はのせましたが、多くのかたの情報でささえられました。
- アウトプット万歳
