その10
ユーザーのログインログアウトも、この画面上でできたらいいですよね。
ちょっと長いですがログインログアウト両方やってしまいましょう。
目次
- 準備
- ログアウト処理の作成
- ログイン処理の作成
準備
・app(account)の作成
blogと平行して、今度はaccountというアプリを作ります。
ブログの内容などを管理するアプリと、ユーザーアカウントを管理するアプリ、分けておくと良いでしょう。
django-admin startapp account
・settings.pyの編集
accountを追加しましょう。
INSTALLED_APPS = [
    'django.contrib.admin',
    'django.contrib.auth',
    'django.contrib.contenttypes',
    'django.contrib.sessions',
    'django.contrib.messages',
    'django.contrib.staticfiles',
    'blog',
    'account',
]
・mysite/urls.pyの編集
親のurls.pyもaccountのurlを追加しておきます。
path('account/', include('account.urls', namespace='account')),
・ログイン情報の表示
今どのユーザーでログインしているかわかるようにしておきましょう。
{{ user.username }}
をhtml中に入れるだけで確認できます。
(略)
<body>
      <div>
        <a href="{% url 'blog:post_list' %}" class="btn btn-primary">HOME</a>
        <a href="{% url 'blog:create_article' %}" class="btn btn-primary">記事の作成</a>
        loginuser: {{ user.username }}<br>
(略)
このようにしてみました。
他にもidを表示させたりできるのですが、詳しくは公式へ。
Django Documentation
ログアウト
まずは簡単なログアウトの処理からいきましょう。
もし誰かがログインしていたら、ログアウトボタンを表示して処理をさせます。
誰もログインしていなかったら、そもそもボタンを表示させません。
・account/views.py
from django.shortcuts import render, redirect
from django.contrib.auth import logout, authenticate

def logoutview(request):
    logout(request)
    return redirect('blog:post_list')
追加します。
・account/urls.py
ないので作成します。
from django.urls import path
from . import views

app_name = 'account'
urlpatterns = [
    path('logout/', views.logoutview, name='logoutview'),
]
・post_list.html
{% if request.user.is_authenticated %}
    <a href="{% url 'account:logoutview' %}" class="btn btn-primary">LOGOUT</a>
{% endif %}
任意の場所にこれをつけます。
_authenticatedはログインされているかされていないかを判断します。
もしボタンを押す(リクエストユーザーが)ログインされていたら…以下の処理をする…というif構文になっています。
・確認
ログイン
こちらはログインフォームを作成する必要がありますね?
ではいきましょう。
・account/forms.py
ないので作成します。
from django import forms

class LoginForm(forms.Form):
    username = forms.CharField(required=True)
    password = forms.CharField(
        required = True,
        widget = forms.PasswordInput,
        )
・account/views.py
logoutの下に付け足します。
from django.shortcuts import render, redirect
from django.contrib.auth import logout, authenticate, login #loginを付け足します。
from . import forms #formsもインポートします。
(略)

def loginview(request):
    if request.method == "POST":
        form = forms.LoginForm(request.POST)
        if form.is_valid():
            user = authenticate(
                username = form.cleaned_data['username'],
                password = form.cleaned_data['password'],
            )
            if not user:
                return redirect('account:loginview')
            login(request, user)
            return redirect('blog:post_list')

    form = forms.LoginForm()
    return render(request, 'account/login.html', {'form':form})
import login と def loginbiewを忘れずに
・account/urls.py
path('login/', views.loginview, name='loginview'),
加えます。
・login.html
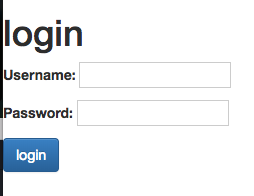
ログイン専用のフォームを載せるhtmlを作ります。
場所は、account/templates/account/login.html です。
templates以下は自分で作る必要があります。
<html>
<head>
  <!-- bootstrap -->
  <link rel="stylesheet" href="//maxcdn.bootstrapcdn.com/bootstrap/3.2.0/css/bootstrap.min.css">
  <link rel="stylesheet" href="//maxcdn.bootstrapcdn.com/bootstrap/3.2.0/css/bootstrap-theme.min.css">
</head>

  <body>
    <h1>login</h1>
    <form method="POST" action="">
      {% csrf_token %}
      {{ form.as_p }}
    <input type="submit" value="login" class="btn btn-primary">
    </form>
  </body>
</html>
覚えていますか?フォームは情報を送るので、POSTです。
セキュリティのために、{% csrf_token %}が必要でした。
・post_list.html
{% if request.user.is_authenticated %}
  <a href="{% url 'account:logoutview' %}" class="btn btn-primary">LOGOUT</a>
{% else %}
  <a href="{% url 'account:loginview' %}" class="btn btn-primary">LOGIN</a>
{% endif %}
先ほどログアウトで処理したif endifの間にelseを入れ、
ユーザーがログインされていないときはログインボタンを表示するという構文にしました。
if else です。
・確認
おわりに & gitclone
ここまでで一通りの実装がおわりました。
お疲れ様でした。
あとは見た目を綺麗にすればそれっぽいブログができるんじゃないでしょうか。
希望があればリクエストコメントを出してください。頑張ってみます。
gitリポジトリを作成しました。
完成形を置いておきます。
使い方は、ターミナルで
git clone https://github.com/ume1126/django-blog.git
cd django-blog
python manage.py migrate
python manage.py runserver
です。


