概要
こんにちは。普段、WebGL(Three.js)をいっぱい使っているukonpowerです。
シェーダーアドベントカレンダー、フラグメントシェーダーを使ったすごい記事がいっぱいありますね...
とてもかないそうにないので今回はバーテックスシェーダーに焦点を当て、バーテックスシェーダーだけでいい感じの演出(?)を作るにはどうすればよいかご紹介できたらなと思います。
なおこの記事ではThree.jsで実装しますが、Unityなど他のツールでも役立つよう、出来るだけ考え方をメインに解説したいと思います。
Three.jsとは
WebGLを超絶簡単に使えるようにしてくれるウルトラハイパーラッパーライブラリです。 (個人的見解です)
Github: https://github.com/mrdoob/three.js
今回使うシーン
今回は以下のようなただの立方体が浮かんでるシーンをバーテックスシェーダーだけで出来るだけ面白くしていきたいと思います。
https://oregl.ukon.dev/gl/Boxes/#0

バーテックスシェーダーだけで映えるために
バーテックスシェーダーではレイマーチングのような摩訶不思議な表現をすることはなかなか難しいですが、以下のことをそれなりに面白い表現ができると思います。
- 物量
- ばらけ
- しなやか
1. 物量
やはり...とりあえずこれですよ...
リアルタイムCGで物量を出すためにはインスタンシングというものを使います。
Three.jsにおいてのインスタンシングについては以前解説記事を書きましたので、よければ御覧ください。
これだけ覚えればできる!Three.jsのGPU Instancing
1回のドローコールで同じモデルデータをドバッと出そうっていうやつです。
インスタンシングのコードです。
let originBox = new THREE.BoxBufferGeometry( 0.1, 0.1, 0.1, 30 );
let geo = new THREE.InstancedBufferGeometry();

let vertice = ( originBox.attributes.position as THREE.BufferAttribute ).clone();
geo.addAttribute( 'position', vertice );

let normal = ( originBox.attributes.normal as THREE.BufferAttribute ).clone();
geo.addAttribute( 'normals', normal );

let uv = ( originBox.attributes.normal as THREE.BufferAttribute ).clone();
geo.addAttribute( 'uv', uv );

let indices = originBox.index.clone();
geo.setIndex( indices );

let posArray = [];

for ( let i = 0; i < this.num; i++ ) {

	for ( let j = 0; j < this.num; j++ ) {

		for ( let k = 0; k < this.num; k++ ) {

			let x = ( i - ( this.num - 1 ) / 2 ) * 0.2;
			let y = ( j - ( this.num - 1 ) / 2 ) * 0.2;
			let z = ( k - ( this.num - 1 ) / 2 ) * 0.2;

			posArray.push( x, y, z );

		}
	}
}

let offsetPos = new THREE.InstancedBufferAttribute( new Float32Array( posArray ), 3, false,  );

geo.addAttribute( 'offsetPos', offsetPos );
attribute vec3 offsetPos;
uniform mat4 rotation;
uniform float time;
varying vec3 vViewPosition;
varying vec3 vColor;

mat2 rotate(float rad) {
  return mat2(cos(rad), sin(rad), -sin(rad), cos(rad));
}

void main() {

	vec3 pos = position;

	pos.xz *= rotate( sin( time * 2.0 ) * 3.0 );
	pos.yz *= rotate( sin( time * 2.0 ) * 3.0 );

	pos = vec4( rotation * vec4( pos + offsetPos, 1.0 ) ).xyz;

	vec4 mvPosition = modelViewMatrix * vec4( pos, 1.0 );
	gl_Position = projectionMatrix * mvPosition;
	vViewPosition = -mvPosition.xyz;

	vColor = vec3( 1.0 );

}
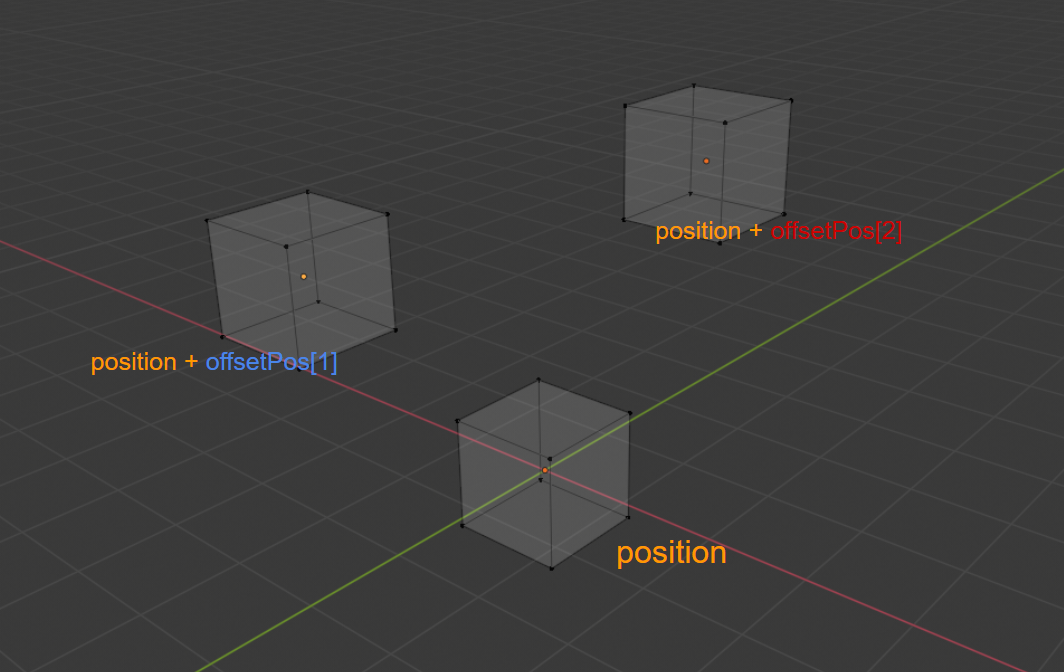
インスタンシングの考え方としては、以下の図のような感じで、インスタンシング用のアトリビュート(この場合offsetPos)一つにつき、ベースとなる頂点データ(この場合BoxBufferGeometry)をループしながら頂点を描画していきます。

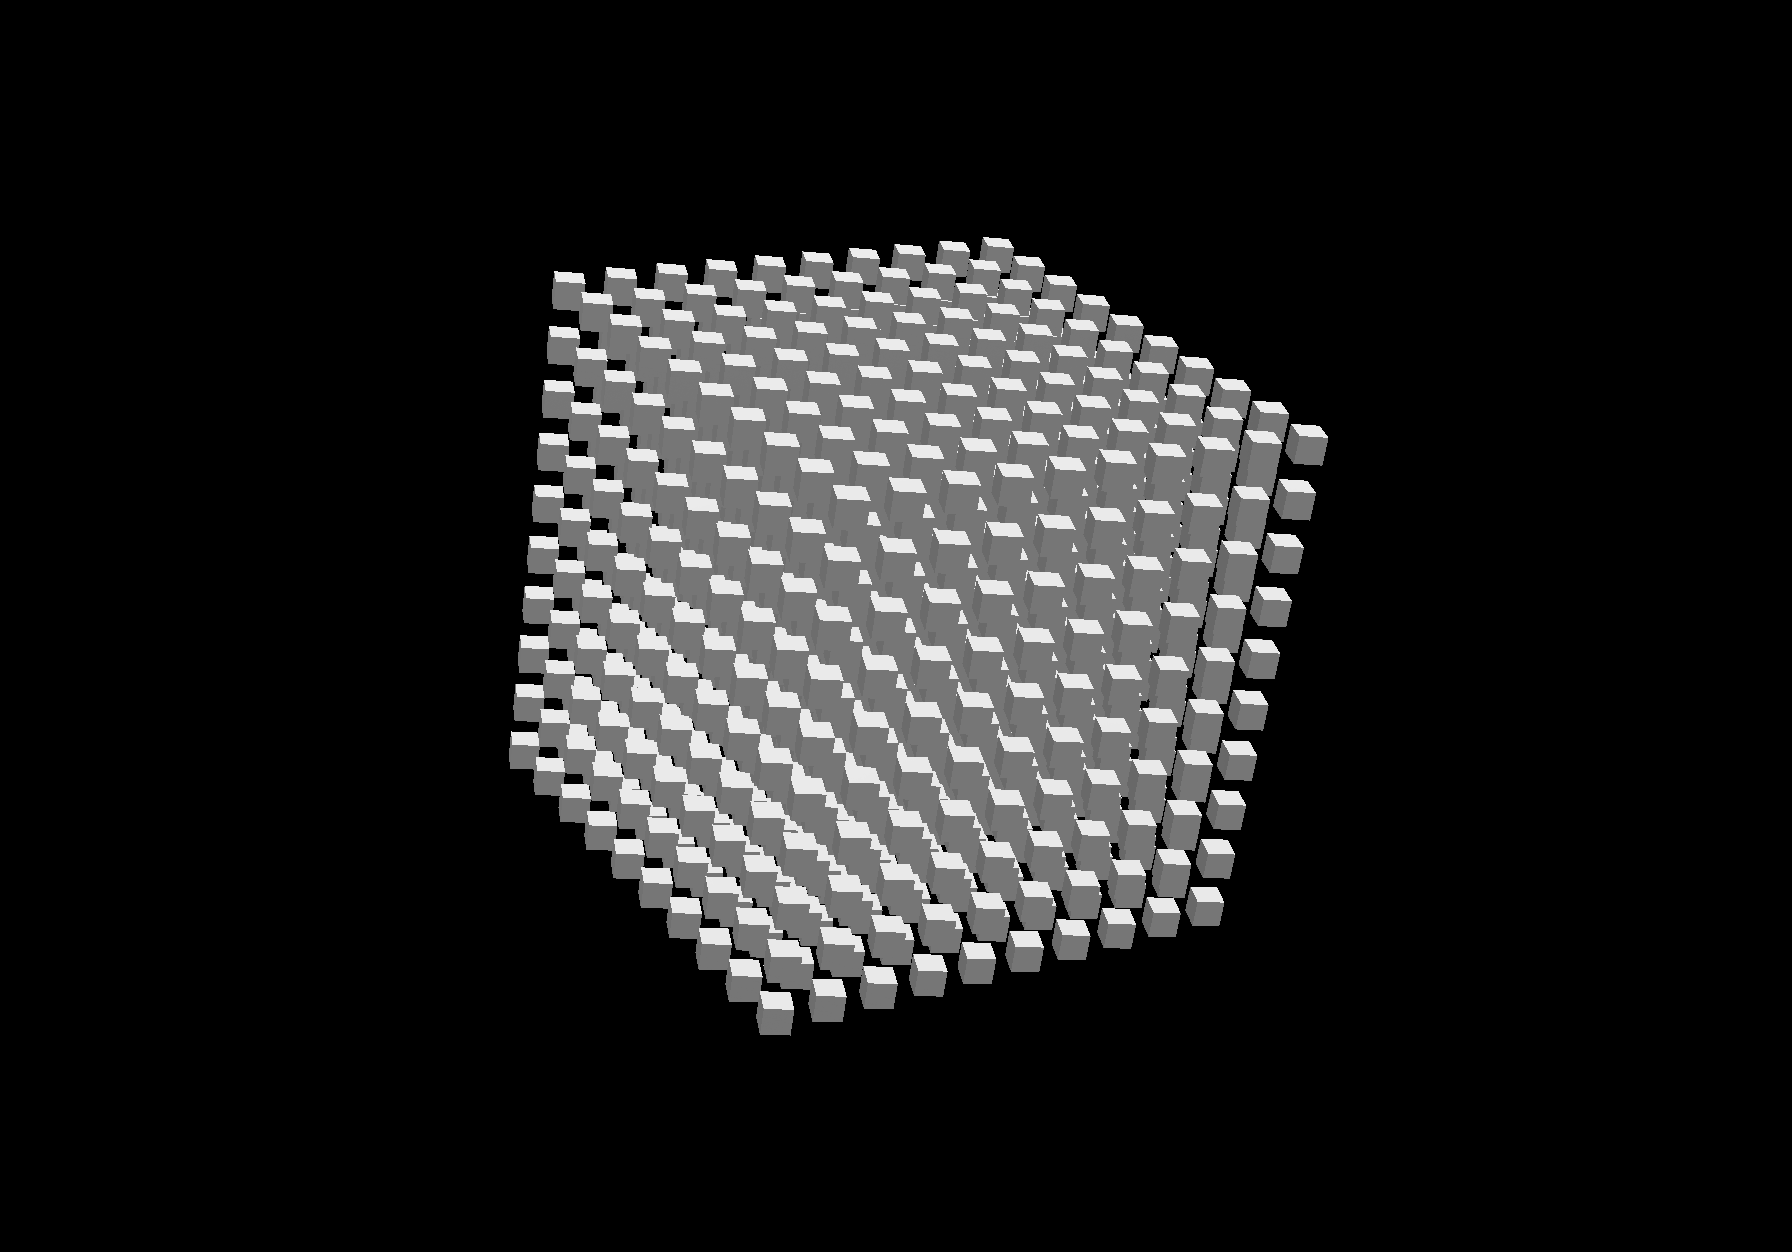
Boxをたくさん表示することができました。
https://oregl.ukon.dev/gl/Boxes/#1

2. ばらけ
1のインスタンシングによって物量は確保されました。
しかしなんかつまらないですよね。
おそらくインスタンシングで作ったオブジェクトたちがどれも同じ形で同じ動きをしてるから、結局ちょっと複雑な1つのオブジェクトに見えちゃってるからではないでしょうか。
そこで今度はそれぞれにばらけを加えたいと思います。
インスタンスたちをばらけさせるためにはそれぞれに固有の番号を与えます。
この値を使ってシェーダーでゴニョゴニョしようというわけです。
let originBox = new THREE.BoxBufferGeometry( 0.15, 0.15, 0.15, 30 );
let geo = new THREE.InstancedBufferGeometry();

let vertice = ( originBox.attributes.position as THREE.BufferAttribute ).clone();
geo.addAttribute( 'position', vertice );

let normal = ( originBox.attributes.normal as THREE.BufferAttribute ).clone();
geo.addAttribute( 'normals', normal );

let uv = ( originBox.attributes.normal as THREE.BufferAttribute ).clone();
geo.addAttribute( 'uv', uv );

let indices = originBox.index.clone();
geo.setIndex( indices );

let posArray = [];
let numArray = [];

let cnt = 0;

for ( let i = 0; i < this.num; i++ ) {

	for ( let j = 0; j < this.num; j++ ) {

		for ( let k = 0; k < this.num; k++ ) {

			let x = ( i - ( this.num - 1 ) / 2 ) * 0.25;
			let y = ( j - ( this.num - 1 ) / 2 ) * 0.25;
			let z = ( k - ( this.num - 1 ) / 2 ) * 0.25;

			posArray.push( x, y, z );

			numArray.push( cnt++ );

		}
	}
}

let offsetPos = new THREE.InstancedBufferAttribute( new Float32Array( posArray ), 3 );
let num = new THREE.InstancedBufferAttribute( new Float32Array( numArray ), 1 );

geo.addAttribute( 'offsetPos', offsetPos );
geo.addAttribute( 'num', num );
attribute vec3 offsetPos;
attribute float num;
uniform mat4 rotation;
uniform float time;
varying vec3 vViewPosition;
varying vec3 vColor;

mat2 rotate(float rad) {
  return mat2(cos(rad), sin(rad), -sin(rad), cos(rad));
}

float random(vec2 p){
    return fract(sin(dot(p.xy ,vec2(12.9898,78.233))) * 43758.5453);
}

void main() {

	vec3 pos = position;

	float sizeRnd = random( vec2( num ) );
	float rotRnd = random( vec2( num + 10.0 ) );

	//サイズをバラけさせる
	pos.yz *= cos( time * 1.0 + sizeRnd * 3.0 );
	pos.x *=  10.0 * sin( time * 1.0 + sizeRnd * 3.0 );

	//回転をバラけさせる
	pos.xz *= rotate( sin( time * 2.0 + rotRnd * 0.5 ) * 3.0 );
	pos.yz *= rotate( sin( time * 2.0 + rotRnd * 1.0 ) * 3.0 );

	pos = vec4( rotation * vec4( pos + offsetPos * 1.5, 1.0 ) ).xyz;

	vec4 mvPosition = modelViewMatrix * vec4( pos, 1.0 );
	gl_Position = projectionMatrix * mvPosition;
	vViewPosition = -mvPosition.xyz;

	vColor = vec3( 1.0 );

}
はい。なんだかいい感じになってきました。
https://oregl.ukon.dev/gl/Boxes/#2

3.しなやかさ
最後に僕がバーテックスシェーダーを書くときによく使うネタとしては、メッシュのしなやかさを意識することです。
なぜだかわかりませんが、うにゅうにゅとした有機物のような表現は心奪われるということありますよね。
特にレイマーチングではそういった表現がよくされると思うので、バーテックスシェーダーでも取り入れたいところです。
しなやかさを作るには、オブジェクトのローカル座標を使います。
attribute vec3 offsetPos;
attribute float num;
uniform mat4 rotation;
uniform float time;
varying vec3 vViewPosition;
varying vec3 vColor;

mat2 rotate(float rad) {
  return mat2(cos(rad), sin(rad), -sin(rad), cos(rad));
}

float random(vec2 p){
    return fract(sin(dot(p.xy ,vec2(12.9898,78.233))) * 43758.5453);
}

void main() {

	vec3 pos = position;

	float sizeRnd = random( vec2( num ) );
	float rotRnd = random( vec2( num + 10.0 ) );

	pos.yz *= cos( offsetPos.y + time * 1.0 + sizeRnd * 3.0 ) * 0.4;
	pos.x *=  6.0 * sin( offsetPos.y + time * 1.0 + sizeRnd * 4.0 );

	//position.xを足すことでしなやかさを作る
	pos.xz *= rotate( sin( offsetPos.y + time * 2.0 + rotRnd * 0.5 + ( position.x + 0.5 ) * 5.0 ) * 3.0 );
	pos.yz *= rotate( sin( offsetPos.y + time * 2.0 + rotRnd * 1.0 ) * 3.0 + ( position.x + 0.5 ) * 5.0 );

	pos = vec4( rotation * vec4( pos + offsetPos * 1.5, 1.0 ) ).xyz;

	vec4 mvPosition = modelViewMatrix * vec4( pos, 1.0 );
	gl_Position = projectionMatrix * mvPosition;
	vViewPosition = -mvPosition.xyz;

	vColor = vec3( 1.0 );

}
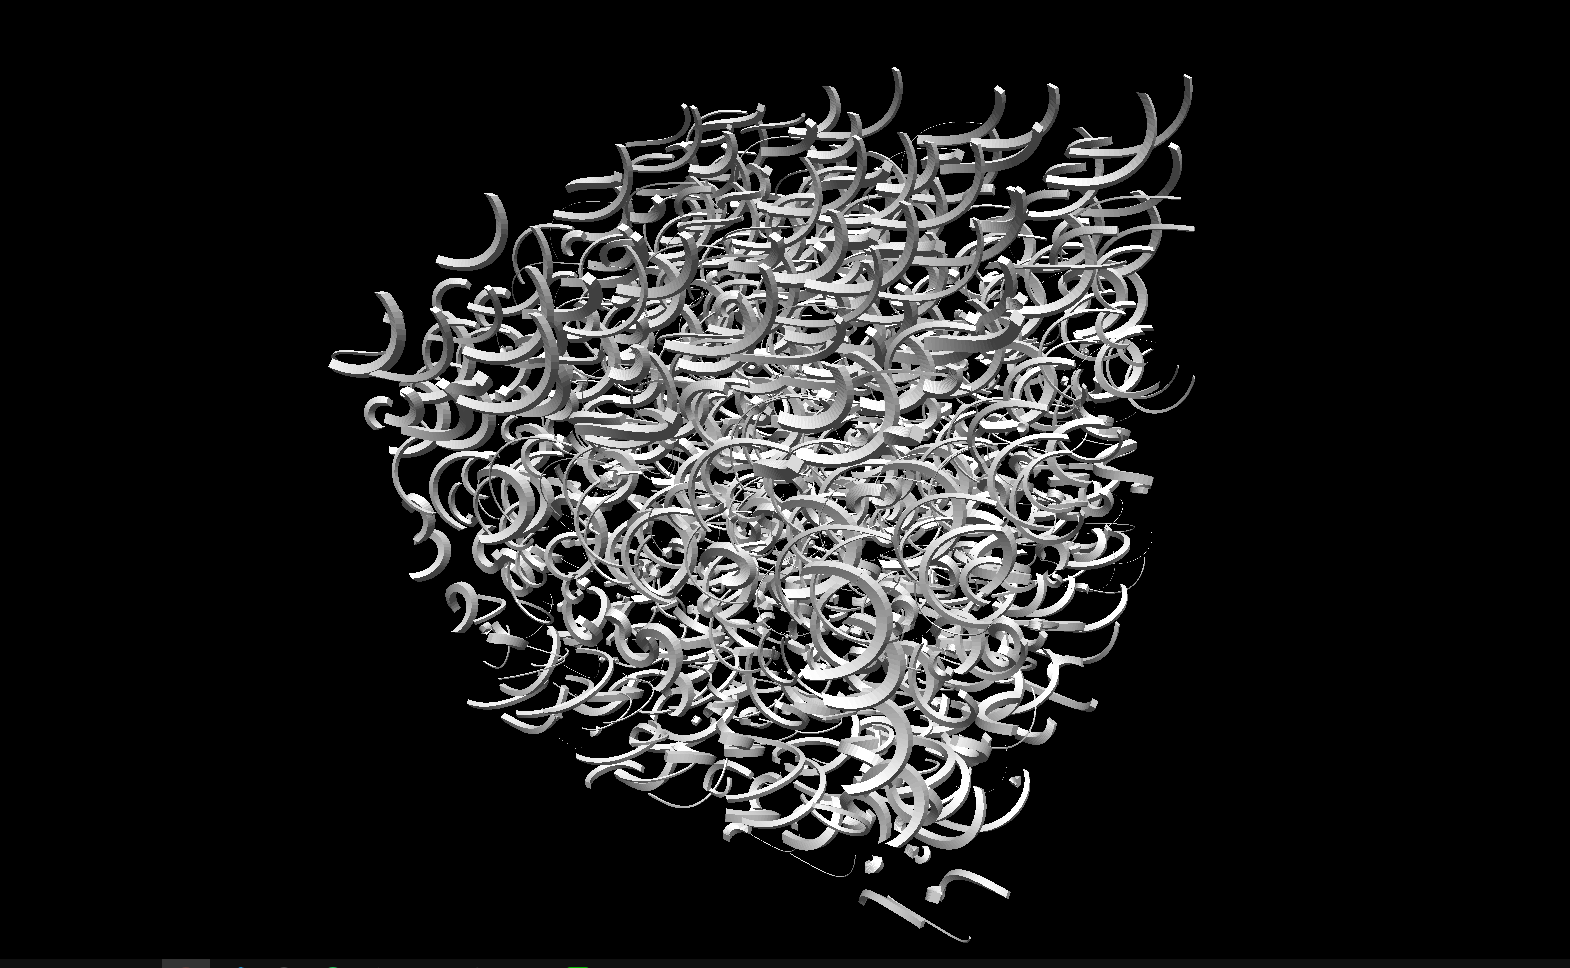
はい。なんか気持ち悪いものができました。
まとめ
ということでバーテックスシェーダーで映えるためには
- 物量
- ばらけ
- しなやかさ
が大事かなという僕の考えでした。
フラグメントシェーダーでレイマーチングなどは、非常に面白い絵が出てとても素敵ですが、
どうしてもパフォーマンス的に厳しい...!!ということもあると思います。
そんなときはバーテックスシェーダーを使ってみるのも良いかもしれません。
