ソースコードの管理やテスト、デプロイがBitbucket内で閉じるのはミニマルで素敵なので、
サーバーにsshしてデプロイする作業を Pipelines にやらせます。
環境は linux(debian9)上に Django(python) + nginx + uwsgi です。
正確には、staging環境へのデプロイになっているので、継続的デリバリーの方が正しい気がしますが、
デプロイの方がイメージしやすそうなので、この記事タイトルにしています。
あと、以降のデプロイサーバーという記述は各自、リモートホストやstagingサーバー、productionサーバーに読み変えてください。
事前準備
デプロイサーバーはリポジトリのクローン、nginxやuwsgiの起動は済ませた状態です。
プロジェクトのディレクトリ構造
※以降の説明に出てくるものだけを記載
project
├── bin
│   ├── manage.py
├── bitbucket-pipelines.yml
├── deploy.sh
├── requirements.txt
├── tests
├── tmp
├
├
bitbucket-pipelines.yml
bitbucket-pipelinesの処理を記述したyamlファイル。
bitbucket-pipelines.ymlの記法詳細
今回はdevelopブランチでデプロイするので、
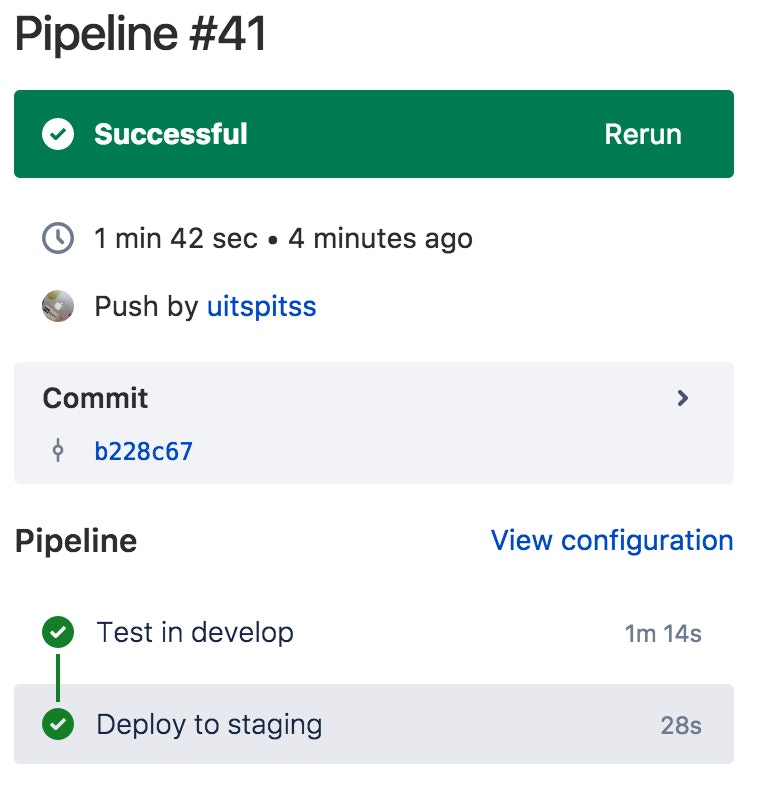
developブランチにテストとデプロイの2ステップ。
もちろん、デプロイだけならテストのステップは不要です。
image: python:latest

pipelines:
  branches:
    develop:
      - step:
          name: Test in develop
          caches:
            - pip
          script:
            - pip install -r requirements.txt
            - python bin/manage.py test -- tests/
          services:
            - postgres
      - step:
          name: Deploy to staging
          script:
            - ssh -p $DEPLOY_SERVER_PORT $BITBUCKET_BRANCH@$DEPLOY_SERVER_IP bash < deploy.sh
definitions:
    services:
      postgres:
        image: postgres
$BITBUCKET_BRANCHのところは、適宜、デプロイサーバーのsshログインユーザー名に置き変えてください。
私はデプロイサーバー上にブランチ名でユーザーを切っているので、このようにしてます。
ちなみに、BITBUCKET_BRANCH はデフォルトで定義されている Enviroment variables です。
その他の Enviroment variables については → Environment variables - Atlassian Documentation
deploy.sh
デプロイサーバーでのデプロイ作業を記述したシェルスクリプト。
Bitbucketのリポジトリからgit pullして、uwsgiのpidファイルをリロードしてます。
# !/bin/bash

PROJECT=project

cd ~/$PROJECT
git pull
source /opt/$PROJECT/bin/activate && uwsgi --reload tmp/uwsgi.pid
echo "Deployed!"
bitbucket側の設定
やることはドキュメント通りです。
Use SSH keys in Bitbucket Pipelines - Atlassian Documentation
ですが、ドキュメントと違っている箇所や躓きやすい箇所を以下に書きます。
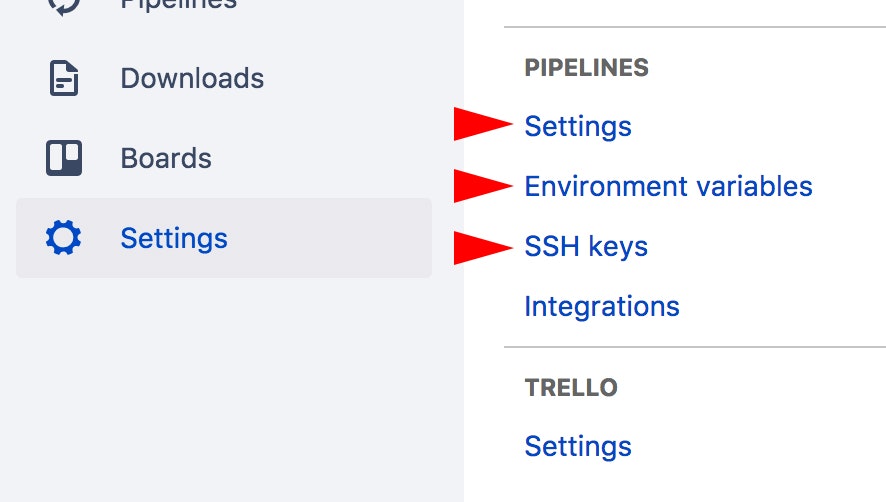
まず、Bitbucketのリポジトリ側でいじるのは、以下の3つ
-
Settings > PIPELINES > Settings →
有効になっていなければ有効にする - Settings > PIPELINES > Enviroment variables → 以下に記述
- Settings > PIPELINES > SSH keys → 以下に記述
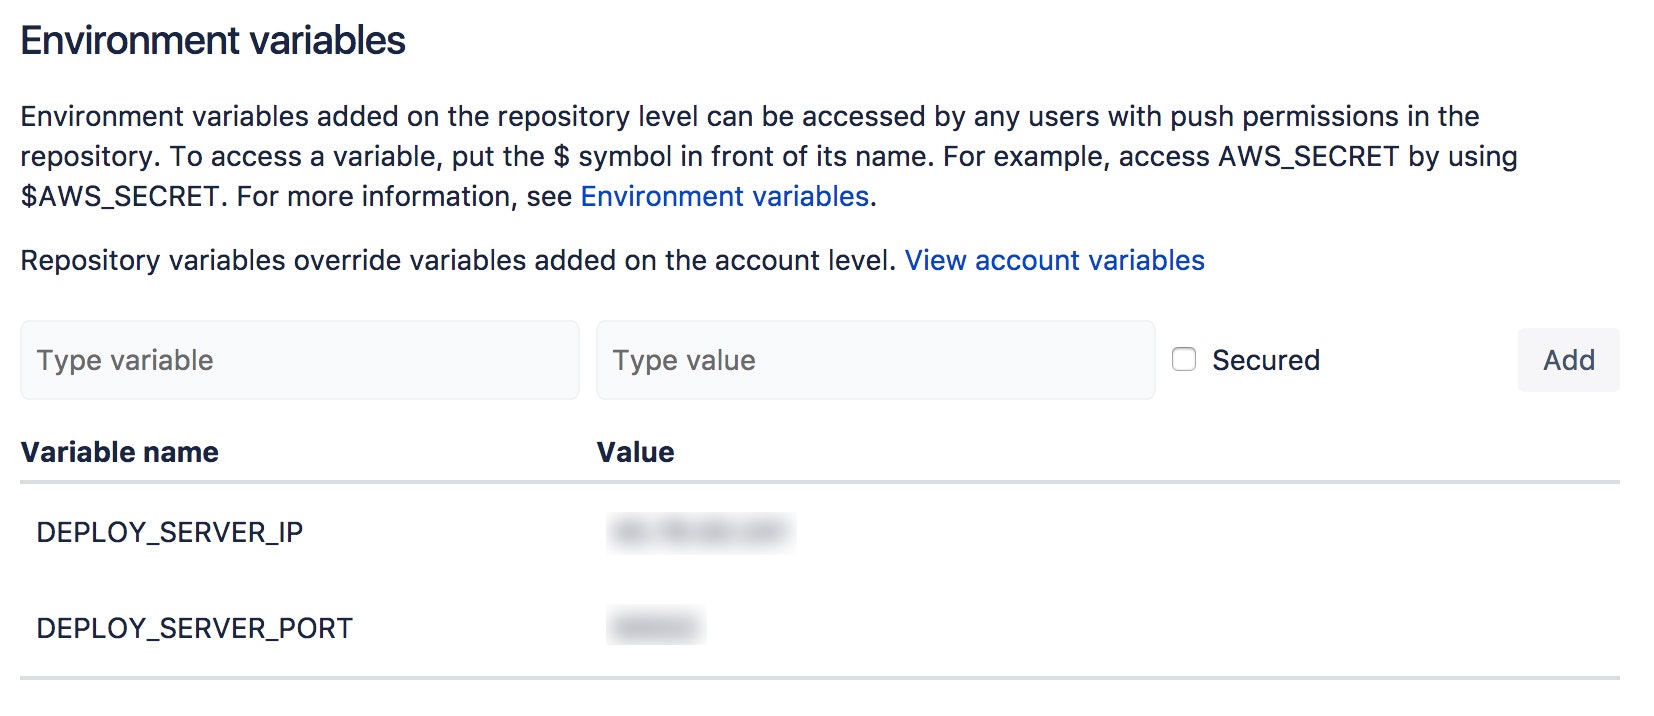
Enviroment variables
bitbucket-pipelines.yml 内で使用する
- DEPLOY_SERVER_IP
- DEPLOY_SERVER_PORT
はここで定義します。
もちろん、ここでこれらの値を定義せずに bitbucket-pipelines.yml に値を直書きでも大丈夫です。
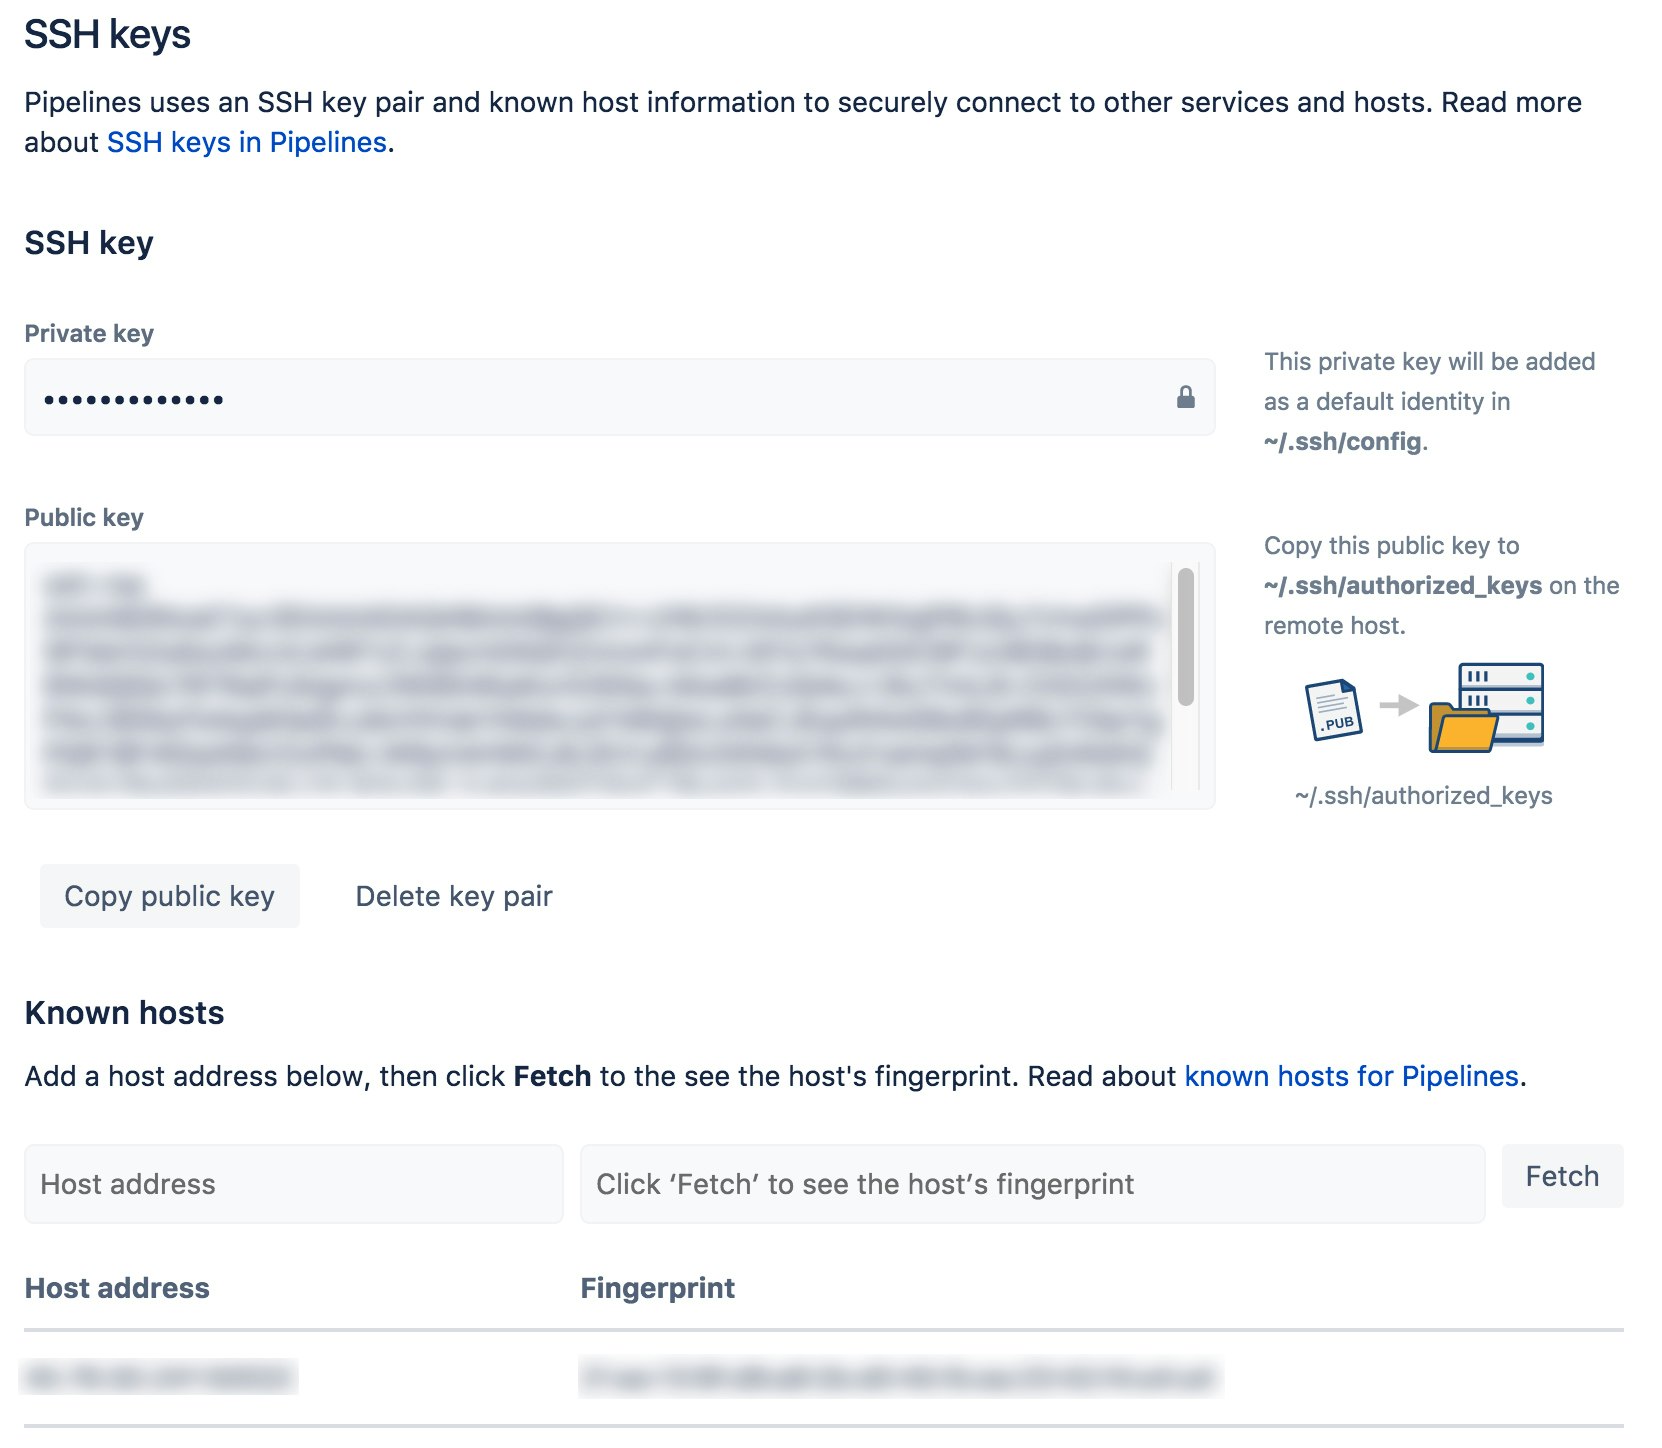
SSH keys
デプロイサーバーへsshする為の鍵はここで生成、設定します。
勘違いしやすいですが、Bitbucketリポジトリへsshする為の鍵は、Settings > GENERAL > Access keys に登録しておく必要があります。
おそらく、事前準備の段階でBitbucketリポジトリをクローンするときに登録しているはずです。
- Bitbucketリポジトリ(Pipelines) → デプロイサーバーへのssh設定は Settings > PIPELINES > SSH keys
- デプロイサーバー → Bitbucketリポジトリへのssh設定は Settings > GENERAL > Access keys
- ここで SSH Key のペアを生成します。
- デプロイサーバーの
~/.ssh/authorized_keysに Public Key を追記します。 -
Host address にデプロイサーバーのアドレスを入れて、Fetch を押します。
sshで使用するPortがデフォルトの22でなければ、127.0.0.1:22222のようにPortを指定したアドレスにします。 -
Fetch が上手くいったら、Figerprintができるので、add host します。
すると、入力欄の下のリストに Host address と Fingerprint が追加されます。
BitbucketリポジトリにpushしてPipelinesを動かす
ここまで設定ができると、push時にPipelinesが動いてデプロイまでしてくれます。
その他の環境でのデプロイ
AWSやHerokuへのデプロイはもっとお手軽です。
Deployment guides - Atlassian Documentation
最後に
Pipelinesからのsshは、1年前くらいの記事を見ると、base64エンコードしたsshキーをEnviroment variablesに登録する方法がよく引っかかるので、そちらにハマってしまうと面倒です。
Atlassianもそのあたりが面倒なのが分かっていて、今年の3月くらいにBitbucketリポジトリからsshする際のキーを生成できるようにしたみたいです。


