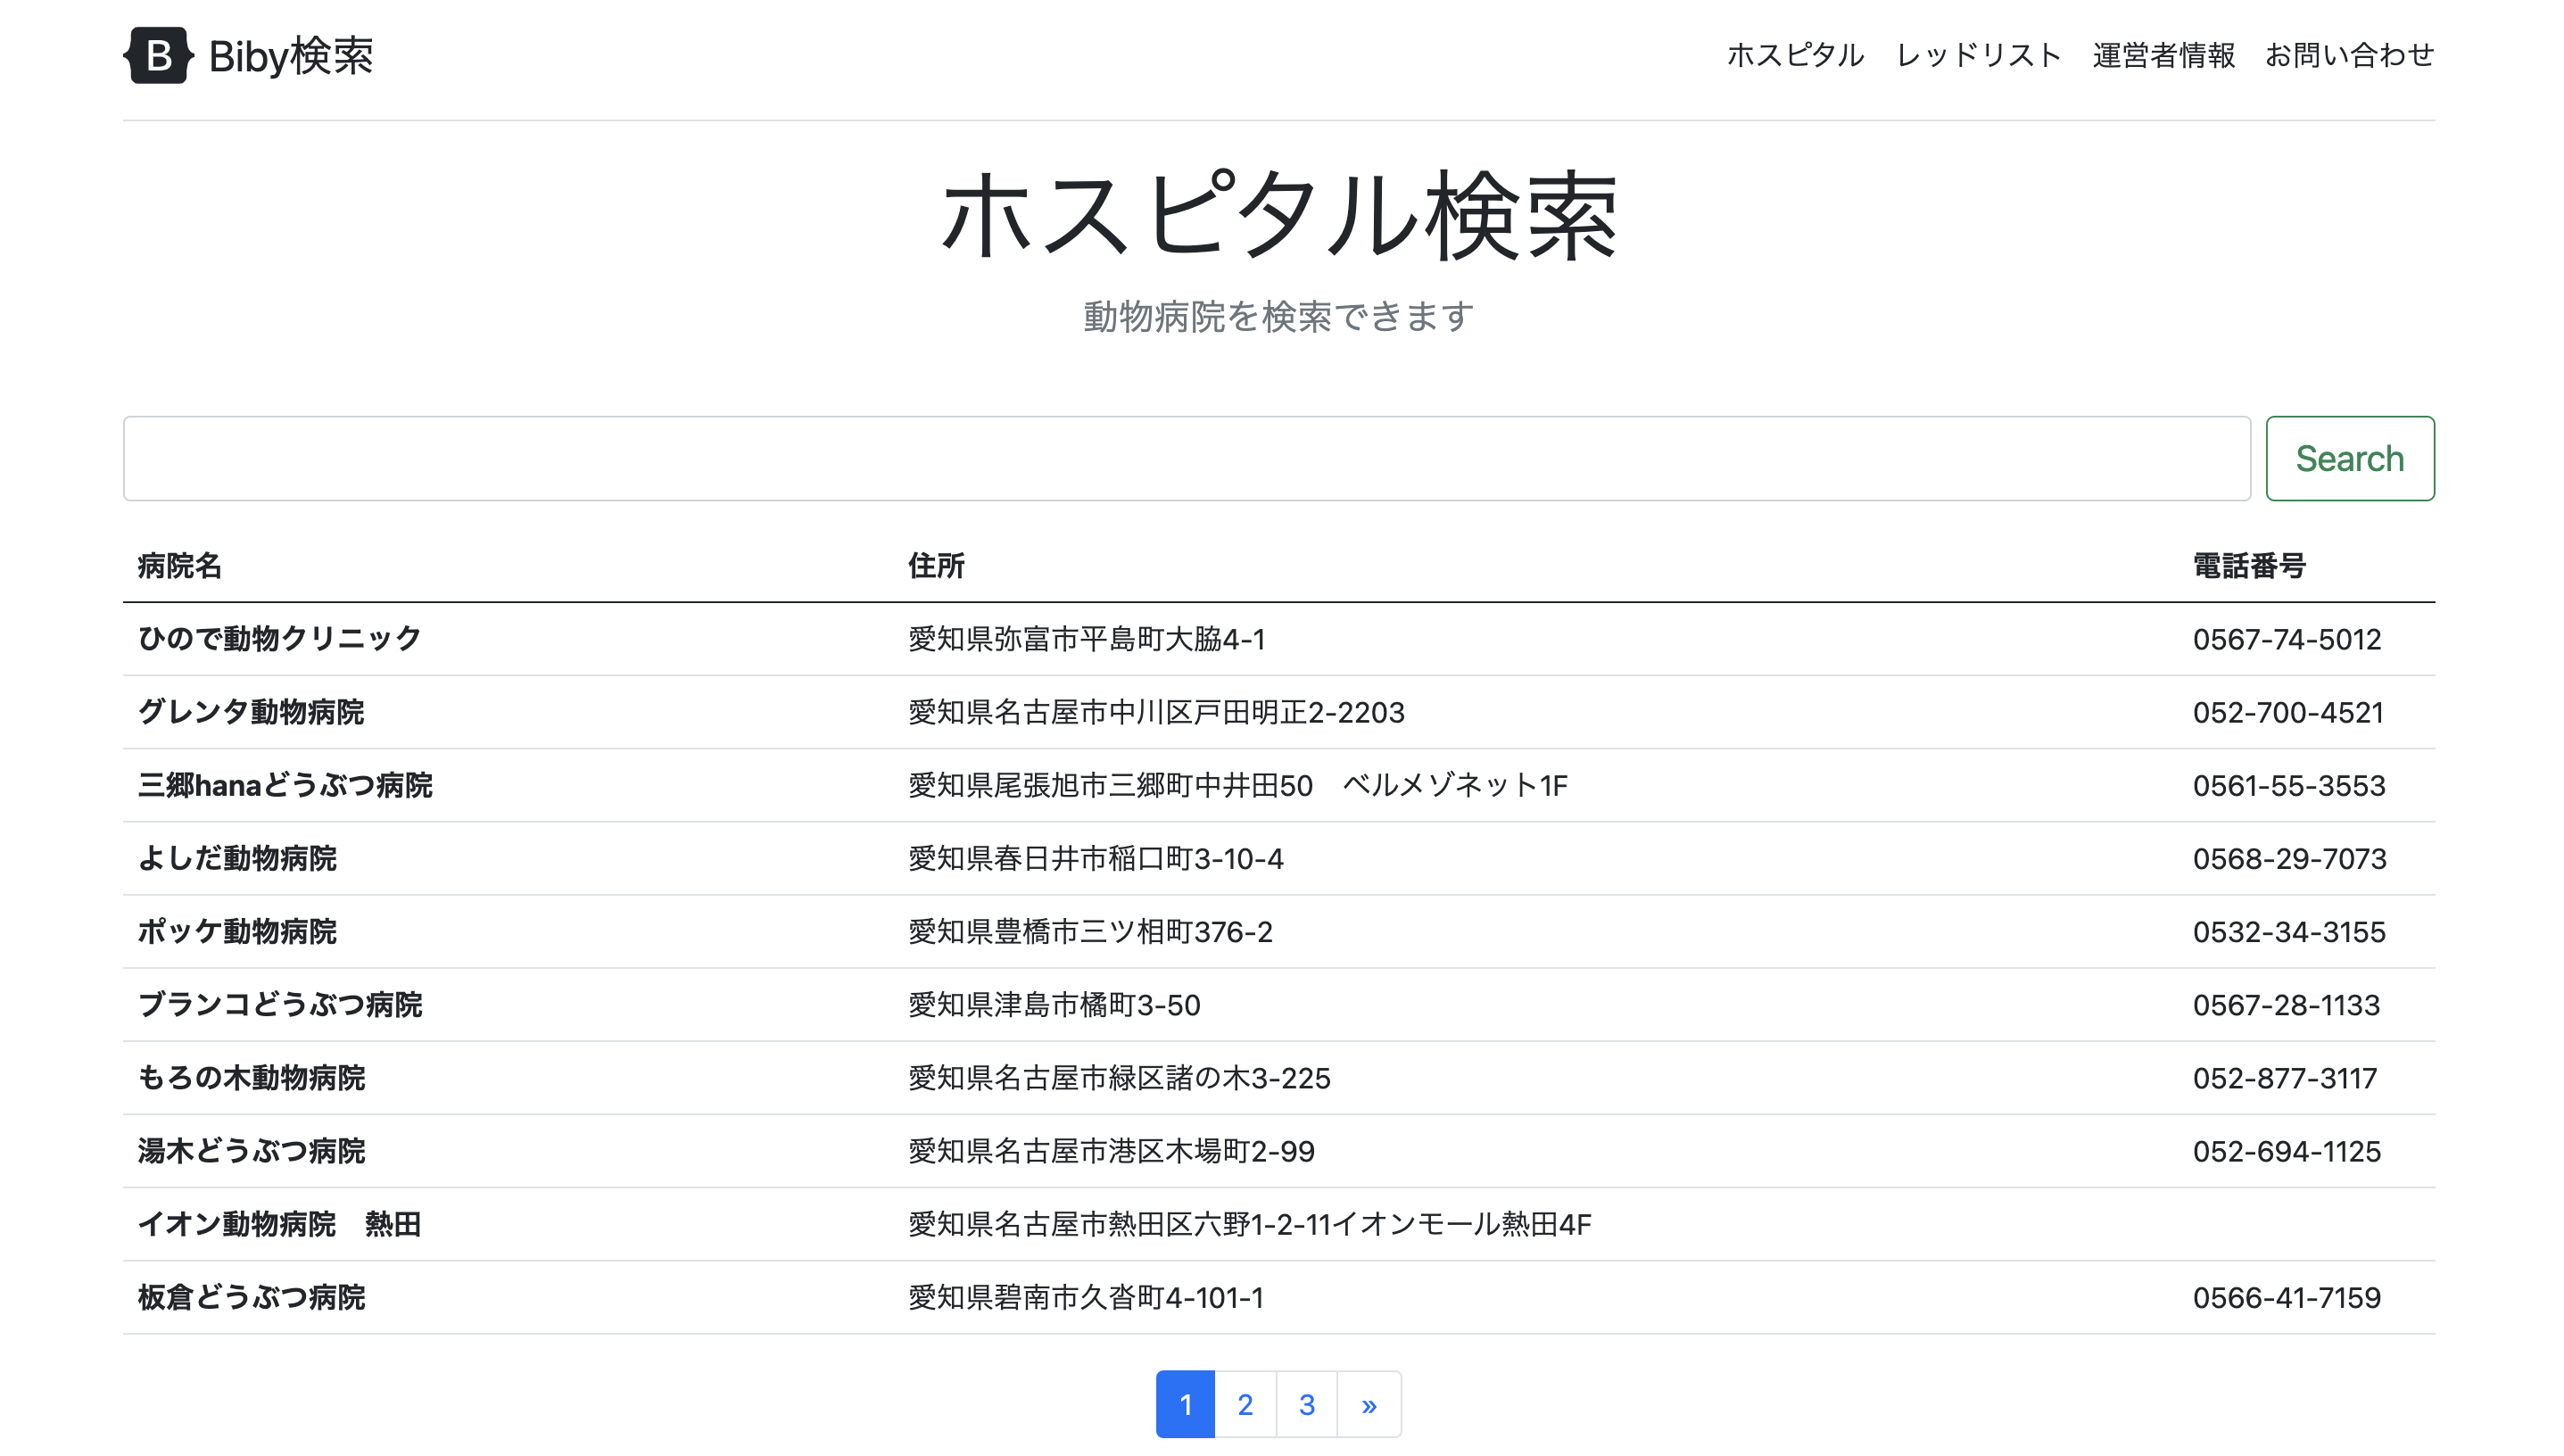
インターネットばかりいじってると自然や動物と疎遠になってしまうので、人以外にもやさしさを向けてみました。
サイトはDjangoで実装しており、簡単な検索システムになっています。
せっかくなので作り方を紹介します。
対象読者はDjangoをかじったことのある方を想定しており、チュートリアル感覚で進められます。
本記事でできること
- 管理画面の作成
- 一般ユーザー向け検索画面作成
- スペース区切りの検索機能作成
また、本記事では一般ユーザー向けの検索システムを作ることを目的としているので、モデルの作成や管理画面作成については深く説明しませんが、参考までにmodels.pyやadmin.pyなどの実装したソースコードを載せています。
Djangoをかじったことのある方なら追いつける内容にはなっています。
Djangoのインストール
まずはDjangoをインストールしましょう。
Pythonのバージョンを切り替えたい方はPyenvを使用してください。
python -m venv env
source env/bin/activate
pip install django
django-admin startproject project .
django-admin startapp [app名]
python manage.py migrate
python manage.py createsuperuser
python manage.py runserver
以上でDjangoの環境が立ち上がりました。
127.0.0.1:8000を開いて正しく表示されていれば最初の環境構築は完了です。
Djangoは標準で管理画面が付いているので、127.0.0.1:8000/adminでcreatesupseruser時に登録したユーザーで管理画面にアクセスできます。
Modelの作成
データベースを定義していきます。
https://biby.live のレッドリストのデータ定義を置いておくので参考にしてください。
from django.db import models


class Category(models.Model):

  name = models.CharField(max_length=32, blank=False, null=False)

  def __str__(self):
      return self.name


class Classification(models.Model):

  name = models.CharField(max_length=32, blank=False, null=False)

  def __str__(self):
      return self.name


class Animal(models.Model):

  japanese_name = models.CharField(max_length=256, blank=False, null=False)
  scientific_name = models.CharField(max_length=256, blank=False, null=True)
  category = models.ForeignKey(Category, on_delete=models.DO_NOTHING)
  classification = models.ForeignKey(Classification, on_delete=models.DO_NOTHING)

  def __str__(self):
      return self.japanese_name
管理画面に追加したデータ定義を表示
管理画面にもmodels.pyで追加したテーブルを追加します。
追加すると、管理画面からテーブルにデータを登録・編集・削除することができます。
ここでもレッドリストの定義を参考までに置いておきます。
from django.contrib import admin
from import_export import resources
from import_export.admin import ImportExportModelAdmin
from import_export.fields import Field
from import_export.widgets import ForeignKeyWidget

from red_list.models import Category
admin.site.register(Category)

from red_list.models import Classification
admin.site.register(Classification)

from red_list.models import Animal
admin.site.register(Animal)
これで管理画面からデータの登録・編集・削除ができるようになりました。
Viewの作成
views.pyで検索機能の実装をします。
スペース区切りの検索には、operatorモジュールとfunctoolsモジュールのreduceを使用します。
先にお見せすると、レッドリストの検索機能はこのようになっています。
from django.shortcuts import render
from django.views.generic import ListView, TemplateView
from .models import Animal, Category, Classification
from django.db.models import Q
from functools import reduce
import operator


class Top(ListView):
    template_name = 'red_list/animal.html'
    model = Animal
    paginate_by = 10

    def get_queryset(self):
        query = self.request.GET.get('query')

        if query and query.split() != []:
            category = Category.objects.filter(reduce(operator.or_, (Q(name__contains=keyword) for keyword in query.split())))
            classification = Classification.objects.filter(reduce(operator.or_, (Q(name__contains=keyword) for keyword in query.split())))
            object_list = Animal.objects.filter(
                reduce(operator.or_, (Q(japanese_name__contains=keyword) for keyword in query.split())) |
                reduce(operator.or_, (Q(scientific_name__contains=keyword) for keyword in query.split())) |
                Q(category__in=category)|
                Q(classification__in=classification)
                )
        else:
            object_list = Animal.objects.all()
        return object_list


class Rule(TemplateView):
    template_name = 'red_list/rule.html'
query.split()は入力された検索キーワードをスペースを区切りにして配列を作っています。
全角も半角もスペースを認識して配列にしてくれます。
query.split() != []としているのは、スペースだけ検索欄に入れてボタンが押されたときに、全検索として処理を走らせたいので条件に入れています。
ちなみにこの条件がないとエラーになってしまいます。
reduce(operator.or_, (Q(name__contains=keyword) for keyword in query.split())はoperator.or_でOR検索を作っています。
ルーティング
ルーティングは2ファイル編集が必要です。
1つはsettings.pyと同じ階層にあるurls.pyで、もう一つはアプリ内に新たに作成するurls.pyです。
settings.pyと同じ階層のurls.pyはこのようになります。
from django.contrib import admin
from django.urls import path, include

urlpatterns = [
    path('admin/', admin.site.urls),
    path('', include('red_list.urls')), # ''の中に/を入れないようにしましょう!
]
今度は追加したアプリにurls.pyを作成してください。
from django.urls import path
from . import views

app_name = 'red_list'

urlpatterns = [
    path('', views.Top.as_view(), name='top'),
]
Templateを追加
いよいよ画面を作成していきます。
CSSフレームワークは定番のBootstrapを使用します。
アプリ内にtemplates/[app名]とディレクトリを作成してください。
作成したディレクトリの中にbase.htmlを作成します。
base.htmlには ヘッダとフッターを作成します。
中身はこちらのソースを参考にしてください。
<!doctype html>
<html lang="ja">
<head>
  <!-- meta tags -->
  <meta charset="utf-8">
  <meta name="viewport" content="width=device-width, initial-scale=1, shrink-to-fit=no">
  <meta name="description" content="動物病院の検索やレッドリストの検索ができます。自然や動物にやさしいこころを持ちましょう。">
  {% load static %}
  <!-- Bootstrap CSS -->
  <link href="https://cdn.jsdelivr.net/npm/bootstrap@5.0.1/dist/css/bootstrap.min.css" rel="stylesheet" integrity="sha384-+0n0xVW2eSR5OomGNYDnhzAbDsOXxcvSN1TPprVMTNDbiYZCxYbOOl7+AMvyTG2x" crossorigin="anonymous">
  <title>biby</title>
</head>
<body>
  <!-- bootstrap js -->
  <script src="https://cdn.jsdelivr.net/npm/bootstrap@5.0.1/dist/js/bootstrap.bundle.min.js" integrity="sha384-gtEjrD/SeCtmISkJkNUaaKMoLD0//ElJ19smozuHV6z3Iehds+3Ulb9Bn9Plx0x4" crossorigin="anonymous"></script>
    <div class="container py-3">
      <header>
        <div class="d-flex flex-column flex-md-row align-items-center pb-3 mb-1 border-bottom">
          <a href="/" class="d-flex align-items-center text-dark text-decoration-none">
            <svg xmlns="http://www.w3.org/2000/svg" width="40" height="32" class="me-2" viewBox="0 0 118 94" role="img"><title>Biby</title><path fill-rule="evenodd" clip-rule="evenodd" d="M24.509 0c-6.733 0-11.715 5.893-11.492 12.284.214 6.14-.064 14.092-2.066 20.577C8.943 39.365 5.547 43.485 0 44.014v5.972c5.547.529 8.943 4.649 10.951 11.153 2.002 6.485 2.28 14.437 2.066 20.577C12.794 88.106 17.776 94 24.51 94H93.5c6.733 0 11.714-5.893 11.491-12.284-.214-6.14.064-14.092 2.066-20.577 2.009-6.504 5.396-10.624 10.943-11.153v-5.972c-5.547-.529-8.934-4.649-10.943-11.153-2.002-6.484-2.28-14.437-2.066-20.577C105.214 5.894 100.233 0 93.5 0H24.508zM80 57.863C80 66.663 73.436 72 62.543 72H44a2 2 0 01-2-2V24a2 2 0 012-2h18.437c9.083 0 15.044 4.92 15.044 12.474 0 5.302-4.01 10.049-9.119 10.88v.277C75.317 46.394 80 51.21 80 57.863zM60.521 28.34H49.948v14.934h8.905c6.884 0 10.68-2.772 10.68-7.727 0-4.643-3.264-7.207-9.012-7.207zM49.948 49.2v16.458H60.91c7.167 0 10.964-2.876 10.964-8.281 0-5.406-3.903-8.178-11.425-8.178H49.948z" fill="currentColor"></path></svg>
            <span class="fs-4">Biby検索</span>
          </a>
          <nav class="d-inline-flex mt-2 mt-md-0 ms-md-auto">
            <a class="me-3 py-2 text-dark text-decoration-none" href="{% url 'red_list:top' %}">レッドリスト</a>
            <a class="me-3 py-2 text-dark text-decoration-none" href="https://twitter.com/nishilyuu" target="_blank" rel="noopener noreferrer">運営者情報</a>
            <a class="py-2 text-dark text-decoration-none" href="https://ykonishi.tokyo/contact" target="_blank" rel="noopener noreferrer">お問い合わせ</a>
          </nav>
        </div>
      </header>
      {% block content %}
      {% endblock %}
      <footer class="pt-4 my-md-5 pt-md-5 border-top">
        <div class="row">
          <div class="col-12 col-md">
            <small class="d-block mb-3 text-muted">© 2021</small>
          </div>
          <div class="col-6 col-md">
            <h5>運営者情報</h5>
            <ul class="list-unstyled text-small">
              <li class="mb-1"><a class="link-secondary text-decoration-none" href="https://twitter.com/uichiyy" target="_blank" rel="noopener noreferrer">https://twitter.com/uichiyy</a></li>
            </ul>
          </div>
          <div class="col-6 col-md">
            <h5>サイト情報</h5>
          </div>
          <div class="col-6 col-md">
            <h5>お問い合わせ</h5>
            <ul class="list-unstyled text-small">
              <li class="mb-1"><a class="link-secondary text-decoration-none" href="https://ykonishi.tokyo/contact" target="_blank" rel="noopener noreferrer">https://ykonishi.tokyo/contact</a></li>
            </ul>
          </div>
        </div>
      </footer>
    </div>
  </div>
</body>
<html>
続いてコンテンツ部分を作ります。
{% extends "red_list/base.html" %}
{% block content %}
<div class="pricing-header p-3 pb-md-4 mx-auto text-center">
<h1 class="display-4 fw-normal">レッドリスト検索</h1>
<p class="fs-5 text-muted">日本のレッドリストを検索できます</p>
</div>
<main>
<div class="row row-cols-1 row-cols-md-1 mb-3 text-center">
<div class="col">
<form class="d-flex" action="" method="get">
<input class="form-control me-2" type="text" aria-label="検索" name="query" value="{{ request.GET.query }}">
<button class="btn btn-lg btn-outline-success" type="submit">Search</button>
</form>
</div>
</div>
<div class="table-responsive mb-1">
<table class="table">
<thead>
<tr>
<th style="width: 25%;">和名</th>
<th style="width: 40%;">学名</th>
<th style="width: 25%;">カテゴリー</th>
<th style="width: 10%;">分類</th>
</tr>
</thead>
<tbody>
{% for animal in object_list %}
<tr>
<th scope="row" class="text-start">{{ animal.japanese_name }}</th>
<td>{{ animal.scientific_name}}</td>
<td>{{ animal.category}}</td>
<td>{{ animal.classification}}</td>
</tr>
{% endfor %}
</tbody>
</table>
</div>
<nav aria-label="Page navigation example">
<ul class="pagination justify-content-center g-mt-28 g-mb-28">
<!-- 前へ の部分 -->
{% if page_obj.has_previous %}
<li class="page-item">
<a class="page-link" href="?page={{ page_obj.previous_page_number }}&query={{ request.GET.query }}">
<span aria-hidden="true">«</span>
</a>
</li>
{% endif %}
<!-- 数字の部分 -->
{% for num in page_obj.paginator.page_range %}
{% if num <= page_obj.number|add:2 and num >= page_obj.number|add:-2 %}
{% if page_obj.number == num %}
<li class="page-item active"><a class="page-link" href="#">{{ num }}</a></li>
{% else %}
<li class="page-item"><a class="page-link" href="?page={{ num }}&query={{ request.GET.query }}">{{ num }}</a></li>
{% endif %}
{% endif %}
{% endfor %}
<!-- 次へ の部分 -->
{% if page_obj.has_next %}
<li class="page-item">
<a class="page-link" href="?page={{ page_obj.next_page_number }}&query={{ request.GET.query }}">
<span aria-hidden="true">»</span>
</a>
</li>
{% endif %}
</ul>
</nav>
</main>
{% endblock %}
検索ボックスのタグにname=queryを入れることでquery変数に入力値を入れてViewに渡すことができます。
Djangoのレベルアップを目指したい方へ
Djangoの実務レベルのサーバー構築を知りたい方はこちらをご参照ください!
UbuntuでDjangoの環境を立ち上げてセキュリティからドメイン設定、SSL化まで最低限のセットアップをする
大量のデータをCSVなどでインポートしたいときは、こちらのチュートリアルでも紹介しています!
Django初心者でも取り組める内容となっています!
Djangoでデータベースシステムを作るチュートリアル
