はじめに
Microsoft Graph APIを使って、iOSアプリからOutlookの予定表を取得する方法を紹介します。
「Microsoft Graph API」とは?
Microsoft 365のデータにアクセスするためのAPIです。
詳細は公式ドキュメントをご参照ください。
https://docs.microsoft.com/ja-jp/graph/overview
前提条件
- Microsoftアカウントを取得している
- アプリ登録の権限を持つAzure AD(Active Directory)が存在する
Azure ADの追加方法は以下の通り
https://blogs.technet.microsoft.com/jpazureid/2018/01/16/azuread-operation/
手順
公式ドキュメントに沿って実装します。
https://docs.microsoft.com/ja-jp/azure/active-directory/develop/quickstart-v2-ios#option-2-register-and-manually-configure-your-application-and-code-sample
選択肢1(自動)はやり方がわからなかったので、今回は選択肢2(手動)で行います。
アプリケーションの登録
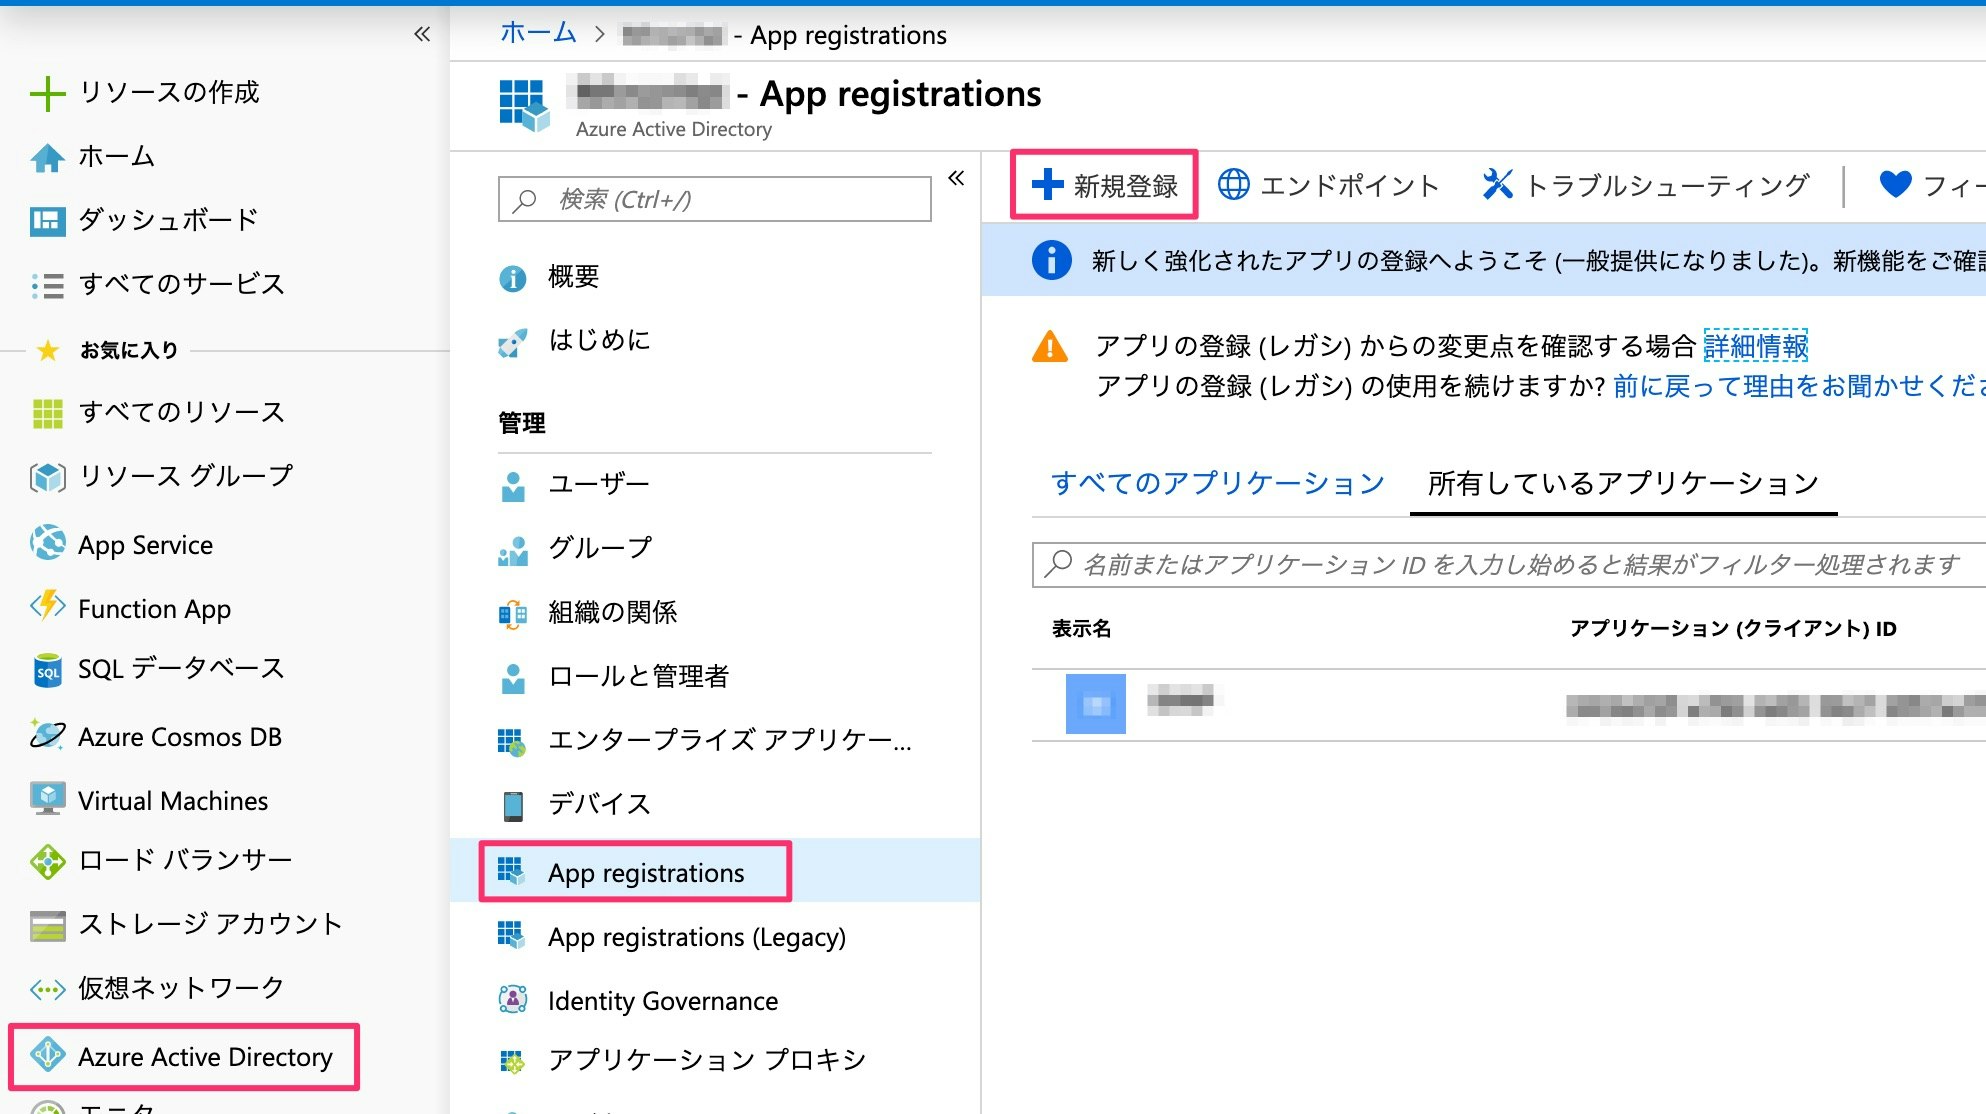
まず、Azureにアプリを登録します。
以下のページにアクセスし、[+新規登録]をクリックします。
https://aka.ms/MobileAppReg
名前を入力し、[登録]をクリックします。
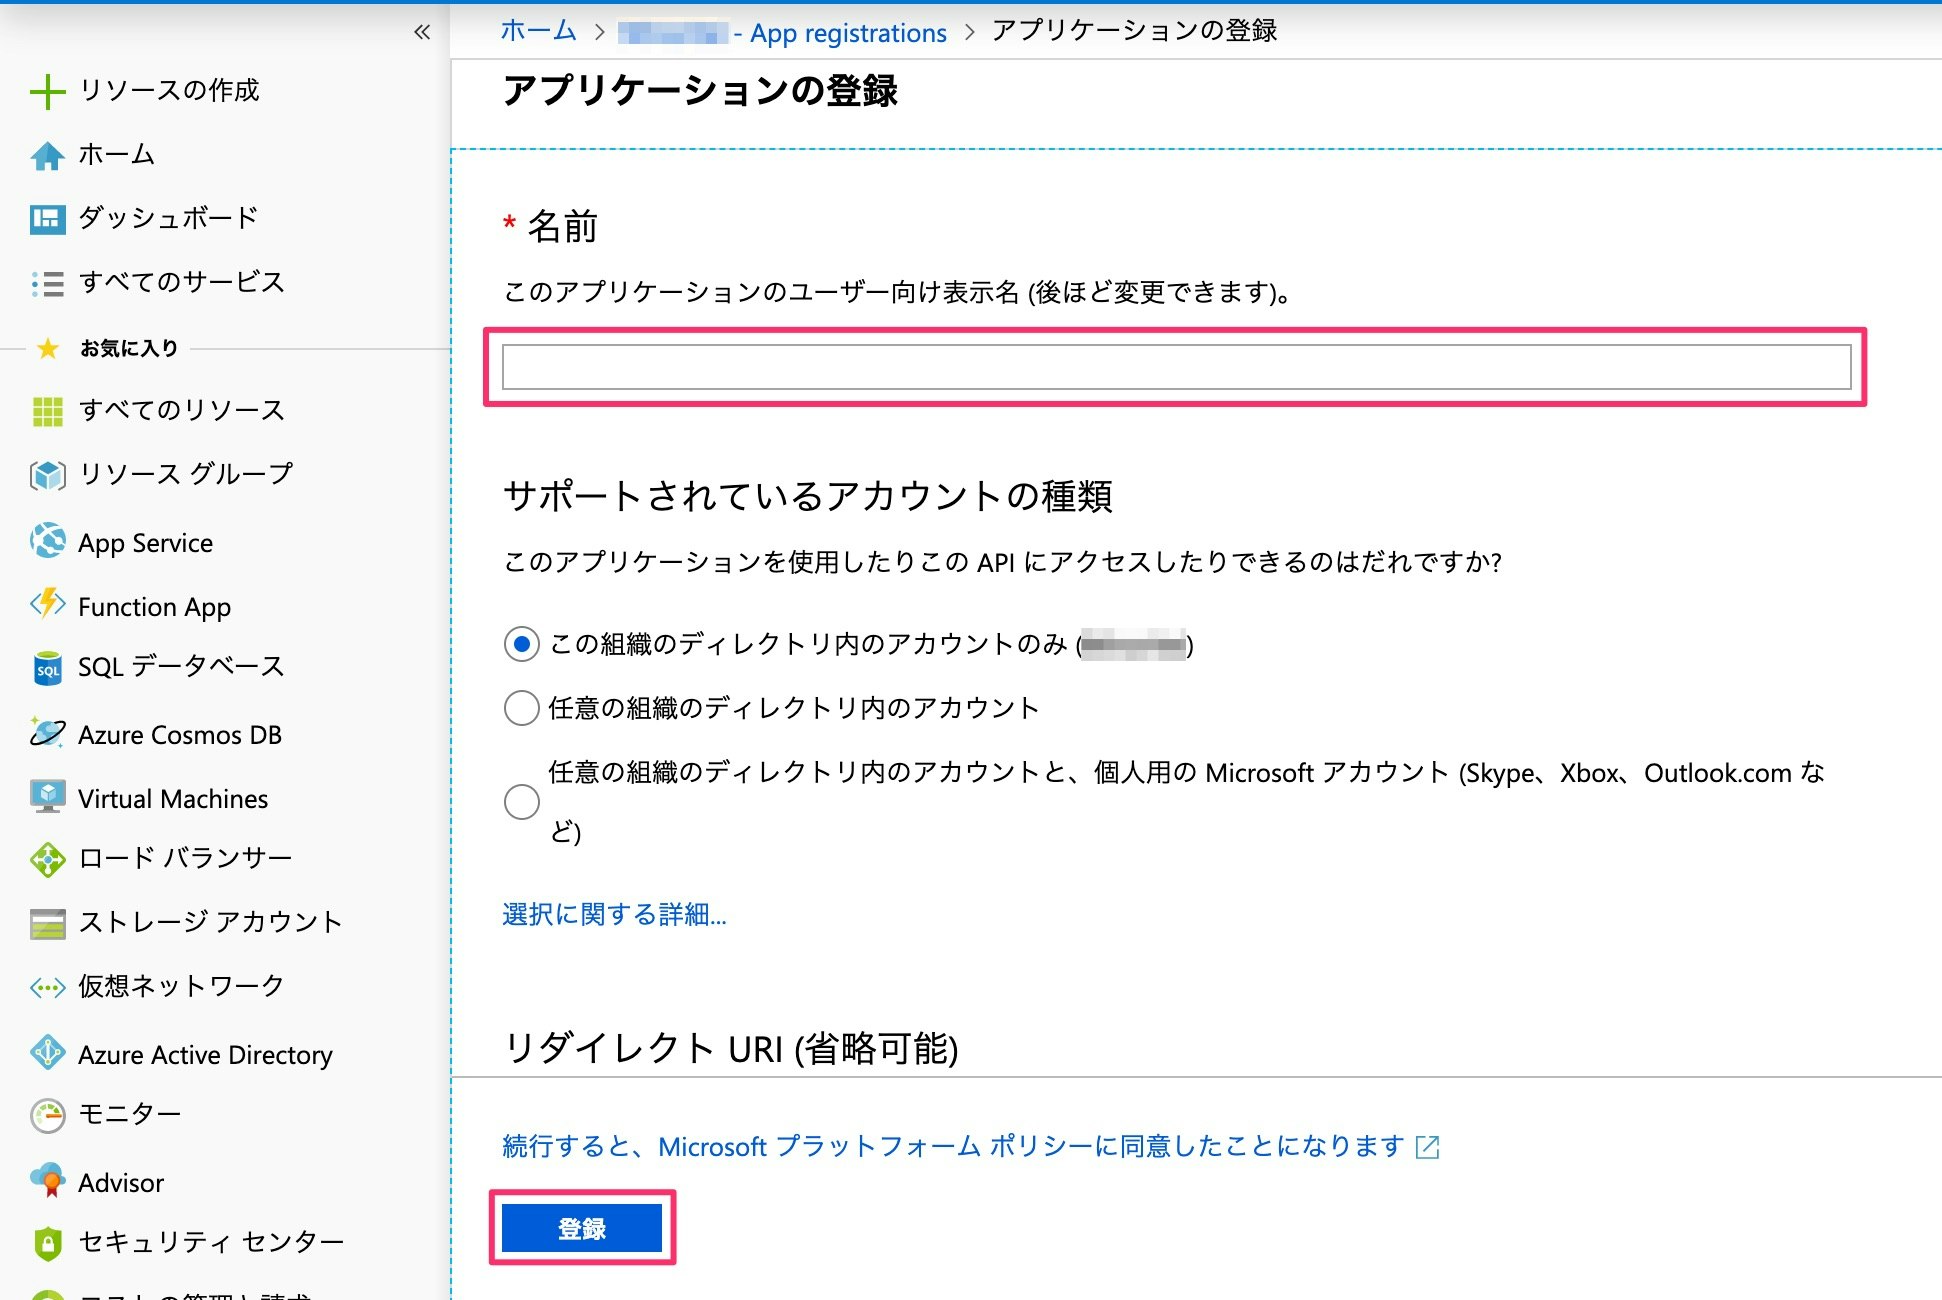
[サポートされているアカウントの種類]では、「この組織のディレクトリ内のアカウントのみ」を選択するとシングルテナントアプリ、他の2つを選択するとマルチテナントアプリとなります。
これでアプリの登録は完了です。
Bundle IDの更新
次に、登録したアプリにBundle IDを追加します。
※公式ドキュメントの手順がわからなかったので、異なる方法で行っています。
[クイック スタート] > [iOS]をクリックします。
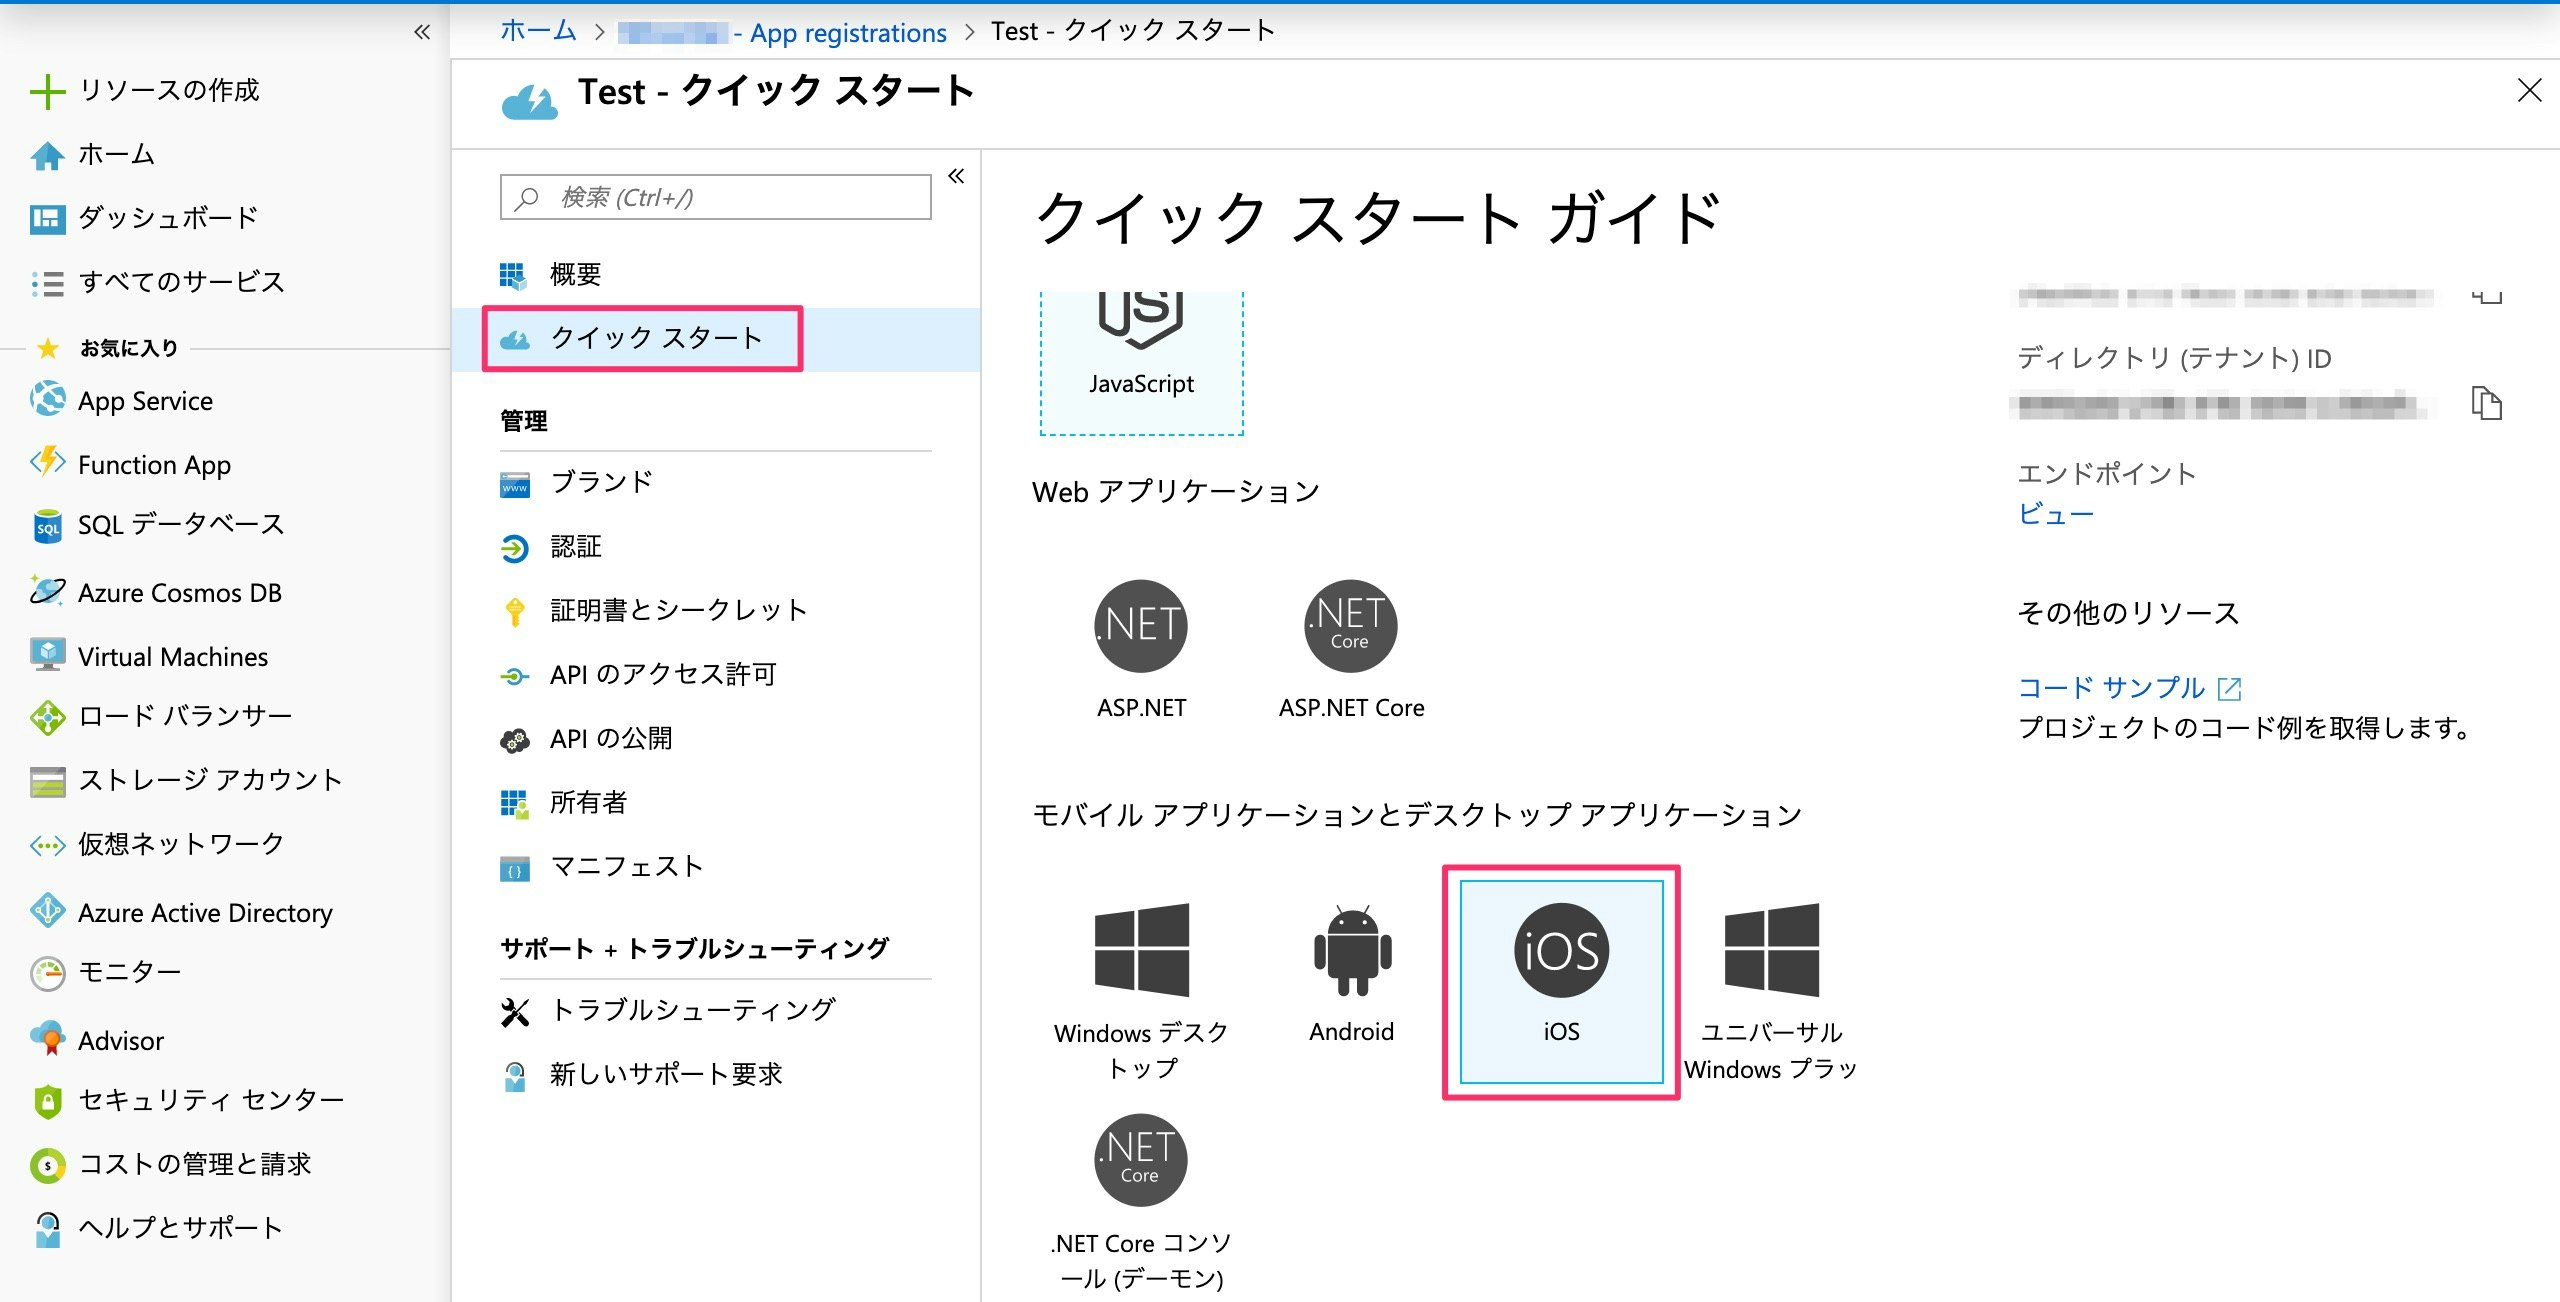
[Step 1: Configure your application]にある[Make this change for me]をクリックします。

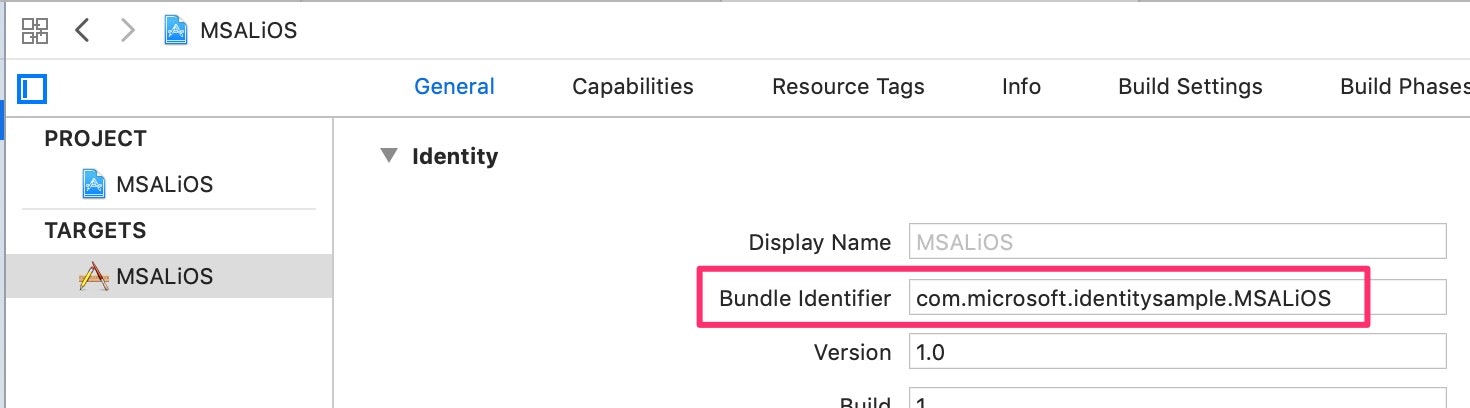
[バンドル ID]にiOSアプリのBundle Identifierを入力し、[更新する]をクリックします。
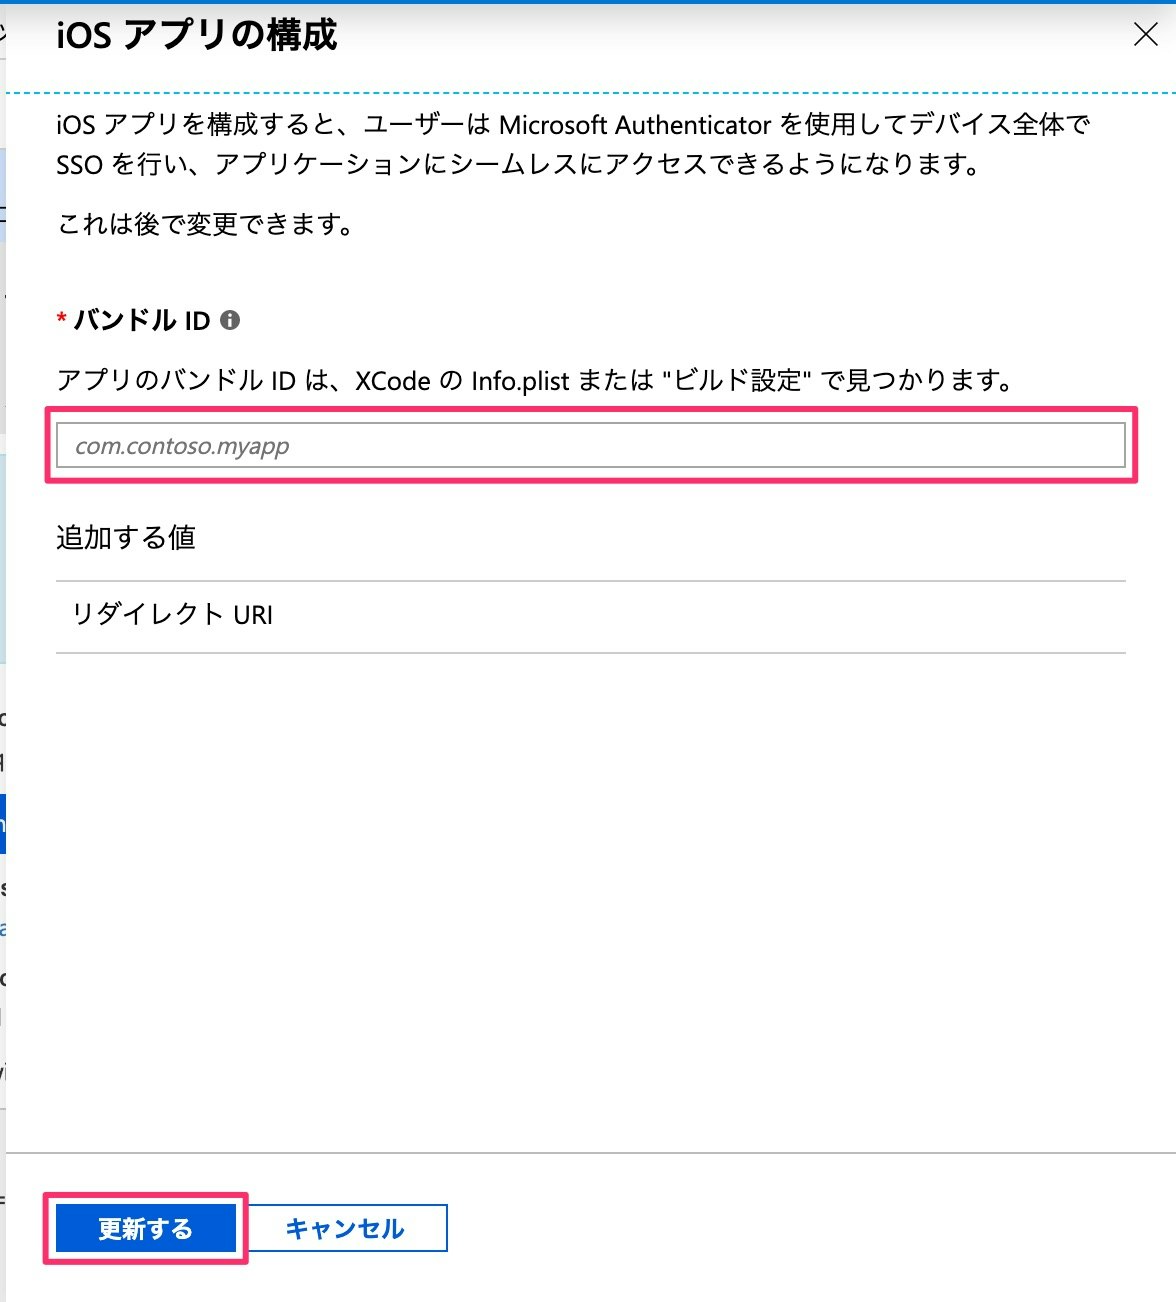
後述するサンプルコードのBundle IDは com.microsoft.identitysample.MSALiOS です。
更新が完了したら緑のチェックが付きます。

※一度Bundle IDを変更すると、[Make this change for me]が非表示になるため、再度Bundle IDを変更できなくなります。
変更する方法を知っている方がいらっしゃったら教えてください![]()
こちらのページの kClientID と kAuthority は後で使うので、ページは開いたままにしてください。
実装
サンプルコードのダウンロード
以下からサンプルコードをダウンロードします。
https://github.com/Azure-Samples/active-directory-ios-swift-native-v2/archive/master.zip
クライアントIDと認証URLの更新
MSALiOS.xcworkspaceをXcodeで開きます。
クライアントIDと認証URLを、先ほど開いたページに記述されている値に変更します。
- let kClientID = "{デフォルトのクライアントID}"
+ let kClientID = "{自アプリのクライアントID}"
…
let kAuthority = "https://login.microsoftonline.com/common" // マルチテナントアプリ
let kAuthority = "https://login.microsoftonline.com/{自アプリのディレクトリ(テナント)ID}" // シングルテナントアプリ
kAuthority はマルチテナントアプリとシングルテナントアプリで指定する値が異なります。
マルチテナントやシングルテナントについては、公式ドキュメントをご参照ください。
https://docs.microsoft.com/ja-jp/azure/active-directory/develop/howto-convert-app-to-be-multi-tenant
権限の追加
必要に応じて権限を追加します。
私は予定表を取得したいので、 Calendars.Read を追加しました。
予定表の取得に必要な権限は、以下に記載されています。
https://docs.microsoft.com/ja-jp/graph/api/user-list-calendarview?view=graph-rest-1.0&tabs=cs
let kScopes: [String] = ["https://graph.microsoft.com/User.Read",
                         "https://graph.microsoft.com/Calendars.Read"]
URLスキームの変更
Info.plistに記述されているURLスキームを以下のように書き換えます。
サンプルアプリだとこのままでも動作しますが、書き換えておくのがいいです。
<array>
    <dict>
        <key>CFBundleURLSchemes</key>
        <array>
-           <string>msauth.com.microsoft.identitysample.MSALiOS</string>
+           <string>msauth.$(PRODUCT_BUNDLE_IDENTIFIER)</string>
        </array>
    </dict>
</array>
デバッグ
ここまでできたらデバッグして動作確認します。
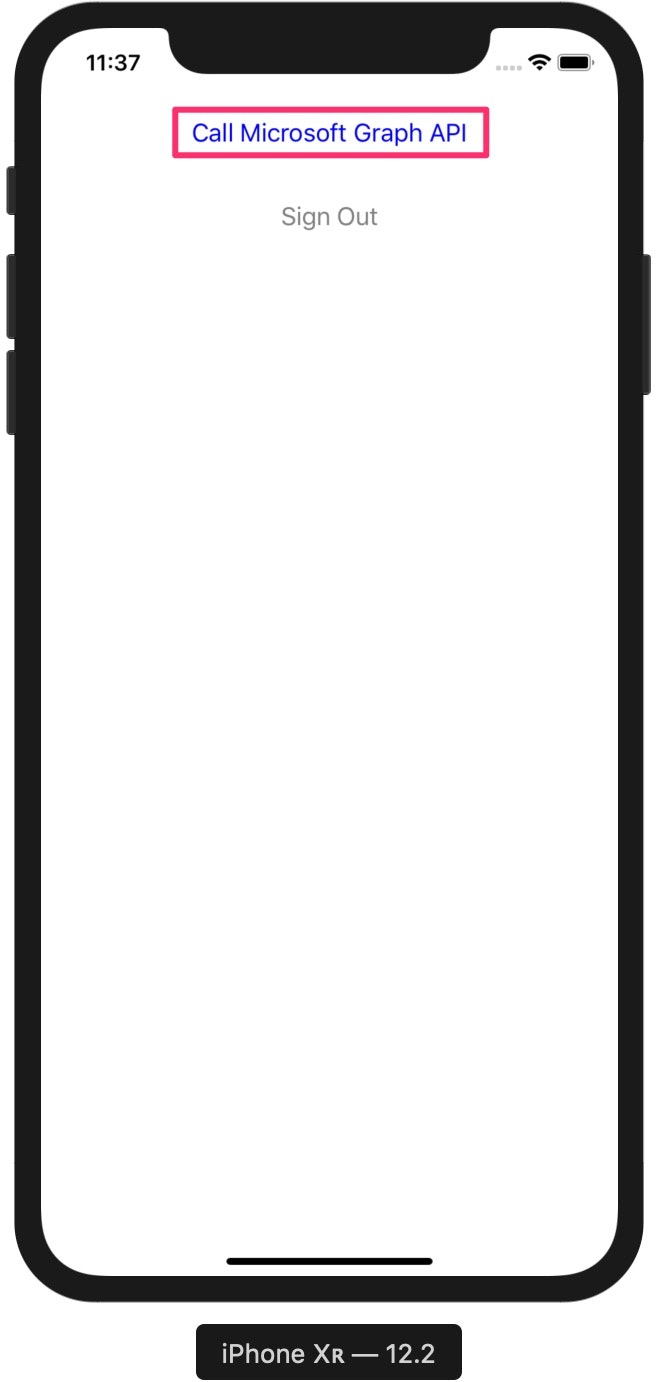
[Call Microsoft Graph API]をタップします。
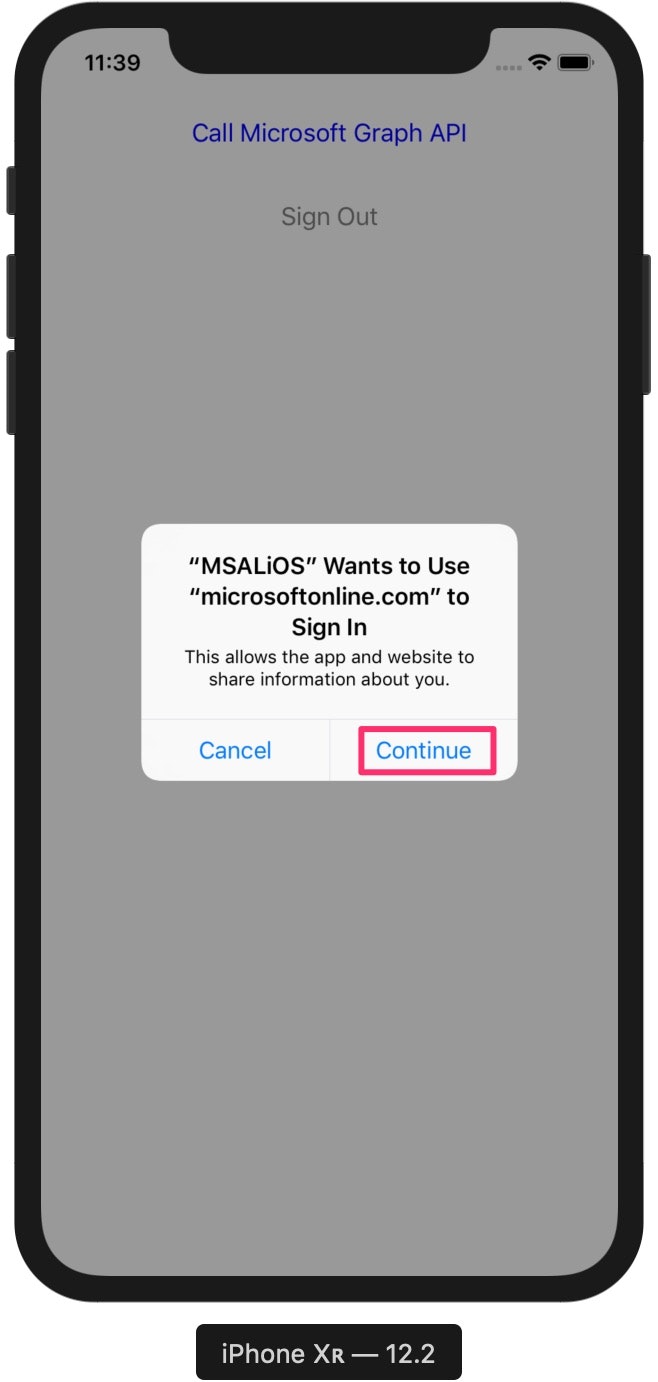
[Continue]をタップします。
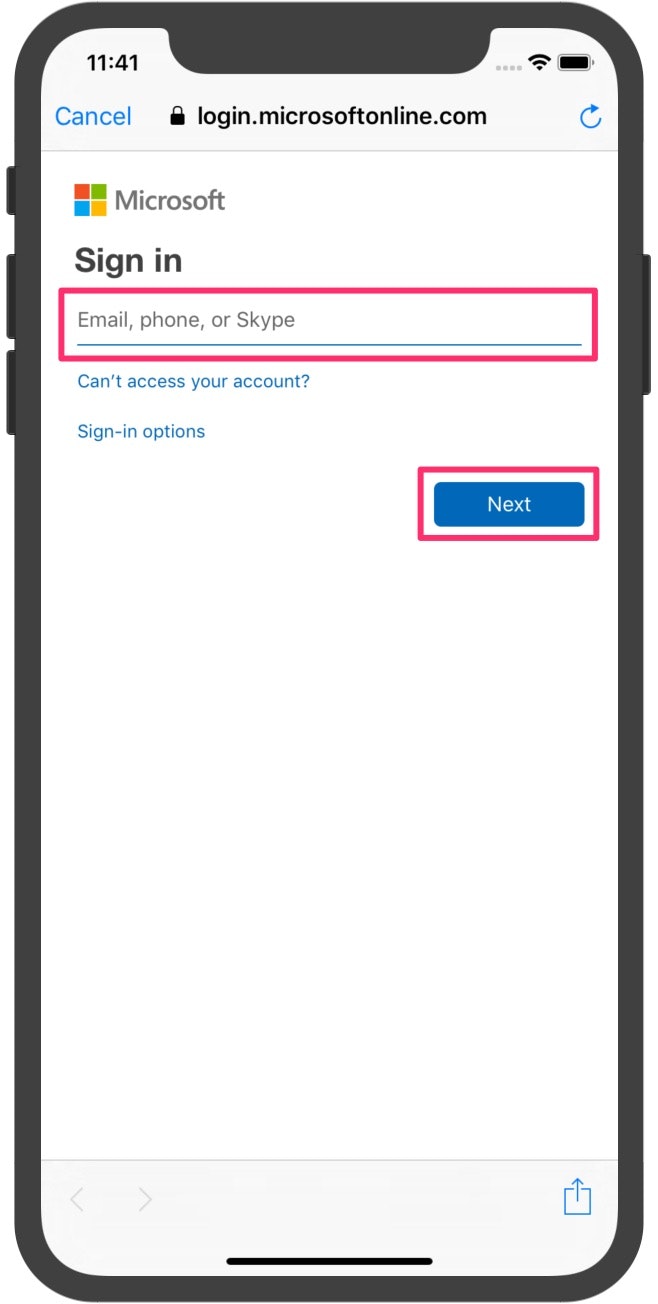
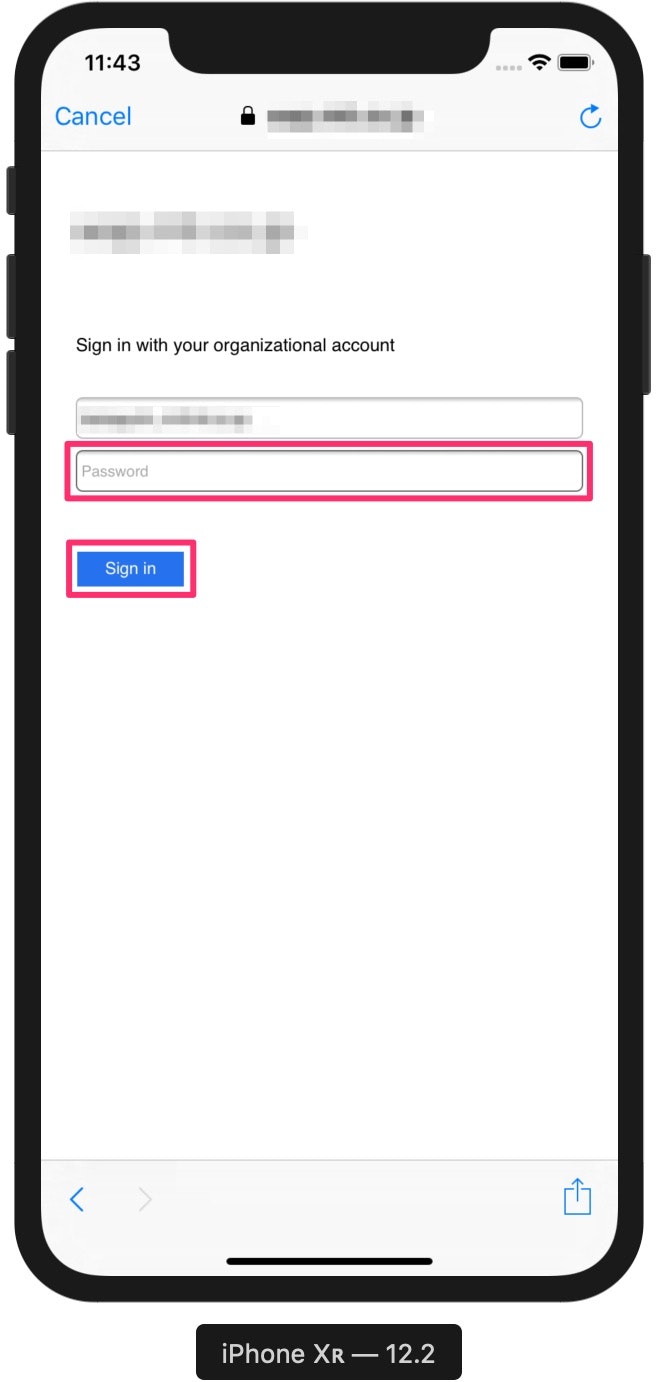
Microsoftアカウントを入力し、[Next]をタップします。
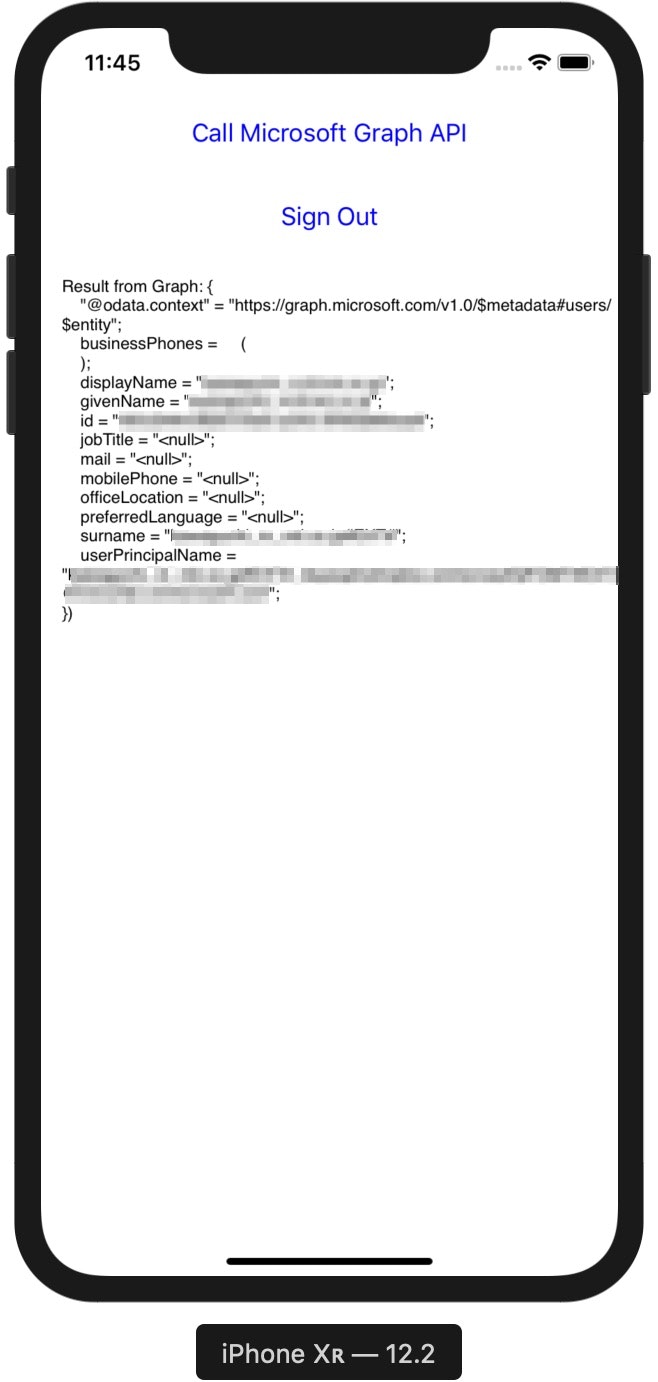
パスワードを入力し、[Sign in]をタップします。
[Result from Graph:]にJSONデータが表示されたらログイン成功です!
予定表の取得
自分の1週間の予定表を取得する処理を実装します。
GraphエクスプローラーにサインインしてAPIを試し、クエリやレスポンスボディを把握すると実装しやすいです。
https://developer.microsoft.com/ja-jp/graph/graph-explorer
サンプルコードの getContentWithToken() メソッドをコピぺし、メソッド名とURLのみ変更すればOKです。
    private func getCalendarWithToken() {
        let formatter = DateFormatter.fullISO8601
        let startDateTime = formatter.string(from: Date())
        let endDateTime = formatter.string(from: Date(timeIntervalSinceNow: 60*60*24*7))

        let urlString = kGraphURI + "calendarview?startdatetime=" + startDateTime + "&enddatetime=" + endDateTime

        // Specify the Graph API endpoint
        let url = URL(string: urlString)
        var request = URLRequest(url: url!)

        // Set the Authorization header for the request. We use Bearer tokens, so we specify Bearer + the token we got from the result
        request.setValue("Bearer \(self.accessToken)", forHTTPHeaderField: "Authorization")

        URLSession.shared.dataTask(with: request) { data, response, error in
            if let error = error {
                self.updateLogging(text: "Couldn't get graph result: \(error)")
                return
            }

            guard let result = try? JSONSerialization.jsonObject(with: data!, options: []) else {
                self.updateLogging(text: "Couldn't deserialize result JSON")
                return
            }

            self.updateLogging(text: "Result from Graph: \(result))")
            }.resume()
    }

}
import Foundation

extension DateFormatter {
    static let fullISO8601: DateFormatter = {
        let formatter = DateFormatter()
        formatter.dateFormat = "yyyy-MM-dd'T'HH:mm:ss.SSSZZZZZ"
        formatter.calendar = Calendar(identifier: .iso8601)
        formatter.timeZone = TimeZone(secondsFromGMT: 0)
        formatter.locale = Locale(identifier: "en_US_POSIX")
        return formatter
    }()
}
getContentWithToken() メソッドを差し替え、デバッグします。(2箇所)
- self.getContentWithToken()
+ self.getCalendarWithToken()
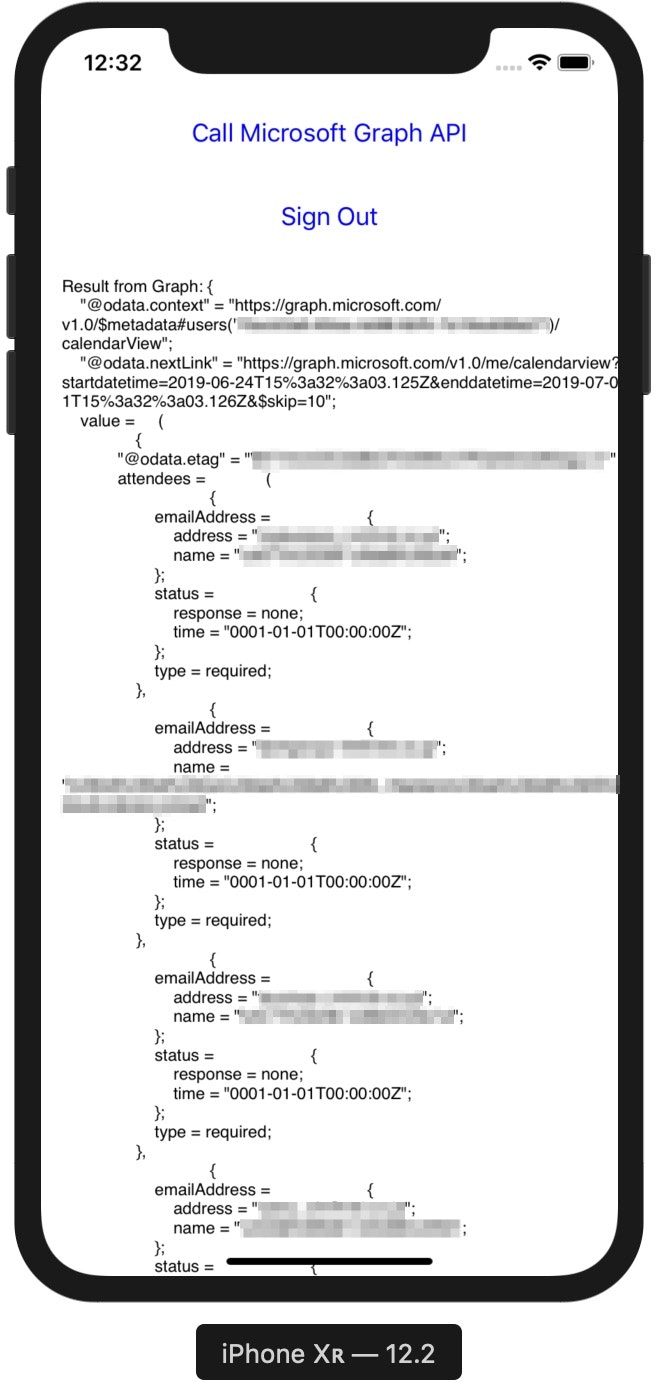
予定表のデータがJSON形式で表示されたら成功です!
おわりに
あとはこれらのコードを参考に製品アプリを実装すればOKです。
iOSアプリからMicrosoftのデータを取得するのはなかなか大変でした![]()
参考リンク
-
【Swift】型を使うという意味を考える (Codable再入門) - Qiita
ISO 8601フォーマットの日付を文字列に変換する方法を参考にさせていただきました。