Verilatorについてはこちら
https://www.veripool.org/projects/verilator/wiki/Intro
WSLのインストール
Microsoft storeからイントール。Ubuntuを選んでみる
VScodeから使えるように設定する
- vscodeでCntl+Shift+X
- Remote - WSLを検索してIntallボタンをクリック
- vscodeを再起動
- Remote Explorer(左の赤ライン)にすでにUbuntuが登録させているので、接続する(右の赤ライン)

4.接続できていると左下にWSL:Ubuntuと表示される

Verilatorのインストール
WSLのターミナルを開く
vscodeのメニューバー→Terminal→New Terminalとしてターミナルを開く
Verilatorのサイトの通りに実行
インストールの手順はこちら
https://www.veripool.org/projects/verilator/wiki/Installing
$ sudo apt-get install git make autoconf g++ flex bison libfl2 libfl-dev
$ git clone https://git.veripool.org/git/verilator
$ cd verilator
$ autoconf
$ ./configure
$ make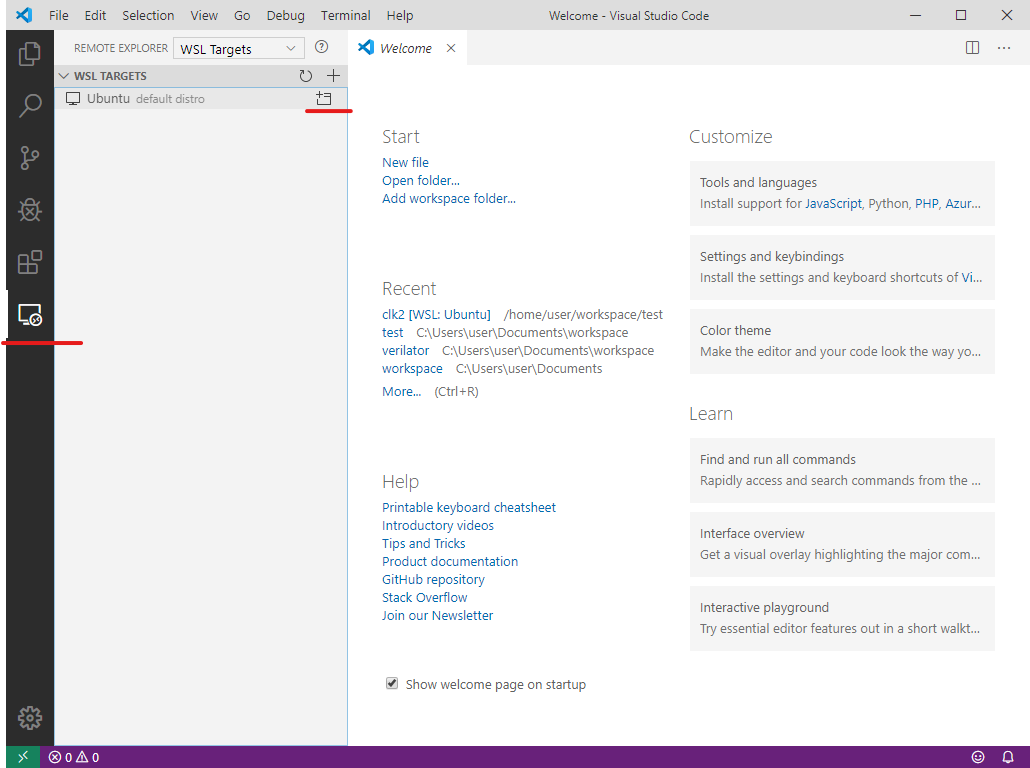
$ sudo make install