Install Raspberry Pi OS
RaspberryPi.comにアクセスします。次に、Softwareのページにアクセスします。

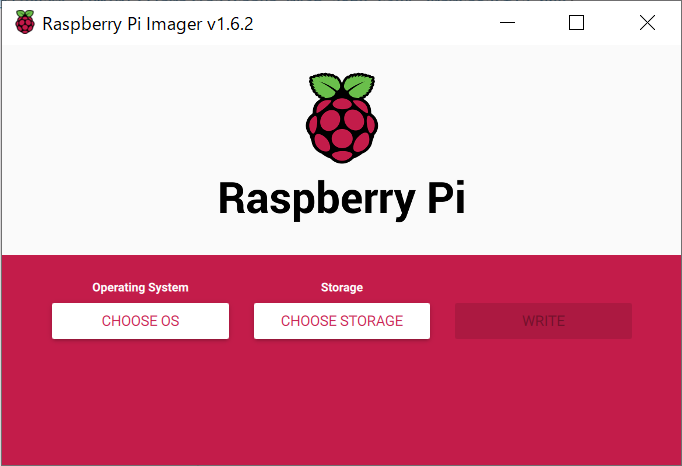
そして、Raspberry Pi Imagerをインストールします。
Raspberry Piで利用するメディア(SDカード等)以外のメディアに該当OSをインストールします。今回は***Raspberry Pi OS (Legacy)***をインストールしました。
A stable legacy version of Raspberry Pi OS Buster for people who need the Raspicam apps, the Picamera Python library, or OMXPlayer.
 ## GUI operations with `gedit` and `nautilus`
#### Install `gedit`
```shell
sudo apt update -y &&
sudo apt autoremove -y &&
sudo apt full-upgrade -y &&
sudo apt clean -y &&
sudo apt install -y gedit &&
sudo apt install -y nautilus
```
#### Setting up VcXsrv
1. クライアントPCに[VcXsrv Windows X Server](https://sourceforge.net/projects/vcxsrv/)をインストールします。
1. インストールをデフォルトのままポチポチ進んでいってください。起動すると以下のような画面が出てきます。`Multiple Windows`を選択してください。
## GUI operations with `gedit` and `nautilus`
#### Install `gedit`
```shell
sudo apt update -y &&
sudo apt autoremove -y &&
sudo apt full-upgrade -y &&
sudo apt clean -y &&
sudo apt install -y gedit &&
sudo apt install -y nautilus
```
#### Setting up VcXsrv
1. クライアントPCに[VcXsrv Windows X Server](https://sourceforge.net/projects/vcxsrv/)をインストールします。
1. インストールをデフォルトのままポチポチ進んでいってください。起動すると以下のような画面が出てきます。`Multiple Windows`を選択してください。
 1. 次へを押すと以下のような画面が出てきます。`Start no client`を選択してください。
 1. 次へを押すと以下のような画面が出てきます。全部選択して、`Additional prame ters for VcXsrv`に`-ac`と入力します。ちなみに`-ac`は***disable access control restrictions***という意味らしいです。
 1. ここで設定は終わりなので、完了を押します。
1. クライアントPCのIPアドレスを確認して、Raspberry Piで`export (クライアントPCのIPアドレス):0.0`を実行します。
1. Raspberry Piで`gedit`と`nautilus`を実行して、正しく実行されるか確認してください。
1. ここで設定は終わりなので、完了を押します。
1. クライアントPCのIPアドレスを確認して、Raspberry Piで`export (クライアントPCのIPアドレス):0.0`を実行します。
1. Raspberry Piで`gedit`と`nautilus`を実行して、正しく実行されるか確認してください。
Setting static IP address
1. sudo gedit /etc/dhcpcd.confでIPアドレスの設定ファイルを開きます。デフォルトのファイルの内容は以下の通りです。
# A sample configuration for dhcpcd.
# See dhcpcd.conf(5) for details.

# Allow users of this group to interact with dhcpcd via the control socket.
# controlgroup wheel

# Inform the DHCP server of our hostname for DDNS.
hostname

# Use the hardware address of the interface for the Client ID.
clientid
# or
# Use the same DUID + IAID as set in DHCPv6 for DHCPv4 ClientID as per RFC4361.
# Some non-RFC compliant DHCP servers do not reply with this set.
# In this case, comment out duid and enable clientid above.
# duid

# Persist interface configuration when dhcpcd exits.
persistent

# Rapid commit support.
# Safe to enable by default because it requires the equivalent option set
# on the server to actually work.
option rapid_commit

# A list of options to request from the DHCP server.
option domain_name_servers, domain_name, domain_search, host_name
option classless_static_routes
# Respect the network MTU. This is applied to DHCP routes.
option interface_mtu

# Most distributions have NTP support.
# option ntp_servers

# A ServerID is required by RFC2131.
require dhcp_server_identifier

# Generate SLAAC address using the Hardware Address of the interface
# slaac hwaddr
# OR generate Stable Private IPv6 Addresses based from the DUID
slaac private

# Example static IP configuration:
# interface eth0
# static ip_address=192.168.0.10/24
# static ip6_address=fd51:42f8:caae:d92e::ff/64
# static routers=192.168.0.1
# static domain_name_servers=192.168.0.1 8.8.8.8 fd51:42f8:caae:d92e::1

# It is possible to fall back to a static IP if DHCP fails:
# define static profile
# profile static_eth0
# static ip_address=192.168.1.23/24
# static routers=192.168.1.1
# static domain_name_servers=192.168.1.1

# fallback to static profile on eth0
# interface eth0
# fallback static_eth0
2. このファイルの下に設定を追加します。
# Example static IP configuration:
interface eth0
static ip_address=192.168.0.10/24
static routers=192.168.0.1
static domain_name_servers=192.168.0.1 8.8.8.8 fd51:42f8:caae:d92e::1
| コマンド | 内容 |
|---|---|
static ip_address |
設定したい固定IPとサブネットマスクの設定をします。 |
static routers |
ゲートウェイのIPアドレスを設定します。 |
static domain_name_servers |
DNSサーバーのアドレスを設定します。 |
| 3. コントロールパネルを開きます。 | |
 |
|
| 4. ネットワークと共有センターを開きます。 | |
 |
|
5. アクティブなネットワークの表示の部分接続:をクリックします。 |
|
 |
|
6. 詳細をクリックしてください。固定IPを設定するために必要な情報が表示されるので、そちらを入力してください。 |
|
 |
|
| 7. 私の場合以下ののよう設定しました。 |
# Setting up a fixed IP address for home wifi
interface wlan0
static ip_address=100.64.1.200/24
static routers=100.64.1.1
static domain_name_servers=8.8.8.8

# Setting up a fixed IP address for home Ethernet
interface eth0
static ip_address=100.64.1.200/24
static routers=100.64.1.1
static domain_name_servers=8.8.8.8
Setting wifi
1. sudo gedit /etc/wpa_supplicant/wpa_supplicant.confでwifiの設定ファイルを開きます。デフォルトのファイルの内容は以下の通りです。
ctrl_interface=DIR=/var/run/wpa_supplicant GROUP=netdev
update_config=1
country=JP
2. wifiの接続をする際は以下を追加します。
network={
        ssid="SSID"
        psk="SSIDのパスワード"
        key_mgmt=WPA-PSK
}
3. 再起動後、正しく設定出来ていると、以下のように固定IPが取得できます。

SSH error
SSH接続を行う際に、以下のようなエラーが発生する場合があります。
@@@@@@@@@@@@@@@@@@@@@@@@@@@@@@@@@@@@@@@@@@@@@@@@@@@@@@@@@@@
@    WARNING: REMOTE HOST IDENTIFICATION HAS CHANGED!     @
@@@@@@@@@@@@@@@@@@@@@@@@@@@@@@@@@@@@@@@@@@@@@@@@@@@@@@@@@@@
IT IS POSSIBLE THAT SOMEONE IS DOING SOMETHING NASTY!
Someone could be eavesdropping on you right now (man-in-the-middle attack)!
It is also possible that a host key has just been changed.
The fingerprint for the ECDSA key sent by the remote host is
SHA256:***************************************************
Please contact your system administrator.
Add correct host key in C:\\Users\\***/.ssh/known_hosts to get rid of this message.
Offending ECDSA key in C:\\Users\\***/.ssh/known_hosts:2
ECDSA host key for ***.***.***.*** has changed and you have requested strict checking.
Host key verification failed.
その場合は、ssh-keygen -R ***.***.***.***によってkeyを再度生成します。
Setting python3
pip、setuptools、wheelを最新の状態にします。 1
python3 -m pip install --upgrade pip setuptools wheel
また、システムソフトウエアを最新のものにします。 上のコマンドは実行しないでください。
sudo apt update -y &&
sudo apt full-upgrade -y &&
sudo apt autoremove -y &&
sudo apt clean -y
仮想環境の名前をpython_venvとして作成します。
cd ~ &&
python3 -m venv python_venv &&
source ~/python_venv/bin/activate
Install numpy
numpyをインストールするためには、libatlas-base-devをインストールするする必要があります。 2
ATLAS is a possible provider of linear algebra.(ATLASは線形代数のプロバイダです。)
sudo apt install libatlas-base-dev -y &&
source ~/python_venv/bin/activate &&
yes | python3 -m pip install numpy &&
deactivate
Install matplotlib、scipy、opencv、PySimpleGUI、SoundFile
source ~/python_venv/bin/activate &&
yes | python3 -m pip install matplotlib &&
yes | python3 -m pip install scipy &&
yes | python3 -m pip install opencv-python &&
yes | python3 -m pip install PySimpleGUI &&
yes | python3 -m pip install SoundFile &&
deactivate
Install PyAudio、sounddevice
portaudio19-devをインストールする必要があります。
sudo apt install portaudio19-dev -y &&
source ~/python_venv/bin/activate &&
yes | python3 -m pip install PyAudio &&
yes | python3 -m pip install sounddevice &&
deactivate