Rustの環境構築のメモです。
普段、VSCodeで開発しているので、VSCodeで開発しやすいように環境構築していきます。
プログラミング言語 Rust, 2nd Editionの1章を使って、サクッとやります。
ゴール
- RustでHello, world!
- VSCodeでのRustの開発環境が整っている
環境
- Mac OS High Sierra 10.13.6
- VSCode Version 1.30.2
Rustのインストール
Rustのバージョンとツールを管理するrustupのインストール
$ curl https://sh.rustup.rs -sSf | sh
.
.
.

1) Proceed with installation (default)
2) Customize installation
3) Cancel installation
>
こんなんが表示されるので1を入力。
1分くらい待つと、
Rust is installed now. Great!
Rustのインストール終了!
パスを通す。
$ source $HOME/.cargo/env
Rustのバージョンを確認する。
$ rustc --version
rustc 1.32.0 (9fda7c223 2019-01-16)
VSCodeの環境構築
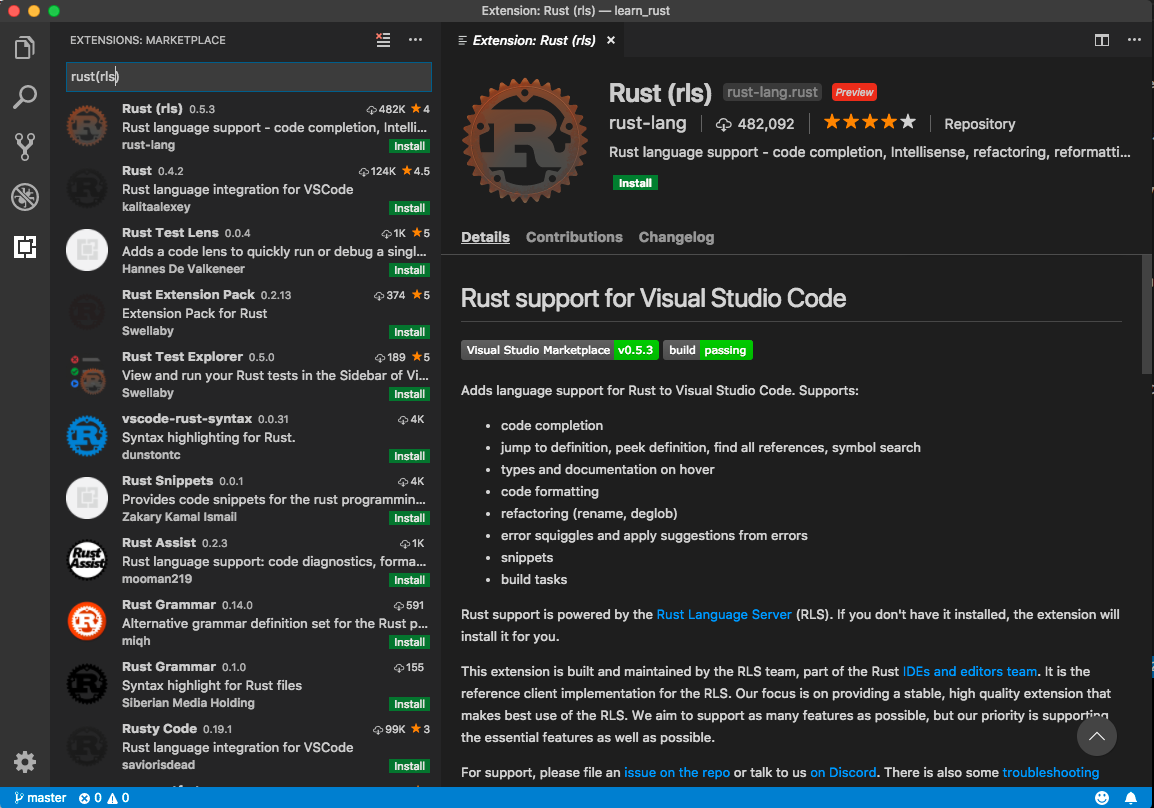
VSCodeの左側一番下の四角アイコン開いて、「Rust(rls)」を検索し、インストール。
これを入れると補完とかが効くようになる。
Hello, World!
とりあえず、ディレクトリの作成
$ mkdir learn_rust
$ cd learn_rust
$ mkdir hello_world
$ cd hello_world
main.rsを作る。
$ touch main.rs
下記コードを入力して、
fn main() {
    // はろーわーるど!
    println!("Hello, world!");
}
ターミナルで
$ rustc main.rs
$ ./main
Hello, world!
やったぜ!
ちょいメモ
- main関数が1番最初に走るコード
- タブではなく、4スペース
- !は関数ではなく、マクロを呼んでいる
Hello, World! with Cargo
終わったと思いきや、もう一度"Hello, World!"
Cargoというビルドシステム兼、パッケージマネージャを使ってもう一度"Hello, World!"します。
Rust開発者の標準ツールらしい。(rustupで勝手に入る)
Cargoのバージョン確認
$ cargo --version
cargo 1.32.0 (8610973aa 2019-01-02)
Cargoでプロジェクトの作成
$ cargo new hello_cargo
$ cd hello_cargo
※ Rust 1.25.0から--binがデフォルトになったので、optionをつける必要はないとのこと
(@scivolaさんご指摘ありがとうございます!)
これだけで、src/main.rsは下記のようになっている。
fn main() {
    println!("Hello, world!");
}
ビルドする。
$ cargo build
   Compiling hello_cargo v0.1.0 (/Users/****/learn_rust/hello_cargo)
    Finished dev [unoptimized + debuginfo] target(s) in 2.03s
さっきと違うのは、実行ファイルがカレントディレクトリではなく、target/debug 下に作成されること。
そのため、実行時は下記のようになる。
$ ./target/debug/hello_cargo
Hello, world!
cargo runを使うと、コードをコンパイルして実行ファイルの実行までの1コマンドで実行できる。
$ cargo run
    Finished dev [unoptimized + debuginfo] target(s) in 0.12s
     Running `target/debug/hello_cargo`
Hello, world!
cargo checkを使うと、コンパイル可能かを確認してくれる。
$ cargo check
    Checking hello_cargo v0.1.0 (/Users/****/learn_rust/hello_cargo)
    Finished dev [unoptimized + debuginfo] target(s) in 0.57s
Rustでの開発ではcargo checkでコンパイル可能かを確かめてから、cargo buildで実行ファイルを生成するというのが基本的な流れらしい。
cargo checkが多用されるので、Rust 1.32.0 からはcargo cで動くとのこと。(@scivolaさんご指摘ありがとうございます!)
リリース時にはcargo build --releaseを使うと最適化してコンパイルしてくれるらしい。便利。
$ cargo build --release
   Compiling hello_cargo v0.1.0 (/Users/takashi.udagawa/learn_rust/hello_cargo)
    Finished release [optimized] target(s) in 1.06s
通常ビルドの際は、target/debug下に実行ファイルができていたが、リリースビルドをするとtarget/release下に実行ファイルが生成される。
まとめ
下記でRustの環境構築は一旦完了!
- rustupのインストール
- VSCodeにrlsをインストール
- cargoの基本コマンドを理解する
- プロジェクト作成 :cargo new プロジェクト名
- ビルド :cargo build
- ビルド&実行 :cargo run
- コンパイルチェック:cargo check(cargo c)
- リリースビルド :cargo build --release
思った以上にサクッといって、特に詰まることもなく良かった!