何としても。
だいたいこんな感じでやっちゃいます
- GRUB に GParted Live HD のメニューエントリーを作る
- GParted Live 環境を起動して、もういらないCentOSのOSパーティションを削除、ディスクの最後未に新たに10GBのパーティションを作り、FAT32にフォーマットする(ここ大事)
- インストールするOSがWindowsなのでext4とかは使用不可、NTFSとかにフォーマットするとWindowsインストーラー起動後なぜかドライバーインストールを要求されすすめない
- ローカルのWindowsからWindows ServerのDVDイメージをDLして、VirtIOドライバーを含むboot.wimを作る
- できればinstall.wim にもVirtIOドライバーを統合する
- install.wimのSystem32\RecoveryのWinRE.wimにも統合してくれるとWindows復元を使うことができる
- インストールが全部終わってからSystem ReservedパーティションのWinRE.wimに作業しても良い
- FAT32には4GB以上のファイルが保存できない為、install.wimを4GB以下に作ってくれる必要がある。
これはDISMの/Export-Imageでほぼ何とかなる。 - 参考:http://www.vwnet.jp/windows/WS12R2/AddDriver/AddDriver2ISO.htm
https://docs.microsoft.com/en-us/windows-hardware/manufacture/desktop/customize-windows-re
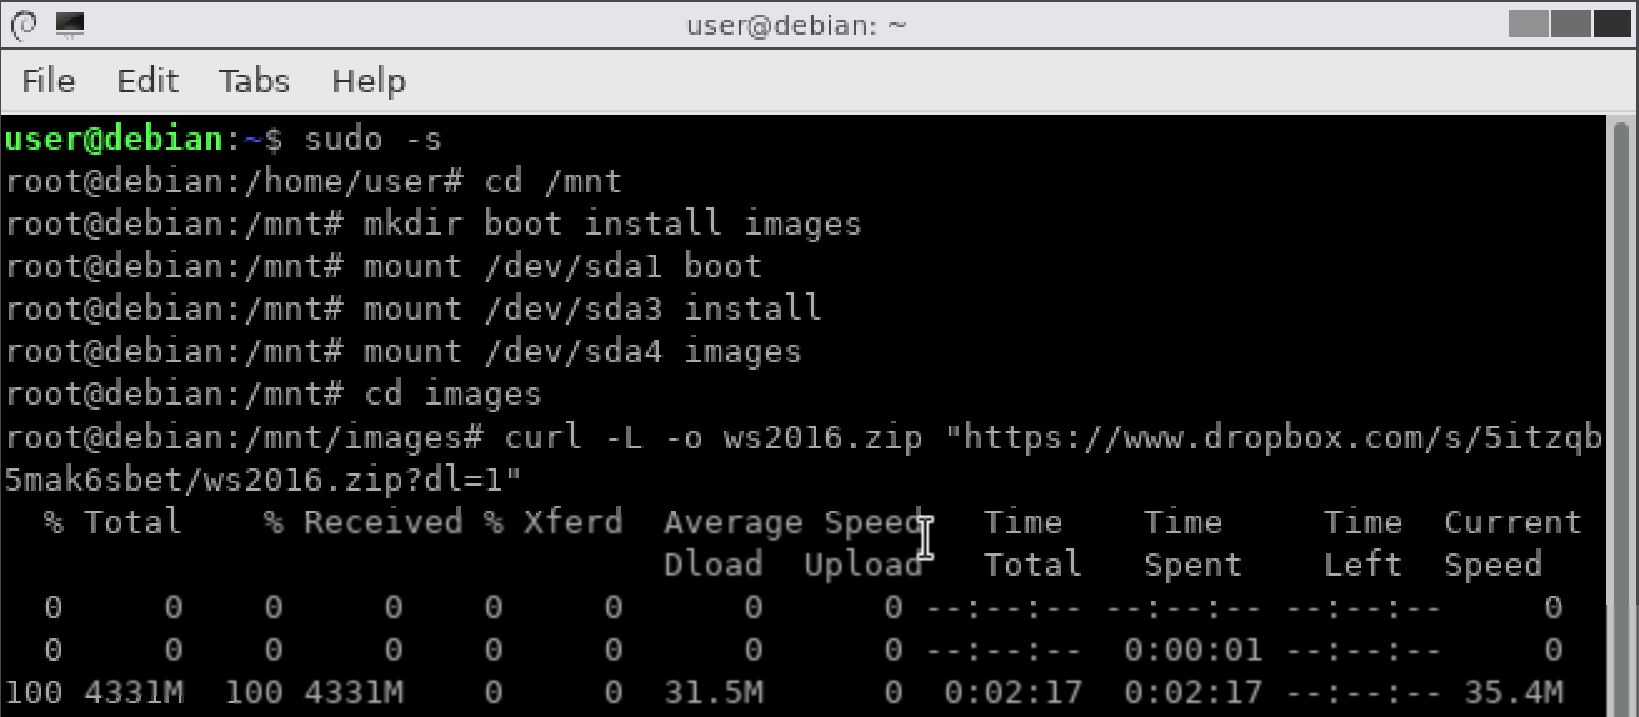
- GParted Live 環境にネットワーク設定を行い、dropboxとかで3で作ったWindows ServerのDVDインストールイメージをVPSに転送
- 2で作ったパーティションにWindows ServerインストールDVDを展開し、編集した物だけ置き換える。念の為にVirtIOのファイルもここに置いておく
- GRUBに5のパーティションをNTLDRでBootするのメニューエントリーを作る
- 普通にWindows Serverをインストールする
- 全て終わったら、ネットワークアダプタのドライバーがインストールされてないので5でコピーしてたファイルを使ってインストールしてもらう
- IPアドレスとかWinRMとかサービスとか設定し終わったら完了
- 新しいWindows Serverを楽しむ

実際やってみた
事前に必要なものはこれだけです
[root@sdurnqde ~]# yum install -y curl vim unzip
とにかくGParted Liveを入手
[root@sdurnqde ~]# cd /boot
[root@sdurnqde boot]# mkdir gparted
[root@sdurnqde boot]# cd gparted
[root@sdurnqde gparted]# curl -L -o gparted.zip "https://jaist.dl.sourceforge.net/project/gparted/gparted-live-stable/0.32.0–1/gparted-live-0.32.0–1-amd64.zip"
 % Total % Received % Xferd Average Speed Time Time Time Current
 Dload Upload Total Spent Left Speed
100 309M 100 309M 0 0 21.1M 0 0:00:14 0:00:14 --: --: --11.1M
[root@sdurnqde gparted]# unzip gparted.zip
マニュアル通り https://gparted.org/livehd.php#live-hd-grub
[root@sdurnqde gparted]# mv live live-hd
[root@sdurnqde gparted]# rm gparted.zip
[root@sdurnqde gparted]# vim /boot/grub2/grub.cfg
もういらないのでCentOSの既存menuentryを全部削除してGParted Liveと今後必要なInstall Windows項目を作りましょう
### BEGIN /etc/grub.d/10_linux ### から
### END /etc/grub.d/10_linux ### までのLineを全部削除して次の通り入力
menuentry "GParted live" {
 set root=(hd0,msdos1)
 linux /gparted/live-hd/vmlinuz boot=live config union=overlay username=user components noswap noeject vga=788 ip=net.ifnames=0 live-media-path=/gparted/live-hd bootfrom=/dev/sda1 toram=filesystem.squashfs
 initrd /gparted/live-hd/initrd.img
}
menuentry "Install Windows" --class windows --class os {
 insmod part_msdos
 insmod ntfs
 insmod fat
 search --no-floppy --set=root --file /bootmgr
 insmod ntldr
 ntldr /bootmgr
}
:wqで保存して問答無用にREBOOT
[root@sdurnqde gparted]# shutdown -r now
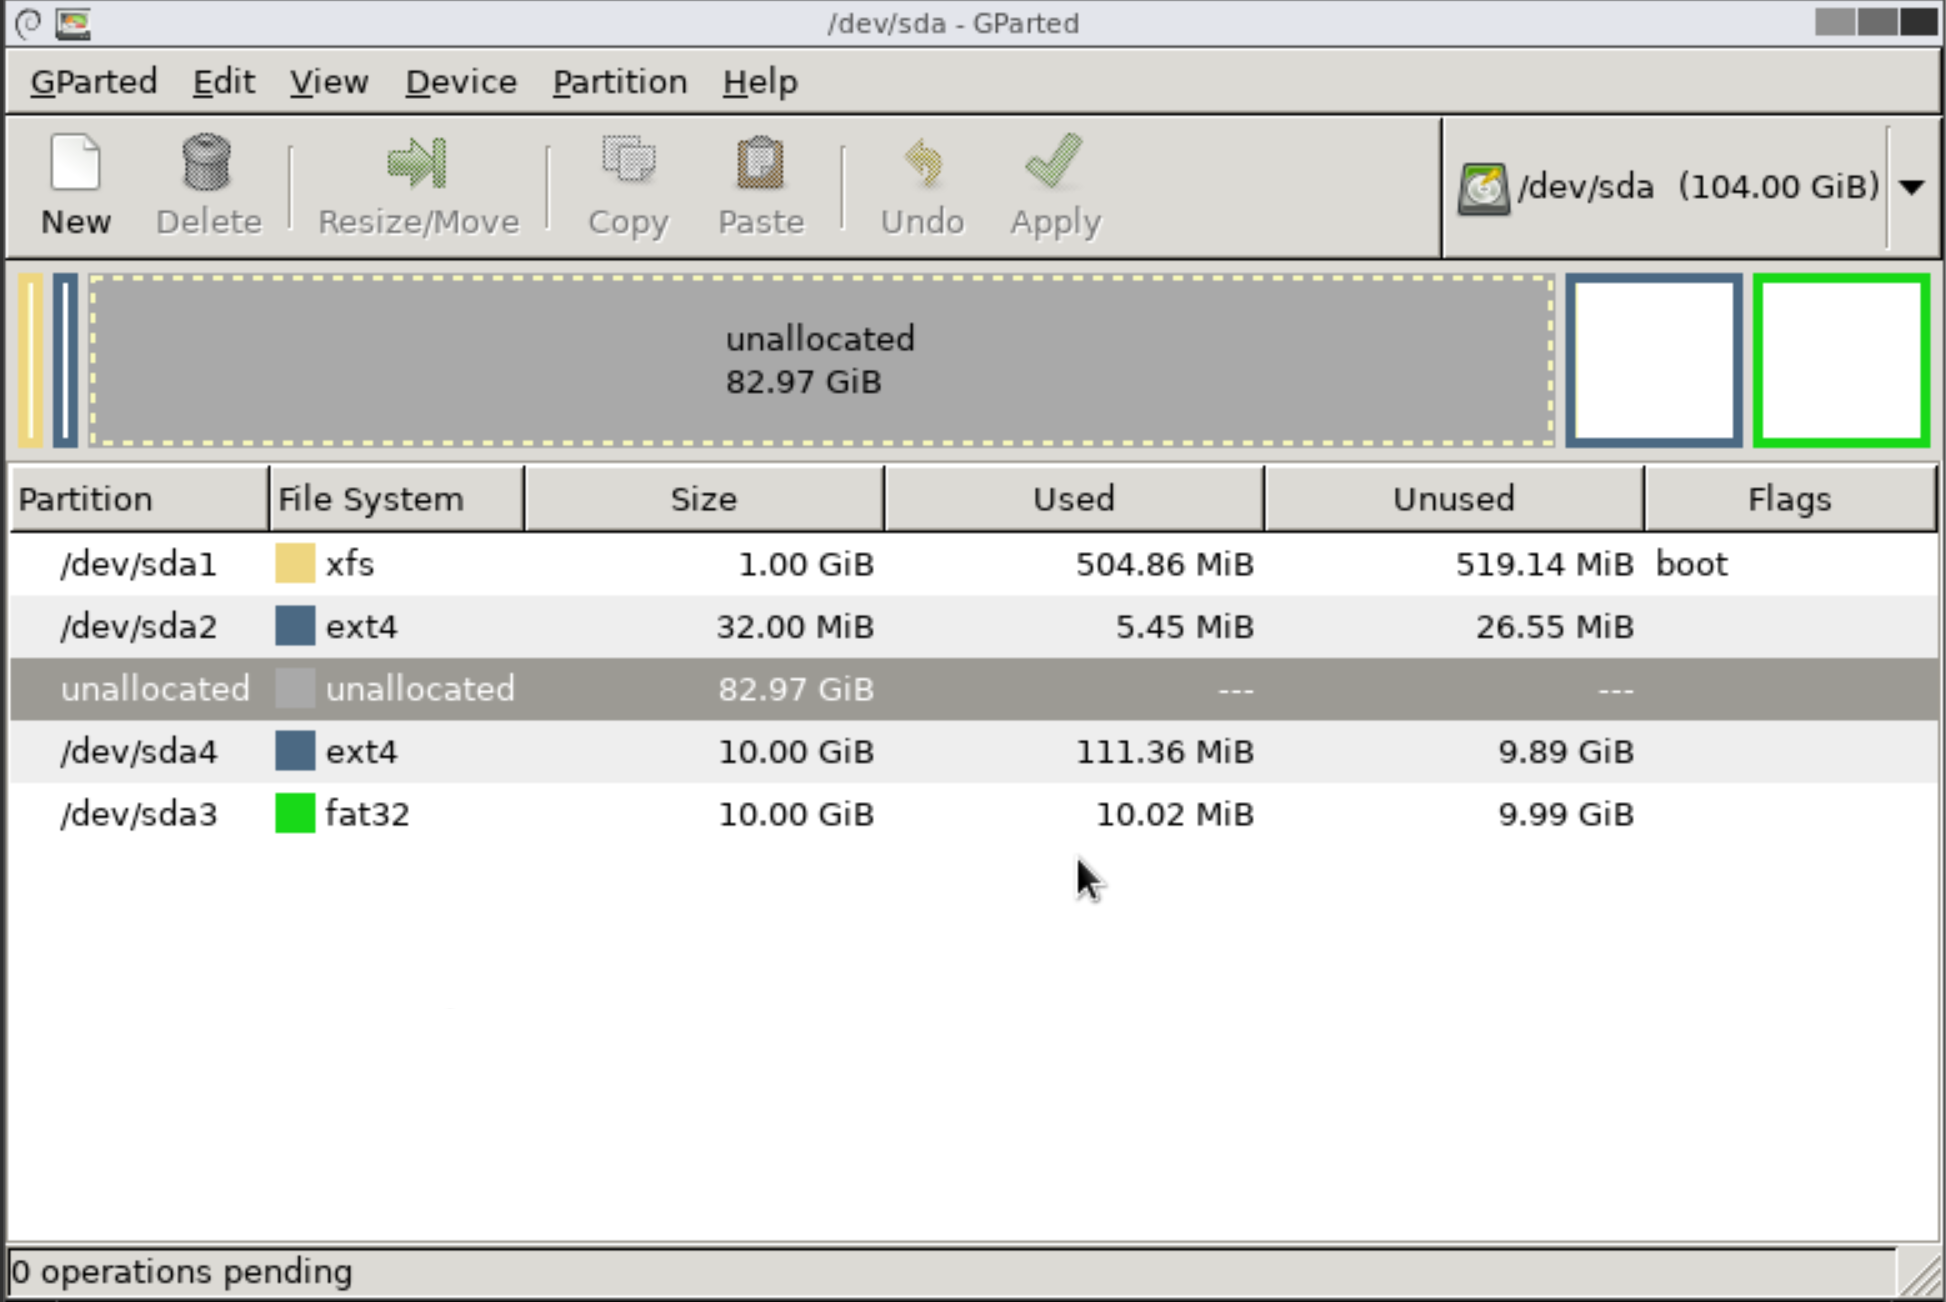
GParted Live環境に進む事ができるので、パーティションテーブルをこのようにしてもらう
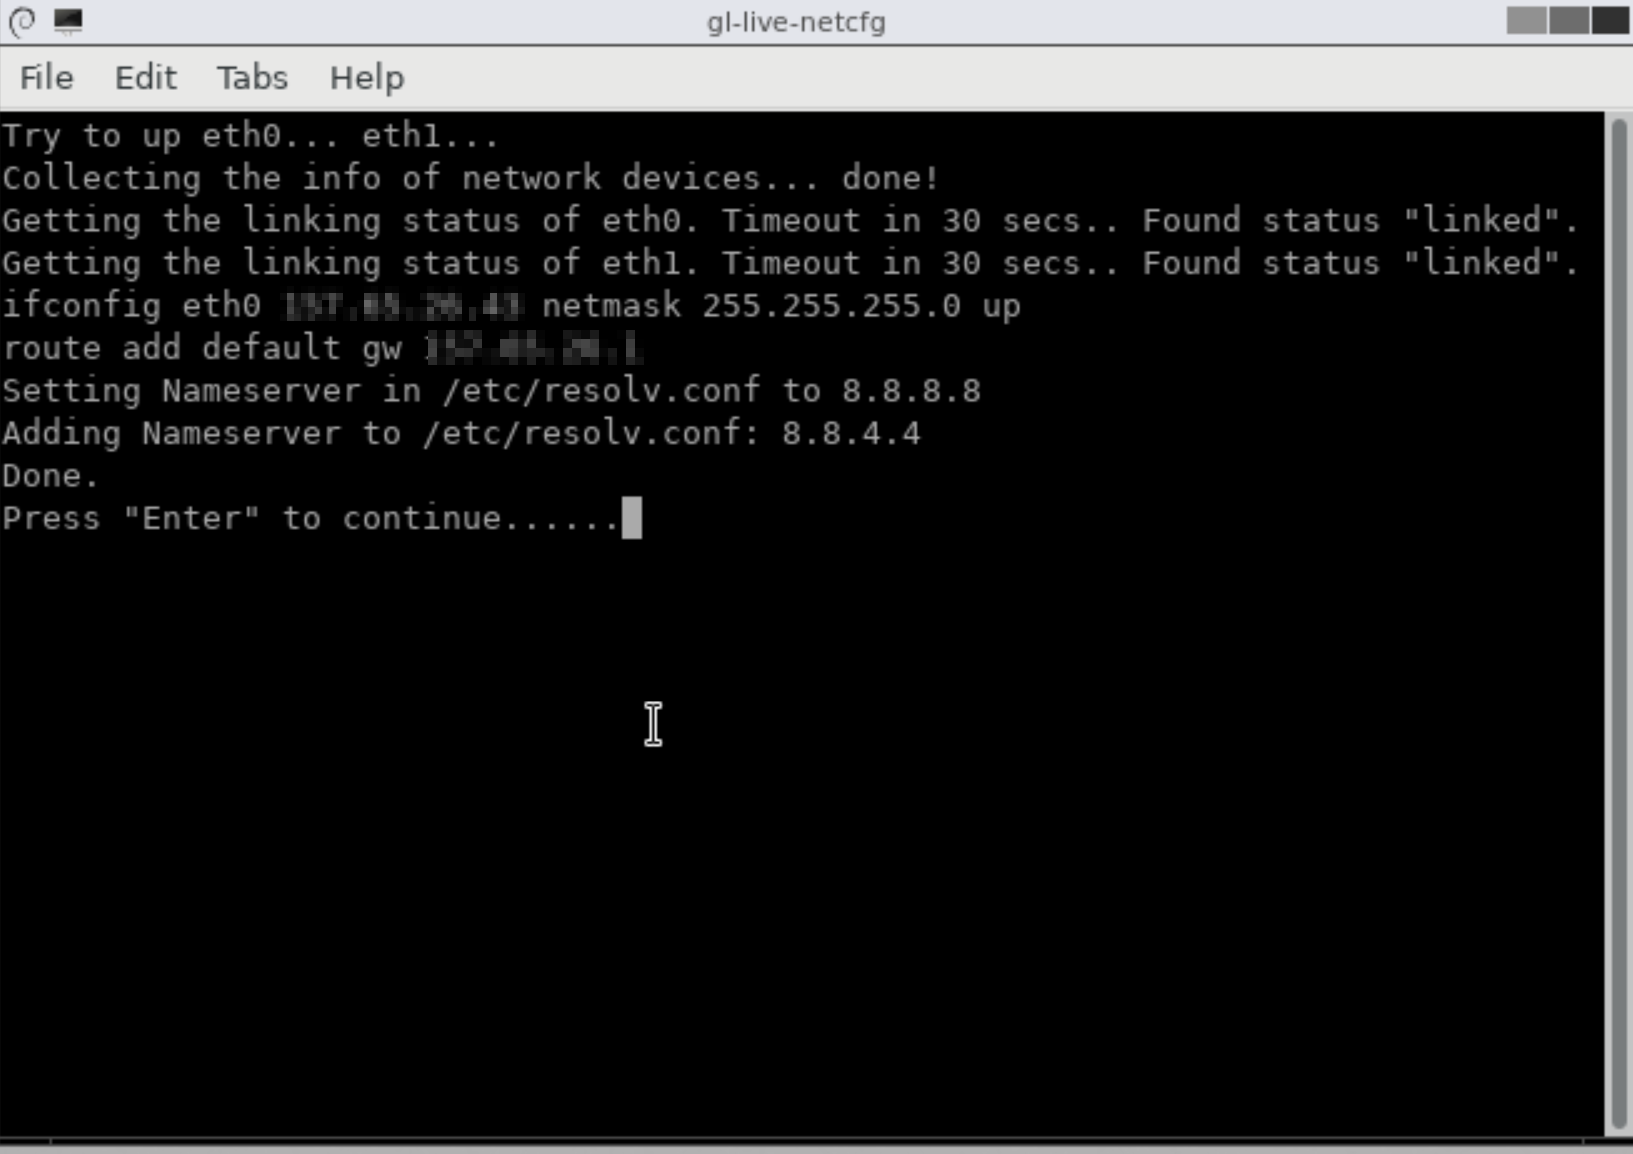
IPを設定
必要なパッケージをインストール
root@debian:/home/user# apt update
root@debian:/home/user# apt install -y curl unzip
- MSDNからWindows Server 1803とWindows Server 2016のインストールDVDを入手する。
- VirtIO-WINのISOイメージも公式サイトから入手して作業用ディレクトリに展開する。
- Windows Server 2016のboot.wimはなぜかBSODで起動不可になっちゃうのでInstallation MediaのベースはWindows Server 1803のものを使う。
- Windows Server 1803のsources\install.wimをインストールしたいWindows Server 2016のものに上書きする。
- WIMイメージをMountさせ、必要なドライバーを注入し、Unmountして、最大圧縮で保存して、作業用ディレクトリにコピー。
こんな感じで。
cd C:\Workspace\
DISM /Export-Image /SourceImageFile:sources\install.wim /SourceIndex:2 /DestinationImageFile:install.wim /Compress:max /CheckIntegrity
mkdir boot install winre
DISM /Mount-Image /ImageFile:boot.wim /Index:1 /MountDir:boot
DISM /Image:boot /Add-Driver /Driver:.\virtio-win-0.1.141\ /Recurse
DISM /Unmount-Image /MountDir:boot /Commit
DISM /Mount-Image /ImageFile:boot.wim /Index:2 /MountDir:boot
DISM /Image:boot /Add-Driver /Driver:.\virtio-win-0.1.141\ /Recurse
DISM /Unmount-Image /MountDir:boot /Commit
DISM /Mount-Image /ImageFile:install.wim /Index:1 /MountDir:install
DISM /Image:install /Add-Driver /Driver:.\virtio-win-0.1.141\ /Recurse
DISM /Mount-Image /ImageFile:install\Windows\System32\Recovery\WinRE.wim /Index:1 /MountDir:winre
DISM /Image:winre /Add-Driver /Driver:.\virtio-win-0.1.141\ /Recurse
DISM /Unmount-Image /MountDir:winre /Commit
DISM /Export-Image /SourceImageFile:install\Windows\System32\Recovery\WinRE.wim /SourceIndex:1 /DestinationImageFile:WinRE.wim /CheckIntegrity
attrib -h -a -s install\Windows\System32\Recovery\WinRE.wim
del install\Windows\System32\Recovery\WinRE.wim
copy WinRE.wim install\Windows\System32\Recovery\WinRE.wim
attrib +h +a +s install\Windows\System32\Recovery\WinRE.wim
DISM /Unmount-Image /MountDir:install /Commit
move install.wim install-raw.wim
move boot.wim boot-raw.wim
DISM /Export-Image /SourceImageFile:boot-raw.wim /SourceIndex:1 /DestinationImageFile:boot.wim /Compress:max /CheckIntegrity
DISM /Export-Image /SourceImageFile:boot-raw.wim /SourceIndex:2 /DestinationImageFile:boot.wim /Compress:max /CheckIntegrity
DISM /Export-Image /SourceImageFile:install-raw.wim /SourceIndex:1 /DestinationImageFile:install.wim /Compress:max /CheckIntegrity
あとは適当に圧縮してdropboxとかにアップロード。
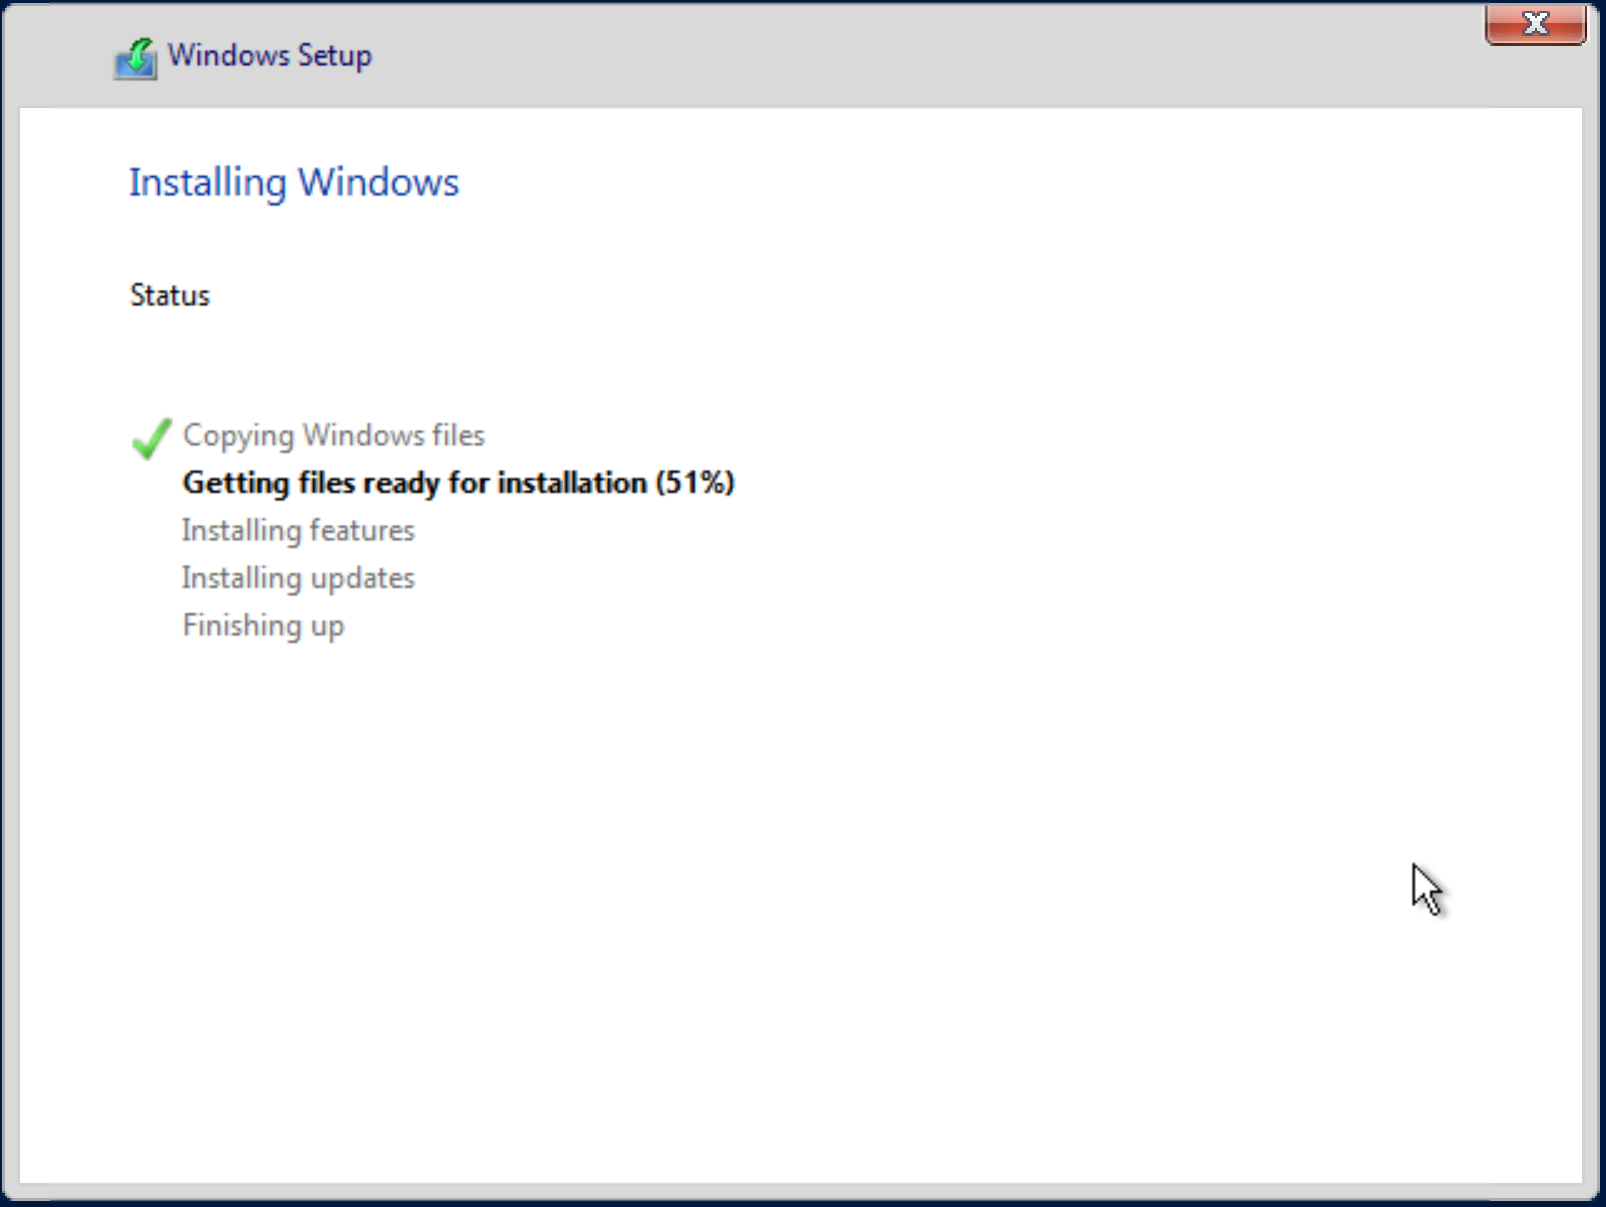
そしてこう
あとはこう

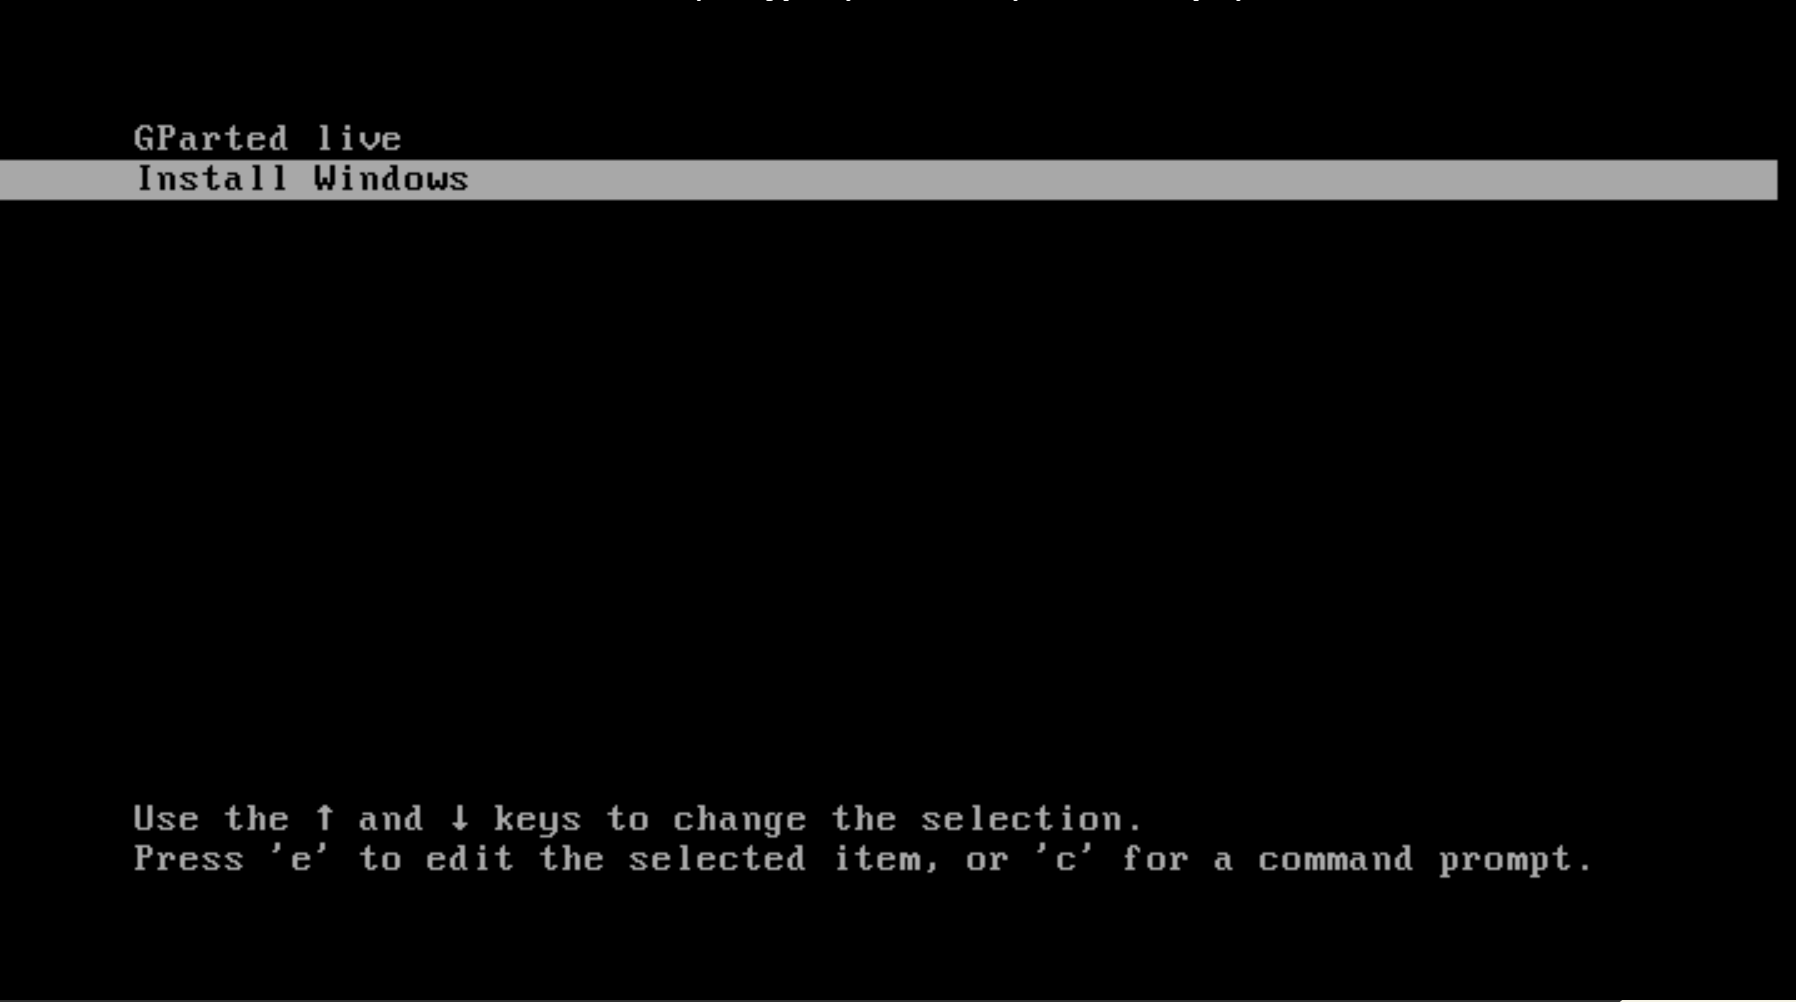
全部終わったぽいならREBOOTしてInstall Windows に進む
root@debian:/mnt/install# shutdown -r now
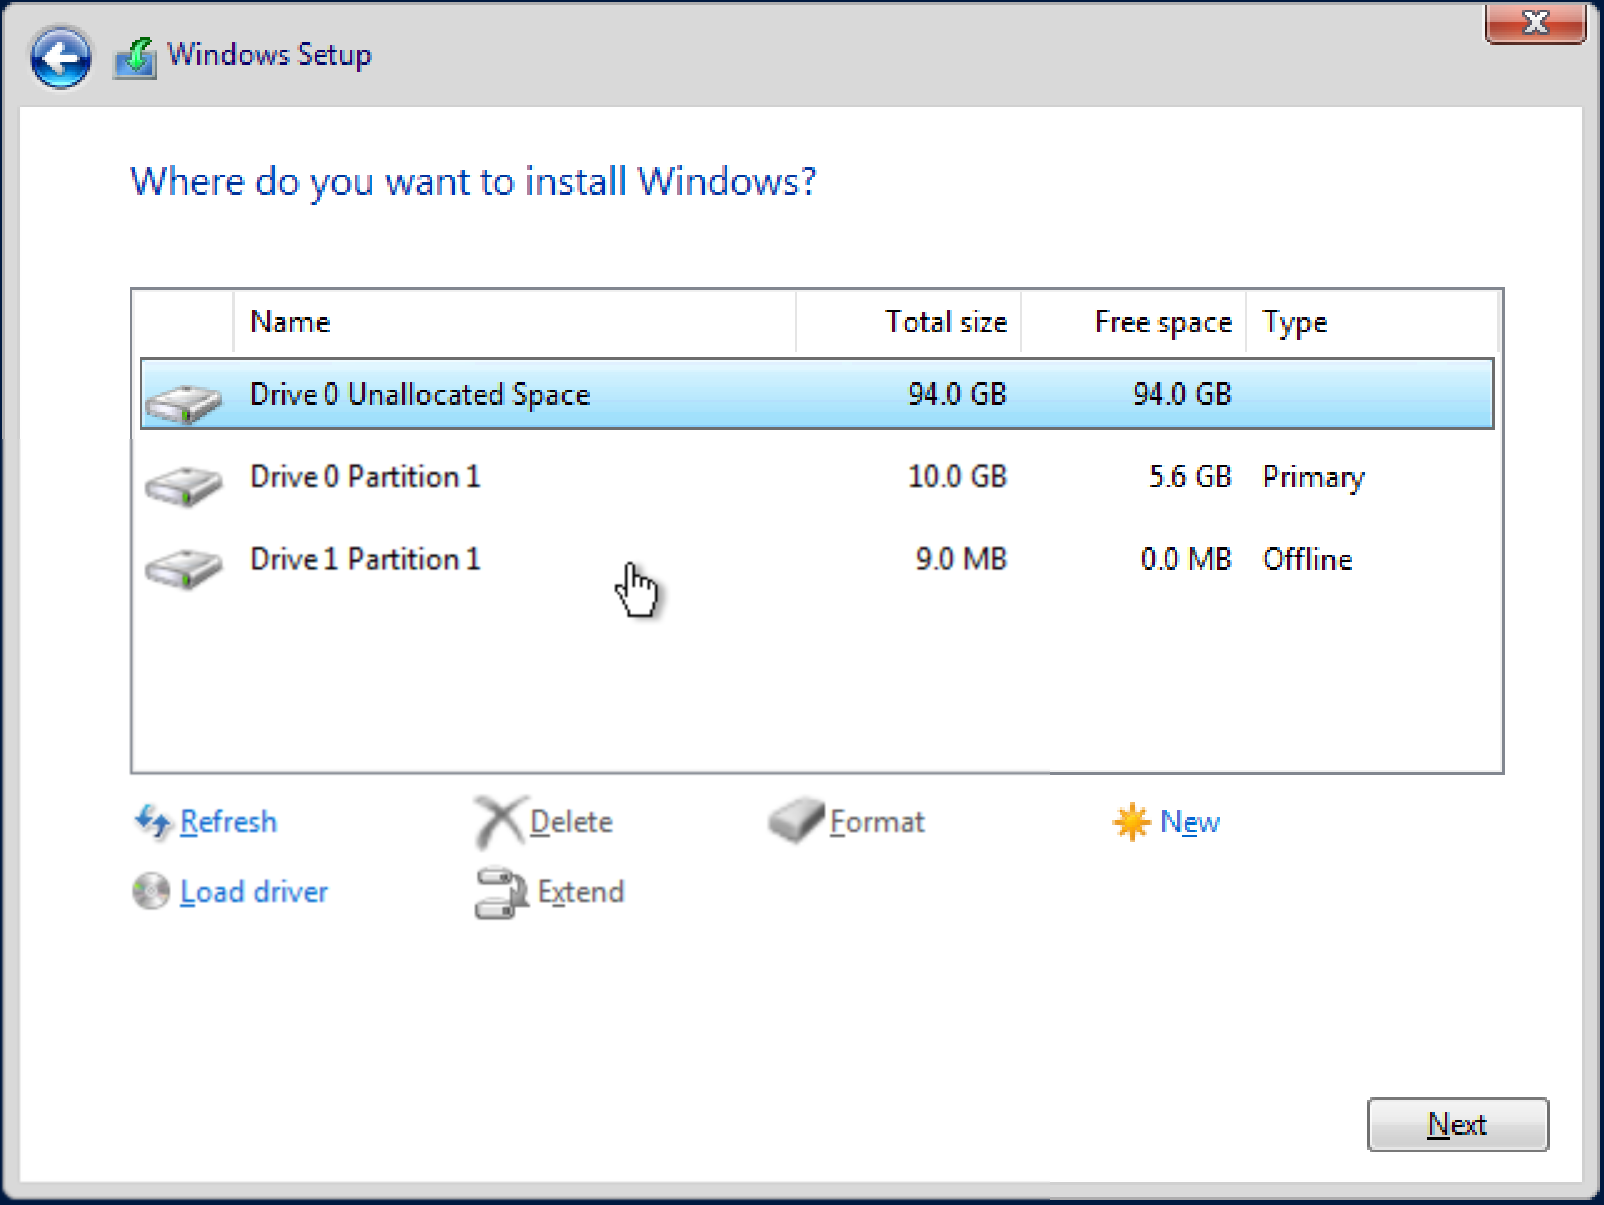
適当にインストールする。
インストールイメージがあるパーティションを削除しないようにご注意。
わーいわたしWindows大好き
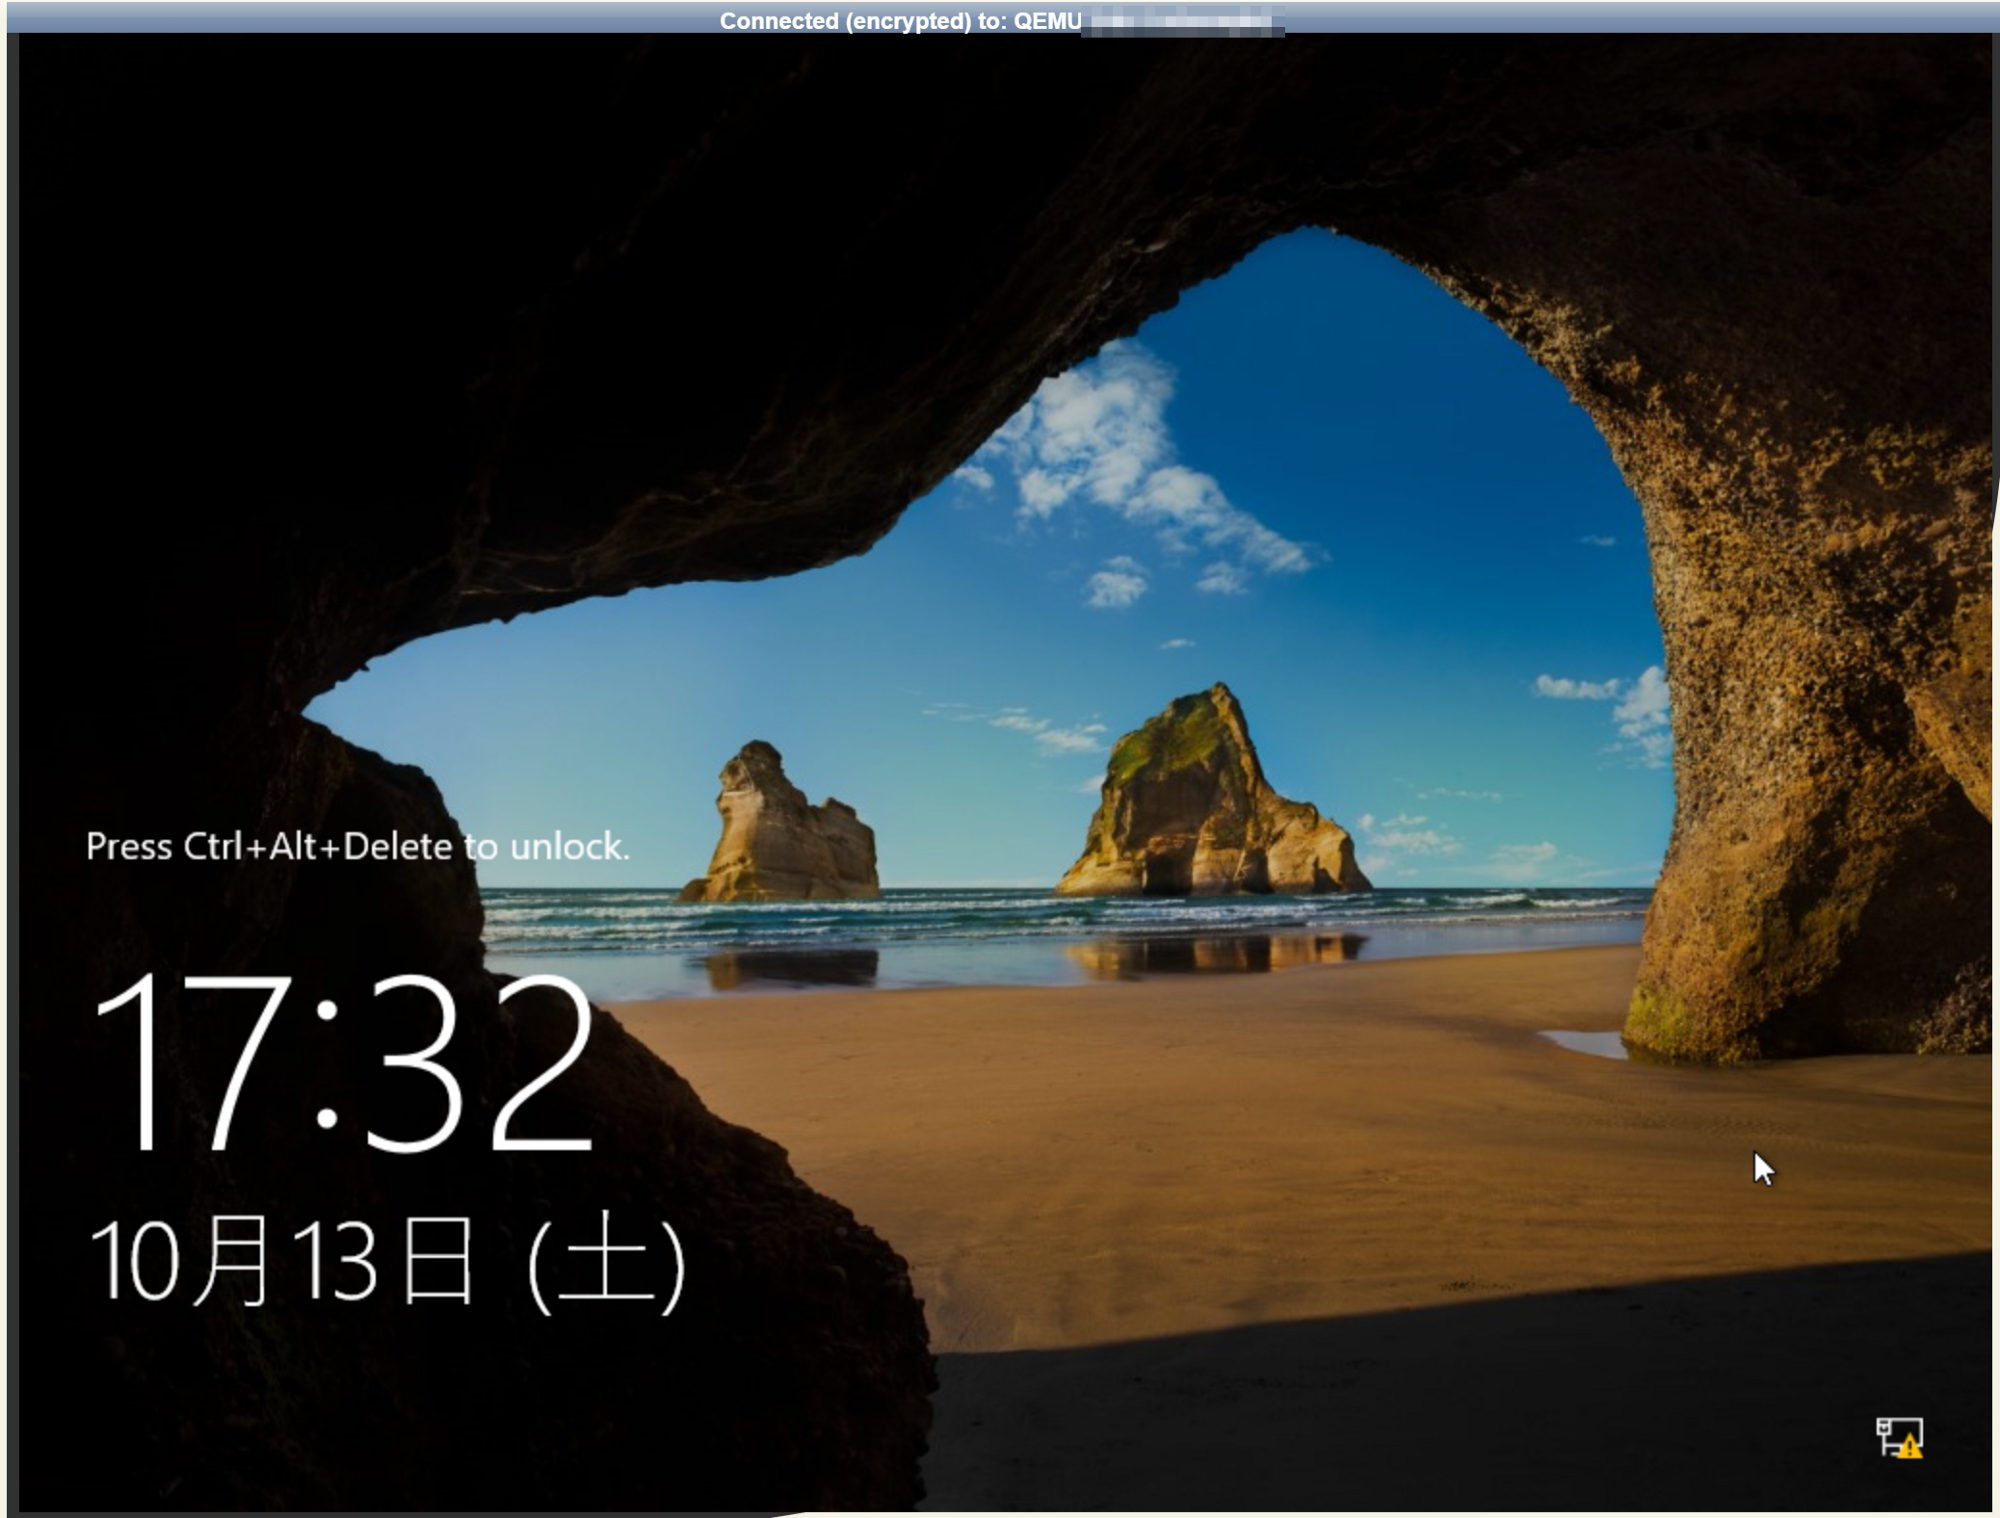
noVNCでCtrl+Alt+Delete押してくれるボタンがUIに無かったのでコンソールを使いました
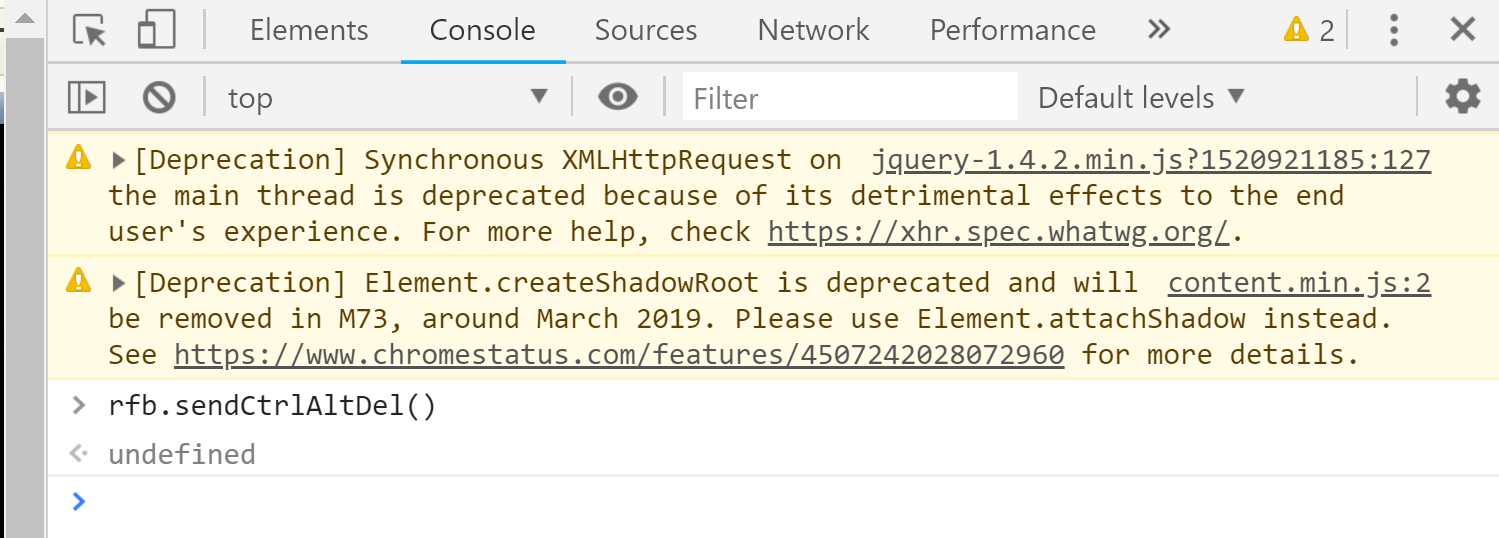
これでログインできる
こんにちは!Windows Server

私はWindows Serverが大好きです。CentOS 嫌だ・・・