テスト用に非同期で動く関数を作る
まずは適当に非同期で動く関数を作ります。
API から天気の情報を取得する想定のクラスです。fetch() を呼び出すと3秒待ってから SUNNY の文字列か例外を返します。
class WeatherFetcher {

    private val executor: ExecutorService = Executors.newCachedThreadPool()

    interface Callback {
        fun onSuccess(weather: String)
        fun onFailure(exception: Exception)
    }

    fun fetch(callback: Callback) {
        executor.submit {
            Thread.sleep(3000)
            try {
                val weather = "SUNNY"
                callback.onSuccess(weather)
            } catch (e: Exception) {
                callback.onFailure(e)
            }
        }
    }
}
今回はこのクラスのテストを作成していきます。
テストクラスを作成する
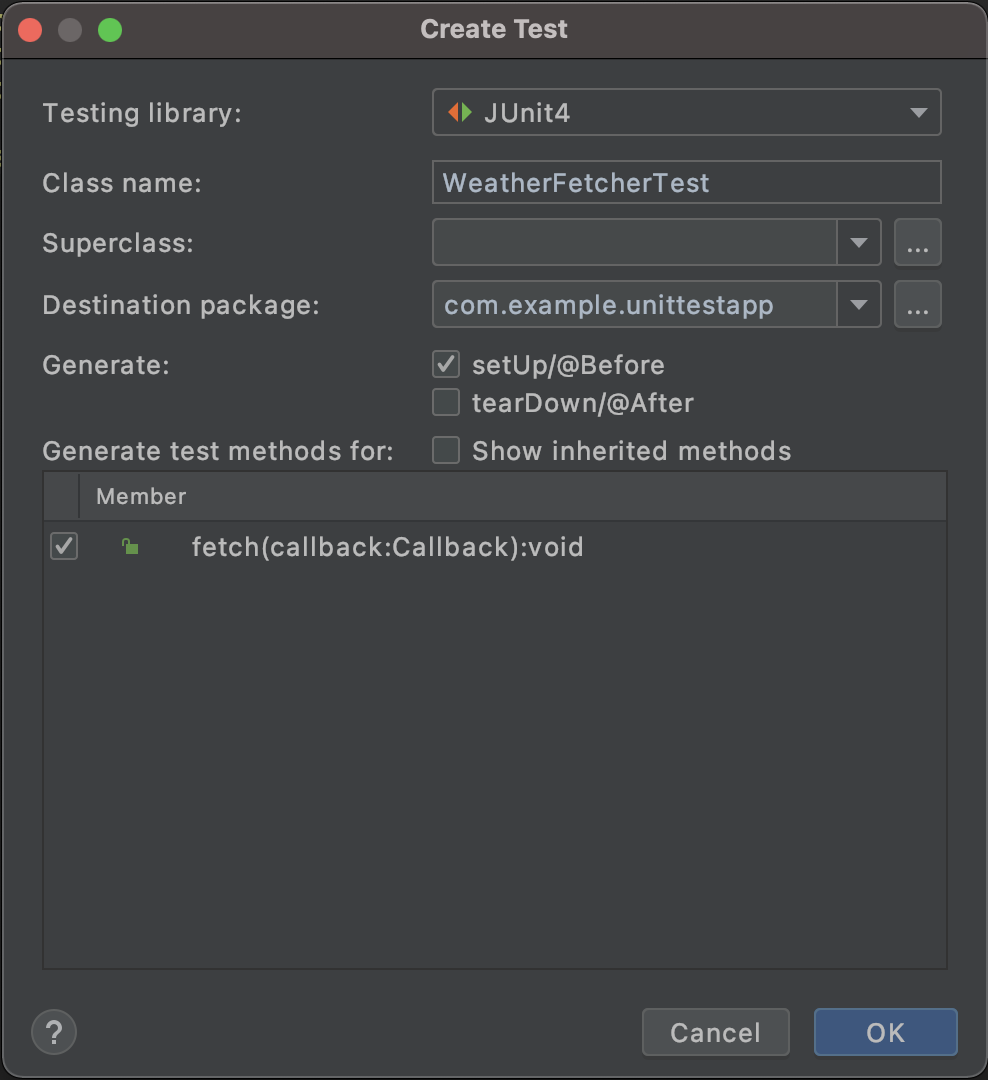
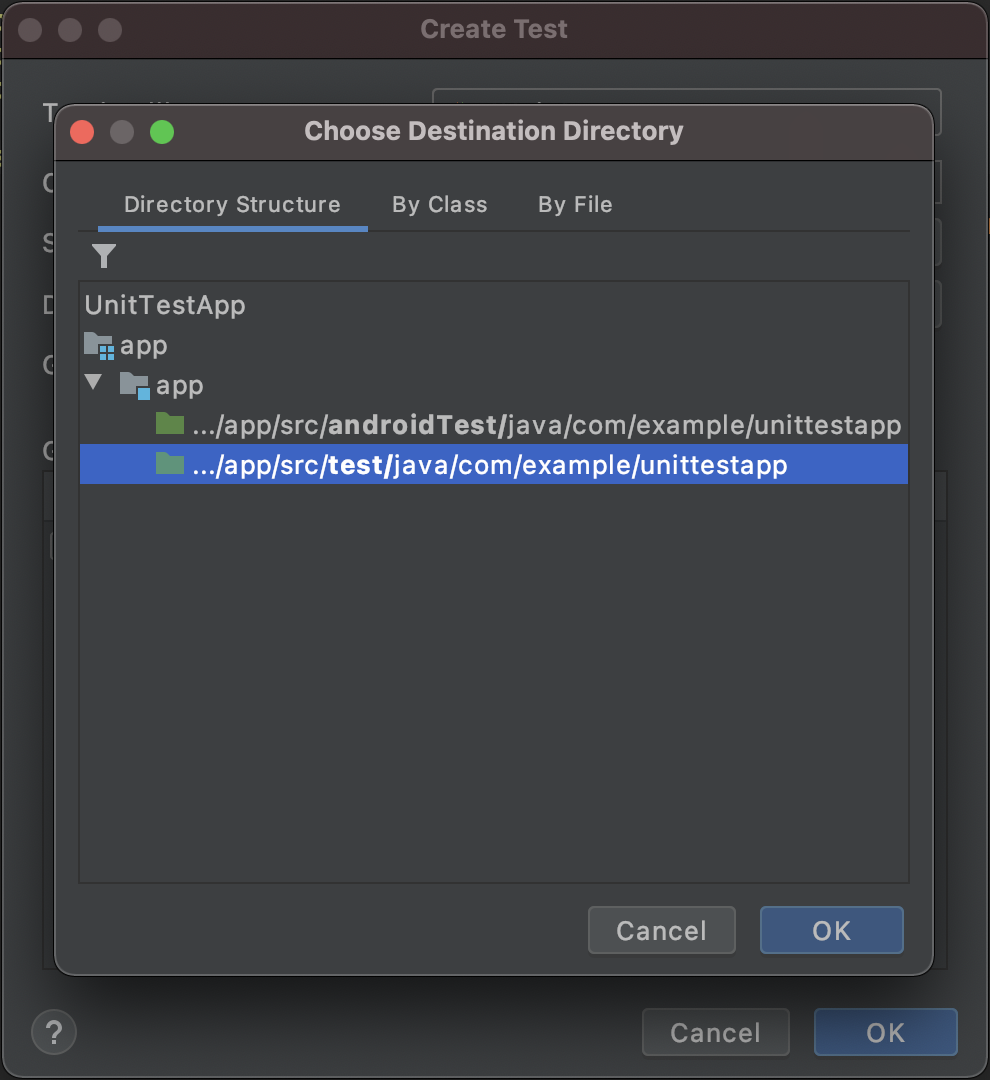
WeatherFetcher のクラス名にカーソルを合わせて command + shift + T でテストが作成できます。設定は以下のとおりです。
これでユニットテスト用のディレクトリ内に WeatherFetcherTest クラスが作成されました。最初は ↓ のような状態かと思います。
class WeatherFetcherTest {

    @Before
    fun setUp() {
    }

    @Test
    fun fetch() {
    }
}
ここに「fetch() を実行したら SUNNY という文字列が返却される」ことを確認するテストを作りたいと思います。
テストコードを書いてみる
まずは以下のようなテストコードを書いてみます。
onSuccess() 内でわざとテストを失敗させるため、RAINY という文字列と比較してみます。
class WeatherFetcherTest {

    lateinit var fetcher: WeatherFetcher

    @Before
    fun setUp() {
        fetcher = WeatherFetcher()
    }

    @Test
    fun fetch() {
        val callback = object : WeatherFetcher.Callback {
            override fun onSuccess(weather: String) {
                println("onSuccess")
                // わざと失敗させるために間違った文字列を用意
                val expect = "RAINY"
                assertEquals(weather, expect)
            }

            override fun onFailure(exception: Exception) {
                println("onFailure")
            }
        }
        println("call fetch()")
        fetcher.fetch(callback)
        println("called fetch()")
    }
}
この状態でテストを実行した場合、assertEquals(weather, expect) が正しくないのでテストが失敗するはずですが、実際には意図せず成功してしまいます。
JUnit ではテストを実行したスレッドでエラーが発生しなかった場合、そのテストは成功したと見なされます。今回のケースでは、fetch() を実行しているスレッドではテストが失敗していましたが、別スレッドなので補足することができず、結果的に成功と見なされました。
CountDownLatch で非同期処理を待つ
CountDownLatch を使うことで、非同期処理が終わるまでスレッドを待機させることができます。
class WeatherFetcherTest {

    lateinit var fetcher: WeatherFetcher

    lateinit var latch: CountDownLatch

    @Before
    fun setUp() {
        fetcher = WeatherFetcher()
        // latch.countDown() が1回呼ばれるまで待機させる設定
        latch = CountDownLatch(1)
    }

    @Test
    fun fetch_useCountDownLatch() {
        var successCount = 0
        var weatherString = ""
        val callback = object : WeatherFetcher.Callback {
            override fun onSuccess(weather: String) {
                println("onSuccess")
                ++successCount
                weatherString = weather
                // コールバック処理の最後でカウントダウンを進める
                latch.countDown()
            }

            override fun onFailure(exception: Exception) {
                println("onFailure")
            }
        }

        println("call fetch()")
        fetcher.fetch(callback)
        println("called fetch()")

        println("awaiting...")
        // latch.countDown() が1回呼ばれるまでここで待機
        latch.await()

        assertEquals(successCount, 1)
        assertEquals(weatherString, "SUNNY")
    }
}
別スレッドでのアサーションが補足できないのは変わらないので、ここでは2つの変数を用意しました。
-
successCount:onSuccess()が呼び出された回数をカウントする -
weatherString: 取得した天気を格納する
最後に、この変数の内容が期待どおりであることを確認するためのアサーションを記述してテストを実行します。問題なければ ↓ のようにテストが成功するかと思います。
call fetch()
called fetch()
awaiting...
onSuccess

Process finished with exit code 0
Future を戻り値にして結果を取得する
もう1つの方法は非同期関数の戻り値に Future を指定する方法です。
fun fetch(callback: WeatherFetcher.Callback): Future<*> {
    return executor.submit {
        Thread.sleep(3000)
        try {
            val weather = "SUNNY"
            callback.onSuccess(weather)
        } catch (e: Exception) {
            callback.onFailure(e)
        }
    }
}
今回は fetch() の戻り値に Future<*> を指定しました。Future オブジェクトは非同期処理が完了しているかどうか確認する isDone() や、現在のスレッドをブロックして非同期処理の結果が取得できる get() などのメソッドが用意されています。また、非同期処理で発生した例外も捕捉することが可能です。
class WeatherFetcherTest {

    lateinit var fetcher: WeatherFetcher

    @Before
    fun setUp() {
        fetcher = WeatherFetcher()
    }

    @Test
    fun fetch_useFuture() {
        var successCount = 0
        var weatherString = ""

        val callback = object : WeatherFetcher.Callback {
            override fun onSuccess(weather: String) {
                println("onSuccess")
                ++successCount
                weatherString = weather
            }

            override fun onFailure(exception: Exception) {
                println("onFailure")
            }
        }
        println("call fetch()")
        // Future.get() により結果が取得できるまで待機できる
        fetcher.fetch(callback).get()
        println("called fetch()")

        assertEquals(successCount, 1)
        assertEquals(weatherString, "SUNNY")
    }
}
これでテストを実行すれば成功するかと思います。
call fetch()
onSuccess
called fetch()

Process finished with exit code 0
CountDownLatch を使用したテストのときは call fetch() → called fetch() → onSuccess でしたが、今回は Future.get() を使ってその場で結果を待っているので実行順序が異なっているのが確認できます。
CountDownLatch よりも記述がスッキリしましたが、テスト対象のメソッドの戻り値を Future にする必要があるのが注意点です。場合によっては今の実装に変更を加える必要があるので、ケースバイケースで CountDownLatch と Future を使い分ける必要がありそうです。


