今回はさくっとAWS EC2でFTPサーバお試し構築してみます。EC2は同一サブネットに2つデプロイして、1つをFTPサーバ、もう1つをクライアントとして設定し、FTPでファイル送受信を行う設定になります。
前提
- 利用するインスタンスはFTPサーバはAmazon Linux2で、クライアント側はWindows Serverとし、FTPソフトウェアはWinSCPとする
- コマンド操作はRoot権限のあるユーザで実施する
構築手順
①EC2をサーバ、クライアント用でそれぞれデプロイ
②サーバ側にvsftpdをインストールして、FTPユーザを作成
③vsftpdの設定ファイルをデフォルトから変更
④クライアント側でWinSCPをインストールし、接続
実際にやってみた
まず①についてはほ他に詳しい記事がたくさんあるので割愛します。EC2をデプロイしてRoot権限のユーザに昇格したものとして以下進めます。
次の②のvfstpdのインストールですが以下でインストールします。
#サーバ側にvsftpdをインストール
yum -y install vsftpd
#vsftpdサービス起動および自動起動されるように設定
systemctl start vsftpd
systemctl enable vsftpd
これでとりあえず、サーバ側で必要なパッケージは準備OKです。
クライアント用のEC2も同じVPCにデプロイして、RDPできるところまで進めます
続いて③ですがvsftpdの設定コンフィグである/etc/vsftpd/vsftpd.confの中身をデフォルトから変更していきます。
※別にデフォルトのままでもFTP接続することは可能です。
#/etc/vsftpd/vsftpd.confを修正
vi /etc/vsftpd/vsftpd.conf

~~~以下抜粋~~~~
1 # Example config file /etc/vsftpd/vsftpd.conf
2 #
3 # The default compiled in settings are fairly paranoid. This sample file
4 # loosens things up a bit, to make the ftp daemon more usable.
5 # Please see vsftpd.conf.5 for all compiled in defaults.
6 #
7 # READ THIS: This example file is NOT an exhaustive list of vsftpd options.
8 # Please read the vsftpd.conf.5 manual page to get a full idea of vsftpd's
9 # capabilities.
10 #
11 # Allow anonymous FTP? (Beware - allowed by default if you comment this out).
12 anonymous_enable=YES  →「No」に変更
13 #
14 # Uncomment this to allow local users to log in.
15 # When SELinux is enforcing check for SE bool ftp_home_dir
16 local_enable=YES
12行目:anonymous_enable=YESは不特定ユーザのアクセス許可はセキュリティ上、よろしくないので「No」にします。
16行目:local_enable=Yesはローカルユーザ(/etc/passwdに記述されたユーザー)のアクセス許可なので「YES」のままでOKです。
112 # When "listen" directive is enabled, vsftpd runs in standalone mode and
113 # listens on IPv4 sockets. This directive cannot be used in conjunction
114 # with the listen_ipv6 directive.
115 listen=NO
116 #
117 # This directive enables listening on IPv6 sockets. By default, listening
118 # on the IPv6 "any" address (::) will accept connections from both IPv6
119 # and IPv4 clients. It is not necessary to listen on *both* IPv4 and IPv6
120 # sockets. If you want that (perhaps because you want to listen on specific
121 # addresses) then you must run two copies of vsftpd with two configuration
122 # files.
123 # Make sure, that one of the listen options is commented !!
124 listen_ipv6=No
125
126 pam_service_name=vsftpd
127 userlist_enable=YES →「YES」だと userlist_file に記載しているユーザは接続拒否されるので「No」に変更
128 tcp_wrappers=YES
115行目:listen=スタンドアロンでvsftpdを起動するかの設定で、デフォルトが[NO]なのでそのままでOKです。
124行目:listen_ipv6=IPv4ソケットの代わりにIPv6ソケットをリッスンする。 このオプションとlistenオプションは、同時に有効にすることができないがこれも「NO」でOKです。
127行目:userlist_enable=userlist_fileオプション(デフォルトは/etc/vsftpd.user_listファイル)で指定したファイルに含まれるユーザリストを元に、ログインの許可/拒否が決定されます。[YES]にすると/etc/vsftpd.user_listがブラックリストになり、ユーザを追記するとアクセス拒否されてしまうので、今回は[NO]に変更しておきます。
「userlist_enable=YES」のままでも、下に「userlist_deny=NO」を記述すれば同じ設定にできますので、そっちの方がわかりやすいかもしれませんね。
FTPにはアクティブモードとパッシブモードがありますが、デフォルトだと「パッシブモード」で設定されます。
明示的に記載する場合は「pasv_enable=YES」とします。
とりあえず最低限の変更は以上です。
次にFTPでアクセスするユーザをサーバ側で作成します。
#ftpで利用するユーザを作成
useradd ftp-user
passwd ftp-user
New-Passwd:任意のパスワード
続いて、etc/vsftpd.user_listに先ほど作成したユーザを追記してやります。
vi etc/vsftpd.user_list

~~以下を追記~~
ftp-user
またリストに既に記載されているユーザでもFTPサーバにアクセスできてしまうので、不要であれば削除しておきましょう。
最後に設定反映のためにvsftpdをサービス再起動させましょう。
systemctl restart vsftpd
これでサーバ側の設定は完了です。
では④のクライアント側の設定に移ります。とっいてもEC2のログインして、WinSCPをインストールするだけなので手順は簡略化します。
とりあえず窓の杜からインストールしておけばOKです。
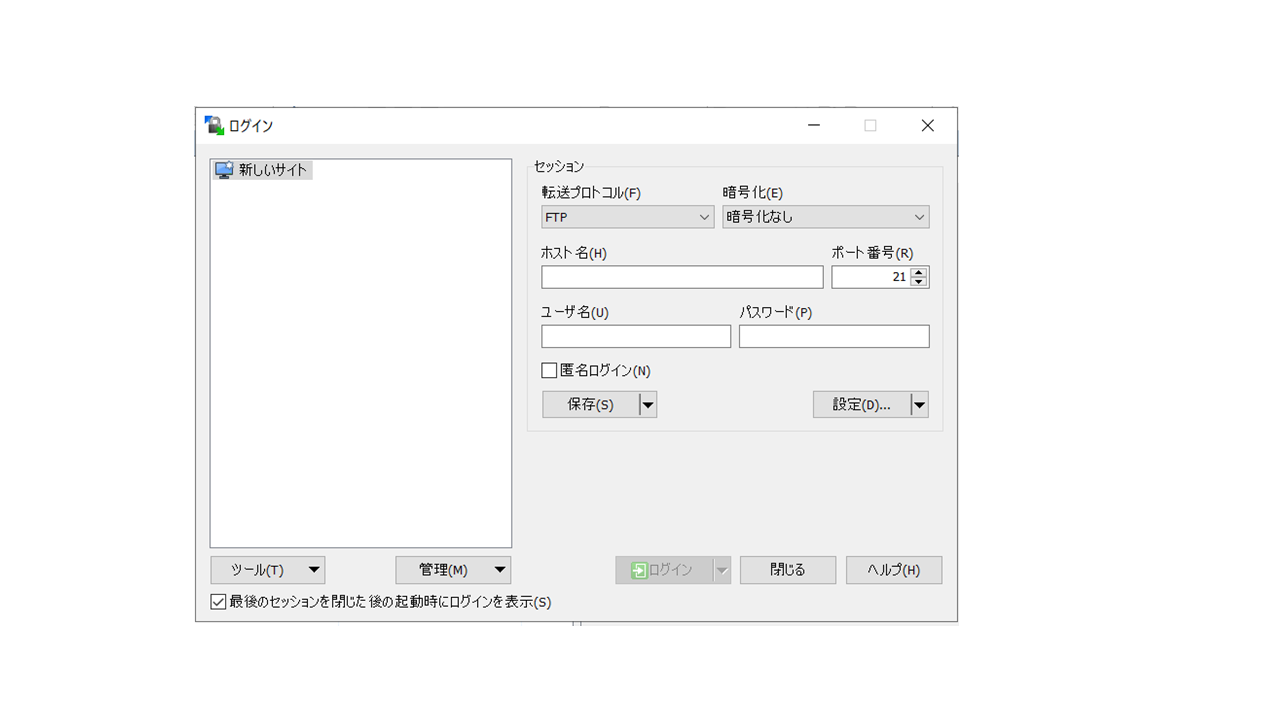
クライアントのEC2でWinSCPを起動させると以下のような画面になるので、「ホスト名」にサーバのIPアドレスを、ユーザ名のところに「ftp-user」と設定したPWを入力します。
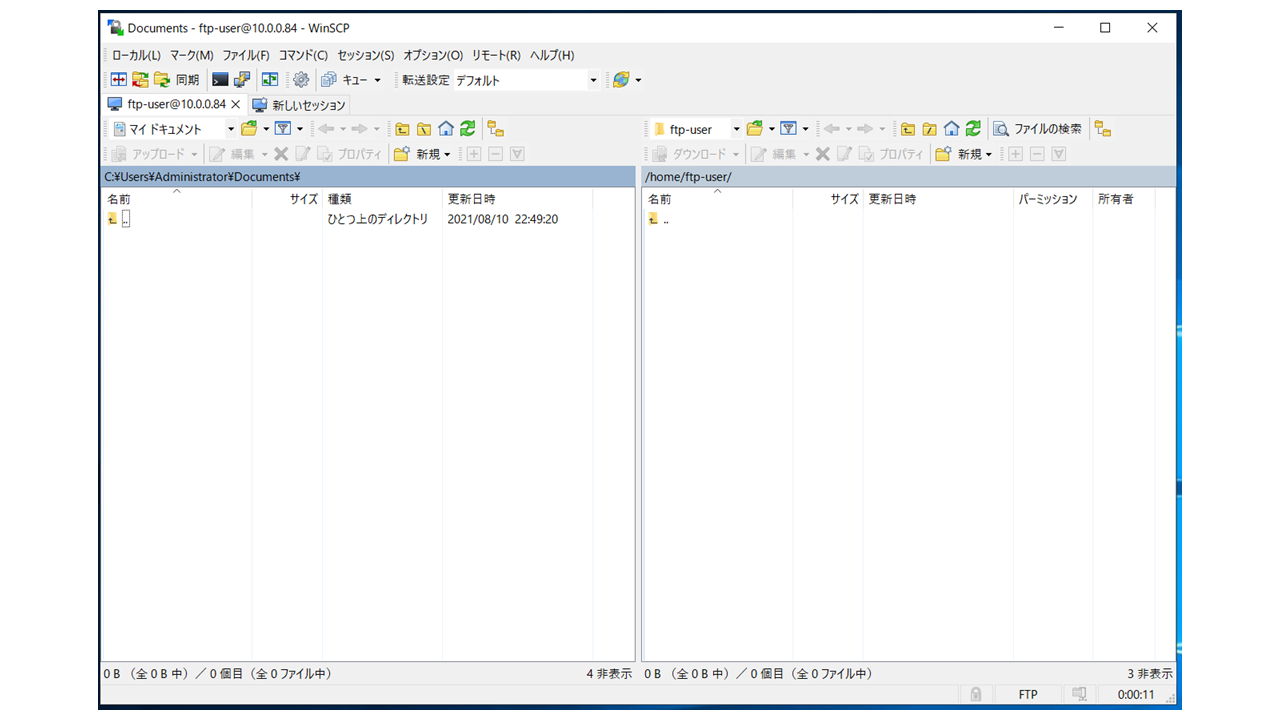
こんな感じで接続できています!
参考にしたサイト
[【AWS】閉域網のEC2にFTPサーバーを構築]
(https://www.hanatare-papa.jp/entry/technology-aws-ftp-1#FTP%E3%83%AD%E3%82%B0%E3%82%A4%E3%83%B3%E3%82%92%E8%A8%B1%E5%8F%AF%E3%81%99%E3%82%8B%E3%83%A6%E3%83%BC%E3%82%B6%E3%83%BC%E3%82%92%E6%8C%87%E5%AE%9A)
【CentOS7】vsftpdでパッシブモードのFTPサーバーを設定する