はじめに
API設計を行う際の環境構築についての調べた内容です。
目的
環境構築の目的は以下の2つです。
- Swaggerを用いたAPI仕様書の作成(設計)を行う。
- 作成したAPI仕様書の沿ったレスポンスを返すモックサーバーを作成する。
上の目的を踏まえてSwagger-ui-watcherとAPISproutを用いて環境を作成します。
また、API仕様の作成方法としては専用のツール(Swagger-editor)を用いる方法もありますが、今回はローカルでファイル作成を行う方法を採用します。
Swagger-ui-watcher
Swagger-uiはSwaggerで定義したAPI仕様をブラウザ上で可視化するツールです。
Swagger-ui-watcherはローカルで作成した仕様ファイルの表示に特化したもので、仕様ファイルの変更時にブラウザに表示されたSwagger-uiの画面を自動で更新します。ローカルの仕様ファイルの修正を行う場合はこちらのほうがスムーズな操作が可能です。
APISprout
APISproutはSwaggerを用いて作成されたAPI仕様書を元にレスポンスを返すモックサーバーを自動で構築するツールです。
環境構築
Dockerを用いて環境の構築を行っています。
ディレクトリ構成
.
├── docker-compose.yaml # Composeファイル
│
├── swagger
│   └── swagger.yaml # API仕様ファイル
│
└── swagger-ui-watcher
   └── build
       └── Dockerfile # swagger-ui-watcherのDockerファイル
docker-compose.yaml
version: '3'

services:
  swagger-ui-watcher:
    build: swagger-ui-watcher/build
    image: swagger-ui-watcher
    container_name: swagger-ui-watcher
    ports:
      - 8080:8000
    volumes:
      - ./swagger:/swagger
    command: /swagger/swagger.yaml

  apisprout:
    image: danielgtaylor/apisprout
    container_name: apisprout
    ports:
      - 8000:8000
    volumes:
      - ./swagger/swagger.yaml:/swagger.yaml
    command: /swagger.yaml --watch
Composeファイルではswagger-ui-watcherとapisproutコンテナを定義しています。
Swagger-ui-watcherは公式のイメージ(https://hub.docker.com/r/shotat/swagger-ui-watcher/ )ではなくDockerファイルからイメージを作成しています。
これは仕様ファイル名(swagger.yaml)を外部で設定可能にするためです。
APISproutは公式のイメージ(https://hub.docker.com/r/danielgtaylor/apisprout/ )を元にコンテナの作成を行っています。
コマンドとして仕様ファイル名, watchオプションを指定しています。
watchオプションを設定することでswagger.yamlの自動読み込みが行われます。
Dockerfile(swagger-ui-watcher)
Swagger-ui-watcherコンテナのDockerファイルは以下です。
FROM node:8-alpine

RUN npm install swagger-ui-watcher -g

ENTRYPOINT ["swagger-ui-watcher", "--no-open", "--host", "0.0.0.0"]

VOLUME ["/swagger"]

EXPOSE 8000
swagger.yaml
公式の例にあるswagger.yamlを修正したものを用いて動作確認を行います。
https://swagger.io/docs/specification/basic-structure/
下記ではテスト用サーバーのURLをモックサーバーのURLに変更しています。
openapi: 3.0.0
info:
  title: Sample API
  description: Optional multiline or single-line description in [CommonMark](http://commonmark.org/help/) or HTML.
  version: 0.1.9
servers:
  - url: http://api.example.com/v1
    description: Optional server description, e.g. Main (production) server
  - url: http://localhost:8000
    description: Optional server description, e.g. Internal staging server for testing
paths:
  /users:
    get:
      summary: Returns a list of users.
      description: Optional extended description in CommonMark or HTML.
      responses:
        '200':    # status code
          description: A JSON array of user names
          content:
            application/json:
              schema:
                type: array
                items:
                  type: string
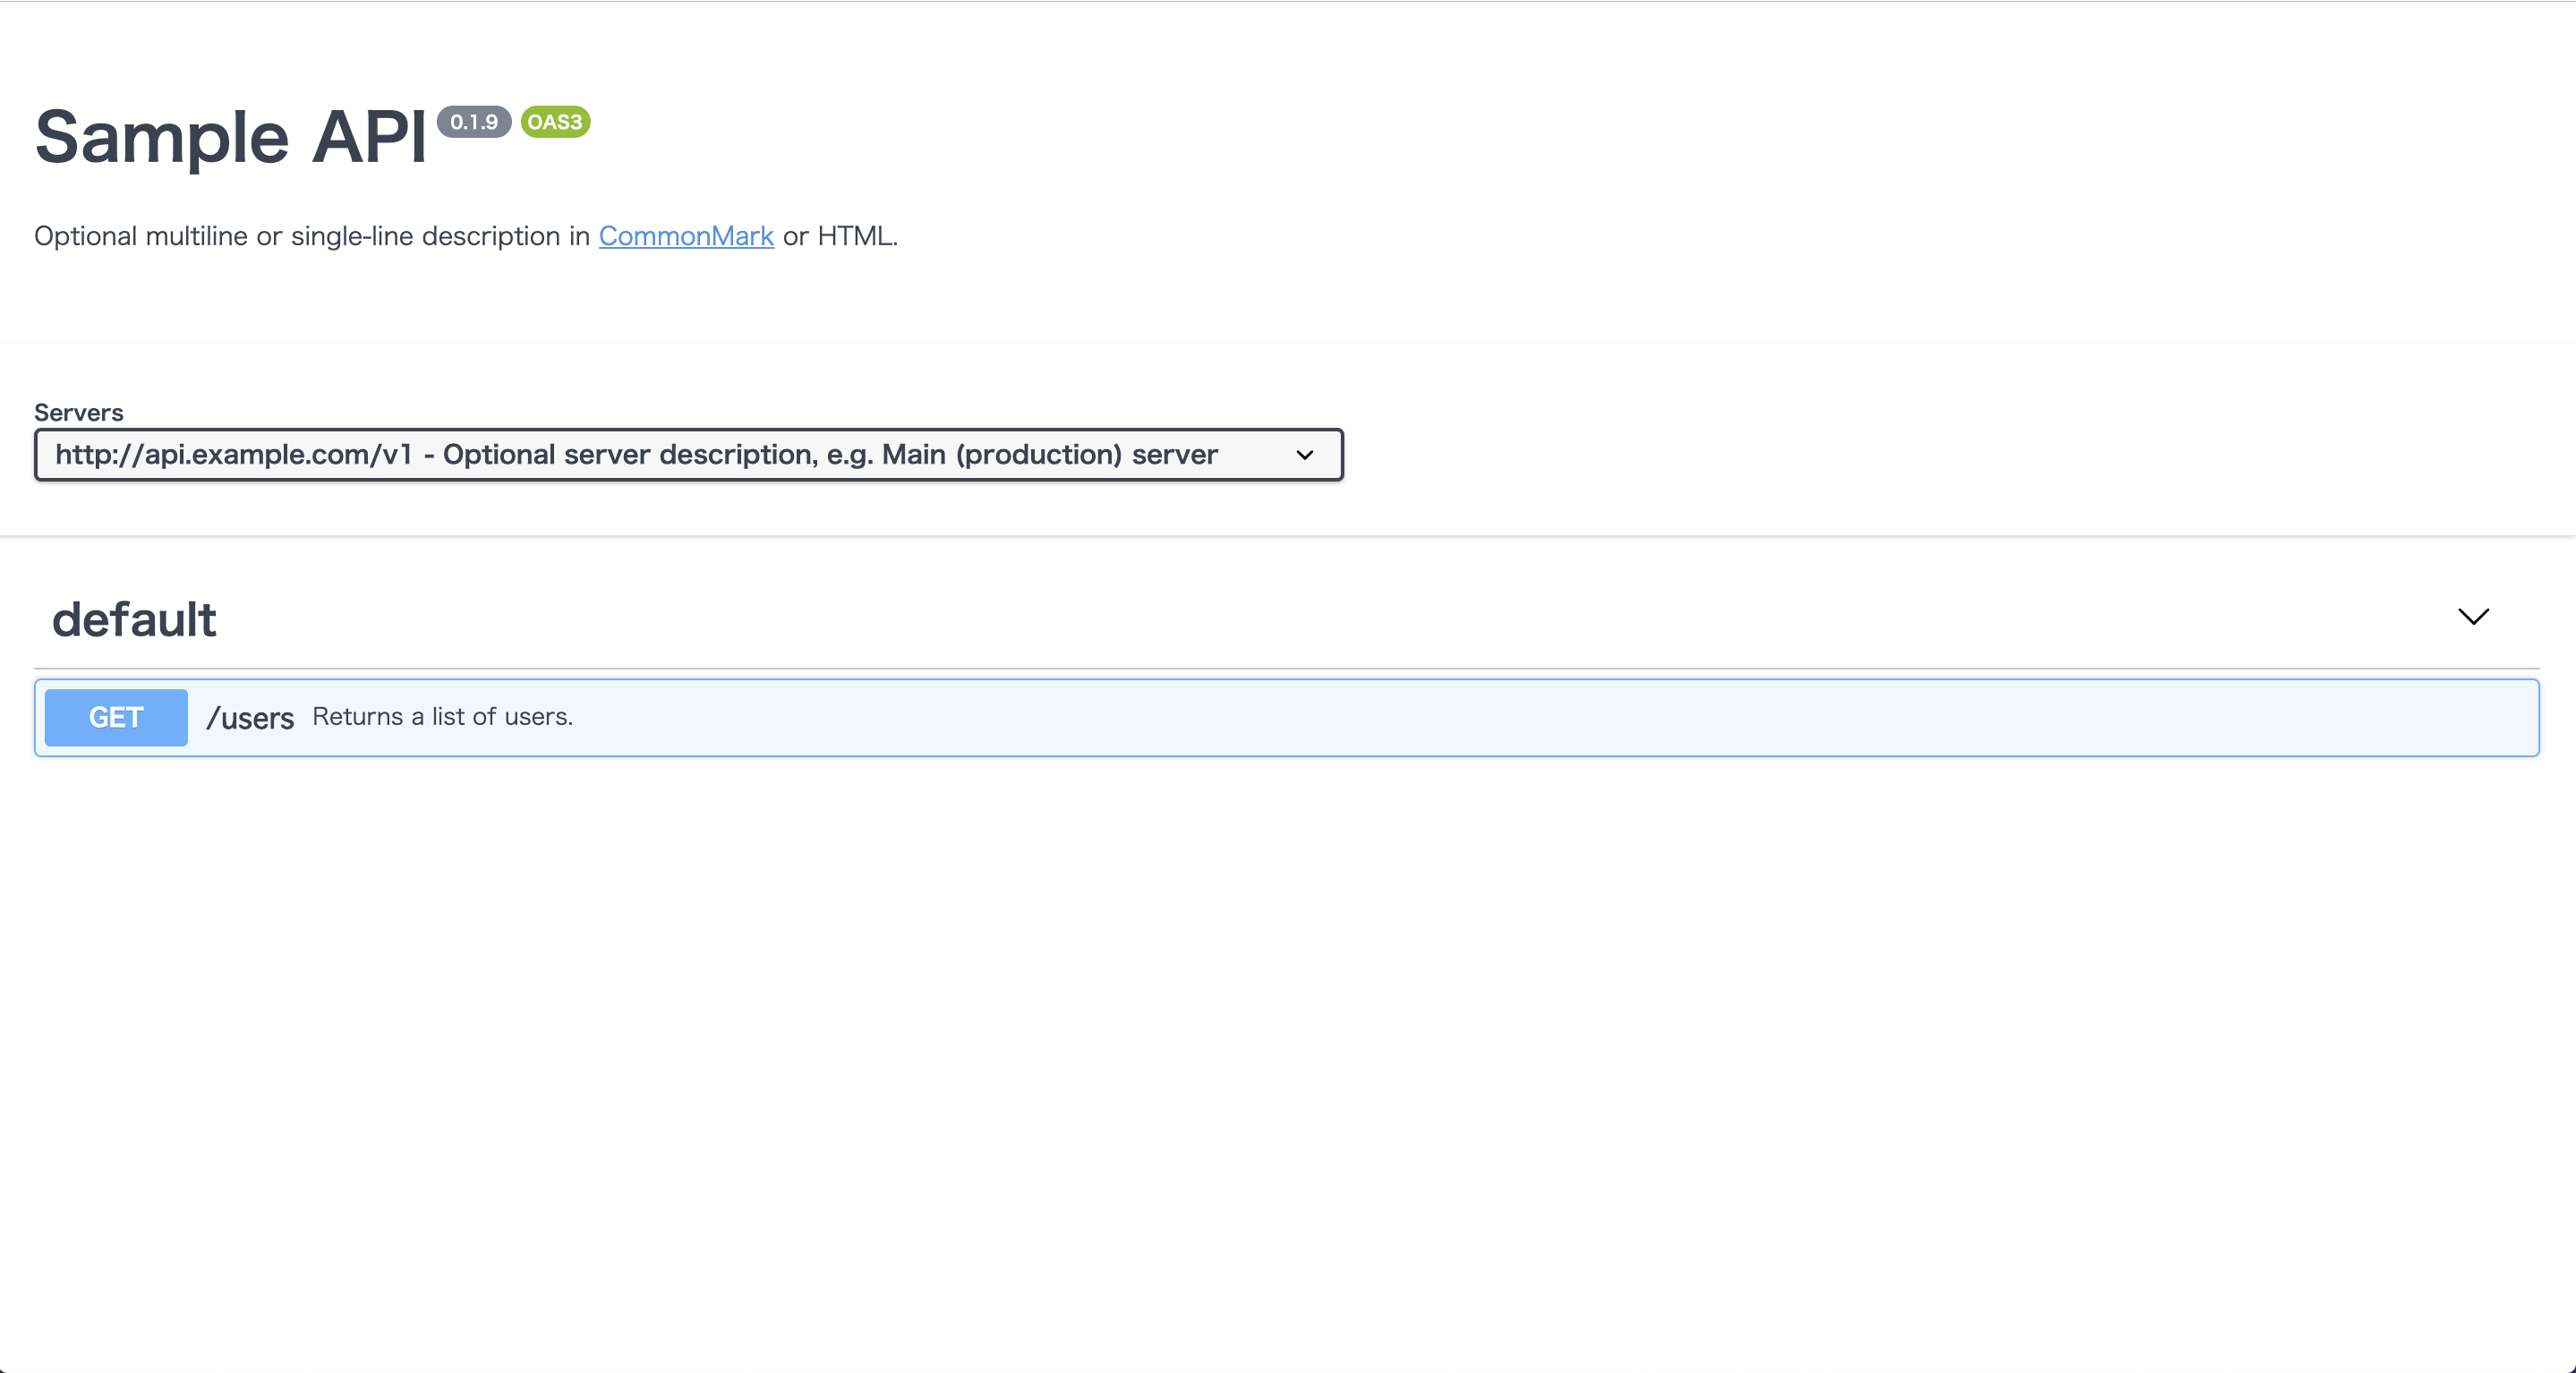
動作確認
以下のコマンドでdockerコンテナを起動し、http://localhost:8080 にアクセスします。
docker-compose up -d
以下のような画面が表示されるのでサーバーをプルダウンから選択し、APIをクリックして"Try it out" ⇒ "Execute"を選択することでモックサーバーのAPIを実行することができます。