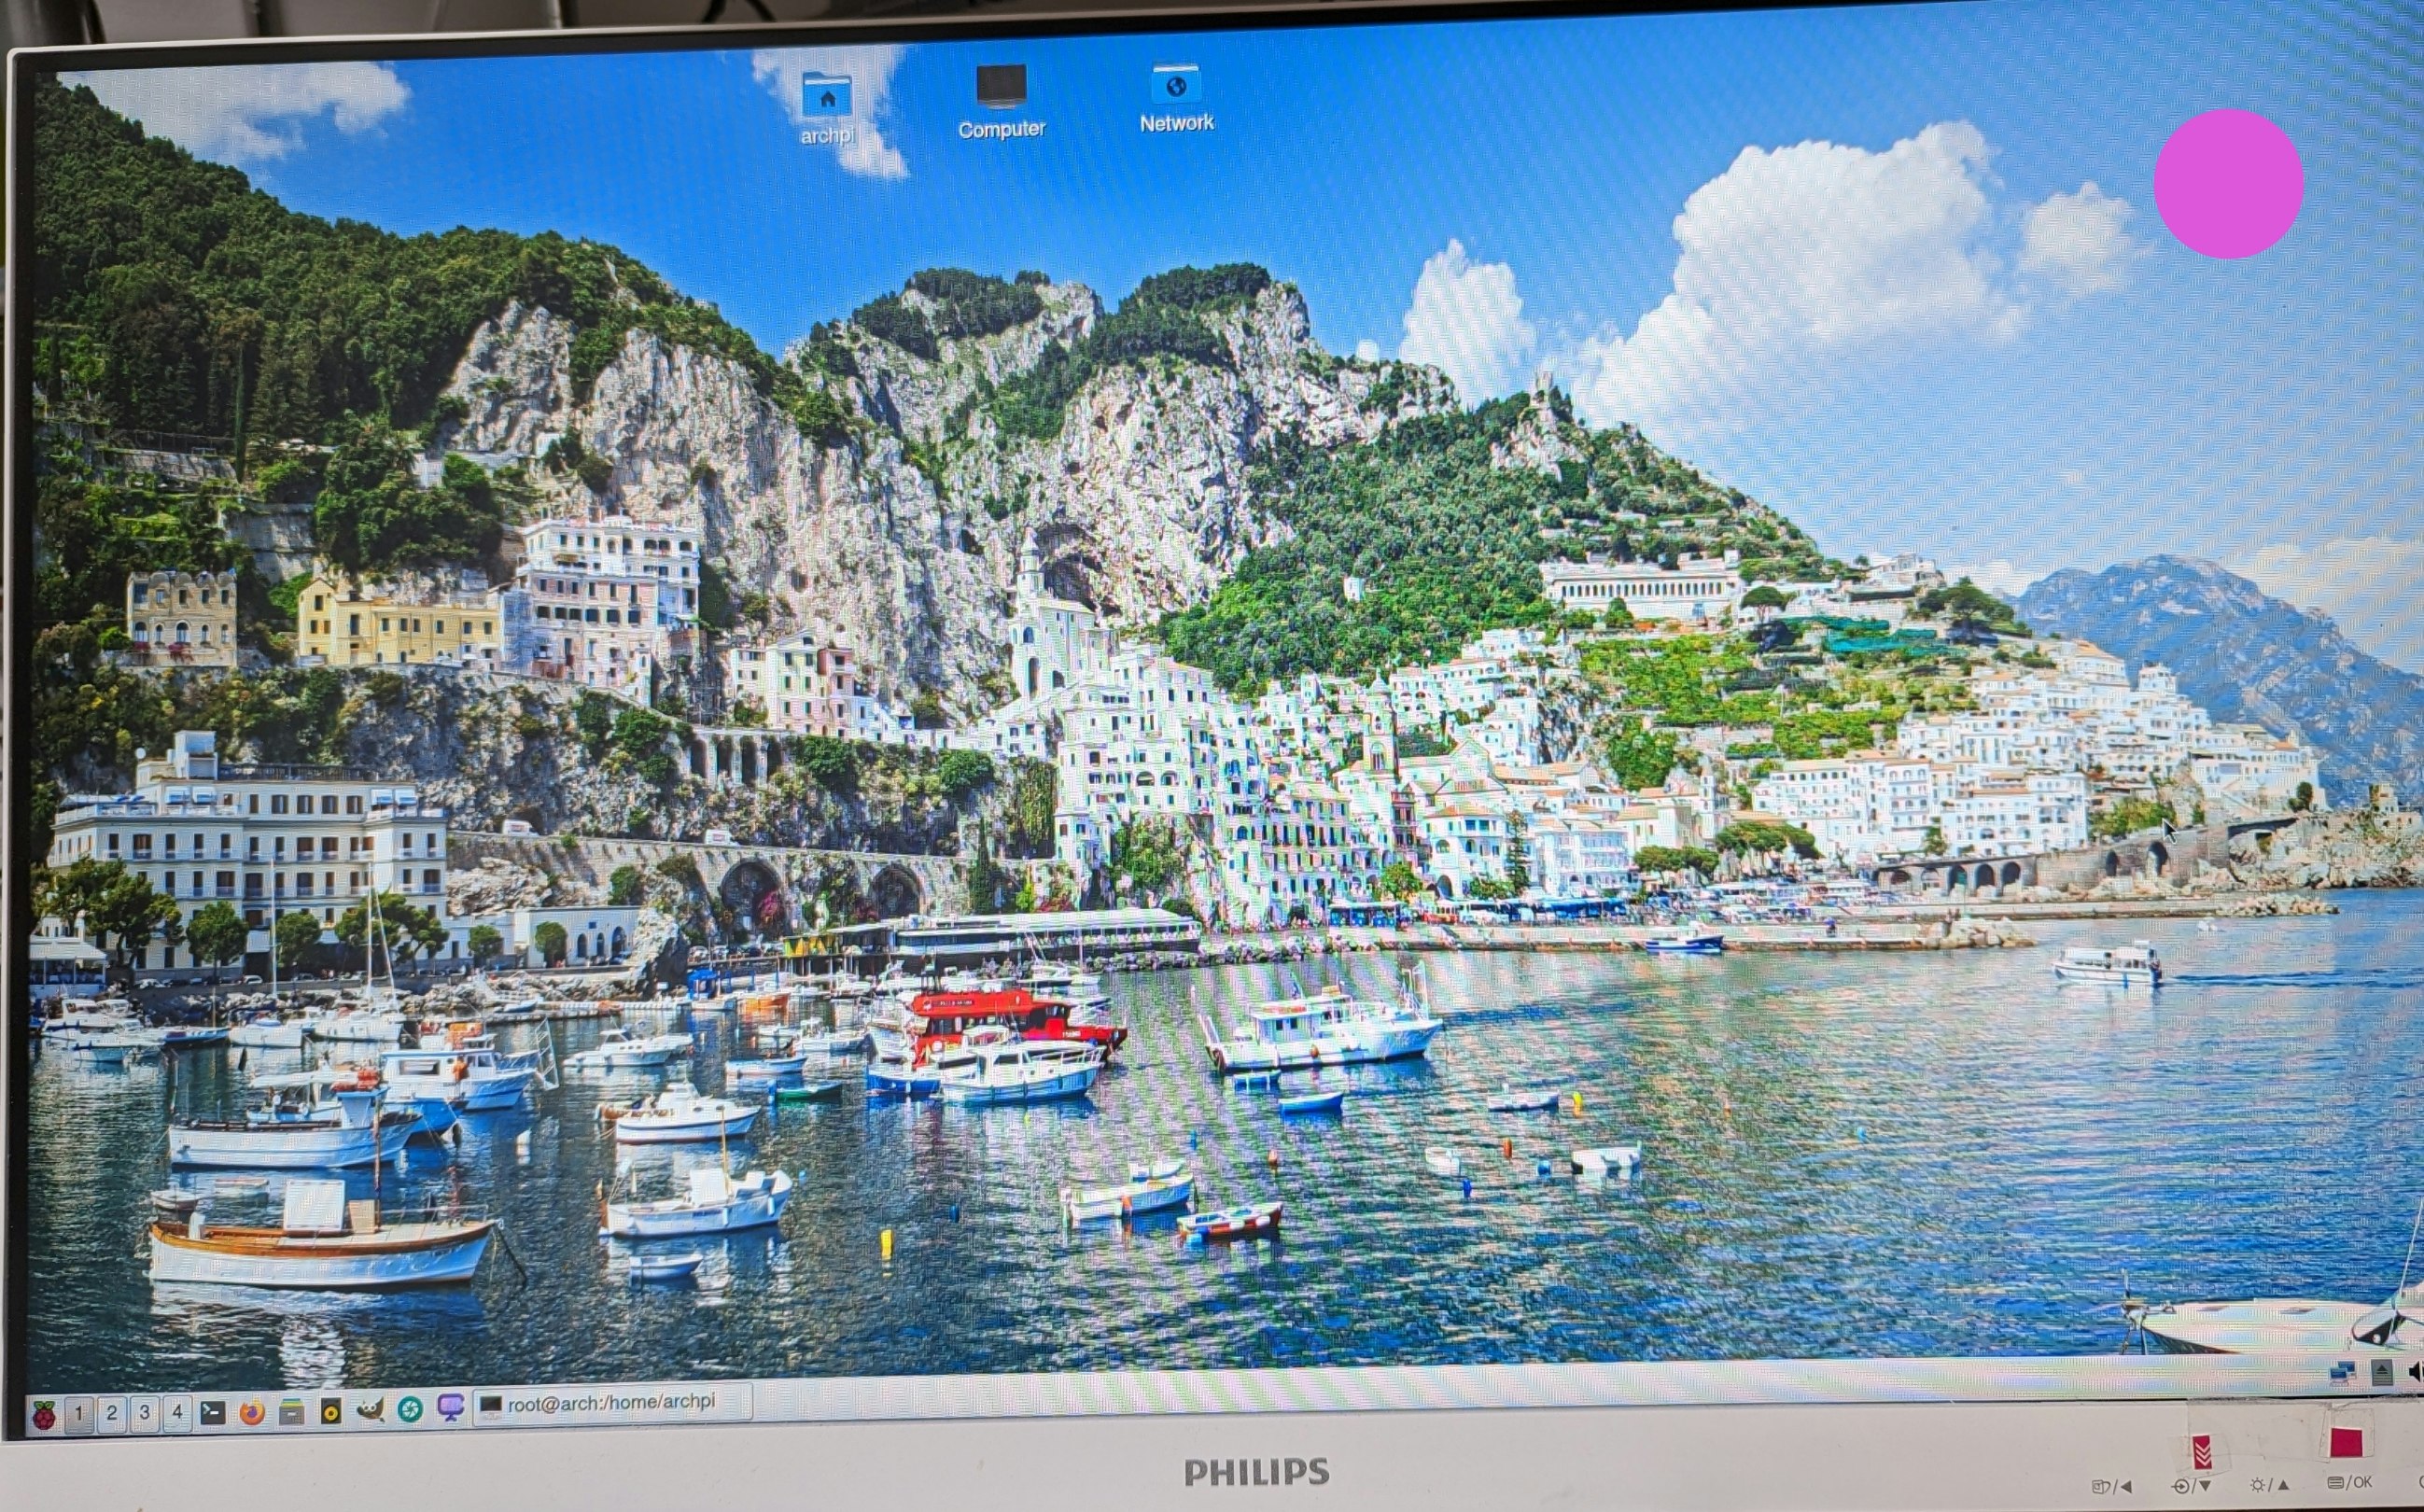
今は こんな感じで起動
出所は https://raspex.exton.se/
以下なことが書かれてる
RaspArch Rpi5 Build 240302 :: Run Arch Linux (aarch64)
with the LXQt DE on your new Raspberry Pi 5 computer

:: Install using Rufus or Etcher in Windows!
1) まずは USB起動です
https://sourceforge.net/projects/rasparch/
にて
ダウンロードして
unzip rasparch-rpi5-exton-2890mb-240302.zip
して
dd if=./rasparch-rpi5-exton-8000mb-240302.img of=/dev/sdX bs=16k status=progress
(Xは USBメモリ 、 自分は nvmeな pi5で やってるので a です
自分にあわせて下さい)
ここから USBから起動するために
1)mount /dev/sda1 /ma1
して
/ma1/cmdline.txtを
root=/dev/sda2 rw rootwait console=serial0,115200 console=tty1 fsck.repair=yes
します
2)mount /dev/sda2 /ma2
して
/ma2/etc/fstab
を
# Static information about the filesystems.
# See fstab(5) for details.
# <file system> <dir> <type> <options> <dump> <pass>
/dev/sda1  /boot   vfat    defaults        0       0
します
最後に gpartedで /dev/sda2を拡張します
すると
となります
なお 初期パスワードは raspberry でした
2)nvme 起動
2−1) /ma1/cmdline.txtを
root=/dev/nvme0n1p2 rw rootwait console=serial0,115200 console=tty1 fsck.repair=yes
とします
2−2) mount /dev/sda2 /ma2
して
/ma2/etc/fstab
を
# Static information about the filesystems.
# See fstab(5) for details.
# <file system> <dir> <type> <options> <dump> <pass>
/dev/nvme0n1p1  /boot   vfat    defaults        0       0
としたあと nvmeアダプターにつけるだけです
起動してみるとわかるのですが ubuntuとちがって wifiが切れたりしません
3) yay入らないので プリンター使えず 常設は無理なので USB ハードディスク な LXQT に戻りました
時刻が9時間ほど遅れてます
あ、そうだこれを忘れてた!
ln -sf /usr/share/zoneinfo/Japan /etc/localtime
で 治りました
なお

$ ./comment-out.bat .xprofile
export XMODIFIERS=@im=fcitx
export GTK_IM_MODULE=fcitx
export QT_IM_MODULE=fcitx


$ ./comment-out.bat .xinitrc
exec startlxqt


./comment-out.bat /etc/pacman.d/mirrorlist
Server = http://jp.mirror.archlinuxarm.org/$arch/$repo
Server = http://mirror.archlinuxarm.org/$arch/$repo
Server = http://ca.us.mirror.archlinuxarm.org/$arch/$repo
Server = http://fl.us.mirror.archlinuxarm.org/$arch/$repo


gdm を利用する
rm /etc/systemd/system/display-manager.service
systemctl enable gdm


その後
# pacman -Rsc fcitx-anthy
してから
# pacman -Sy fcitx-mozc
したあと
system tools -> fcitx
にてできるようになりました
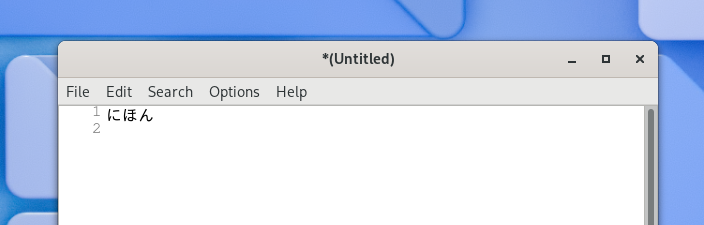
こんな風です
./comment-out.bat .xprofile
awk: fatal: cannot open file `.xprofile' for reading: No such file or directory
つまり ないです


    ーーー相当前進ーーー
なふうです
残念ながら 自分の古い brotherのプリンターでこれから 印刷できないので
nvmeを pimoriniのアダプターにはubuntuを接続したままで
rasparchのnvmeは USB接続で使ってます