はじめに
ブラウザゲームやソシャゲでは、ローカルの端末で遊んで操作結果をサーバに送信します。
このとき、サーバに単にクリアしたなどのゲーム結果を送るとチートし放題となってしまいますので、暗号化だったり逐一通信することでそれを防ぎます。
ですが、これはチートとのいたちごっこになったり、逐一通信することでユーザの体感速度が著しく落ちます。
そこで「ローカルで動かしたゲームの操作だけ送るが、ゲームのアルゴリズムをサーバと共通にし、サーバ側で再現することでデータの不整合を防ぐ」ことを考えてみます。
ソースはここに置いておきます
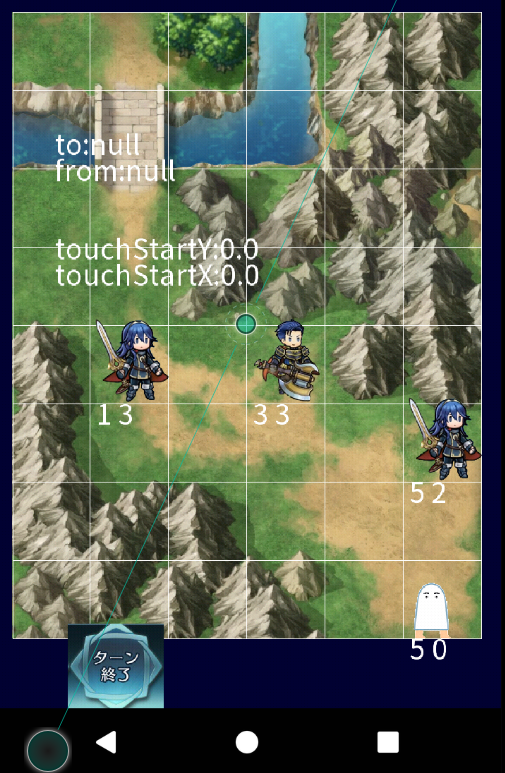
まずは Kotlin + LibGDX でゲームを作る
ゲームは何度も使ってるファイアーエムブレムのクローンです。(クローンと言ってもSDキャラのアニメとか作ってないので動かして戦闘ができるだけですが。)
環境はたまたまKotlinを勉強しようとしただけなので、普通に作るなら Unity のほうが良いかと思います。ゲームの心臓部もC#ならサーバ上で動くでしょう。多分。
この時、環境に依存しない形でドメインモデル=ゲームの心臓部のモジュールを作るのが重要です。
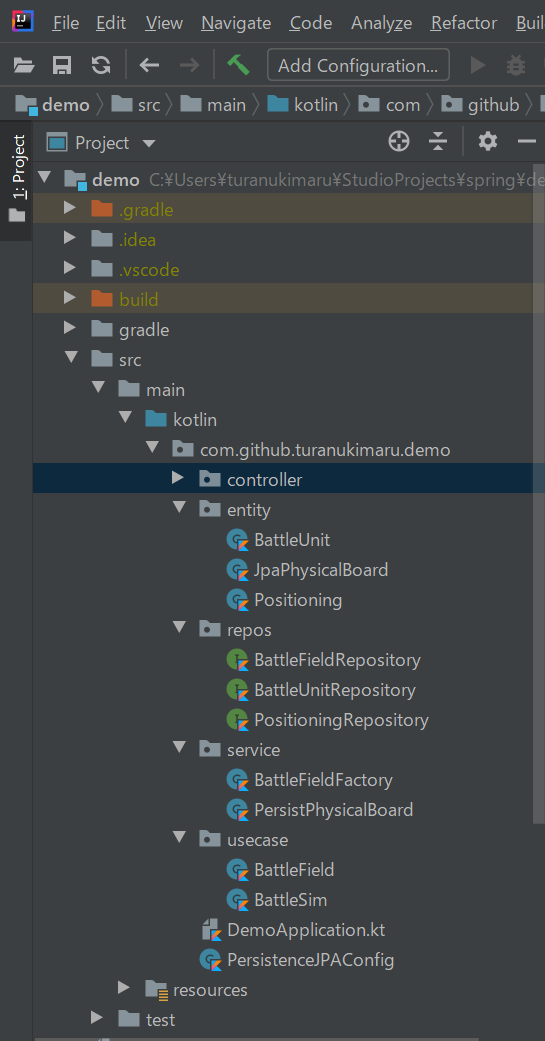
VSCode で Kotlin + Spring boot 環境を作る
有料 IntelliJ なら Kotlin + Spring 環境がサポートされてるのですが無料版にはついてないので、VSCode 用の環境を作ります。丁度 VSCode 使ってみようと思ったので良い機会です。
VSCode をインストールして、 Spring boot のプラグインや Java 環境を構築します。
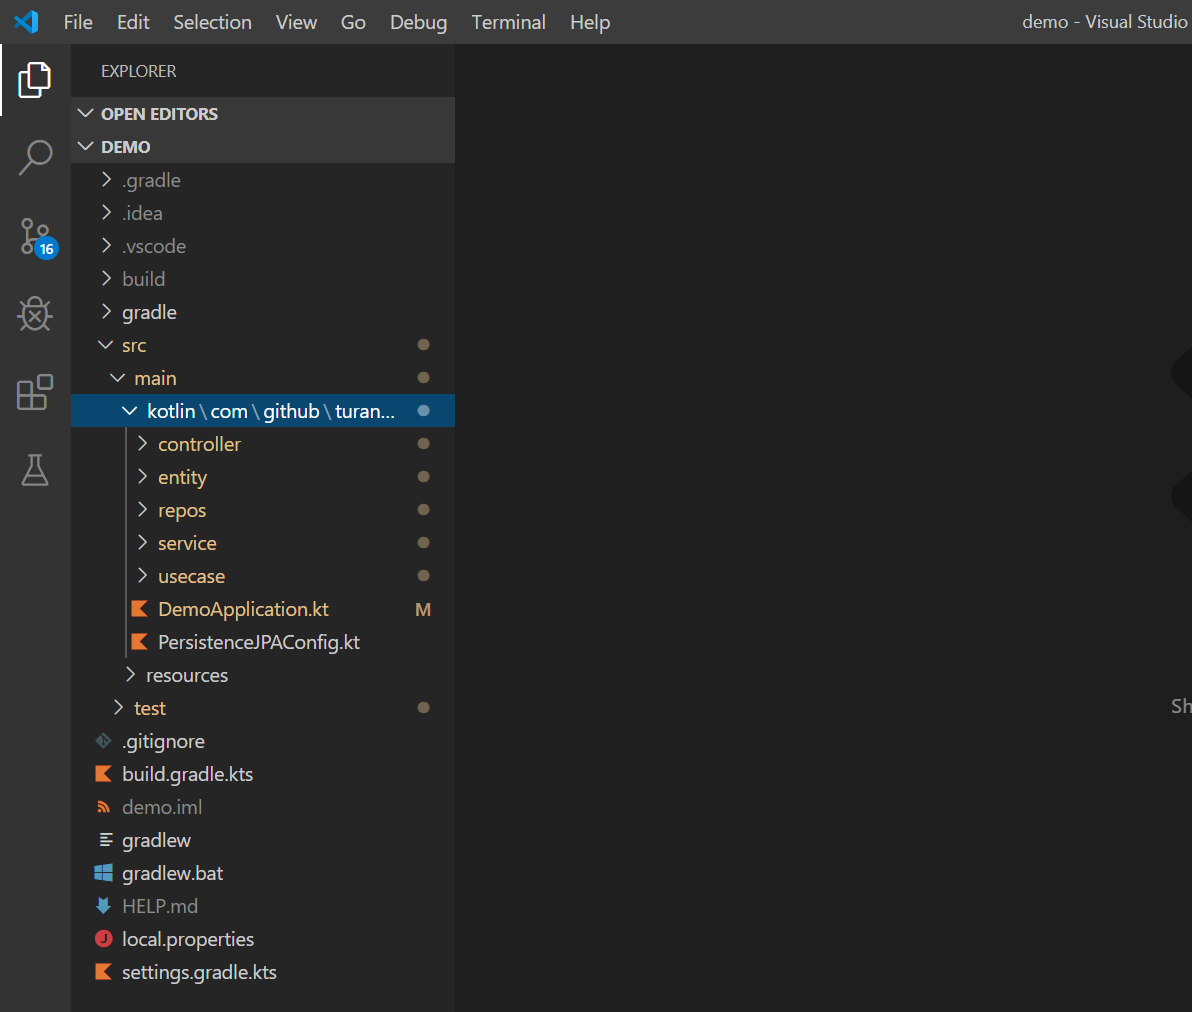
無事開けました。VSCode 上でコードを書くのは正直ツールの支援的な意味で辛いのでこのスタイルで開発していきます。
build.gradle.ks でゲームの心臓部のモジュールをインポートします。(本当はゲーム部をいじれるようにプロジェクトとしてインポートしたいところですが gradle でできるんでしょうか?)
後で使うのでJPAとMySQLへのコネクタも追加しておきましょうか。
dependencies {
	implementation("org.springframework.boot:spring-boot-starter-data-rest")
	implementation("org.springframework.boot:spring-boot-starter-web")
	implementation("com.fasterxml.jackson.module:jackson-module-kotlin")
	implementation("org.jetbrains.kotlin:kotlin-reflect")
	implementation("org.jetbrains.kotlin:kotlin-stdlib-jdk8")
	implementation(fileTree(mapOf("dir" to "..\\..\\FEHS\\fehsbattlemodel\\build\\libs", "include" to arrayOf("**/*.jar"))))
	implementation(fileTree(mapOf("dir" to "..\\..\\FEHS\\board\\build\\libs", "include" to arrayOf("**/*.jar"))))
	implementation(fileTree(mapOf("dir" to "..\\..\\FEHS\\battlefield\\build\\libs", "include" to arrayOf("**/*.jar"))))
        // jpa
	implementation("org.springframework.boot:spring-boot-starter-data-jpa")
	// mysql connector
	implementation( "mysql:mysql-connector-java")
	testImplementation("org.springframework.boot:spring-boot-starter-test") {
		exclude(group = "org.junit.vintage", module = "junit-vintage-engine")
	}
}
fehsbattlemodel : ユニット同士の戦闘モデル
board : 将棋盤のモデル=将棋盤上の駒の動きを管理する
battlefield : 戦場のモデル=将棋盤の上に地形を配置し、駒を載せ、駒とユニットを結び付けている
これで開発の準備が出来ました。
ここからはCleanArchitectureをベースに開発していきます
インポートしたドメインモデルはそのまま使えるので、それを利用するユースケースを作成します。
とりあえず特定のユニットの戦闘結果を計算するユースケースでも作ってみましょう。
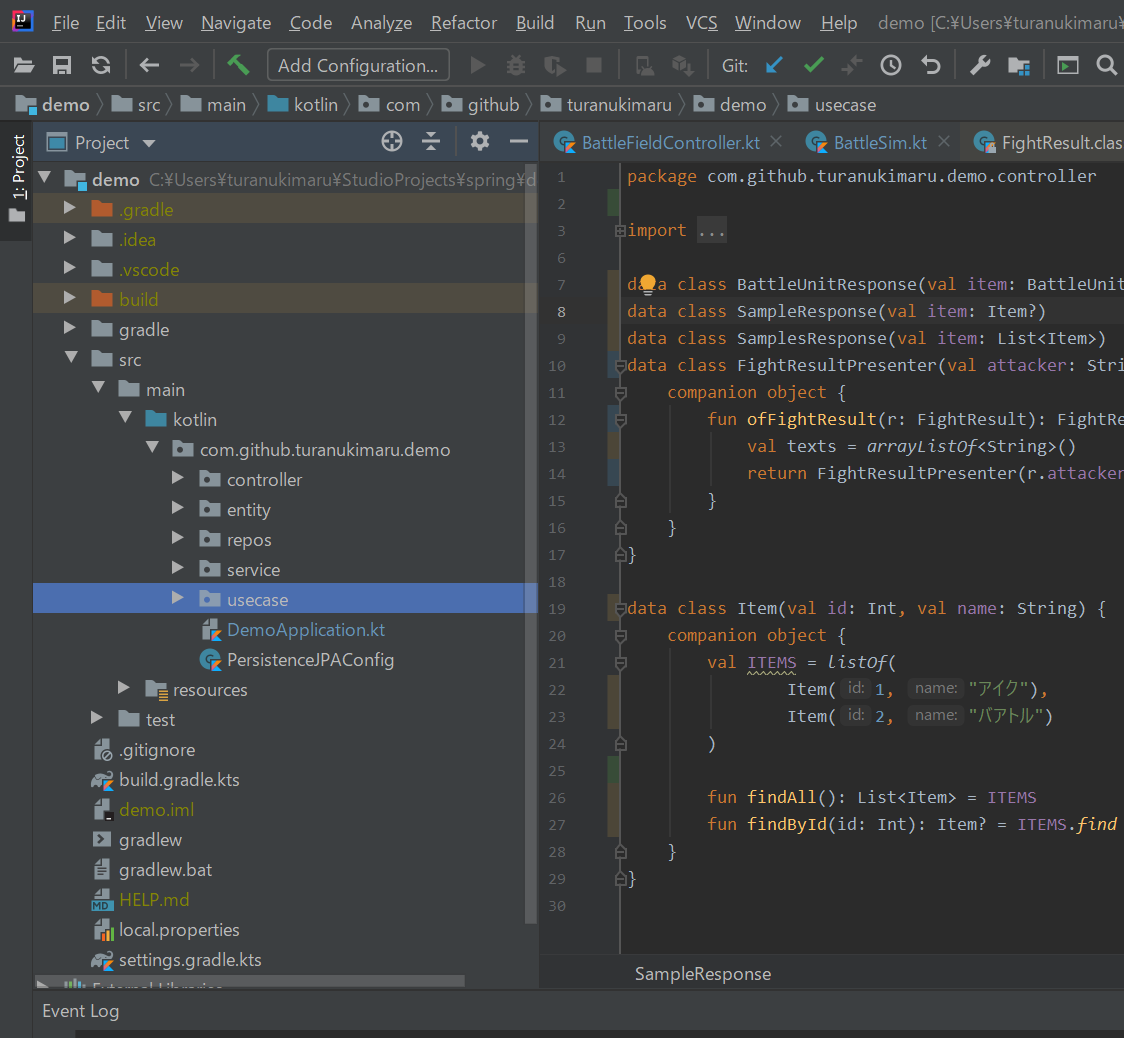
package com.github.turanukimaru.demo.usecase

class BattleSim {

   fun fight(source : String, target : String): FightResultPresenter {
        //攻撃側作成
        val unitA = ArmedHero(StandardBaseHero.get(source)!!)
        val attacker = BattleUnit(unitA, unitA.maxHp)

        //対象作成
        val unitB = ArmedHero(StandardBaseHero.get(target)!!)
        val target = BattleUnit(unitB, unitB.maxHp)

        val fightResult = attacker.fightAndAfterEffect(target)
        return FightResultPresenter.ofFightResult((attacker, Position(0, 0), target, Position(0, 0), fightResult))
    }
}

// Presenter は Json 出力をするためただのオブジェクト
data class FightResultPresenter(val attacker: String, val target: String, val resultTexts: List<String>) {
    companion object {
        fun ofFightResult(r: FightResult): FightResultPresenter {
            val texts = arrayListOf<String>()
            return FightResultPresenter(r.attacker.statusText(Locale.JAPANESE), r.target.statusText(Locale.JAPANESE), texts)
        }
    }
}

@RestController
class BattleFieldController {
    @RequestMapping("/fight/{source}/{target}")
    fun fight(@PathVariable source: String, @PathVariable target: String): FightResultPresenter = BattleSim().fight(source,target)
}
ユースケースでユニットのモデルを作成し、戦闘結果を計算し、結果をプレゼンターへ送りレスポンスに変換します(この戦闘結果は攻撃順序やスキルの発動などの全戦闘データを保持しているため、必要な情報を見やすい形で出力するためにプレゼンターを通す必要があります)。
Spring サーバを起動して localhost:8080/fight/マルス/アイク にアクセスしてみます。

戦闘モデルで定義していたデータが出力されました。戦闘結果も入っているのでPresenterで詰めてやれば出てくることでしょう。
これでゲームのモデルを Spring サーバ上で利用することができました!まぁ同じコードを共有しているのでできて当たり前ですが…
戦場を作り永続化する
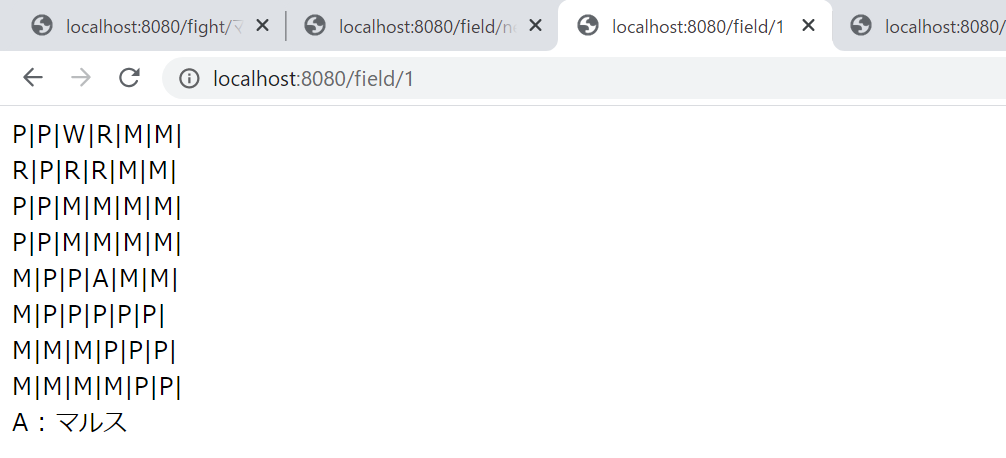
将棋盤と駒を用いて戦場を構築し、Entityとします。
Root Entity は Board とし、自然な盤面(Physical Board)とその上での駒の位置取り(Positioning)、駒が表す戦闘ユニットという構成になります(大雑把には、ですが)。
Android上ではゲームを起動している間は将棋盤は存在し続けるため、まだ永続化コードは書いていません。
これを Android でも Spring でも同じように永続化します。
永続化にも色々ありますが、一般的には Entity を変更したら repository.save(entity) で永続化しなおすようなManagedでない永続化が多いのではないでしょうか?ですが、Androidのゲームには明示的な永続化というのはあまり似合いません。今回はManagedな Entity を一から作成します。
Managed な永続化は難しい
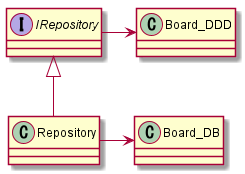
(DDD の Entity ではない)一般に DB と対応した Entity はカラムに合わせてフィールドを持つため、 DB に依存してしまいます。また DB フレームワークによってはアノテーションが必要となります。なので DDD の Entity = DB の Entity とする事は出来ません。また、DDD の Entity から DB の Entity を参照することもできません。
実のところ、DDD の Entity は「既に永続化されてるから永続化の情報を持たない」のですが DB の Entity は永続化のための情報が必要なのです。
よって、多くの場合は Service や Factory で詰め替え処理を行うことになるのではないでしょうか?
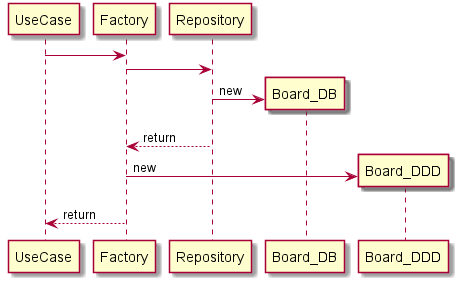
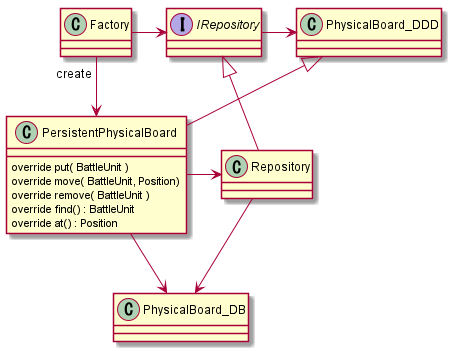
今回は Managed にするために次のような構成にします。
他の Entity を持つ PhysicalBoard を継承して、駒の操作を行うメソッドを上書きし、永続化されたデータへのアクセスと交換します。
Board がゲームのルールを持つ一方(例えば、ある駒はどこへ動けるか?)で、 PhysicalBoard はゲームのルールを持っておらず、「ある枡に駒を置く・動かす・取り除く・駒の位置を探す・ある枡の駒を知る」ことしかできないので、内部のデータ構造へのアクセスを永続化されたデータへのアクセスに取り換えても正しく動きます。
(DBの)Entity とかリポジトリはこんな感じになります。
Entity は JPA のEntityです。まだ試作品なので最低限のデータしか持っていません。
JpaPhysicalBoardというのが DB 上の PhysicalBoard ですね。
@Entity
class BattleUnit(
        @Id
        var id: String? = null
        , var hp: Int = 0
) {
    constructor() : this()
}

@Entity
class JpaPhysicalBoard
(
        @Id
        @GeneratedValue(strategy = GenerationType.IDENTITY)
        var id: Int?,
        @OneToMany
        var unitList: MutableList<Positioning> = mutableListOf()
) {
    constructor() : this()
}

@Entity
class Positioning(
        @Id
        var id: String? = null,
        var x: Int = 0,
        var y: Int = 0,
        @OneToOne
        var battleUnit: BattleUnit? = null
) {
    constructor() : this()
}
repository は JPA が管理するので宣言だけです。
@Repository
interface BattleFieldRepository : JpaRepository<JpaPhysicalBoard, Int>

@Repository
interface BattleUnitRepository : JpaRepository<BattleUnit, String>

@Repository
interface PositioningRepository : JpaRepository<Positioning, String>
repository に Entity 生成コードを書いてもいいのですが、JPA が管理してるものに手を入れたくないので別に BattleFieldFactory を作ります。
@Service
class BattleFieldFactory {
    @Autowired
    var battleFieldRepository: BattleFieldRepository? = null
    @Autowired
    var battleUnitRepository: BattleUnitRepository? = null
    @Autowired
    var positioningRepository: PositioningRepository? = null

    @Transactional
    fun findBoardByRepos(id: Int) = Board(6, 8, id,
            PersistPhysicalBoard(6, 8, battleFieldRepository!!.getOne(id), this))

    @Transactional
    fun createBoard(): Board<MyPiece, Ground> {
        val result = create(6, 8)
        return Board(6, 8, result.physicalBoard.id , result)

    }

    fun create(x: Int = 6, y: Int = 8): PersistPhysicalBoard {
        val newField = JpaPhysicalBoard()
        battleFieldRepository!!.save(newField)
        return PersistPhysicalBoard(x, y, newField, this)
    }
}
永続化された Entity 本体は、内部に Factory を持っており駒が操作されたら repository に save します。…本当は save 要らないはずなのですがなんか save しないと保存されません!JPAほぼ初めてなのでなんか設定間違ってそうです!
なお、一般的な ORM / DAO を用いた永続化でも同じように Entity から DAO へアクセスすることで managed な Entity として振舞わせることができます。
class PersistPhysicalBoard(horizontalLines: Int, verticalLines: Int, var physicalBoard: JpaPhysicalBoard, val repos: BattleFieldFactory)
 : PhysicalBoard<MyPiece, Ground>(horizontalLines, verticalLines) {
    override fun localPut(piece: Piece<MyPiece, Ground>, x: Int, y: Int, orientation: Int) {
        super.localPut(piece, x, y, orientation)
        val b = BattleUnit(piece.unit.containUnit.armedHero.baseHero.heroName.us, 1)
        val p = Positioning(piece.unit.containUnit.armedHero.baseHero.heroName.us, x, y, b)
        physicalBoard.unitList.add(p)
        repos.battleUnitRepository!!.save(b)
        repos.positioningRepository!!.save(p)
        repos.battleFieldRepository!!.save(physicalBoard)
    }

    override fun localMove(piece: Piece<MyPiece, Ground>, x: Int, y: Int, oldX: Int?, oldY: Int?, orientation: Int) {
        super.localMove(piece, x, y,oldX, oldY, orientation)
        physicalBoard.unitList.find { it.battleUnit?.id == piece.unit.containUnit.armedHero.baseHero.heroName.us }.also { it?.x = x;it?.y = y }
        //なくても保存されるはずなんだけどなんか勘違いしてるのかな…?
        repos.battleFieldRepository!!.save(physicalBoard)
    }

    override fun positionOf(piece: Piece<MyPiece, Ground>): Position? {
        val target = physicalBoard.unitList.find { it.battleUnit?.id == piece.unit.containUnit.armedHero.baseHero.heroName.us }
        return if (target == null) null else Position(target.x, target.y)
    }

    override fun getPiece(x: Int, y: Int): Piece<MyPiece, Ground>? {
        val target = physicalBoard.unitList.find { it.x == x && it.y == y }
        if (target == null) return null
        val hero = StandardBaseHero.get(target.id!!)!!
        return MyPiece(jp.blogspot.turanukimaru.fehs.BattleUnit(ArmedHero(hero)), Board(6, 8, 1, this), Player())
    }
}
Usecase は Factory を使って Entity を得、操作するだけ。Controller は Usecase を呼ぶだけです。
presenter はモデルに直にメソッドを追加してみましたが、他の presenter に変える場合は切り出す必要があるでしょう。
class BattleField(val battleFieldFactory: BattleFieldFactory) {
    val battleGround = arrayOf(
            arrayOf(Ground.P, Ground.P, Ground.W, Ground.R, Ground.M, Ground.M),
            arrayOf(Ground.R, Ground.P, Ground.R, Ground.R, Ground.M, Ground.M),
            arrayOf(Ground.P, Ground.P, Ground.M, Ground.M, Ground.M, Ground.M),
            arrayOf(Ground.P, Ground.P, Ground.M, Ground.M, Ground.M, Ground.M),
            arrayOf(Ground.M, Ground.P, Ground.P, Ground.P, Ground.M, Ground.M),
            arrayOf(Ground.M, Ground.P, Ground.P, Ground.P, Ground.P, Ground.P),
            arrayOf(Ground.M, Ground.M, Ground.M, Ground.P, Ground.P, Ground.P),
            arrayOf(Ground.M, Ground.M, Ground.M, Ground.M, Ground.P, Ground.P)

    )
    var user = Player()
    var enemy = Player()
    fun newField(): String {
        val board: Board<MyPiece, Ground> = battleFieldFactory.createBoard()
        board.physics.copyGroundSwitchXY(battleGround)
        val piece1 = MyPiece(BattleUnit(ArmedHeroRepository.getById("マルス")!!, 40), board, user)
        board.physics.put(piece1, 3, 3)
        return board.id.toString()
    }

    fun put(id: Int, name: String, x: Int, y: Int): String {
        val board: Board<MyPiece, Ground> = battleFieldFactory.findBoard(id)
        board.physics.copyGroundSwitchXY(battleGround)
        val piece1 = MyPiece(BattleUnit(ArmedHeroRepository.getById(name)!!, 40), board, user)
        board.physics.put(piece1, x, y)
        return board.present()
    }

    fun find(id: Int): String {
        val board: Board<MyPiece, Ground> = battleFieldFactory.findBoard(id)
        board.physics.copyGroundSwitchXY(battleGround)
        return board.present()
    }

    fun move(id: Int, name: String, x: Int, y: Int): String {
        val board: Board<MyPiece, Ground> = battleFieldFactory.findBoard(id)
        board.physics.copyGroundSwitchXY(battleGround)
        val piece1 = MyPiece(BattleUnit(ArmedHeroRepository.getById(name)!!, 40), board, user)
        board.physics.move(piece1, Position(x, y))
        return board.present()
    }

    private fun Board<MyPiece, Ground>.present(): String {
        val sb = StringBuilder()
        val nameSb = StringBuilder()
        //SDキャラの代わりに画面に表示させる文字
        val names = listOf("A", "B", "C", "D", "E", "F")
        var nextName = 0
        // android 画面は上下反転している!
        physics.verticalIndexes.reversed().forEach { y ->
            physics.horizontalIndexes.forEach { x ->
                val p = Position(x, y)
                val g = physics.groundAt(p)
                val u = physics.pieceAt(p)
                if (u != null) {
                    val initial = names[nextName++]
                    sb.append(initial).append("|")

                    nameSb.append("$initial : ${u.unit.containUnit.armedHero.localeName(Locale.JAPANESE)}").append("<br />\r\n")
                } else {
                    sb.append(g?.name ?: "").append("|")
                }
            }
            sb.append("<br />\r\n")
        }
        return sb.toString() + nameSb.toString()
    }
}


@RestController
class BattleFieldController {
    @Autowired
    var battleFieldFactory: BattleFieldFactory? = null

    @RequestMapping("/fight/{source}/{target}")
    fun fight(@PathVariable source: String, @PathVariable target: String): FightResultPresenter = FightResultPresenter.ofFightResult(BattleSim().fight(source,target))

    @RequestMapping("/field/new")
    fun newField(): String = BattleField(battleFieldFactory!!).newField()

    @RequestMapping("/field/{id}")
    fun findField(@PathVariable id: Int): String = BattleField(battleFieldFactory!!).find(id)

    @RequestMapping("/field/{id}/put/{name}/{x}/{y}")
    fun putField(@PathVariable id: Int, @PathVariable name: String, @PathVariable x: Int, @PathVariable y: Int): String = BattleField(battleFieldFactory!!).put(id, name, x, y)

    @RequestMapping("/field/{id}/move/{name}/{x}/{y}")
    fun moveField(@PathVariable id: Int, @PathVariable name: String, @PathVariable x: Int, @PathVariable y: Int): String = BattleField(battleFieldFactory!!).move(id, name, x, y)
}
アクセスしてみる
/field/new で戦場が作成され、割り振られたIDが帰ってきます。
/field/1/move/マルス/2/3 でマルスが移動します。
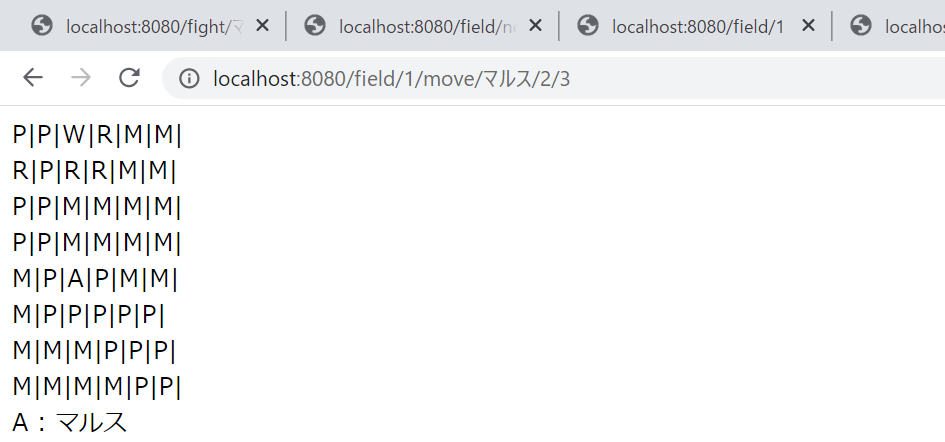
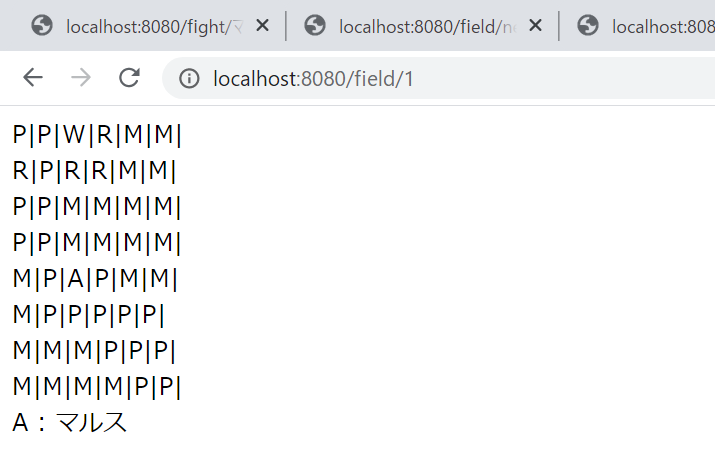
/field/1 で永続化された戦場で移動出来たことが確認できました。
Androidと同期させる
ドメインモデルは既に存在しておりAndroidとSpringサーバの両方に配置してあるため、Android上のモデルへの操作をSpringサーバに伝えればそれで同期します。実際にゲームの制約を利かせなければならない(今回はゲームの制約が入ってない)ため、Board.move(駒)などのゲームの制約を持つ root への操作を永続化する際に repository にアクセスするついでに REST を叩けば十分でしょう。
通信の省力化をするならば、内部の操作を repository にため込み、ゲーム終了時にサーバにまとめて送信すればOKです。サーバ側は特に永続化せずにその操作を再現してゲーム結果の整合性を確認することができます。
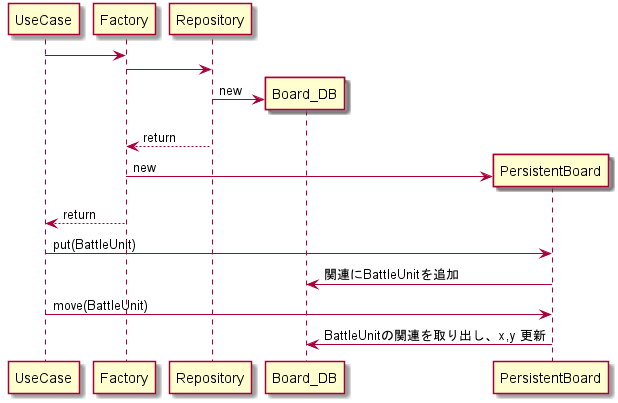
時間切れなのでシーケンスとかは後で描きます。多分。
乱数が欲しいときは、Seedから一意の乱数が発生する乱数機を用い、最初にSeedを生成して同期して置けば生成される乱数は全て同じになるはずです。
時間切れ・やり残し
Entityを見ればわかるように、ユニット名をIDに使っているため同じユニットを複数使うことができません…他にもゲーム上の値が省略されてるので永続化はもうちょっとしんどいことになります。
一々Saveしないでの永続化もまだできてませんし、慣れない Spring-boot+JPA での開発事例としてはまだまだですね…
