HTML文字列をタグごとに配列に格納
<?php
$htmlString = '<div>要素1</div><p>要素2</p><a href="#">要素3</a>';

// HTML文字列をタグごとに分割
$tags = preg_split('/<\/?[^>]+>/', $htmlString, -1, PREG_SPLIT_NO_EMPTY);

// 結果の表示
print_r($tags);
バックトレースログを表示
<?php
$trace = debug_backtrace();
foreach($trace as $line) {
    echo sprintf("%s: line %d<br>", $line["file"], $line["line"]);
}
もしくは
<?php
debug_print_backtrace();
var_exportをファイルに保存
- /tmp/1671500221 に出力
$fp = fopen('/tmp/'.time(), 'a+');
fputs($fp, var_export($_POST, true));
fclose($fp);
httpsからのアクセスかを判別する
<?php
if ($_SERVER["HTTP_X_SSL_CIPHER"]) {
    return "https";
}
return "http";
数字を含む配列のソート
natsort($array);
IEか判定
IE6〜IE11まで対応。
if (!preg_match('/(Trident|MSIE)/', $_SERVER['HTTP_USER_AGENT'])) {
    // edge, chrome, safari, firefoxなど
} else {
    // ieです
}
CSVダウンロード
- CPU,メモリをあまり消費しない方法。
<?php
header("Content-Type: application/octet-stream");
header("Content-Disposition: attachment; filename=output.csv");
$fp = fopen("php://output","w");
$data = array();

//見出し
$line = array();
$line[] = "title";
$line[] = "memo";
$line[] = "updated_at";
$data[] = $line;

foreach($dbdata as $key=>$val) {
	$line = array();
	$line[] = $val["title"];
	$line[] = $val["memo"];
	$line[] = $val["updated_at"];
	$data[] = $line;
}
foreach($data as $datum){
	fputcsv($fp, $datum, ',' ,'"');
}
fclose($fp);
die();
make testが大量のFAILの場合、selinuxが無効を確認
- /etc/selinux/config
SELINUX=disabled
reboot
ファイル一覧取得
function get_file_list($path = './files/') {
        $files = array();
        foreach (scandir($path) as $key=>$val) {
                if (substr($val,-3) != "png") continue;
                $files[] = $val;
        }
        return $files;
}
UserAgent判定
function is_office() {
	$office = array("192.168.10.2","22.22.22.22");
	if (! in_array($_SERVER['REMOTE_ADDR'], $office)) {
		return false;
	}
	return true;
}
ファイルのupload
素のphp
tmpフォルダを777で作っておく。
index.html
<form action="upload.php" method="post" enctype="multipart/form-data">
  <input type="file" name="file" />
  <input type=submit />
</form>
upload.php
<?php
if ($file = $_FILES['file']) {
    $target = __DIR__ . "/tmp/" . $file['name'];
    move_uploaded_file($file['tmp_name'], $target);
    echo "upload success.";
} else {
    echo "upload failure.";
}
dropzone.js
git clone https://github.com/enyo/dropzone.git
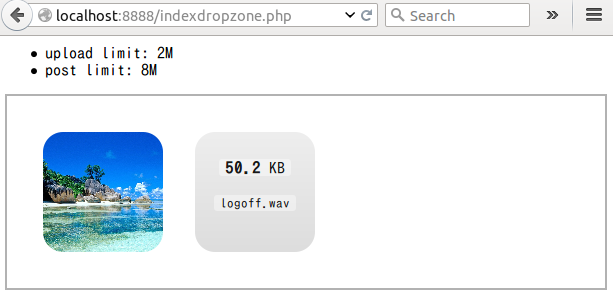
indexdropzone.php
<link rel="stylesheet" type="text/css" href="dropzone/dist/basic.css">
<link rel="stylesheet" type="text/css" href="dropzone/dist/dropzone.css">
<script src="dropzone/dist/dropzone.js"></script>

<ul>
<?php
echo sprintf("<li>upload limit: %s", ini_get("upload_max_filesize"));
echo sprintf("<li>post limit: %s", ini_get("post_max_size"));
?>
</ul>

<form action="upload.php" class="dropzone">
    <div id="dropzone"></div>
</form>
upload.php は上で準備したものでよい。
ドラグアンドドロップでuploadが完了する。
日付を曜日に変換
$yymmdd = "2015-12-23";

$weekno = date("N", strtotime($yymmdd))-1;
$weeks = array("mon", "tue", "wed", "thu", "fri", "sat", "sun");
echo $weeks[$weekno];
一週間後の日付取得
$dtime = strtotime("+1 week");
echo date("Y-m-d" ,$dtime);
セッションについて
sessionは以下に保存される
$ grep session.save_path /etc/php5/cli/php.ini
;session.save_path = "/var/lib/php5/sessions"
-
/var/lib/php5/sessions/
- sess_FIXED
-
PHP - 参考にならないほどシンプルな掲示板 - Qiitaの一部を抜粋すると
FIXEDというIDを指定
session_id('FIXED');
こうすると /var/lib/php5/sessions/sess_FIXEDにデータが保存される。
以下のような形式で保存される。
/var/lib/php5/sessions/sess_FIXED
log|a:5:{i:0;s:3:"お";i:1;s:3:"え";i:2;s:3:"う";i:3;s:3:"い";i:4;s:6:"ああ";}#
session_start();
if (($msg = (string)filter_input(INPUT_POST, 'msg')) !== '') {
  $_SESSION['log'][] = $msg;
  $_SESSION['log'] = array_slice($_SESSION['log'], -100);
-
その他メモ
- 別サイトであるならCookieが使えない。
- サブドメイン同士なら、有効範囲を同一ドメインまで許せばよい...
- 独自のドメインなら可能性がありますが、レンタルサーバなどでは有り得ない
- セッション情報をクッキーに持たせるなりNFSやデータベースに持たせる