参考
をもとに手を動かしてみた。
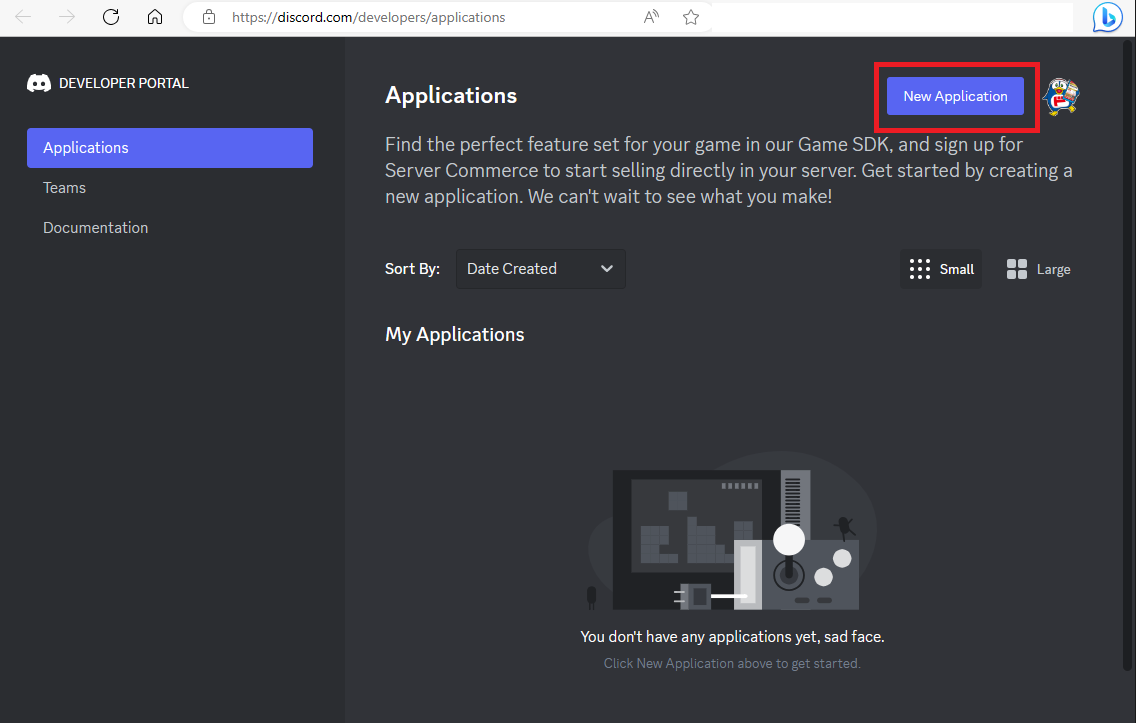
Discordでアプリケーションの作成

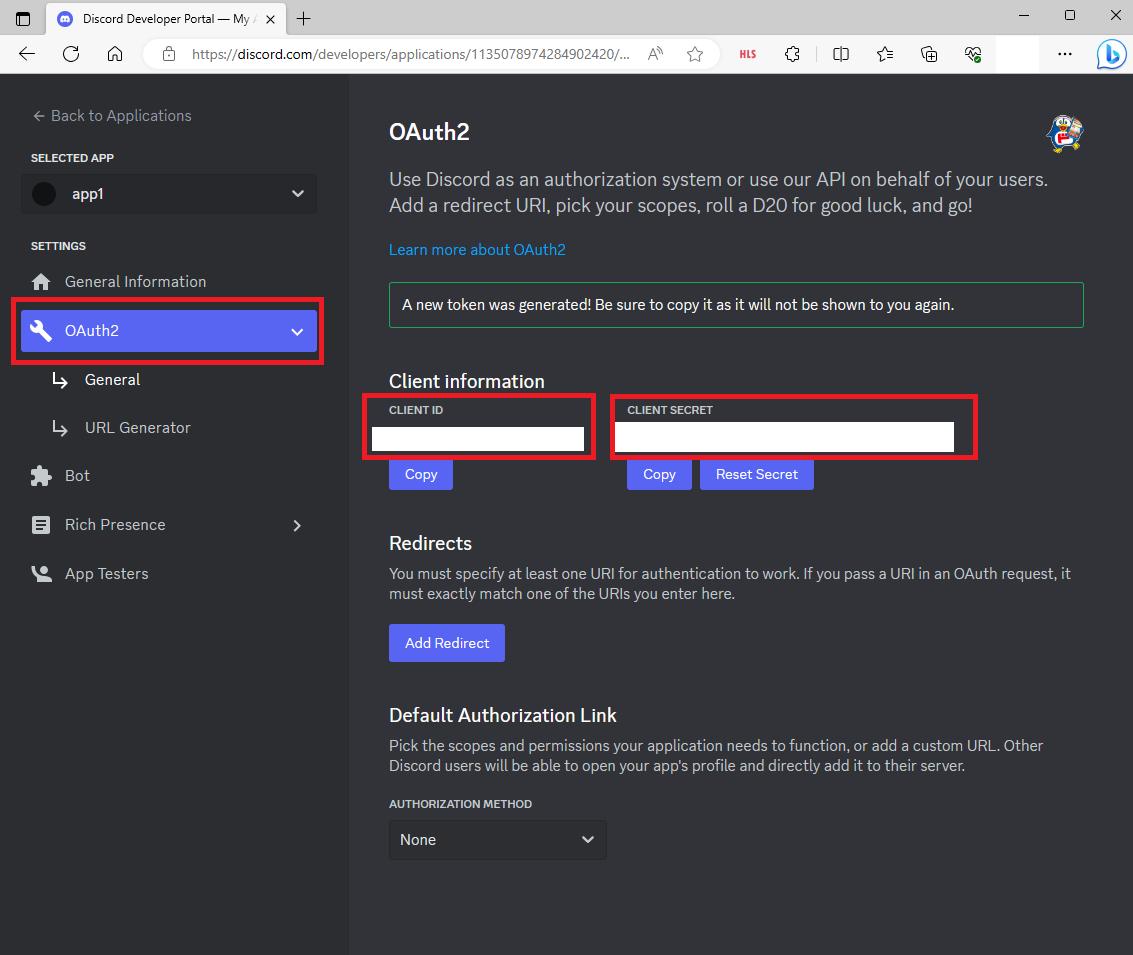
Client ID, Client Secretをメモ
- 特にClient Secretは一度しか表示されないため注意
認証が終わったら飛ぶ先URL指定
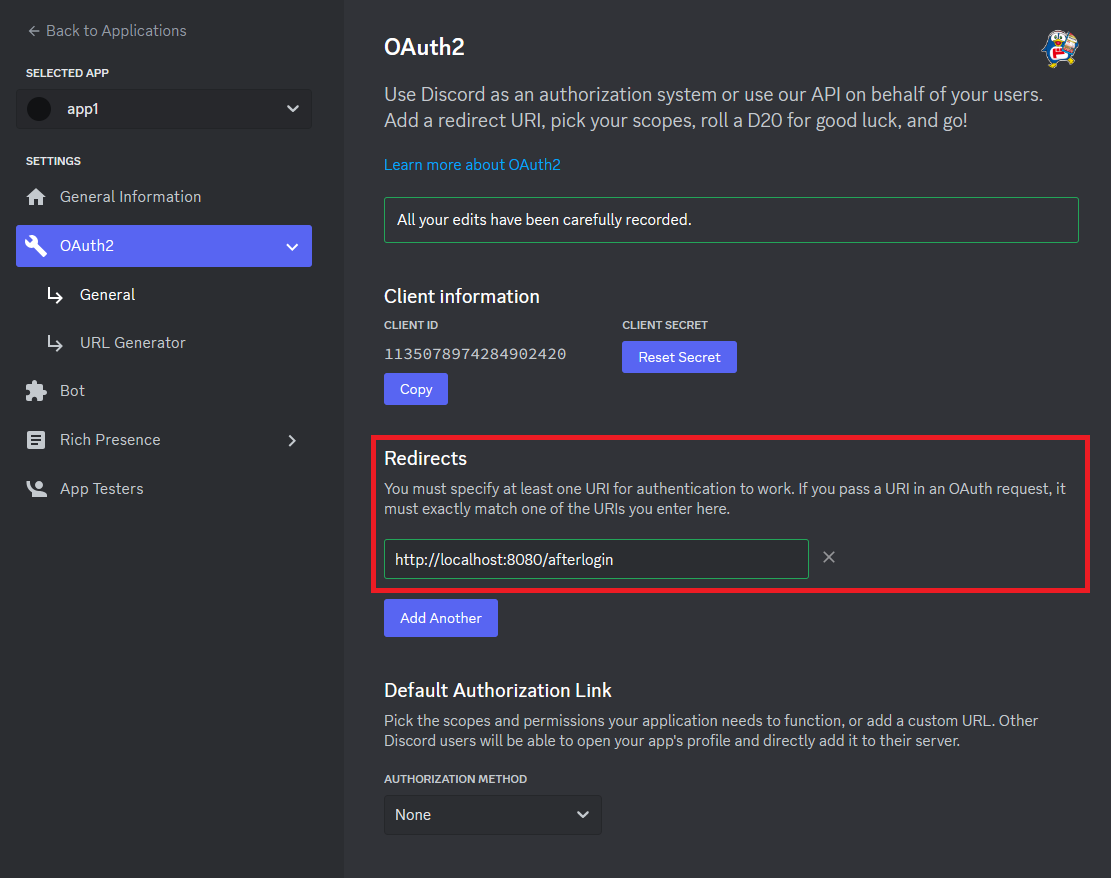
今回は http://localhost:8080/afterlogin
を指定しました。
URL Generator
- identify にチェック
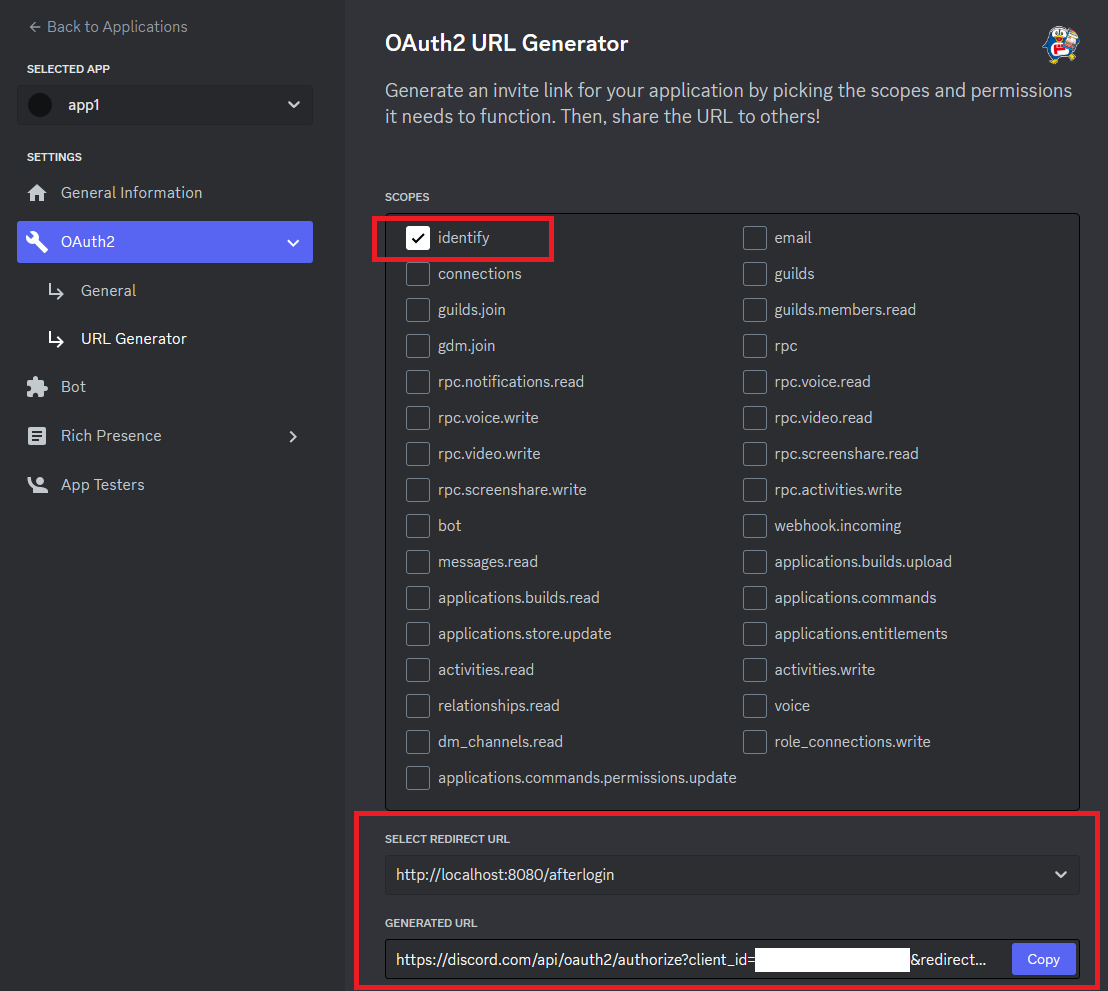
URLは
https://discord.com/api/oauth2/authorize?client_id=クライアントID&redirect_uri=リダイレクト先&response_type=code&scope=identify
となっている。
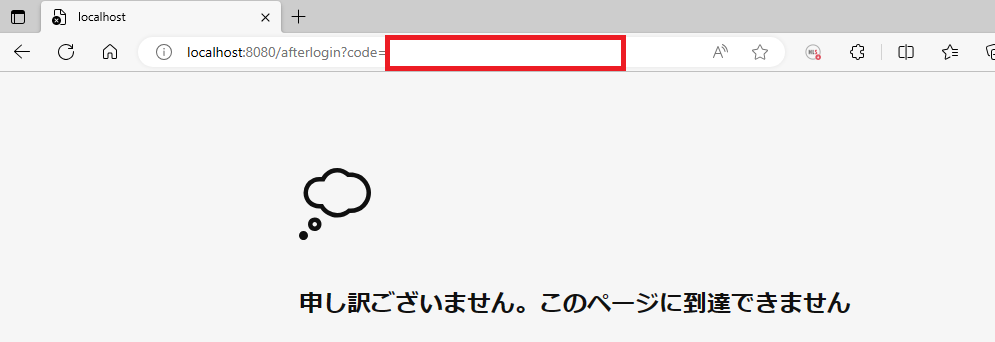
codeの取得
- 先ほどの
https://discord.com/api/oauth2/authorize?client_id(略)のURLにアクセスし、code値を取得
tokenの取得のため、curl でアクセス
windowsのコマンドプロンプトにて以下
set clientid=0000000000000000000
set clientsecret=xxxxxxxxxxxxxxxxxxxxxxxxxxxxxxxx
set redirect_uri=http://localhost:8080/afterlogin
set code=xxxxxxxxxxxxxxxxxxxxxxxxxxxxxx

curl -X POST -H "Content-Type:application/x-www-form-urlencoded" -d "client_id=%clientid%&client_secret=%clientsecret%&grant_type=authorization_code&code=%code%&redirect_uri=%redirect_uri%" https://discordapp.com/api/oauth2/token
失敗例

成功例

- 有効期限 "expires_in": 604800 の値は7日間。(604800 / 24 / 60 / 60 = 7)
token値でDiscordのユーザー情報の取得
set access_token=xxxxxxxxxxxxxxxxxxxxxxxxxxxxxx
curl -H "Authorization: Bearer %access_token%" https://discordapp.com/api/users/@me
- 以下のような情報が取得できる。
{"id":"000000000000000000"
,"username":"xxxxxxxx"
,"avatar":"xxxxxxxxxxxxxxxxxxxxxxxxxxxxxxxx"
,"discriminator":"0000"
,"public_flags":0
,"flags":0
,"banner":null
,"accent_color":null
,"global_name":"xxxxxxxx"
,"avatar_decoration":null
,"banner_color":null
,"mfa_enabled":false
,"locale":"ja"
,"premium_type":0}
認証の延長
set clientid=0000000000000000000
set clientsecret=xxxxxxxxxxxxxxxxxxxxxxxxxxxxxxxx
set refresh_token=xxxxxxxxxxxxxxxxxxxxxxxxxxxxxx

curl -X POST -H "Content-Type:application/x-www-form-urlencoded" -d "client_id=%clientid%&client_secret=%clientsecret%&grant_type=refresh_token&refresh_token=%refresh_token%" https://discordapp.com/api/oauth2/token
新しいrefresh_tokenが発行される。
なお発行された後は、古いrefresh_tokenは使用できなくなるので注意。