download
環境
- dnsmasq (
brew install dnsmasq)- DHCPサーバ、TFTPサーバ
-
iPXE、ROM-o-matic.eu | Generate iPXE images | open source network boot firmware
- PXE BOOTイメージ
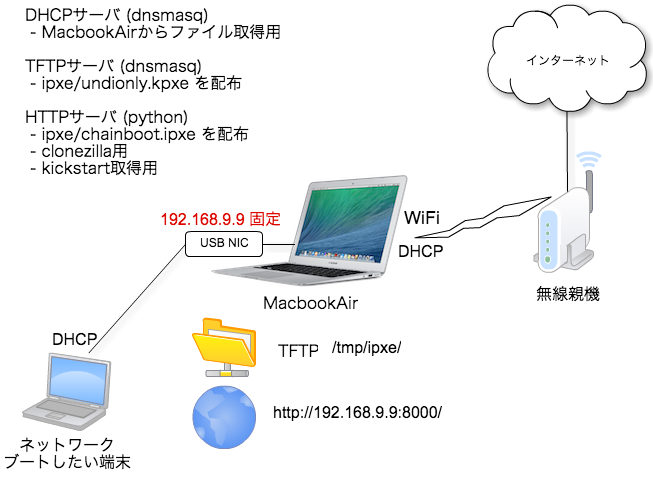
- MacbookAir + usb nic
- HTTPサーバ + CloneZilla
- HTTPサーバのためTFTPより3倍くらい転送速度が早い
構成図
準備
- brew install dnsmasq
- Macbook AirにUSB LANアダプターを接続 (en4として認識される)
- en4のIPアドレスを192.168.9.9に設定
- USB LANアダプターと、ネットワークブートさせたいPCをLANケーブルで直繋ぎする
CloneZillaをネットワークブートさせたい場合
- cd clonezilla
- ./extract_clonezilla_i486.sh
を実行し、以下ファイルが作成される。
- filesystem.squashfs
- initrd.img
- vmlinuz
起動/終了
起動の仕方
- ./startup.sh で起動、ctrl+Cでdnsmasq停止
終了の仕方
- ./stop.sh で子プロセス終了
注意点
- CentOS7はネットワークブート成功していない。後日対応するかも
- PXEブートの途中で止まる場合、PXEブートイメージを切り替えてください。
dnsmasq.conf
  # PXEブート完了しない場合は、以下切り替えて試すこと。
- dhcp-boot=undionly.kpxe
+ dhcp-boot=ipxe.kkpxe
  #dhcp-boot=ipxe.kkkpxe
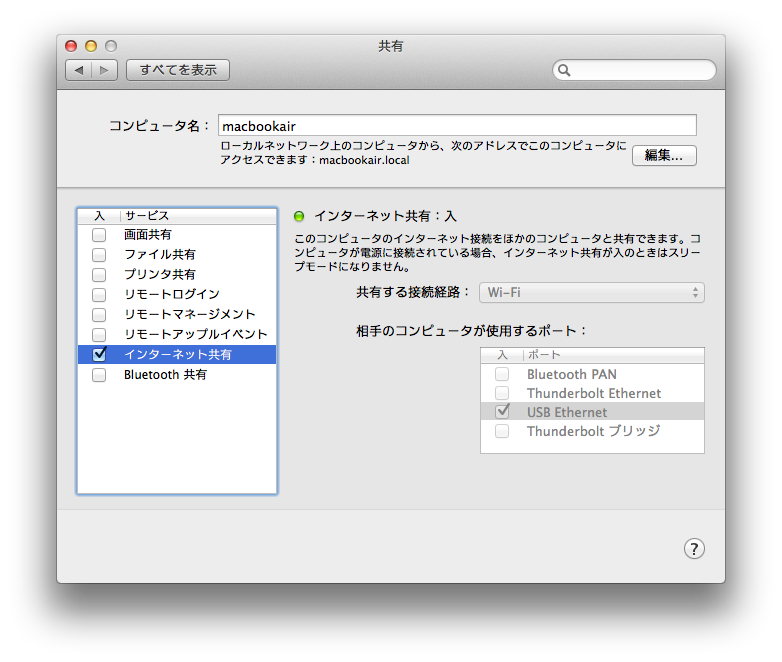
- インターネット共有をしていると以下エラーが出るので同時にはしないこと。
dnsmasq: failed to bind DHCP server socket: Address already in use
デフォルトゲートウェイの変更
route add default gw 192.168.xxx.xxx