2
2

Delete article

Deleted articles cannot be recovered.

Draft of this article would be also deleted.

Are you sure you want to delete this article?

More than 5 years have passed since last update.

MariaDB 10.0.20 をインストールしてみる。

Last updated at Posted at 2015-07-27

CentOS 7 の環境を作ったので、MariaDB 10.0.20をインストールしてみる

1. まずは、リポジトリの設定

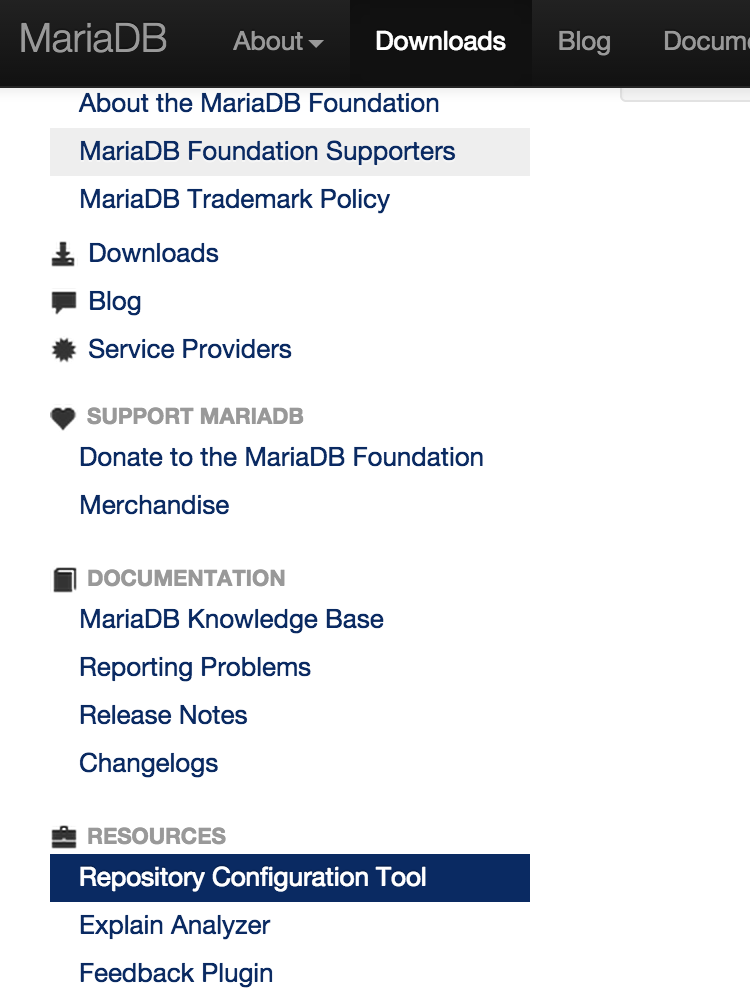
下記ページの左メニューにて、[RESOURCES] > [Repository Configuration Tool] を選択
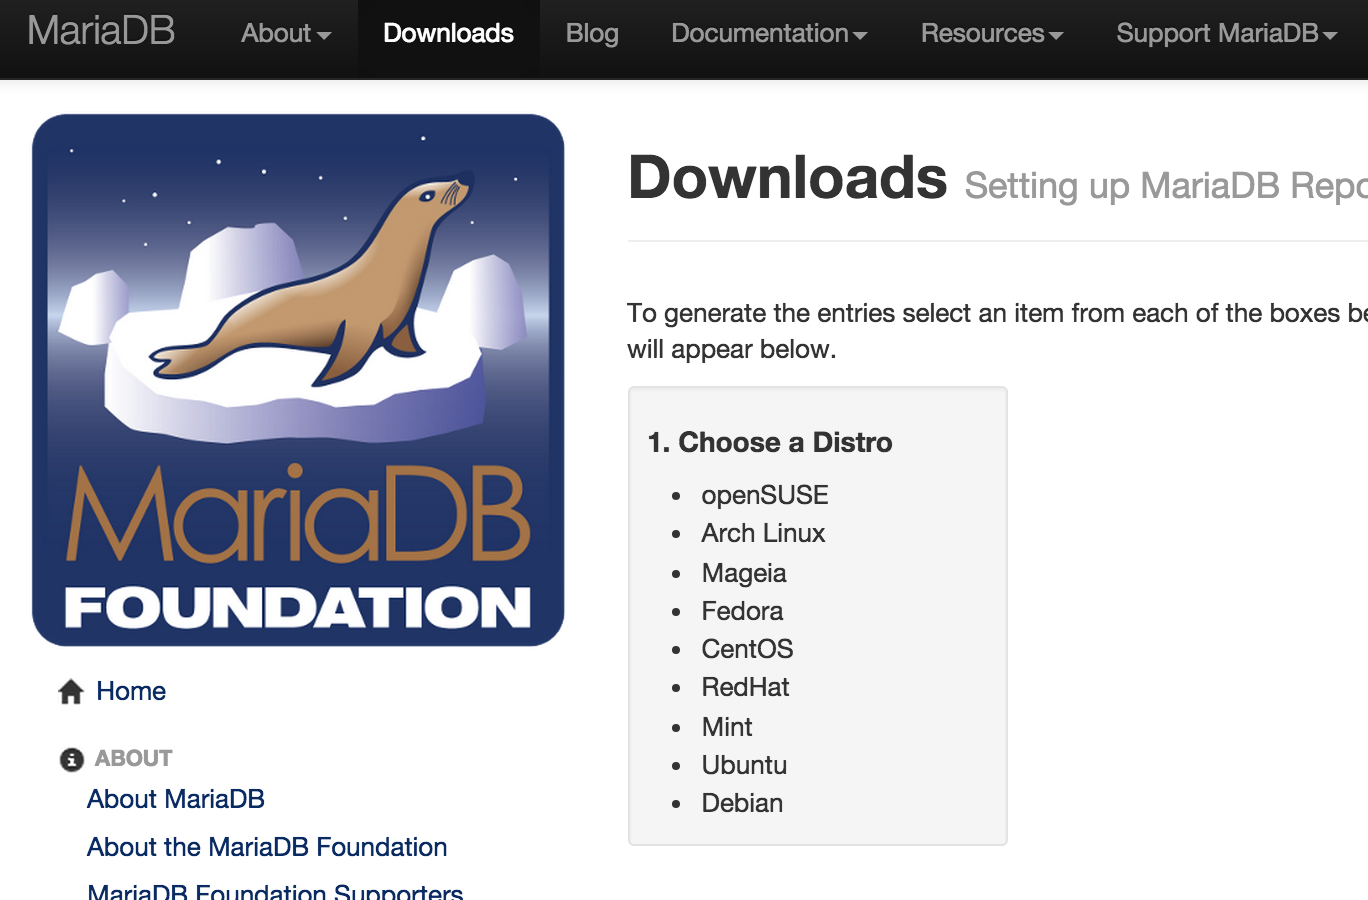
Installing MariaDB with yum

スクリーンショット 2015-07-27 23.24.52.png

2. Distributionを選択

インストールする環境はCentOSなので、「CentOS」を選択

スクリーンショット 2015-07-27 23.26.18.png

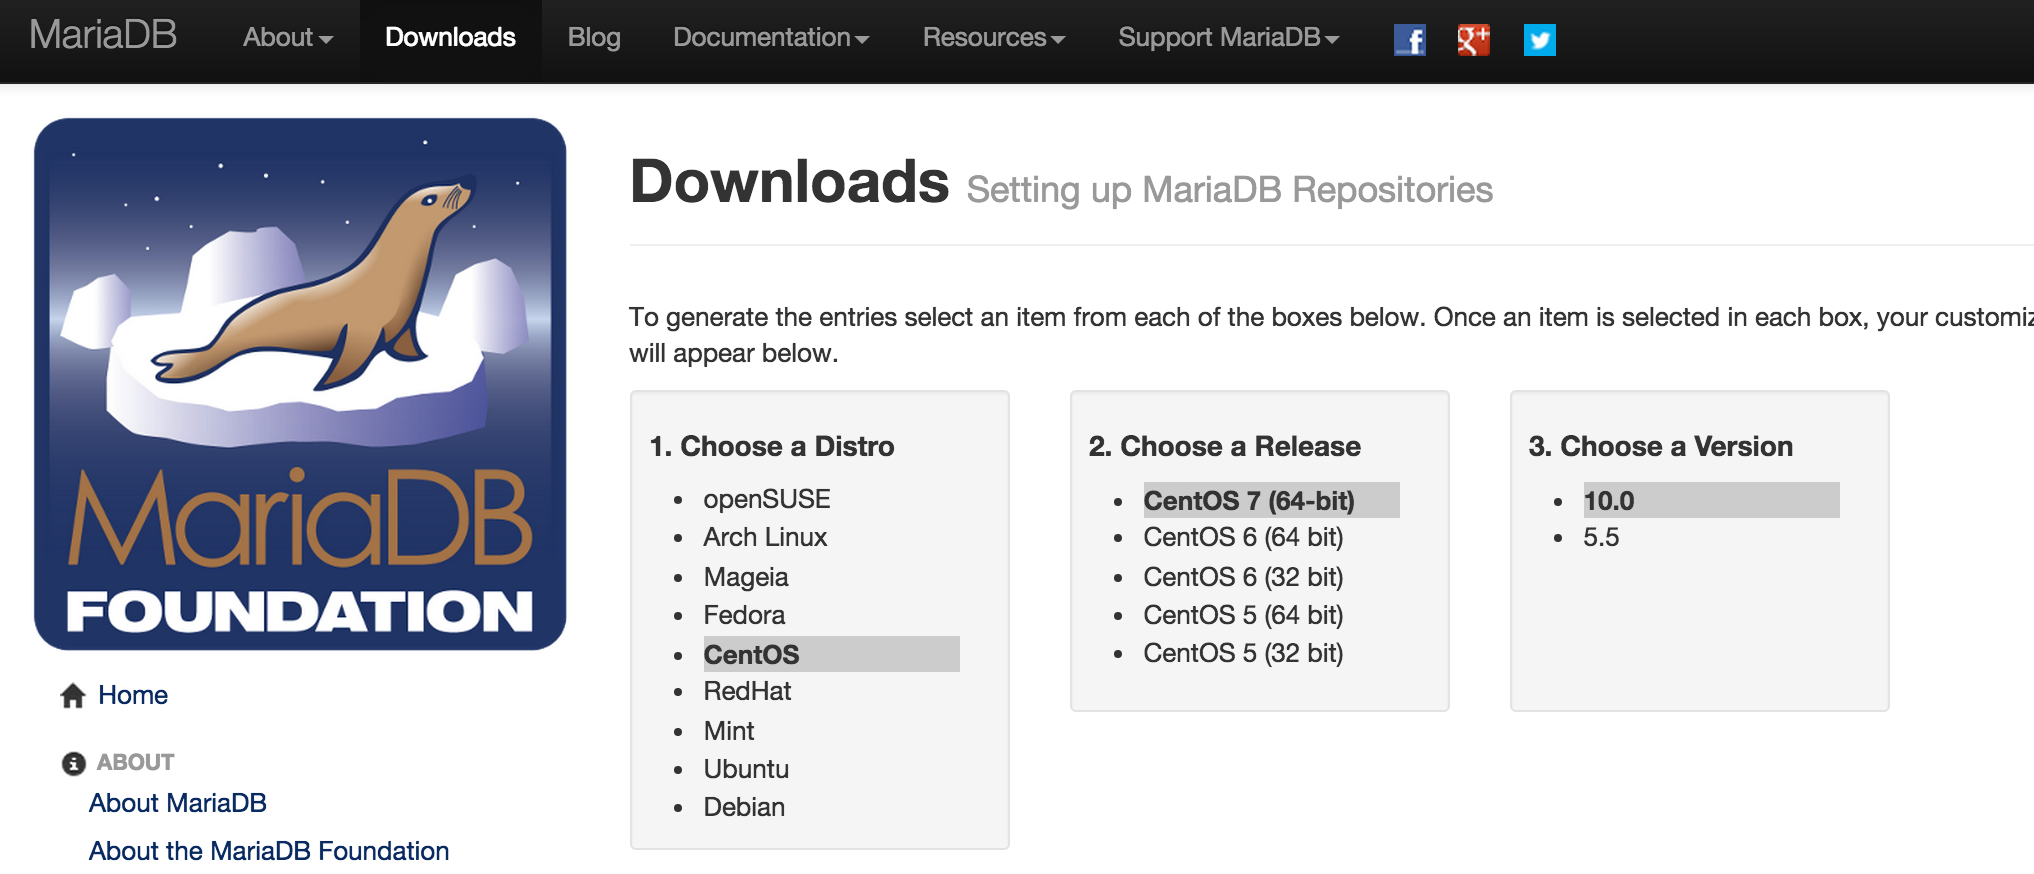
3. 2のバージョン、MariaDBのバージョンを選択

スクリーンショット 2015-07-27 23.27.31.png

4. 手順通りインストール

3の後、画面下に手順が表示されるので、そのまま実行
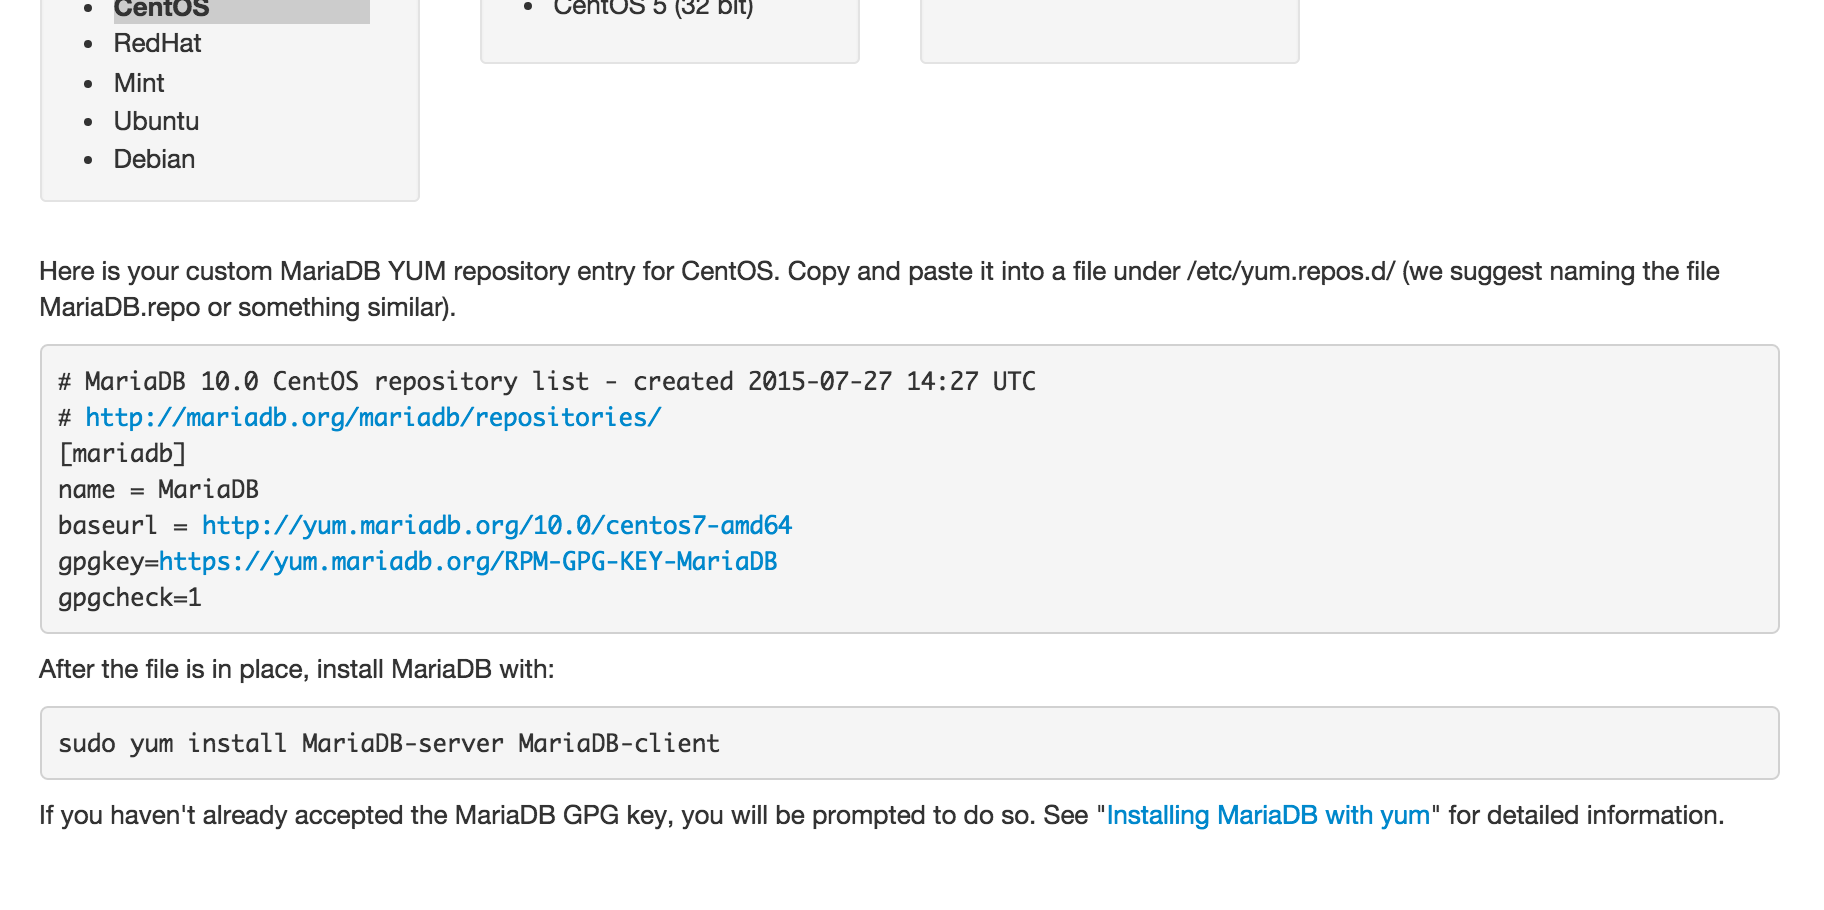
スクリーンショット 2015-07-27 23.29.58.png

リポジトリの設定を行い、

# vim /etc/yum.repos.d/MariaDB.repo
/etc/yum.repos.d/MariaDB.repo
  [mariadb]
  name = MariaDB
  baseurl = http://yum.mariadb.org/10.0/centos7-amd64
  gpgkey=https://yum.mariadb.org/RPM-GPG-KEY-MariaDB
  gpgcheck=1

そのままyumでインストール

# yum install MariaDB-server MariaDB-client

楽、、楽すぎる!
楽ですわよ!!
奥様!!!

2
2
0

Register as a new user and use Qiita more conveniently

  1. You get articles that match your needs
  2. You can efficiently read back useful information
  3. You can use dark theme
What you can do with signing up
2
2

Delete article

Deleted articles cannot be recovered.

Draft of this article would be also deleted.

Are you sure you want to delete this article?