この記事は Goodpatch Advent Calendar 2019 の11日目です.
UICollectionViewで自由度の高いレイアウト定義をしたくなる機会があったので、遊んでみました。
UICollectionViewLayout
UICollectionViewLayoutを使うと、UICollectionView内に表示するセル配置の自由度を高められるのでとても便利です。
すべてのセルのサイズが決まっていて、かつ格子状に並べるだけであればstoryboardでの設定やUICollectionViewDelegateFlowLayoutで事足りる場合が多い一方で、たとえばセルごとに高さが異なることで、必ずしも格子状に並ばない状況もありえます。そうしたときは、UICollectionViewLayoutでレイアウト定義を実装します。
実装してみる
以下のように、UICollectionViewLayoutのサブクラスを実装します
class Layout: UICollectionViewLayout {
    //レイアウト計算結果(キャッシュ)
    private var calcResult: [IndexPath : UICollectionViewLayoutAttributes] = [:]
    //結果的に collectionView.contentSize.height となる値
    private var contentHeight: CGFloat = 0

    //①レイアウト計算
    override func prepare() {
        super.prepare()

        guard let collectionView = collectionView else { return }
        if !calculationCache.isEmpty { return }
        //↑キャッシュがあれば以下のレイアウト計算はしない

        let numOfSections = collectionView.numberOfSections
        for section in 0..<numOfSections {
            let numOfItems = collectionView.numberOfItems(inSection: section)
            for i in 0..<numOfItems {
                let indexPath = IndexPath(item: i, section: section)

                let cellFrame: CGRect = ... //⭐️indexPathに対応するセルのframe計算⭐️
                //キャッシュ
                let attrs = UICollectionViewLayoutAttributes(forCellWith: indexPath)
                attrs.frame = cellFrame
                calcResult[indexPath] = attrs
                //contentSize.heightの更新
                contentHeight = max(contentHeight, cellFrame.maxY)
            }
        }
    }

    //②計算済みのキャッシュからindexPathに対応するセルのレイアウト属性を返す
    override func layoutAttributesForItem(at indexPath: IndexPath)
        -> UICollectionViewLayoutAttributes? {
            return calcResult[indexPath]
    }

    //③計算済みのキャッシュからある領域内に含まれるセルのレイアウト
    override func layoutAttributesForElements(in rect: CGRect) -> [UICollectionViewLayoutAttributes]? {
        return calcResults.filter {
            $0.value.frame.intersects(rect)
        }.map {
            $0.value
        }
    }

    //④collectionView.contentSizeを返す
    override var collectionViewContentSize: CGSize {
      return CGSize(width: contentWidth, height: contentHeight)
    }

    //⑤レイアウトの再計算が必要な際はキャッシュを削除する
    override func invalidateLayout() {
        super.invalidateLayout()
        calcResult.removeAll()
    }
}
実装したUICollectionViewLayoutをイニシャライズ時に渡せば完了です。
let cv = collectionView(frame: frame, collectionViewLayout: Layout())
レンガを積む
レイアウトの定義においては、①レイアウト計算prepare()の実装をがんばればよいのです。
幅をランダムに指定したセルを敷き詰める例が以下。(prepare()の実装から抜粋)
//レンガ高さは40で固定
let brickHeight: CGFloat = 40
//可変のレンガ幅
let brickWidthRange: ClosedRange<CGFloat> =  60...120
func brickWidth() -> CGFloat {
    CGFloat.random(in: brickWidthRange)
}

for i in 0..<collectionView.numberOfItems(inSection: section) {
    let brickFrame: CGRect
    if contentWidth - currentPos.x > brickWidthRange.upperBound {
        //現在行に十分なあまりがあれば、そのまま隣に並べる
        let brickSize = CGSize(width: brickWidth(), height: brickHeight)
        brickFrame = .init(origin: currentPos, size: brickSize)
        currentPos.x += brickSize.width
    } else {
        //現在行に十分なあまりがなければ、あまりを埋める
        let brickSize = CGSize(width: contentWidth - currentPos.x, height: brickHeight)
        brickFrame = .init(origin: currentPos, size: brickSize)
        //改行する
        currentPos.x = 0
        currentPos.y += brickSize.height
    }
    let attrs = UICollectionViewLayoutAttributes(forCellWith: IndexPath(item: i, section: section))
    let insetFrame = brickFrame.inset(by: .init(top: 1, left: 1, bottom: 1, right: 1))
    attrs.frame = insetFrame
    calcResults.append(attrs)
}

実用的にはコンテンツに応じてセル高さを決めるので、その場合は独自に実装したdelegateを介して、prepare()で文字列や画像サイズを得、レイアウトを決定することになるでしょう。
たとえば、簡単に、単語の配列をもとにセルサイズを決定するならば次のような実装になります。
func brickWidth(forText text: String) -> CGFloat {
    let brickSidePadding: CGFloat = 8
    let string = text as NSString
    let textWidth = string.boundingRect(with: .init(width: 0, height: brickHeight), attributes: [.font : fontOfCellLabel], context: nil).width
    return ceil(textWidth + brickSidePadding * 2)
}

override func prepare() {
    guard let delegate = delegate else { return }
    ...
    for i in 0..<collectionView.numberOfItems(inSection: section) {
        ...
        let indexPath = IndexPath(item: i, section: section)
        // delegate経由でindexPathに相当したセルに表示する文字列を取得し、セル幅を計算
        let text = delegate.string(for: indexPath) as NSString
        let brickWidth = brickWidth(forText: text)
        ...
    }
}
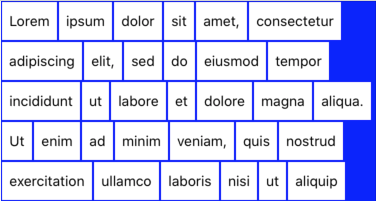
これでは右側が空いていたりと不格好なので、たとえばレンガ列を1段下げる前に、空いた幅分列内のレンガ幅に均等に配分する、など上記のアルゴリズムを工夫することで、いい感じの見た目を実現することができます。

まとめ
簡単な例でしたが、タグクラウド的な応用ができそうです。
最終的なサンプルは以下。
https://gist.github.com/p0dee/03e81df4b7dd6e7994d295686ca29d32
UICollectionViewLayoutでGoogle画像検索すると、ほかにもタイムテーブルといったさまざまな活用方法が見つけられます。