Springコミュニティのカンファレンスが来週に迫ってきたので、テンション上げる目的も兼ね、「なんとなく」を解消すべく基本に戻っている今日このごろです。
ということで、Spring boot tutorialの Accessing Twitter Data を写経した際のメモを残しておくことにしました (日本語でメモを残しておく事に意義を感じ) 。
「TwitterアプリはWebアプリのHello worldだ」とよく言われますが、Spring bootでtwitter API使うの、簡単すぎじゃない?とビックリしました。
なお、TutorialではJavaを使用していますが、敢えてgroovyを使っていこうと思います (といってもgroovy特有の機能は使わず、ほぼJavaです)。
Tutorialのscope
スクラッチからprojectを起こし、twitterの認証を行った後friends一覧を表示するところまでです。
org.springframework.social.twitter.api.Twitterというクラスが用意されていて、ここからTwitter APIを簡単に叩くことができるため、friends一覧が取れるようになるということは他の機能も簡単に使えるようになったということですね。
試した環境
- IntelliJ IDEA 14.1.3
- Groovy
- Gradle 2.3
以下、tutorialのSection名をそのままSection titleにしつつ解説していきます。
Build with Gradle
- File > New > Project と選択して、下記の感じでGradleとGroovyを選択します
- Tutorialの How to complete this guide に従って、下記を行ってください
- src配下のフォルダを作成
- TwitterのAPIキー取得
- build.gradleの作成
- build.gradleは、今回groovyを使うということでtutorialと少しだけ変えました
group 'Tutorial'
version '1.0-SNAPSHOT'

buildscript {
    repositories {
        mavenCentral()
    }
    dependencies {
        classpath("org.springframework.boot:spring-boot-gradle-plugin:1.2.5.RELEASE")
    }
}

apply plugin: 'idea'
apply plugin: 'spring-boot'
apply plugin: 'groovy'

jar {
    baseName = 'gs-accessing-twitter'
    version =  '0.1.0'
}

repositories {
    mavenCentral()
}

sourceCompatibility = 1.8
targetCompatibility = 1.8

dependencies {
    compile 'org.codehaus.groovy:groovy-all:2.3.11'
    compile("org.springframework.boot:spring-boot-starter-thymeleaf")
    compile("org.springframework.social:spring-social-twitter")

    testCompile group: 'junit', name: 'junit', version: '4.11'
}

task wrapper(type: Wrapper) {
    gradleVersion = '2.3'
}
Enable Twitter
Twitter dev consoleから取得してきたAppIDとSecretを設定します。application.propertiesファイルに設定してください、とありますが、application.ymlに設定してみます (どちらでも結果は一緒です) 。
spring.social:
  twitter:
    appId: <取ってきたapp ID>
    appSecret: <取ってきたsecret>
applicationのpropertyにそれらの設定 (spring.social.twitter) があって、かつ、Spring Social Twitterがprojectのクラスパスに存在していることにより、Spring socialのSocialConnectとTwitterConnectionFactory、そしてSpring socialのconnection frameworkの初期化にtriggerかかるのだそうです。
(余談) 開発とProductionでAppIDを切り替えたい場合
ここ が参考になります。application-xxx.ymlというファイルを作成して、Application実行時のパラメータに --spring.profiles.active=xxx を追加すると (*)、application.ymlではなくて、application-xxx.ymlが読み込まれます。
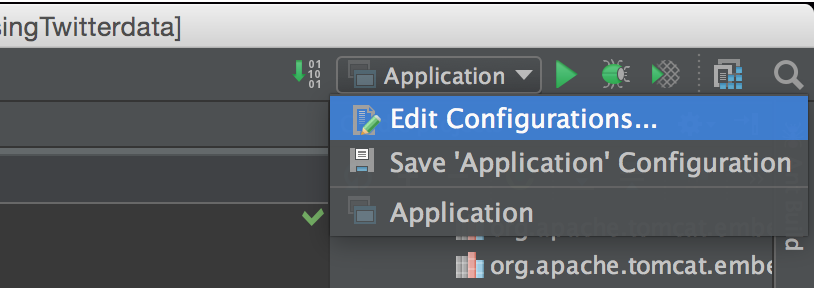
(*) IntelliJであれば、ここから設定できます
Create connection status views
- Spring social frameworkの
ConnectControllerは、/connect/{provider} (今回の場合、providerは "twitter") へ来たGETリクエストに対し、connectionのstatusに応じて表示する画面を切り替える機能があります - Connect状態の時
- /connect/{provider}Connected
- (今回の場合は/connect/twitterConnected)
- Not connect状態の時
- /connect/{provider}Connect
- (今回の場合は/connect/twitterConnect)
- もっと具体的に言うと、src/main/resources/template/connect/twitterConnected.html(twitterConnect.html)が、
ConnectControllerによって使われるようになる、ということです - これらのhtmlはtutorialにありますので、そのままコピペします
じゃあどうやってConnection作成をkickするのか
- /connect/twitter へPOSTリクエストを送ることで、twitterの認証へredirectされます
- 認証が完了すると/connect/twitter (へのGETリクエスト) へredirectされますので、認証が取れていればtwitterConnected.htmlが表示されます
Fetch Twitter data
- tutorialの中ではHelloControllerというクラスを作成してfriend一覧を表示するパスを作っています
- 下記メソッドにて、"/"へのアクセスに対してconnectionの有無で表示する画面を切り替えるということをしています
@RequestMapping(method=RequestMethod.GET)
public String helloTwitter(Model model) {
    if (connectionRepository.findPrimaryConnection(Twitter.class) == null) {
        return "redirect:/connect/twitter";
    }

    model.addAttribute(twitter.userOperations().getUserProfile());
    CursoredList<TwitterProfile> friends = twitter.friendOperations().getFriends();
    model.addAttribute("friends", friends);
    return "hello";
}
- InjectionしたconnectionRepositoryへ問い合わせることでconnectionの有無が確認できるようです
- twitterのconnectionが知りたいのであれば、Twitterのclassオブジェクトを渡すのですね
- connectionが存在していれば、Twitterクラスオブジェクトをinjectionして、そこからAPI callができるようです
- 普通にgetFriends()と呼んでしまっていますね
Make the application executable
-
ここはtwitterとは関係なので、そのまま従ってください
-
IntelliJから実行
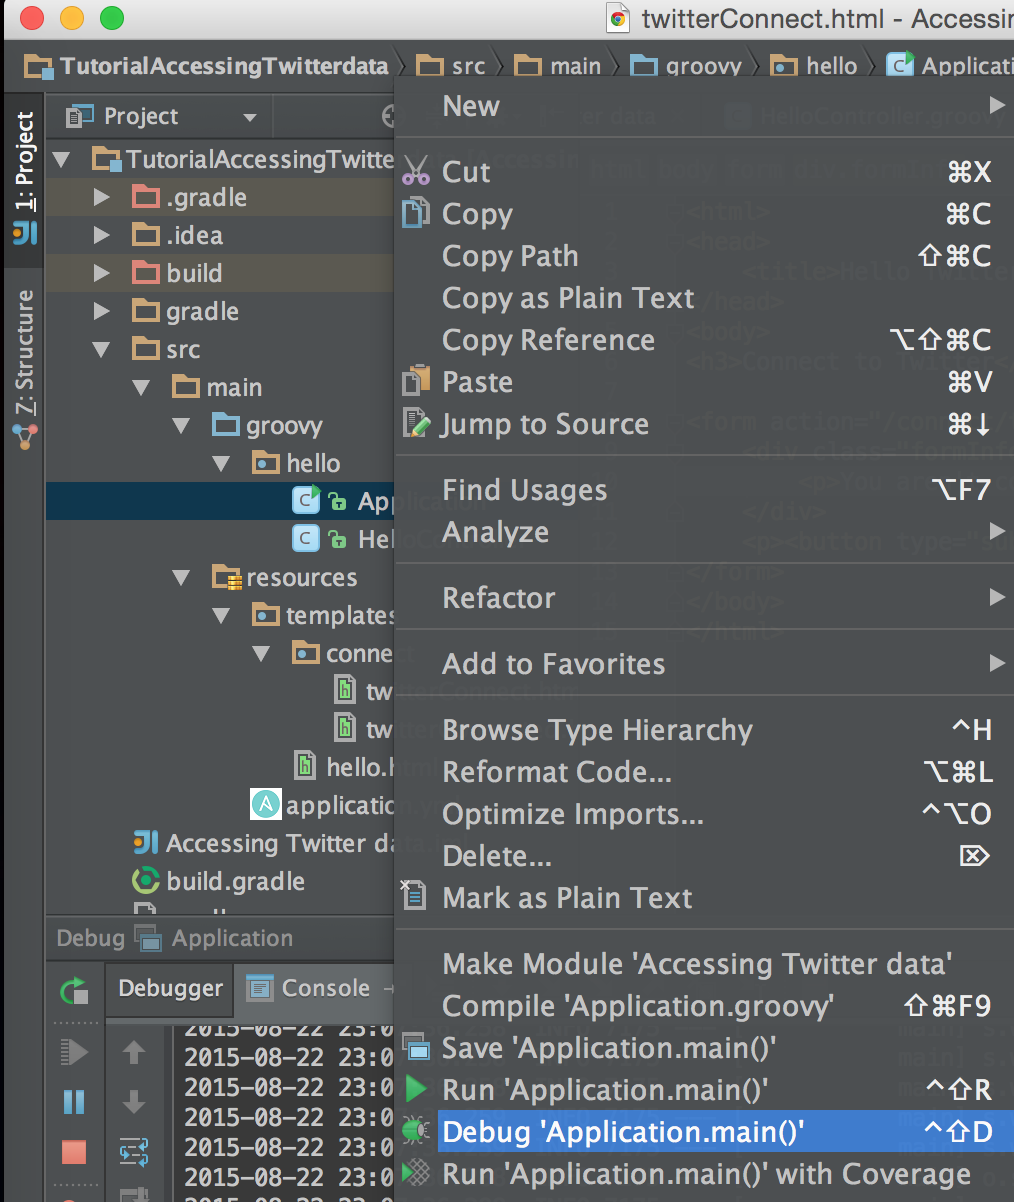
- Applicationクラスを右クリックして、Debug 'Application main()' を実行
- Terminalから実行
$ cd <project root>
$ ./gradlew bootRun
まとめ
- Spring boot tutorialのAccessing Twitter Dataを写経していきました
- applicationのpropertyの設定や実行方法など、tutorialだけだとイマイチわかりにくいところも触れてみましたので、良かったら参考にしてみてください。


