自己紹介
FusicでPHPerやってる早﨑です。
今年はPHP以外にもというととで、昔買ってインテリア化していたRaspberryPiで何かしよう!と意気込んでちょこちょこやってきたことを書きたいと思います。
具体的にやったこと
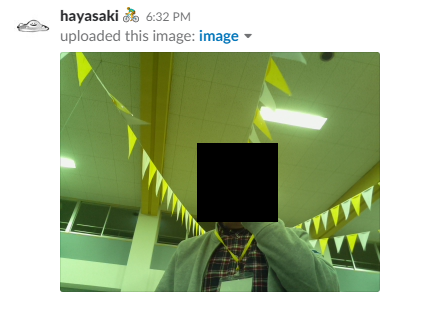
RaspberryPi(以下RasPi)+カメラモジュール+カメラ固定台で、SSHでRasPiに入ってpython書いたプログラムを実行してキーボードでカメラ固定台を動かして撮影が出来るようにした。
用意するもの
- RaspberryPi2 ModelB
- PLANEX 無線LAN子機 (USBアダプター型) 11n/g/b 150Mbps MacOS X10.10対応 GW-USNANO2A (FFP)
- Raspberry Pi Video Module Raspberry Pi Camera Board 775-7731(カメラモジュール)
- Pimoroni Pan-Tilt HAT - パン-ティルト キット for Raspberry Pi Camera(カメラ固定台)
全てAmazonで購入可能
実装までの流れ
※RasPiのセットアップとSSH接続は出来てる前提とします。
1.カメラとカメラ固定台をRasPiに取り付ける。
2.PiCameraをインストールしてPythonで撮影してみる。
3.pimoroniをインストールしてPythonでカメラ固定台を動かしてみる。
4.キーボード入力が出来るようにしてみる
5.作成コード
inputkey.py
import fcntl
import termios
import sys
import os

def getkey():
  fno = sys.stdin.fileno()

  #stdinの端末属性を取得
  attr_old = termios.tcgetattr(fno)

  # stdinのエコー無効、カノニカルモード無効
  attr = termios.tcgetattr(fno)
  attr[3] = attr[3] & ~termios.ECHO & ~termios.ICANON # & ~termios.ISIG
  termios.tcsetattr(fno, termios.TCSADRAIN, attr)

  # stdinをNONBLOCKに設定
  fcntl_old = fcntl.fcntl(fno, fcntl.F_GETFL)
  fcntl.fcntl(fno, fcntl.F_SETFL, fcntl_old | os.O_NONBLOCK)

  chr = 0

  try:
    # キーを取得
    c = sys.stdin.read(1)
    if len(c):
      while len(c):
        chr = (chr << 8) + ord(c)
        c = sys.stdin.read(1)
  finally:
    # stdinを元に戻す
    fcntl.fcntl(fno, fcntl.F_SETFL, fcntl_old)
    termios.tcsetattr(fno, termios.TCSANOW, attr_old)

  return chr
camera.py
from pantilthat import *
import time
import picamera
import requests
import inputkey

# カメラの設定
camera = picamera.PiCamera()
camera.hflip = True
camera.vflip = True
camera.resolution = (320, 240)

angle_pan = 0
angle_til = 0

while True:

  val_pan = 0
  val_til = 0

  # key取得
  key = inputkey.getkey()

  # keyOFFはスルー
  if key == 0:
    time.sleep(0.01)
    continue

  # key処理
  if key == 10: # enter
    break;

  elif key == 97: # a
    time.sleep(1) # カメラのブレ防止
    camera.capture('image.jpg')
    with open("image.jpg",'rb') as f:
      param = {
        'token':'xxxxxxxxxxxxxxxxxxxxxxxxxxxxxxxxxxxxx',
        'channels':'xxxxxxxx',
      }
      r = requests.post('https://slack.com/api/files.upload', params = param, files = {'file':f})

  elif key == 1792833: # 上
    if angle_til > -90:
      val_til = -0.5

  elif key == 1792834: # 下
    if angle_til < 90:
      val_til = 0.5

  elif key == 1792835: # 右
    if angle_pan > -90:
      val_pan = -0.5

  elif key == 1792836: # 左
    if angle_pan < 90:
      val_pan = 0.5
#  else:
#    print(key) # key何押したかデバッグ用

  # カメラ動作
  angle_pan += val_pan
  angle_til += val_til
  pan(angle_pan)
  tilt(angle_til)

  time.sleep(0.01)

quit()
6. 実行してみる
$ python3 camera.py
後は、キーボードから上下左右カーソルキーでカメラを動かしスつt、Aキーでパシャリ!Slackにアップロード!!!
参考記事
- PYTHON PICAMRA:http://igarashi-systems.com/sample/translation/raspberry-pi/usage/python-camera.html
- Raspberry Pi のカメラモジュールの使い方:http://www.mztn.org/rpi/rpi23.html
まとめ
- Python楽しい!電子工作楽しい!
- 監視としてはいいですが、使い方を誤れば盗撮になるので気を付けましょう。
最後に
- それでまた来年~
