Azure Static Web Apps って便利ですよね。
JAMStack や SPA のアプリケーションを Azure にホストするときに適したサービスです。
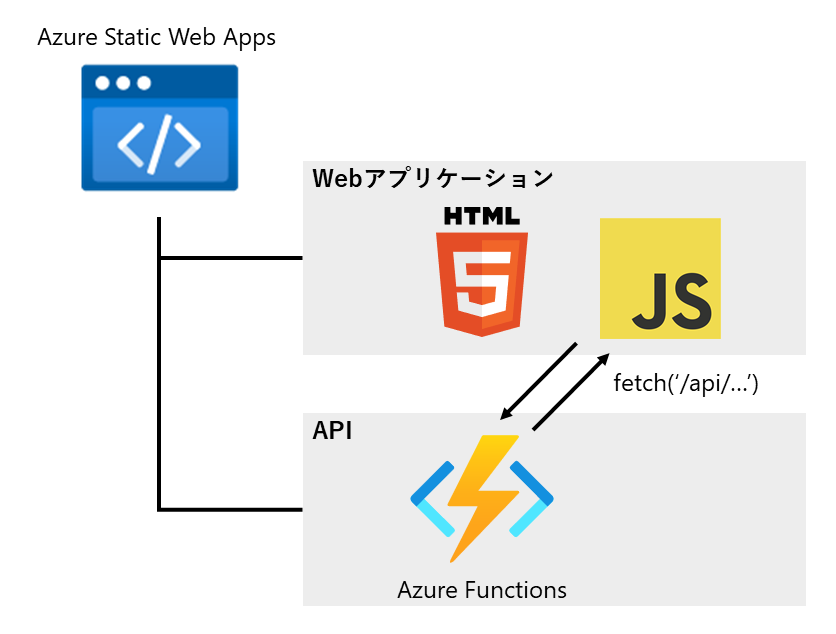
Azure Static Web Apps の特徴の一つとして、API を構成する Azure Functions を Azure Static Web Apps に内包することができるということです。
API を内包しているため、HTML/JavaScript から API を呼び出す際は localhost に対して通信をすることになります。
では、この構成をローカル環境で開発するとして、はじめにどのようにプロジェクトを作成すると良いでしょうか。
公式ドキュメントでも解説されていますが、少し分かりにくかったので自分なりに手順をまとめてみます。
前提
これから説明する手順では以下の環境を前提とします。
説明の範囲においては、プログラミング言語での違いはありません。
他のツールを使っている場合は適宜読み替えてください。
プロジェクトの作成
まずはプロジェクト用のフォルダを作成します。
Webアプリケーション用の app フォルダと、API用の api フォルダも作成します。
mkdir static-web-app-sample
cd static-web-app-sample/
mkdir app
mkdir api
Visual Studio Codeでプロジェクトを開く
code . コマンドを実行し、プロジェクトを Visual Studio Code で開きます。
Azure Functions のプロジェクトを作成する
まずは api フォルダに Azure Functions のプロジェクトを作成します。
func コマンドで作成してもいいですが、今回は Visual Studio Code を使って作成します。
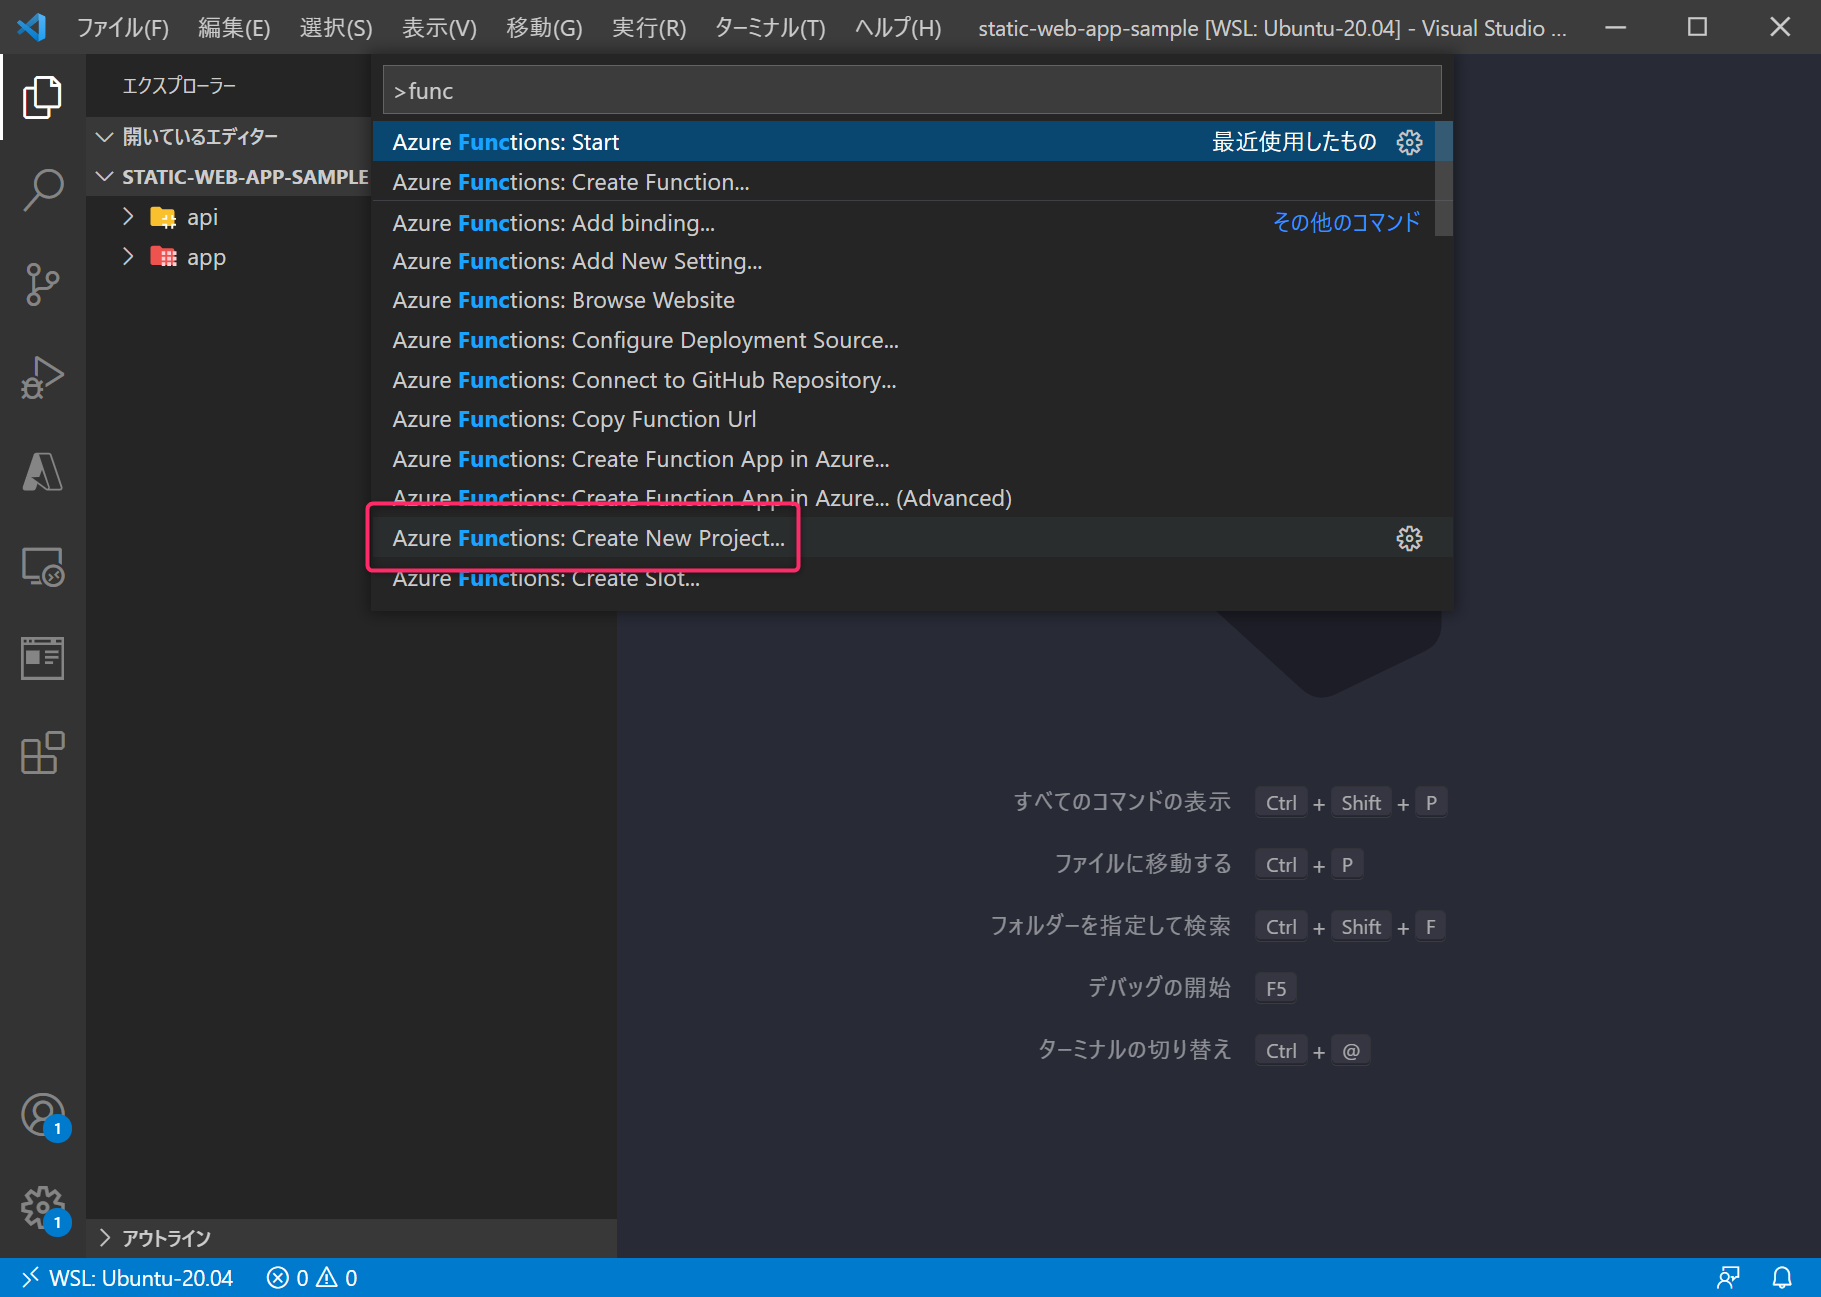
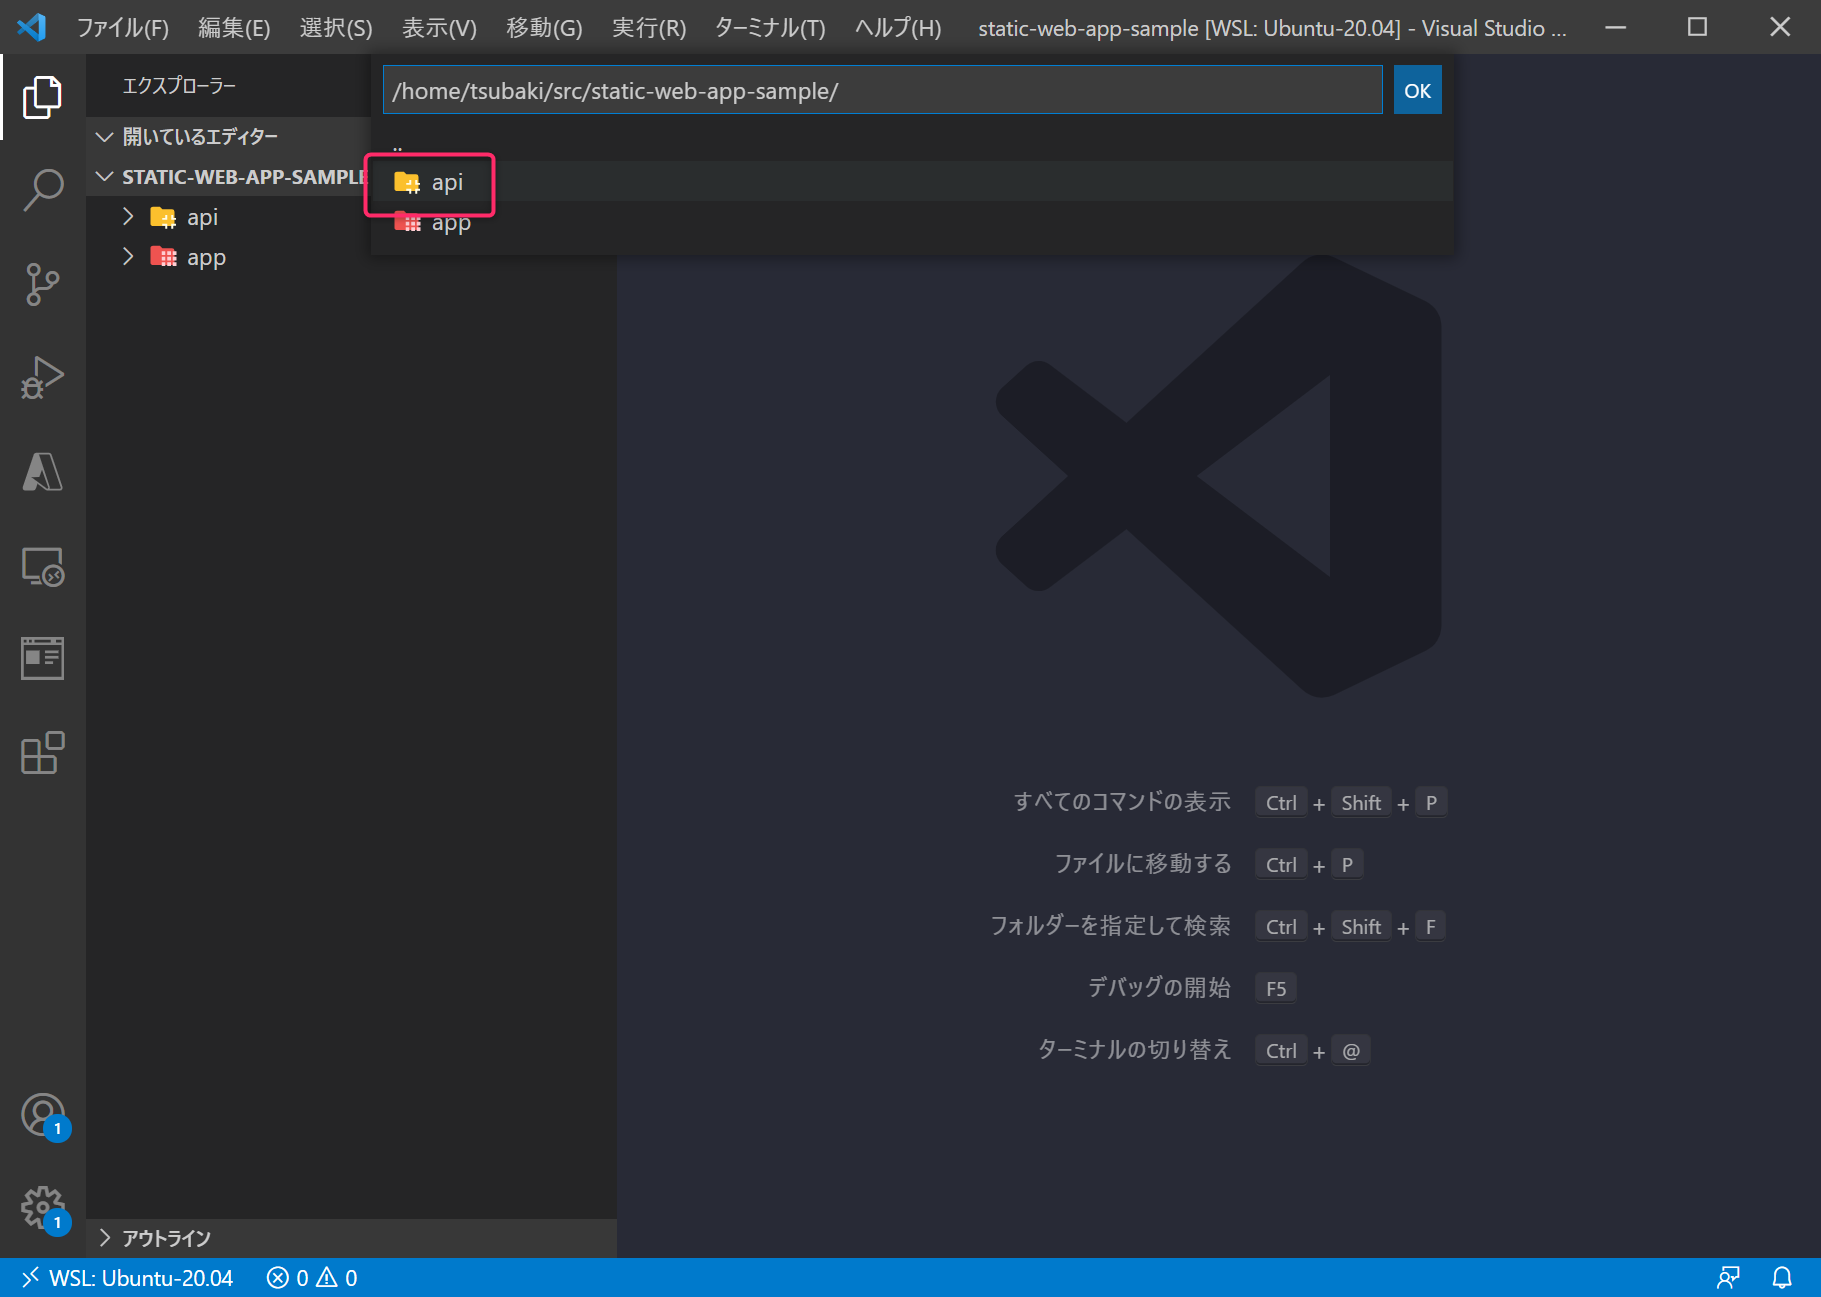
コマンドパレットを開き、Azure Functions: Create New Project... を選択します。
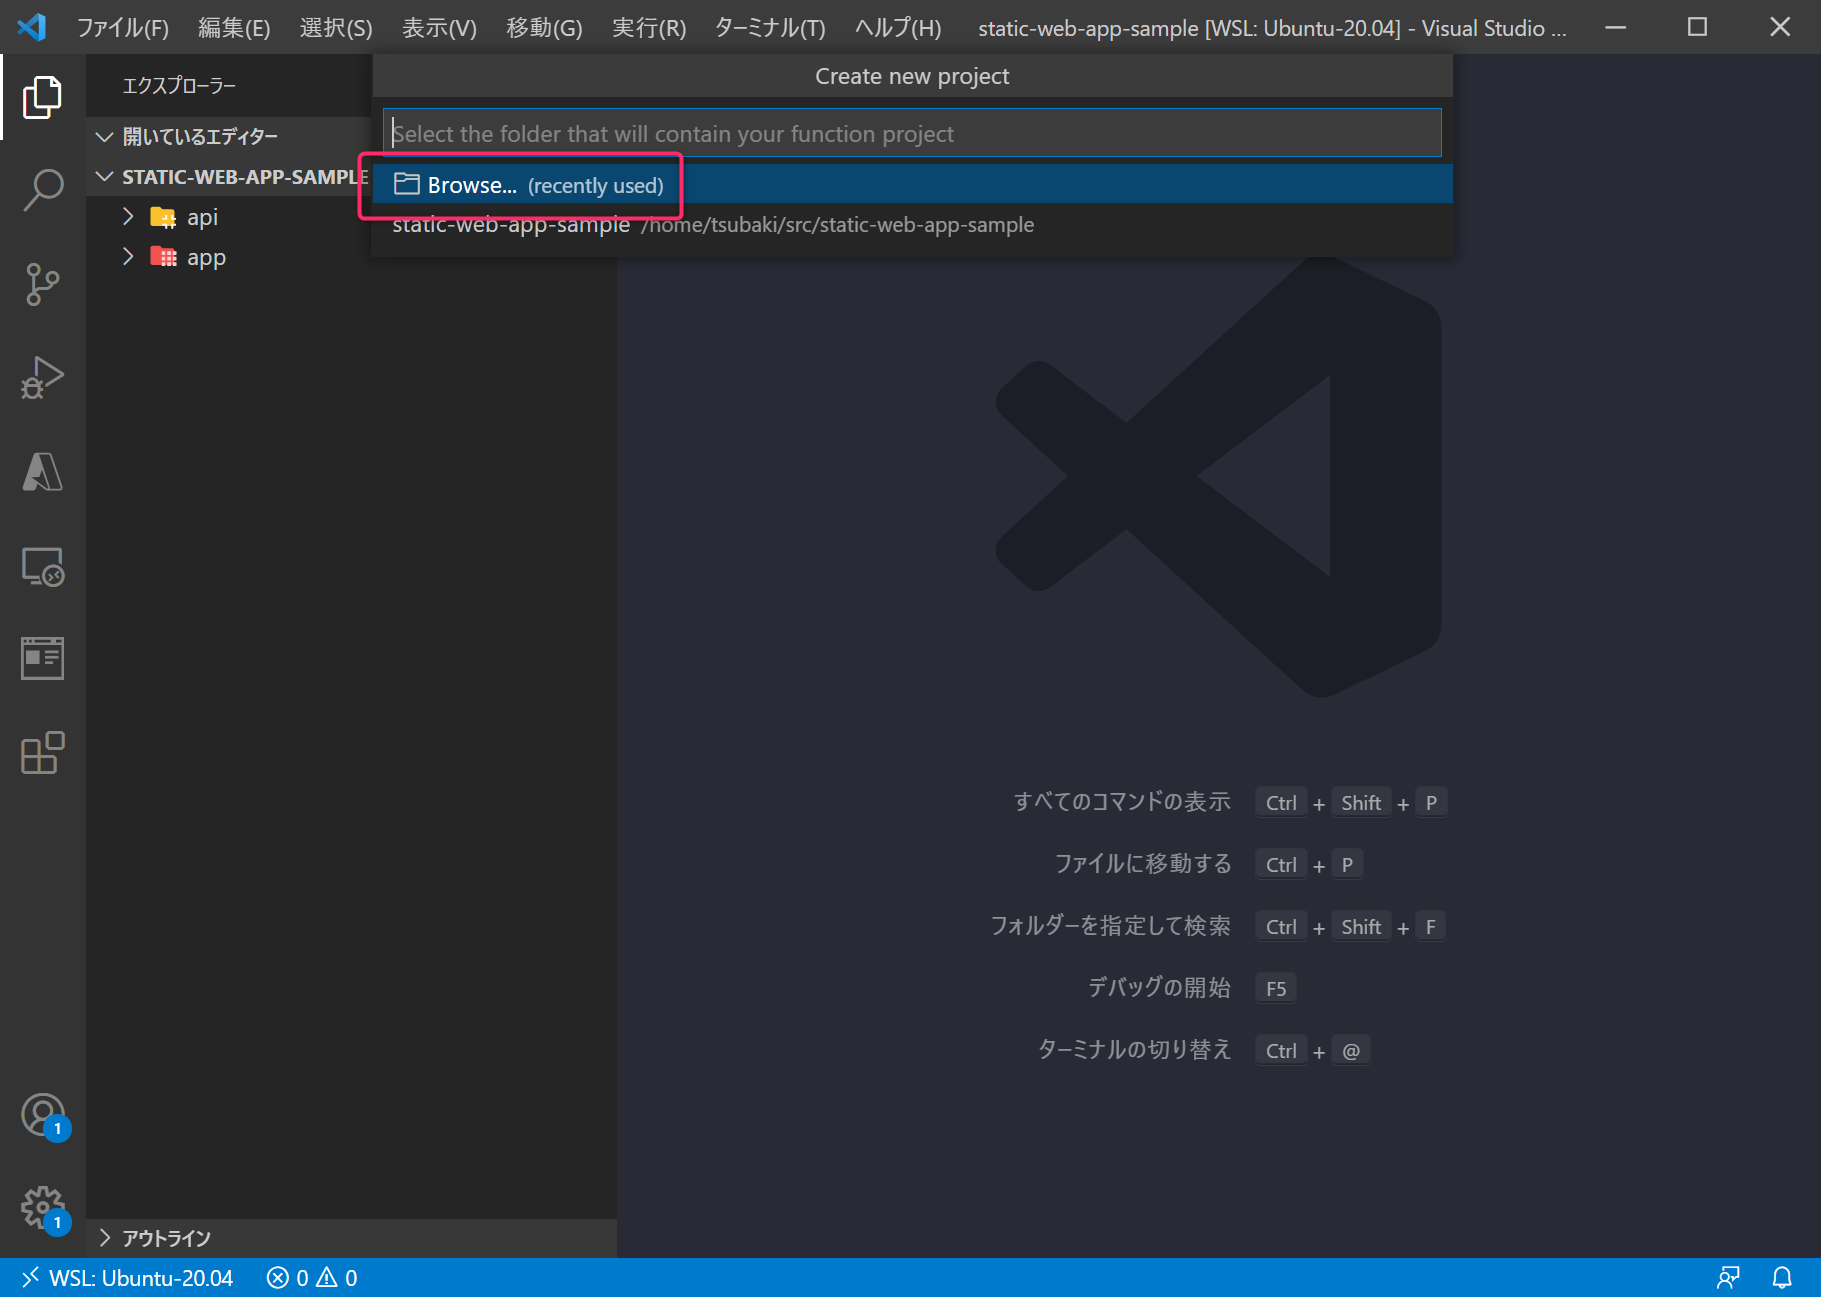
Azure Functions のプロジェクトの保存先に api フォルダを指定することを忘れないようにしましょう。
また、承認レベルは Anonymous を選択します。
module.exports = async function (context, req) {
    context.log('JavaScript HTTP trigger function processed a request.');

    const name = (req.query.name || (req.body && req.body.name));
    const responseMessage = name
        ? "Hello, " + name + ". This HTTP triggered function executed successfully."
        : "This HTTP triggered function executed successfully. Pass a name in the query string or in the request body for a personalized response.";

    context.res = {
        // status: 200, /* Defaults to 200 */
        body: responseMessage
    };
}
Azure Functions を実行してみる
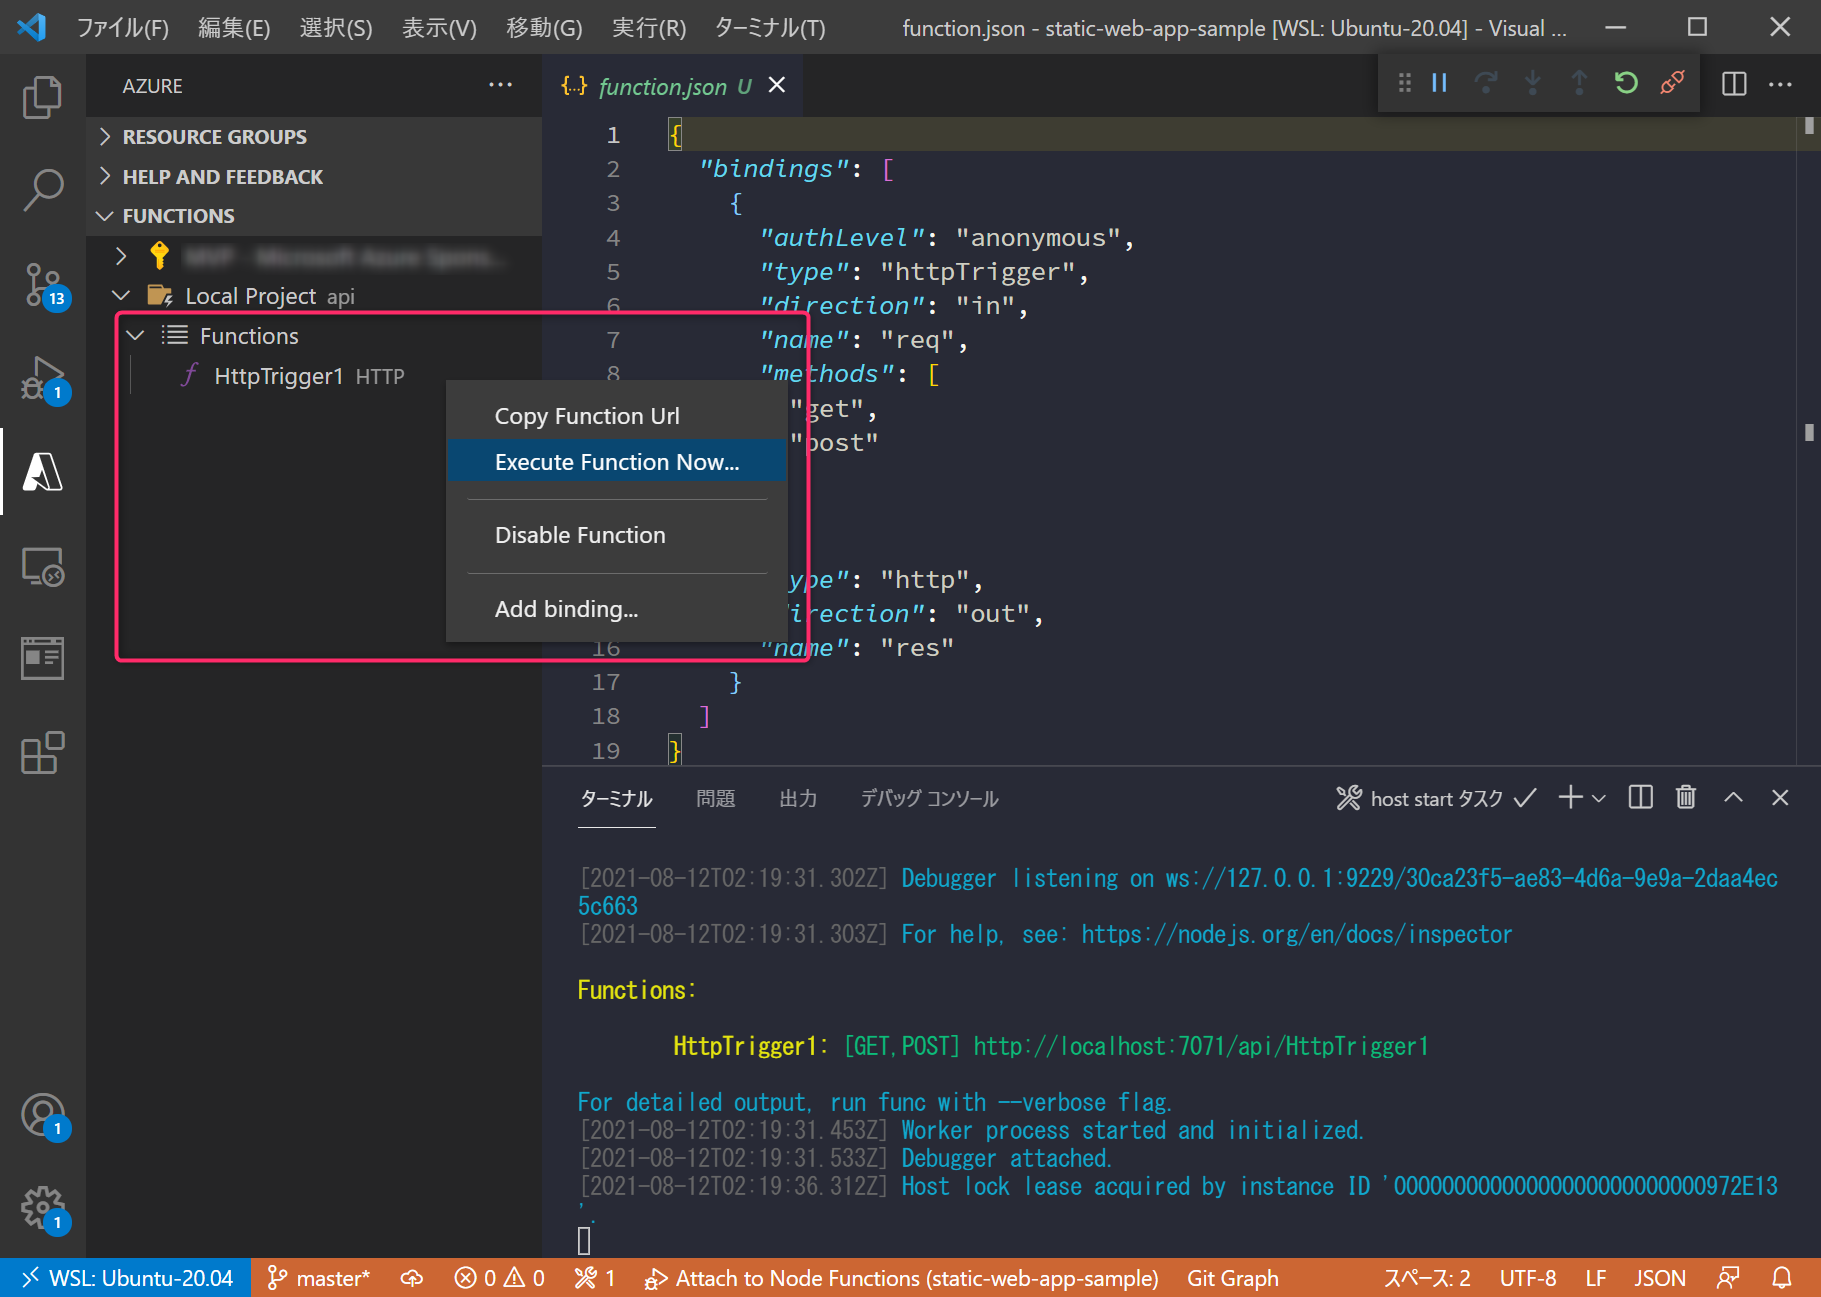
ひとまず API は作成することができたので、きちんとデバッグ実行できることを確認しておきましょう。(メニュー > 実行 > デバッグの開始)
Visual Studio Code の Azure Functions 拡張機能では、開いているプロジェクトに含まれる関数を表示してくれます。
関数を右クリックし「Execute Function Now」から、関数を実行することができます。
Web アプリケーションを作成する
次に Web アプリケーションを作成します。
今回はあくまでサンプルなので、JSフレームワークは特に使いません。
app フォルダに以下の内容の index.html を作成します。
<!DOCTYPE html>
<html lang="ja">

<head>
  <meta charset="UTF-8">
  <meta http-equiv="X-UA-Compatible" content="IE=edge">
  <meta name="viewport" content="width=device-width, initial-scale=1.0">
  <title>Azure Static Web Apps Sample</title>
</head>

<body>
  <div id="message"></div>
  <script>
    fetch('/api/HttpTrigger1?name=tsubakimoto')
      .then(response => response.text())
      .then(text => document.getElementById('message').textContent = text);
  </script>
</body>

</html>
fetch('/api/HttpTrigger1?name=...') をみていただくとわかるように、同じドメインにある API をコールしています。
Web アプリケーションを動かしてみる
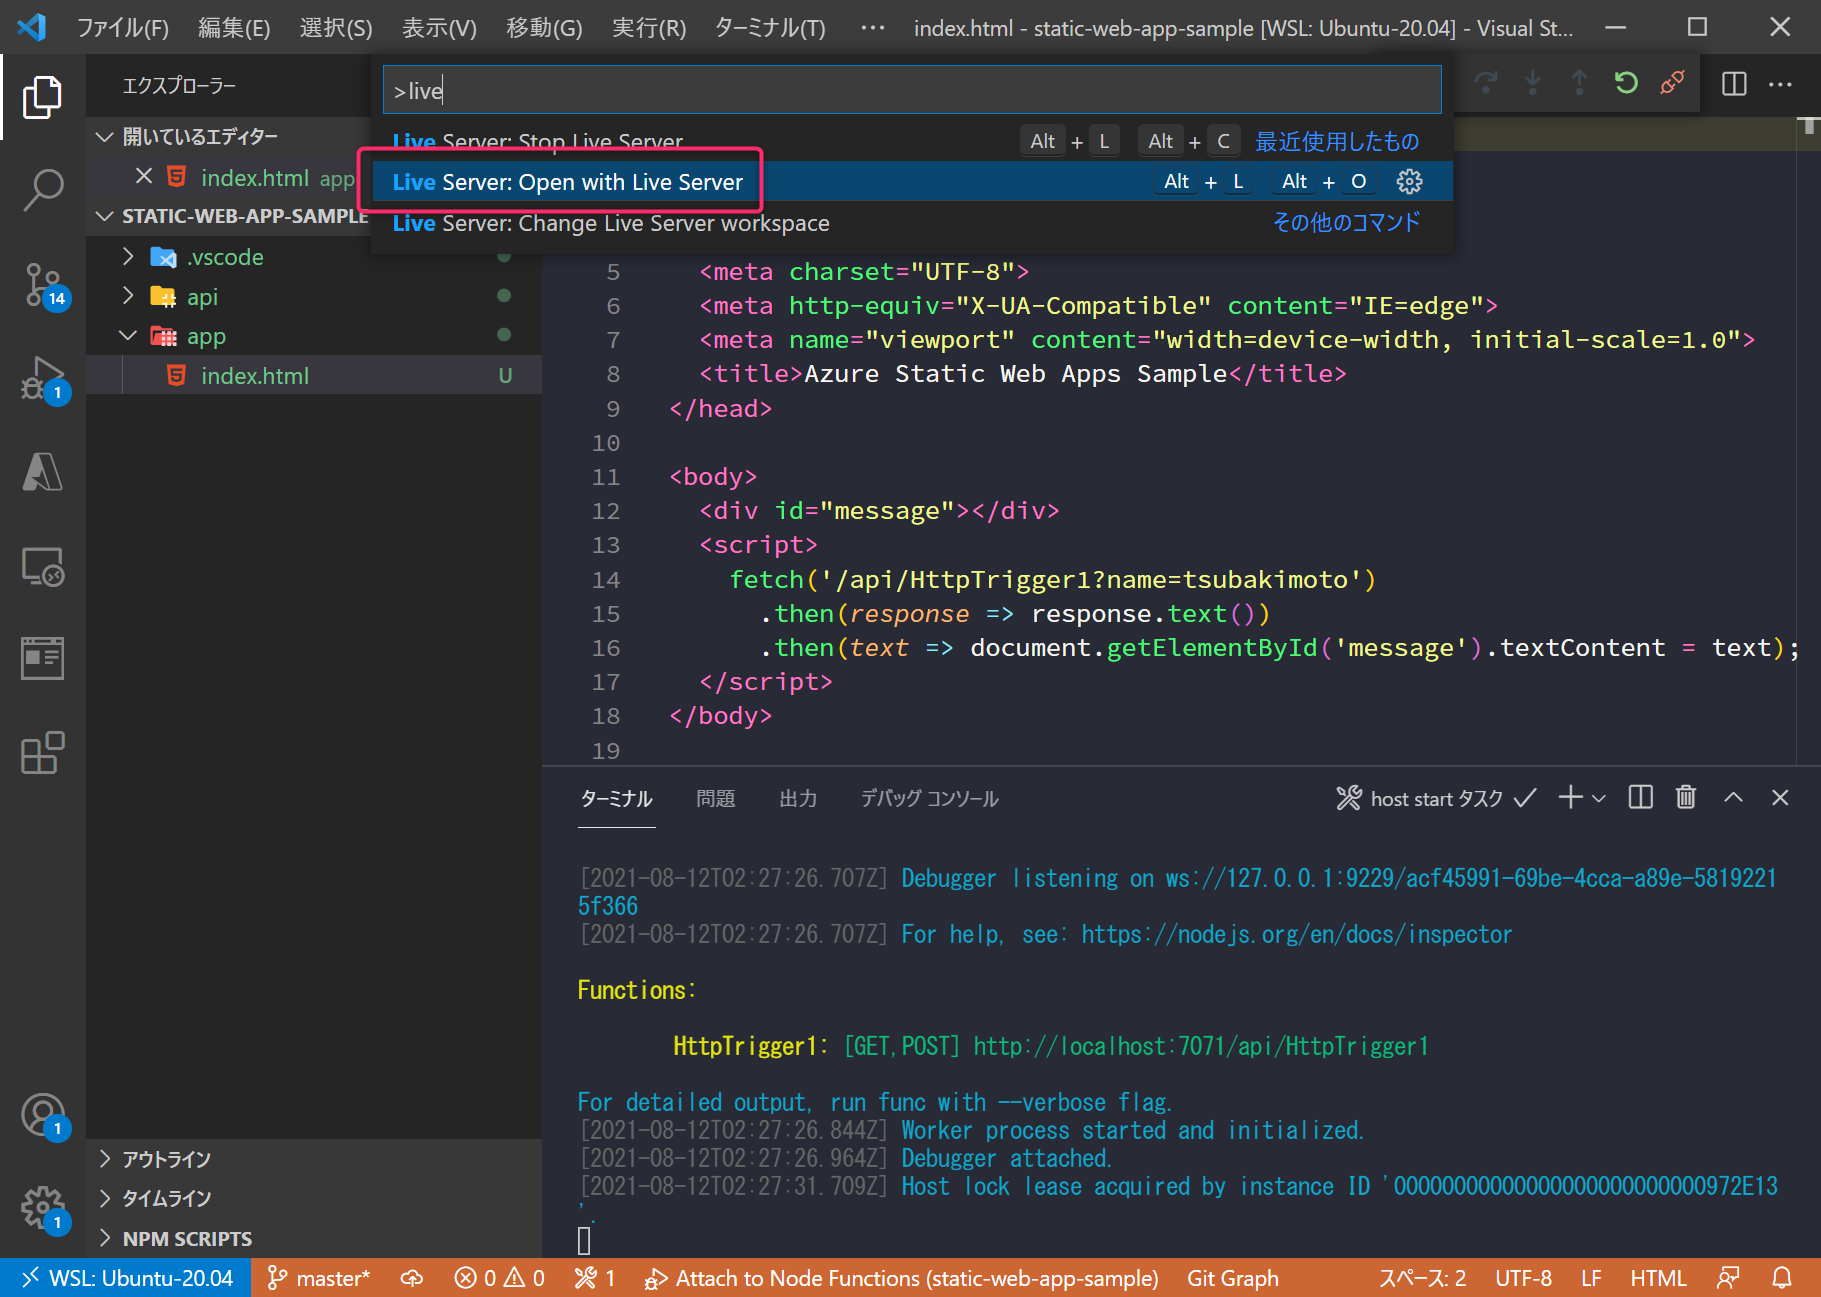
API を実行した状態で、コマンドパレットから Live Server: Open with Live Server を実行します。
Live Server とは、開発環境向けの簡易的な Web サーバーを利用することができる拡張機能です。
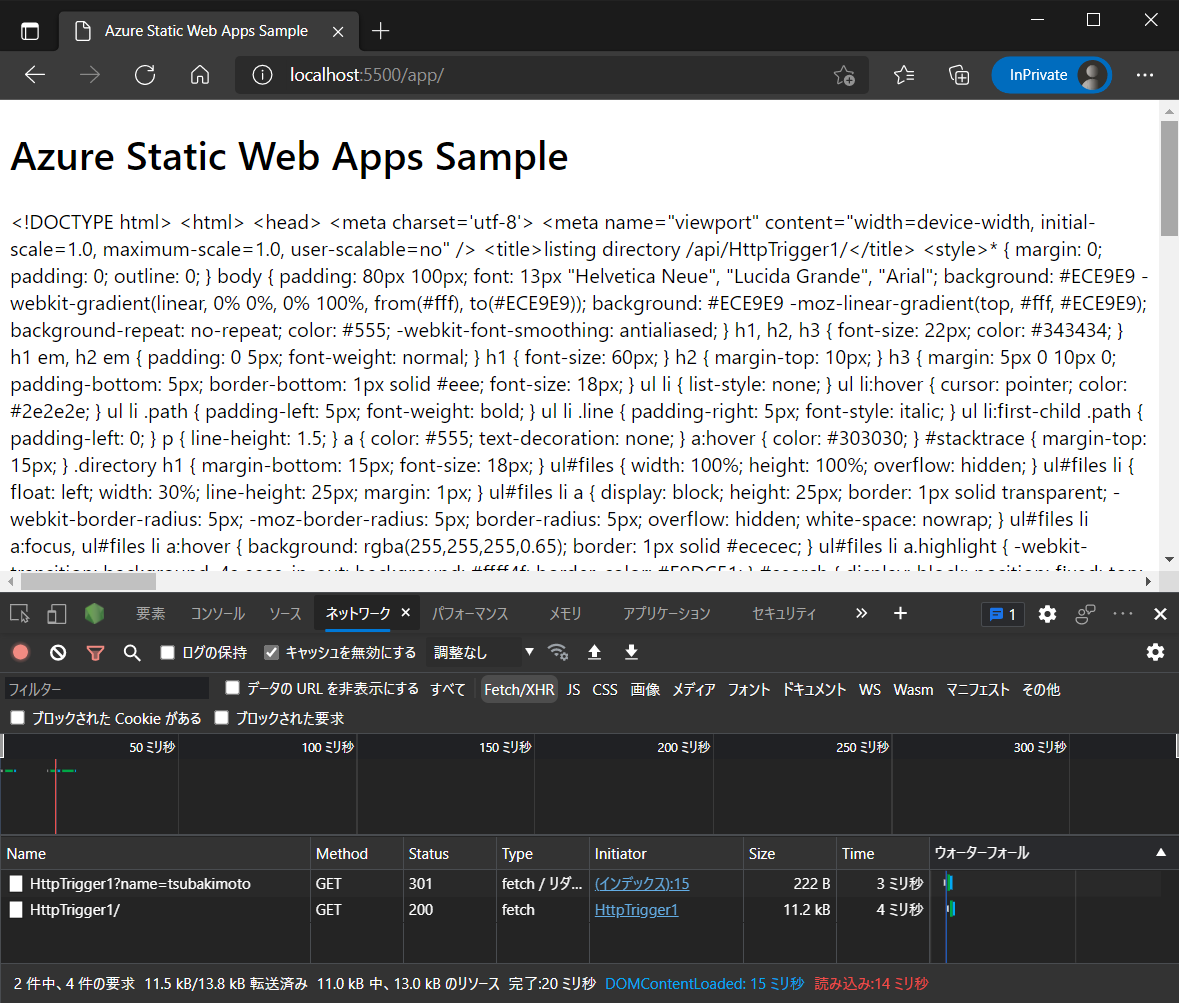
http://localhost:5500/app/ にアクセスするとページ自体は表示できていますが、API の結果を正しく取得することができていないようです。
localhost:5500 から localhost:7071 にある API にアクセスできていないことがわかります。
Visual Studio Code のプロキシ設定をする
http://localhost:7071/api/ で実行中の API にアクセスできるようにするために、Live Server のプロキシ設定を行います。
.vscode/settings.json を開き、以下を追加します。
"liveServer.settings.proxy": {
   "enable": true,
   "baseUri": "/api",
   "proxyUri": "http://127.0.0.1:7071/api"
}
Node.js の Azure Functions であれば、以下の構成となります。
{
    "azureFunctions.deploySubpath": "api",
    "azureFunctions.postDeployTask": "npm install (functions)",
    "azureFunctions.projectLanguage": "JavaScript",
    "azureFunctions.projectRuntime": "~3",
    "debug.internalConsoleOptions": "neverOpen",
    "azureFunctions.preDeployTask": "npm prune (functions)",
    "liveServer.settings.proxy": {
        "enable": true,
        "baseUri": "/api",
        "proxyUri": "http://127.0.0.1:7071/api"
     }
}
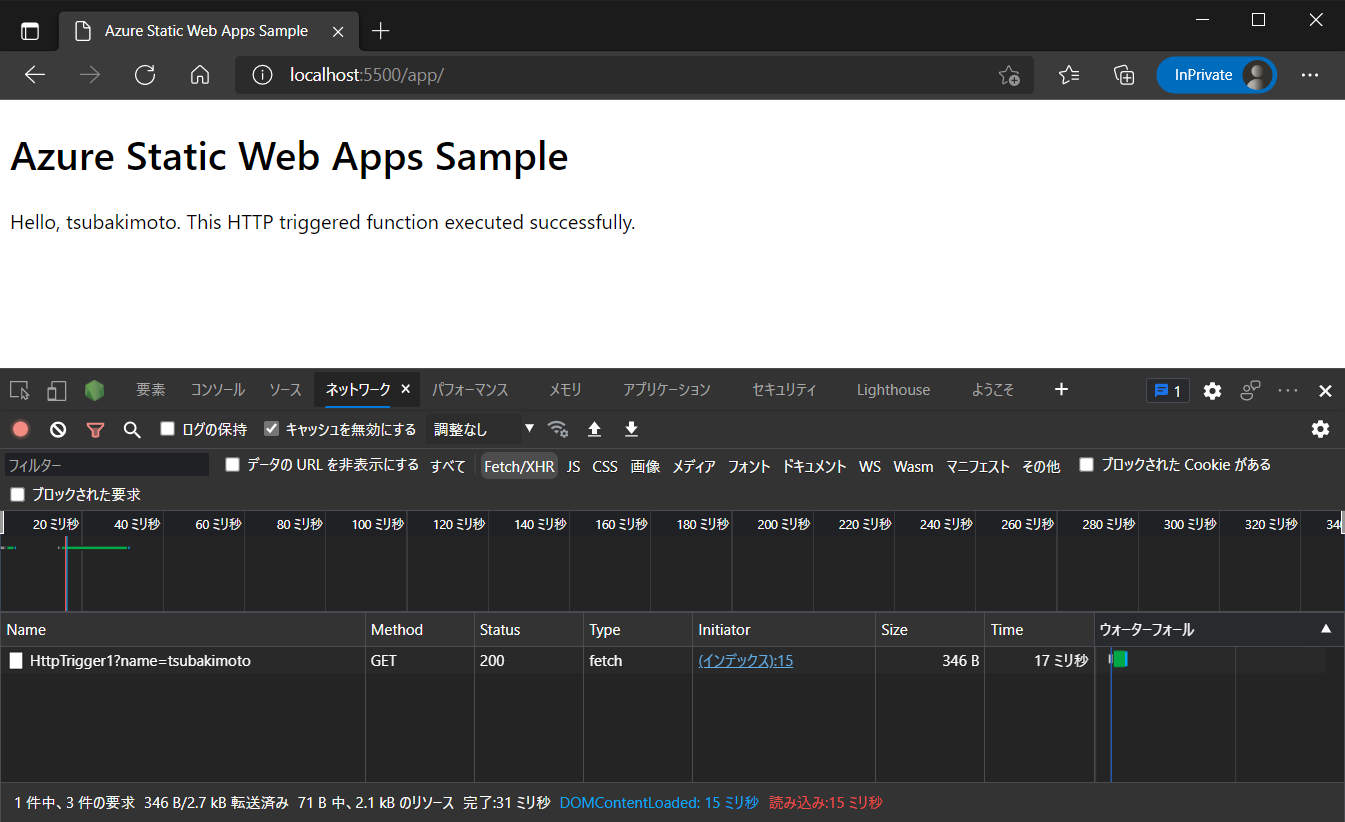
再度 Live Server を起動し直して http://localhost:5500/app/ にアクセスすると、きちんと API がコールできたことが分かります。
Azure Static Web Apps にデプロイする
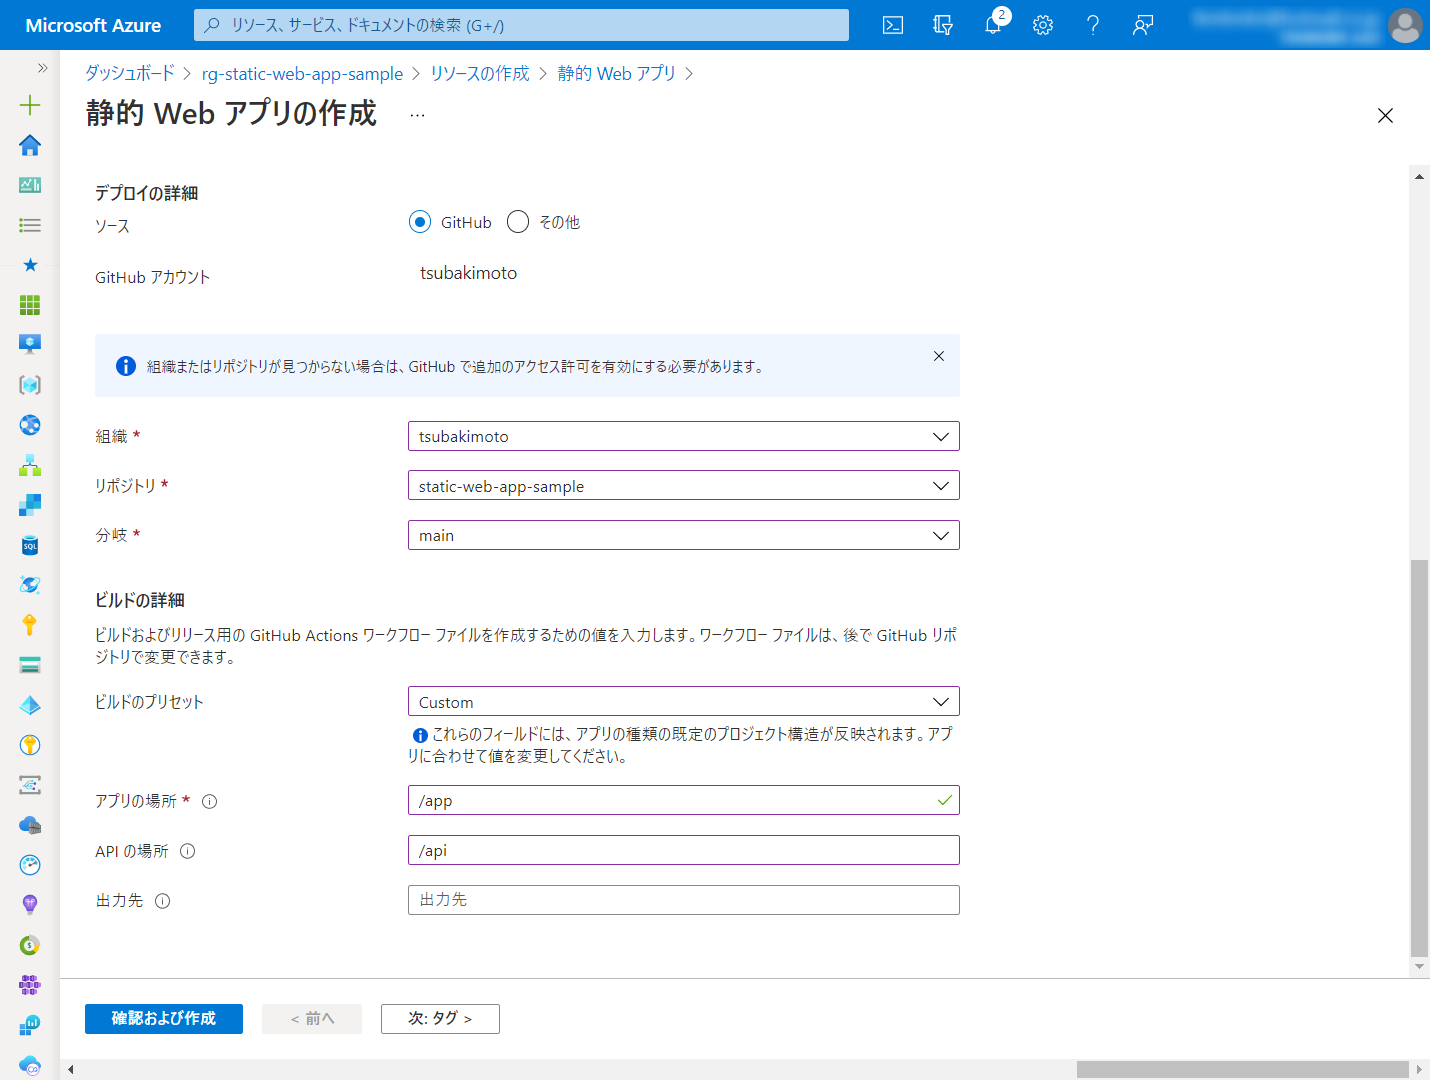
ローカル環境でアプリを動かすことができたので、Azure Static Web Apps にデプロイしてみましょう。
基本的な手順は公式ドキュメントどおりです。
今回の手順では以下のようにビルド設定しました。
- ビルドのプリセット:Custom
- アプリの場所: /app
- APIの場所: /api
- 出力先:未指定
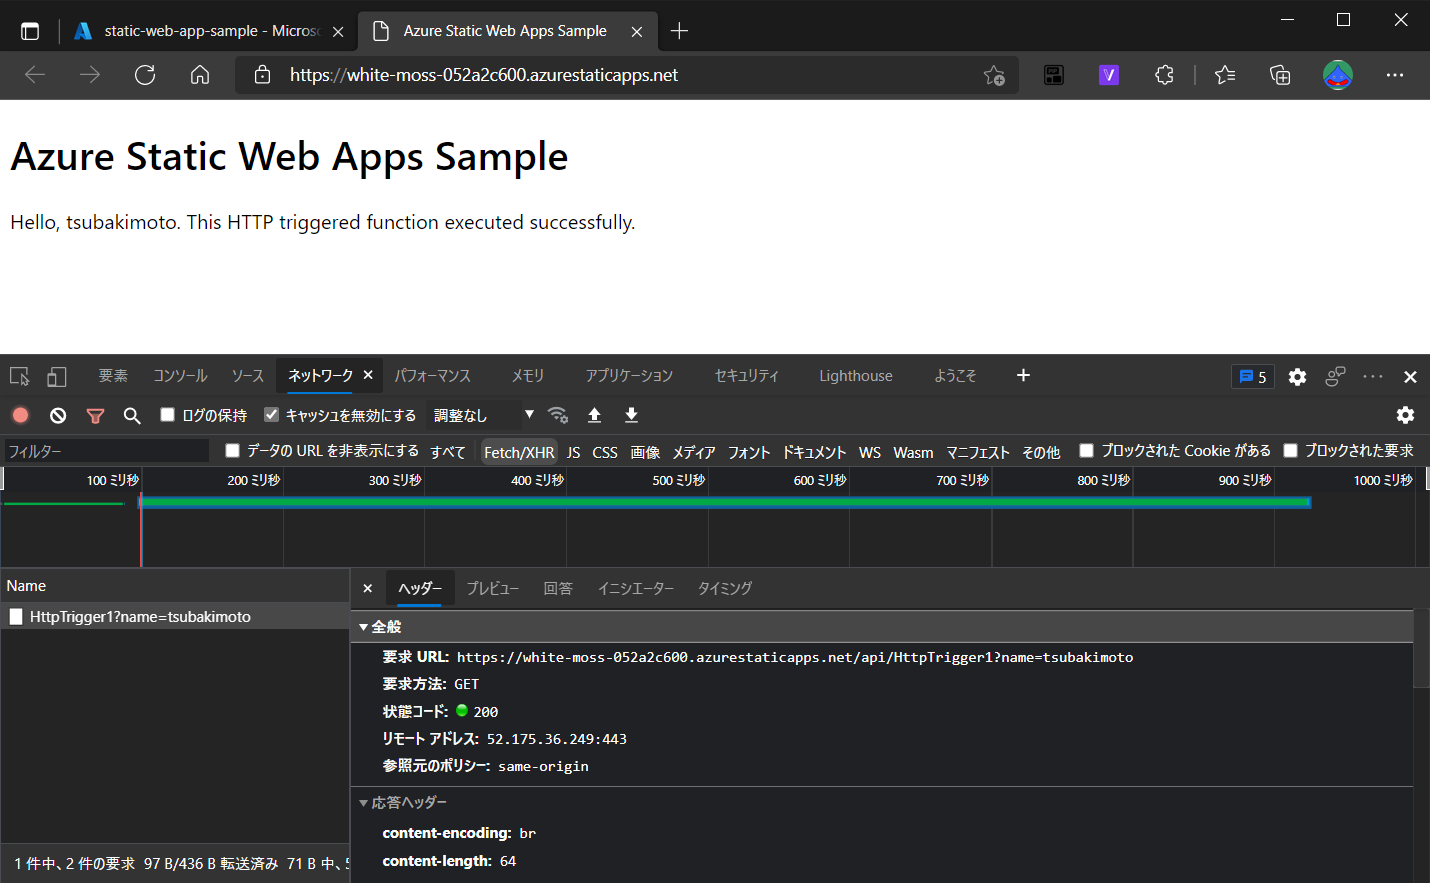
GitHub Actions でのデプロイの完了を待って、Webページにアクセスします。
きちんと /api/HttpTrigger1 つまり、Azure Static Web Apps に内包された Azure Functions にアクセスできていることが確認できます。
ローカル開発環境を整えて、Azure Static Web Apps を上手に使っていきましょう!
今回のサンプルコードは GitHub で公開していますので参考にしてみてください。
