概要
filebeat5.3.0では、moduleというものが入っていて、用意されているもの(nginxやapache2、mysqlなど)であれば
Elasticsearchでのmapping設定やkibanaのダッシュボード設定を一切しなくても、
filebeatがよしなに初期値やダッシュボードを作成してくれます。
Logstashでログの種類ごとに設定ファイルを書いたり、あるいはgrokフィルターを頑張って書くことをしていた人からすると、
moduleの設定でonにすれば、そのログがすぐに取り込めるようになる、というのは大変ありがたいのではないでしょうか。
また、filebaetはすごく軽量でしかも、実行ファイルで提供されていて、
やれ.NETFrameworkの3.5が必要とか、VCランタイムの何とかいうバージョンが必要、などの制約なしに動作するため、
分散した環境においてログの集約をしたい、という人には向いていると思うのです。
自分の運用しているシステムがmoduleで対応していると、その動きがもっと簡単になってハッピー、そういう期待感です。
moduleを書いてみる
で、ここからが本題です。
今回は、intra-mart Accel-Platformのいろんなログを取り込むためのmoduleを書いてみます。
簡易に試すには、filebeatに標準で含まれているnginxやapache2などのものを参考にすると良いと思います。
公式の作成方法は、以下にあります。
https://www.elastic.co/guide/en/beats/filebeat/current/filebeat-modules-devguide.html
全くの余談ですが、intra-mart Accel-Platform 2017 Springでは、Kibanaの画面をポートレットでintra-mart上で
表示できるようになったそうです。
http://www.intra-mart.jp/document/library/iap/public/iap_release_note/texts/limitations/kibana_portlet.html
intra-martのBPM機能でもElasticsearch/Kibanaがありましたね。
filebeat.yml
enabled: trueとするだけで、あとはログの場所の設定も、文字列をこねくり回すfilterの設定も不要!
すぐにElasticsearchに取り込まれ、確認できる、と そうなるようなmoduleを作っていきます。
(その分、module側でいろいろ書くわけですが、それを以下で紹介していきます)
filebeat.modules:

- module: imart

  access:
    enabled: true
    var.pipeline: with_plugins

  transition:
    enabled: true
    var.pipeline: with_plugins

  system:
    enabled: true
    var.pipeline: with_plugins

  exception:
    enabled: true
    var.pipeline: with_plugins
前提
今回は、intra-martを対象とするということで、module名をimartとし、
取り込むログの種類は、accessログ、transitionログ、exceptionログ、systemログとします。
| name | value |
|---|---|
| モジュール名 | imart |
| ログの対応種類 | accessログ transitionログ exceptionログ systemログ |
複数のログの種類があるため、内部で共通して利用されるような項目は、共通のフィールドに入れることとして、
それ以外は個別にする。
例えば、テナントIDやユーザIDなどは、ログを横串で見たいこともあるだろうから、imart.tenant_idなどに格納するようにする。
構成
モジュールのフォルダ、ファイルの構成はこのようになります。
filebeat.exe
 - module
   - apache2
   - mysql
   - nginx
   - system
   - imart    ← moduleの階層
     - access   ← ログの種類ごとのフォルダ
     - exception
     - system
     - transition
さらに、ログの種類ごとのフォルダ以下は、以下のようになります。
- access
  - config
    - access.yml
  - ingest
    - default.json
  - manifest.yml
各ファイルについては、以下に詳細を書きます。
manifest.yml
ログファイルの保管場所の規定値や、elasticsearchで送られた文字列を処理するためのingest_nodeの設定、
filebeatで読み込むときの設定(prospector)の設定を行います。
requires.processorsでは、ingest_nodeのpipelineで使用するプラグインを書いておきます。
ここで書いておくと、filebeatが起動して処理されるとき、使用するモジュールの中に書かれたこの部分を確認し、
Elasticsearch側でそのプラグインが入ってなければ、エラー終了します。
module_version: 1.0

var:
  - name: paths
    default:
      - /var/log/resin/access.log*
    os.darwin:
      - /usr/log/resin/access.log*
    os.windows:
      - "C:/resin*/log/access.log*"

ingest_pipeline: ingest/default.json
prospector: config/access.yml

requires.processors:
- name: user_agent
  plugin: ingest-user-agent
config/access.yml
filebeatでファイルを読み込むときの設定です。
exclude_filesで除外するファイルを指定したりできます。
input_type: log
paths:
{{ range $i, $path := .paths }}
 - {{$path}}
{{ end }}
exclude_files: [".gz$"]
複数行からなるExceptionログなどを処理するときは、その設定を追加しておくことができます。
たとえば、exceptionの設定ファイルだとこう書きました。
input_type: log
paths:
{{ range $i, $path := .paths }}
 - {{$path}}
{{ end }}
exclude_files: [".gz$"]

encoding: shift-jis
multiline.pattern: '^log\.generating\.time'
multiline.negate: true
multiline.match: after
ingest/default.json
ingest_nodeのpipeline設定を書きます。
以下、全部を書くと長いので一部を示します。
{
  "description": "Pipeline for parsing imart access logs. Requires ingest_user_agent plugin.",
  "processors": [
    {
      "grok": {
        "field": "message",
        "patterns": [
          "%{IPORHOST:imart.access.remote_ip} - %{DATA:imart.access.user_name} \\[%{HTTPDATE:imart.access.time}\\] \"%{WORD:imart.access.method} %{DATA:imart.access.url} HTTP/%{NUMBER:imart.access.http_version}\" %{NUMBER:imart.access.response_code} %{DATA:imart.access.body_sent.bytes} (\"%{DATA:imart.access.referrer}\")?( \"%{DATA:imart.access.agent}\")",
          "\\[%{IPORHOST:imart.access.remote_ip}\\] - %{DATA:imart.access.user_name} \\[%{HTTPDATE:imart.access.time}\\] \"%{WORD:imart.access.method} %{DATA:imart.access.url} HTTP/%{NUMBER:imart.access.http_version}\" %{NUMBER:imart.access.response_code} %{DATA:imart.access.body_sent.bytes} (\"%{DATA:imart.access.referrer}\")?( \"%{DATA:imart.access.agent}\")"
        ],
        "ignore_missing": true
      }
    },
    {
      "remove": {
        "field": "message"
      }
    },
    {
      "rename": {
        "field": "@timestamp",
        "target_field": "read_timestamp"
      }
    },
    {
      "date": {
        "field": "imart.access.time",
        "target_field": "@timestamp",
        "formats": [
          "dd/MMM/YYYY:H:m:s Z"
        ],
        "timezone": "Asia/Tokyo"
      }
    },
ここで指定したpipelineは、他の設定値を変更せずに初期値のまま動作させた場合は、filebeat-filebeat-5.3.0-imart-access-defaultという名称で作成されることになります。
Kibanaのdev toolから中身を取得したい場合は、以下で確認することができます。
GET _ingest/pipeline/filebeat-5.3.0-imart-access-default
その他の設定
filebeat.template.json
今回追加したimartモジュール内で使用するフィールドでは、数値型のところ、あるいはStringでkeywordにするには向かないところ(エラーのStacktraceなど)があるため、
この部分のMappingをテンプレートに書いておきます。
filebeat.template.jsonが規定値で読み込まれるファイルなので、ここに今回追加したフィールドで設定が必要なものを
追加しておくことにします。
 "properties": {
        "@timestamp": {
          "type": "date"
        },
        "imart": {
          "properties": {
            "system": {
              "properties": {
                "message": {
                  "type": "text"
                }
              }
            },
            "access": {
              "properties": {
                "agent": {
                  "norms": false,
                  "type": "text"
                },
                "body_sent": {
                  "properties": {
                    "bytes": {
                      "type": "long"
                    }
                  }
                },
                "response_code": {
                  "type": "long"
                },
                "user_agent": {
                  "properties": {
                    "device": {
                      "ignore_above": 1024,
                      "type": "keyword"
                    },
                    "major": {
                      "type": "long"
                    },
                    "minor": {
                      "type": "long"
                    },
                    "name": {
                      "ignore_above": 1024,
                      "type": "keyword"
                    },
                    "os": {
                      "ignore_above": 1024,
                      "type": "keyword"
                    },
                    "os_major": {
                      "type": "long"
                    },
                    "os_minor": {
                      "type": "long"
                    },
                    "os_name": {
                      "ignore_above": 1024,
                      "type": "keyword"
                    },
                    "patch": {
                      "type": "long"
                    }
                  }
                }
              }
            },
            "exception": {
              "properties": {
                "message" :{
                  "type": "text"
                },
                "stacktrace": {
                  "type": "text"
                }
              }
            },
            "transition": {
              "properties": {
                "exceptionmessage": {
                  "type": "text"
                },
                "time_response": {
                  "type": "long"
                }
              }
            }
          }
        },
テストなどでテンプレートをfilebeat起動ごとに上書きしたい場合は、
output.elasticsearch:
  # <中略>
  # Overwrite existing template
  template.overwrite: true
としておくと良いでしょう。
filebeat実行とkibanaによる動作確認
Elasticsearchの場所の指定を忘れずに行い、ログファイルがある環境で以下を実行します。
今回はログファイルは c:/resin-pro-4.0.51/log 以下にあるものとします。
filebeat.exe -e
で、実行し、kibanaで確認してみます。
ログ文字列が分割され、期待したフィールドに値として格納されていることが確認できました。
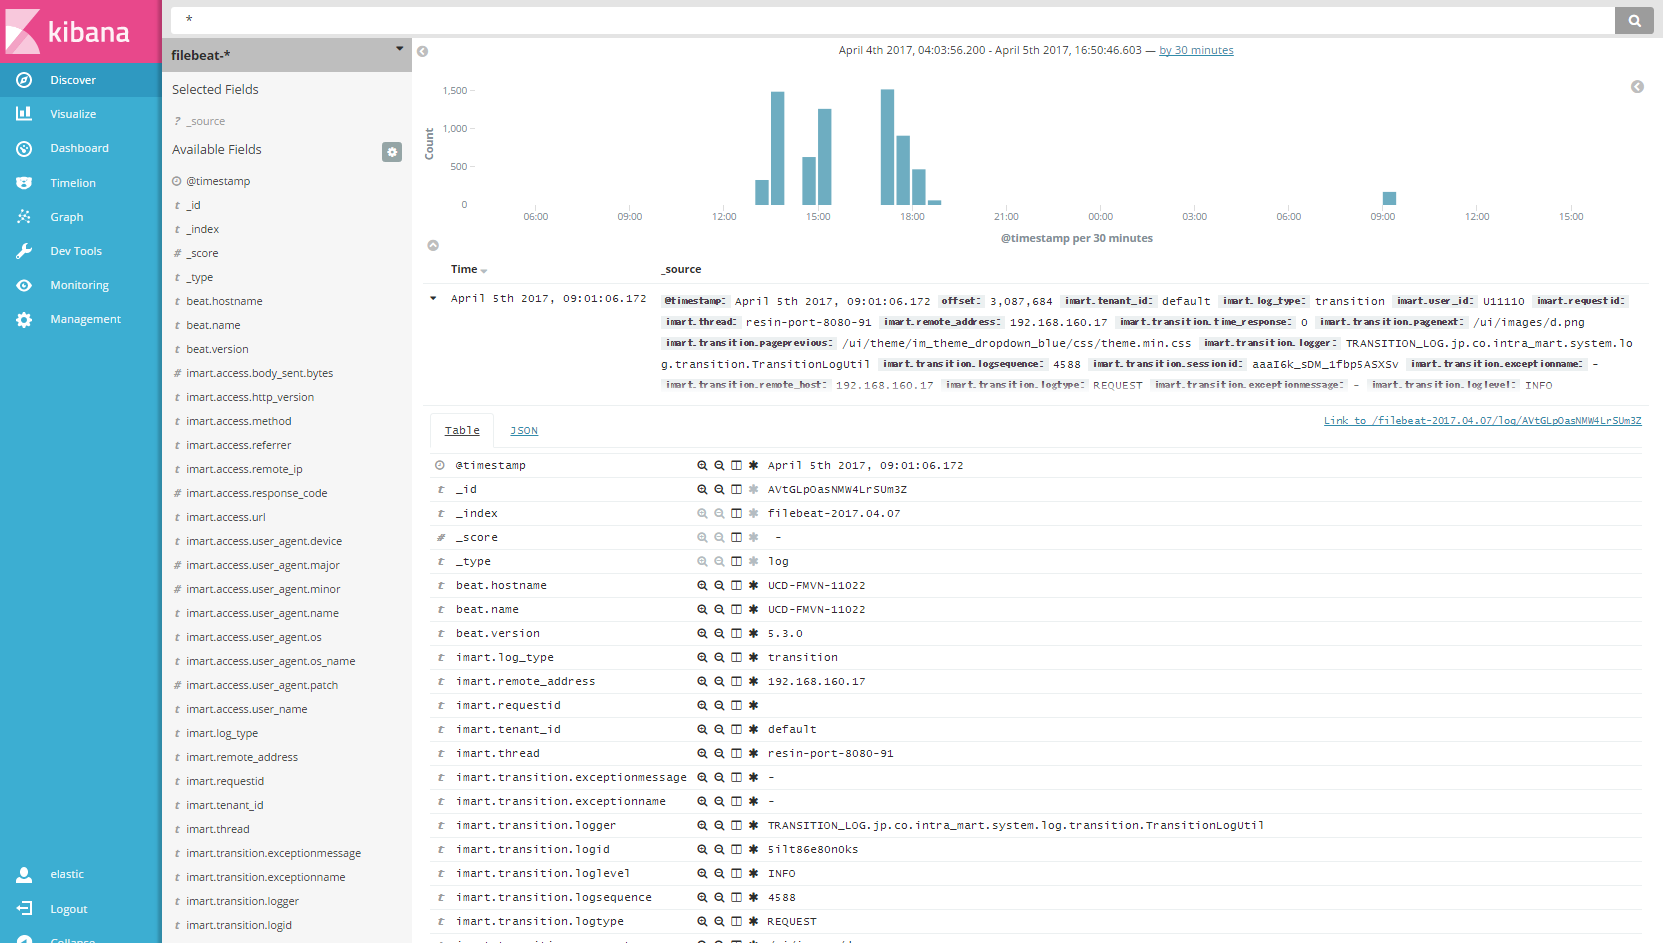
項目を展開してみると、user_idやremoteのホスト、リクエストタイプなどの種類が確認できます。
Visualizeで、ページ遷移に時間がかかっている処理を探したり、エラーが多発している時間帯を探したり、
そういう用途に使えそうです。

Exceptionのログで絞って検索してみると、どんな例外がいつ発生していたのか、すぐ探せます。
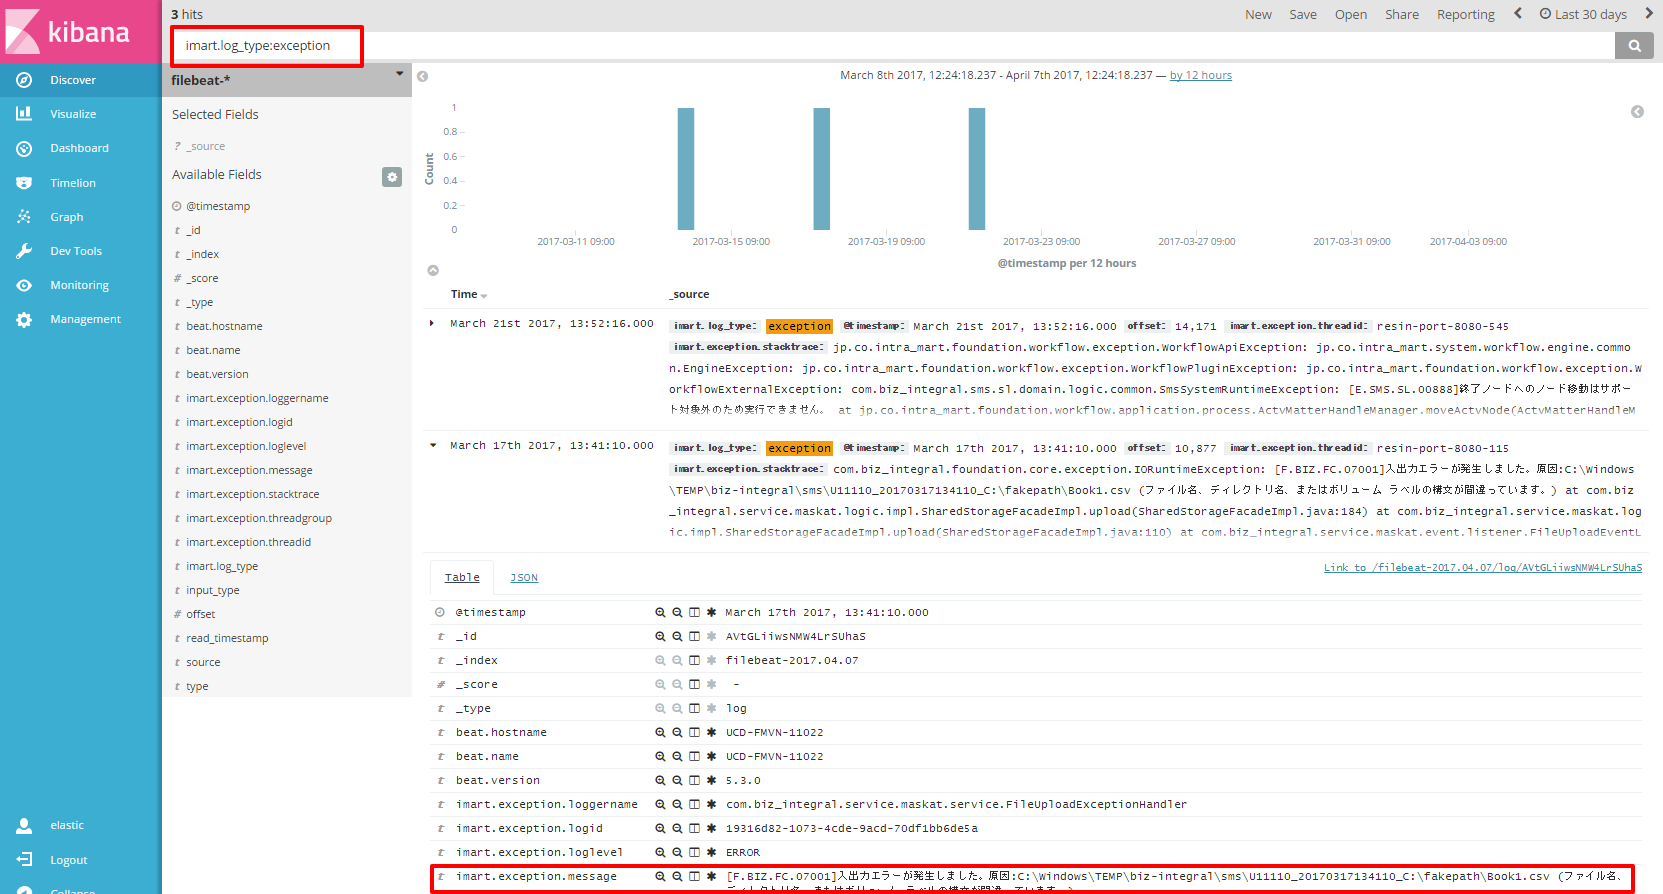
例外の前後にどんな操作があったのか、追って探したいときなどに使えそうです。
おまけ
今回使用したmoduleの資材はこちらにおいてあります。