Reactの基本をマスターしよう
条件分岐
- 即時関数
(() => {
       // ここに処理を書く
      })()
- 三項演算子
jsxに式を埋め込む
const Hello = () => {
  const isReact = true;
  return <p>{ isReact ? "Hello, React!!" : "Hello!!" }</p>;
}
- ログイン/ログアウトボタンの出し分け(if文)
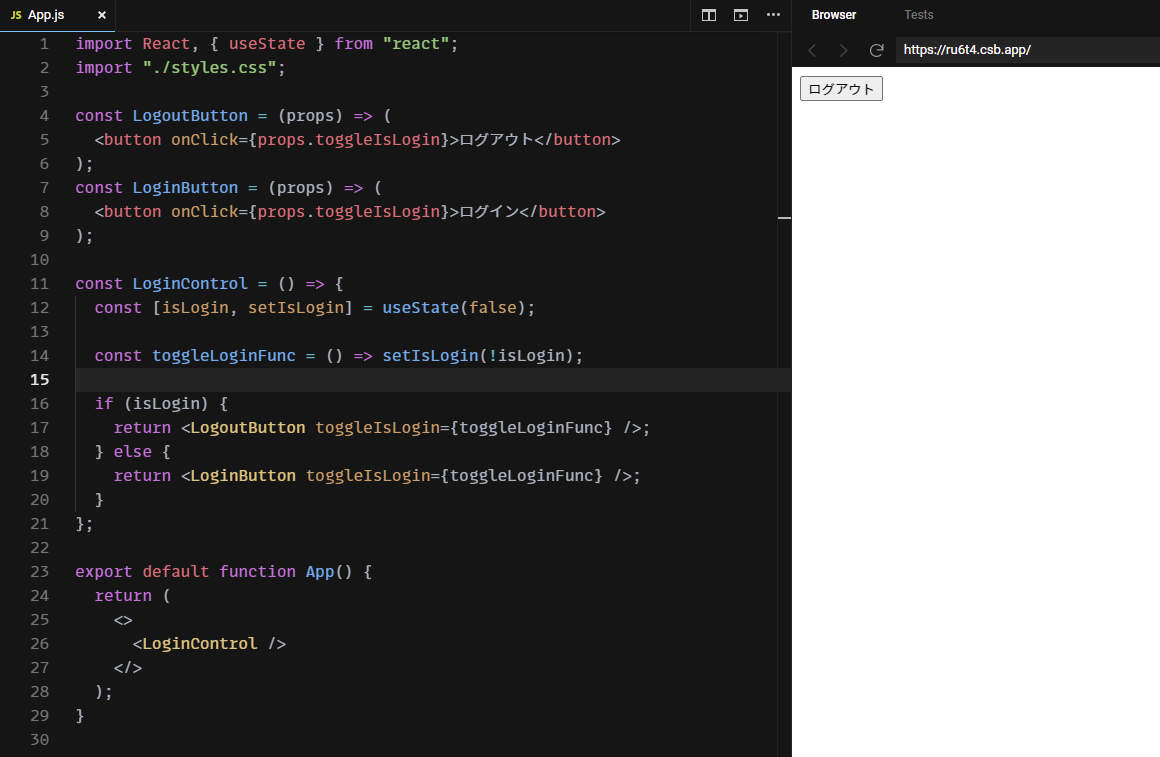
import React, { useState } from "react";
import "./styles.css";

const LogoutButton = (props) => (
  <button onClick={props.toggleIsLogin}>ログアウト</button>
);
const LoginButton = (props) => (
  <button onClick={props.toggleIsLogin}>ログイン</button>
);

const LoginControl = () => {
  const [isLogin, setIsLogin] = useState(false);

  const toggleLoginFunc = () => setIsLogin(!isLogin);

  return (
    <p>
      {(() => {
        // 即時関数
        if (isLogin) {
          return <LogoutButton toggleIsLogin={toggleLoginFunc} />;
        } else {
          return <LoginButton toggleIsLogin={toggleLoginFunc} />;
        }
      })()}
    </p>
  );
};

export default function App() {
  return (
    <>
      <LoginControl />
    </>
  );
}
繰り返し処理
-
map((要素, [index], [array]) => {})を使う - 繰り返す要素には、key属性にユニークな値を入れる
const numbers = [2, 4, 6, 8];

const ListItem = () => {
  const items = numbers.map((item) => <li key={item.toString()}>{item}</li>);

  return <ul>{items}</ul>;
};

export default function App() {
  return <ListItem />;
}
イベント処理
- イベントハンドリング
-
onChangeやonClickに関数を渡すことによりイベントハンドリングを行う。 - 引数にイベントオブジェクトを受け取ることができる。
-
const handleOnchange = (e) => {
  console.log(e.target.value);
};

const SampleInputText = () => {
  return <input type="text" onChange={handleOnchange} />;
};

export default function App() {
  return <SampleInputText />;
}
フォーム
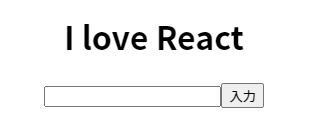
- テキスト入力フォーム
- 文字列を入力して「入力」ボタンを押すと、上部に表示される
import React, { useState } from "react";
import "./styles.css";

const InputText = () => {
  // リアルタイムに入力される文字列
  const [inputTextValue, setInputTextValue] = useState("");
  // ボタンが押下されて、画面に表示する文字列
  const [text, setText] = useState("JavaScript");
  // リアルタイム入力のイベントハンドラ
  const handleChange = (e) => {
    setInputTextValue(e.target.value);
  };
  // 入力ボタンを押したとき
  const handleClick = () => {
    setText(inputTextValue);
    setInputTextValue("");
  };

  return (
    <div className="App">
      <h1>I love {text}</h1>
      <input type="text" value={inputTextValue} onChange={handleChange} />
      <button onClick={handleClick}>入力</button>
    </div>
  );
};

export default function App() {
  return <InputText />;
}
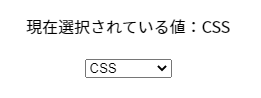
- セレクトボックス
- 選択すると、上部に表示される
import React, { useState } from "react";
import "./styles.css";

const values = [
  { id: 1, item: "HTML" },
  { id: 2, item: "CSS" },
  { id: 3, item: "JavaScript" }
];

const selectItems = values.map((value) => {
  return (
    <option key={value.id} value={value.item}>
      {value.item}
    </option>
  );
});

const InputSelectBox = () => {
  // セレクトボックスの洗濯をリアルタイムで保持するstate
  const [selectedValue, setSelectedValue] = useState(values[0].item);
  // セレクトボックスが変更されたときのハンドラ
  const handleChange = (e) => {
    setSelectedValue(e.target.value);
  };

  return (
    <div className="App">
        <p>現在選択されている値:{selectedValue}</p>
      <select value={selectedValue} onChange={handleChange}>
        {selectItems}
      </select>
    </div>
  );
};

export default function App() {
  return <InputSelectBox />;
}
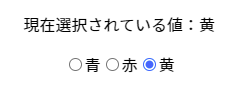
- ラジオボタン
- 選択すると上部に表示される
import React, { useState } from "react";
import "./styles.css";

const colors = [
  {
    id: 1,
    value: "青"
  },
  {
    id: 2,
    value: "赤"
  },
  {
    id: 3,
    value: "黄"
  }
];

const colorRadioButtons = ({ handleChange, checkedValue }) =>
  colors.map((color) => {
    return (
      <label key={color.id}>
        <input
          type="radio"
          value={color.value}
          onChange={handleChange}
          checked={checkedValue === color.value}
        />
        {color.value}
      </label>
    );
  });

const InputRadio = () => {
  const [checkedValue, setCheckedValue] = useState("青");

  const handleChange = (e) => {
    setCheckedValue(e.target.value);
  };

  return (
    <div className="App">
      <p>現在選択されている値:{checkedValue}</p>
      {colorRadioButtons({ handleChange, checkedValue })}
    </div>
  );
};

export default function App() {
  return <InputRadio />;
}
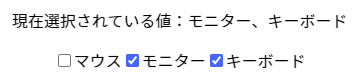
- チェックボックス(チェック状態を配列で管理)
- 選択した値が上部に表示される。

import React, { useState } from "react";
import "./styles.css";

const items = [
  {
    id: 1,
    value: "マウス"
  },
  {
    id: 2,
    value: "モニター"
  },
  {
    id: 3,
    value: "キーボード"
  }
];

const CheckButtonItems = ({ handleChange, checkedValues }) =>
  items.map((item) => {
    return (
      <label key={item.id}>
        <input
          type="checkbox"
          value={item.value}
          onChange={handleChange}
          checked={checkedValues.includes(item.value)}
        />
        {item.value}
      </label>
    );
  });

const InputCheckBox = () => {
  const [checkedValues, setCheckedValues] = useState([]);

  const handleChange = (e) => {
    if (checkedValues.includes(e.target.value)) {
      // 既に含まれていれば、チェックオフしたとみなして、消す
      setCheckedValues(
        checkedValues.filter((checkedValue) => checkedValue !== e.target.value)
      );
    } else {
      // ない場合は、末尾に追加する
      setCheckedValues([...checkedValues, e.target.value]);
    }
  };

  return (
    <div className="App">
      <p>現在選択されている値:{checkedValues.join("、")}</p>
      <CheckButtonItems
        handleChange={handleChange}
        checkedValues={checkedValues}
      />
    </div>
  );
};

export default function App() {
  return <InputCheckBox />;
}
- チェックボックス(チェック状態をオブジェクトで管理)
- 選択した値が上部に表示される。
import React, { useState } from "react";
import "./styles.css";

const items = [
  {
    id: 1,
    value: "マウス"
  },
  {
    id: 2,
    value: "モニター"
  },
  {
    id: 3,
    value: "キーボード"
  }
];

const CheckButtonItems = ({ handleChange, checkedValues }) =>
  items.map((item) => {
    return (
      <label key={item.id}>
        <input
          type="checkbox"
          value={item.value}
          onChange={handleChange}
          checked={checkedValues[item.value]}
        />
        {item.value}
      </label>
    );
  });

const InputCheckBox = () => {
  const [checkedValues, setCheckedValues] = useState(
    // {マウス: false, モニター: false, キーボード: false} をセットする
    //(空の{}に足していくイメージ)
    items.reduce((acc, cur) => {
      acc[cur.value] = false;
      return acc;
    }, {})
  );

  const handleChange = (e) => {
    // keyが変数の場合、[]で囲む
    setCheckedValues({ ...checkedValues, [e.target.value]: e.target.checked });
  };
  // entriesは、 [[key1, value1],[key2, value2], ... ] のようにして返す
  const stateOfCheckedValues = Object.entries(checkedValues).reduce(
    (pre, [key, value]) => {
      // チェックがonのkeyの配列を作成する
      value && pre.push(key);
      return pre;
    },
    []
  );

  return (
    <div className="App">
      <p>現在選択されている値:{stateOfCheckedValues.join("、")}</p>
      <CheckButtonItems
        handleChange={handleChange}
        checkedValues={checkedValues}
      />
    </div>
  );
};

export default function App() {
  return <InputCheckBox />;
}
参考