次回
1.環境構築からHello Worldまで
1-1. 開発環境
- Java11以上
- Spring Boot 2
- Intellij IDEA Community
1-2. Javaのインストール
- Java11 または 17 を使用します。
- Javaは各社から提供されていますので任意のJavaを使用してください。(Oracle、OpenJDK、Amazon、RedHat、Microsoft、IBM等)
- ここではAmazon Corettoをインストールします。
https://aws.amazon.com/jp/corretto/ - 既に古いバージョンのJavaが入っている場合は、PATHを変更することによりバージョンを切り替えてください。
- Javaのインストール確認
> java -version
openjdk version "11.0.18" 2023-01-17 LTS
OpenJDK Runtime Environment Corretto-11.0.18.10.1 (build 11.0.18+10-LTS)
OpenJDK 64-Bit Server VM Corretto-11.0.18.10.1 (build 11.0.18+10-LTS, mixed mode)
1-3. IntelliJ IDEA Community Editionのインストール
以下よりOSを選択後「Community Edition」ダウンロード&「次へ」連打でインストールします。
https://www.jetbrains.com/ja-jp/idea/download/
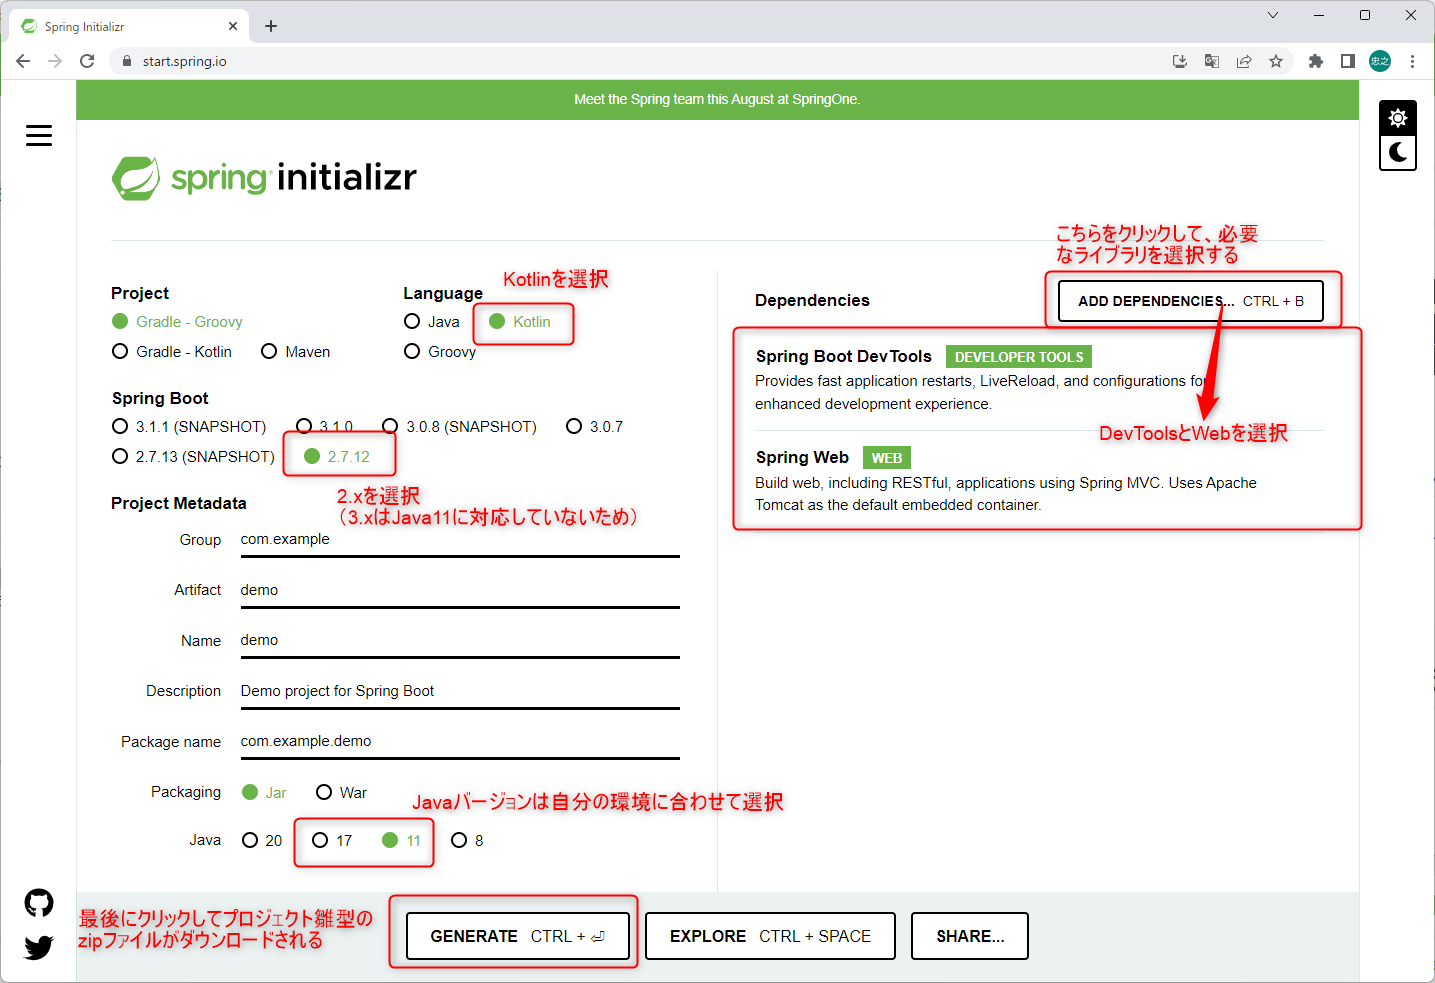
1-4. Spring Initilizrでのプロジェクト雛型の作成
-
https://start.spring.io/
からプロジェクトの雛型を作成します。
- demo.zipファイルがダウンロードされるので、解凍して任意のフォルダに置いてください。
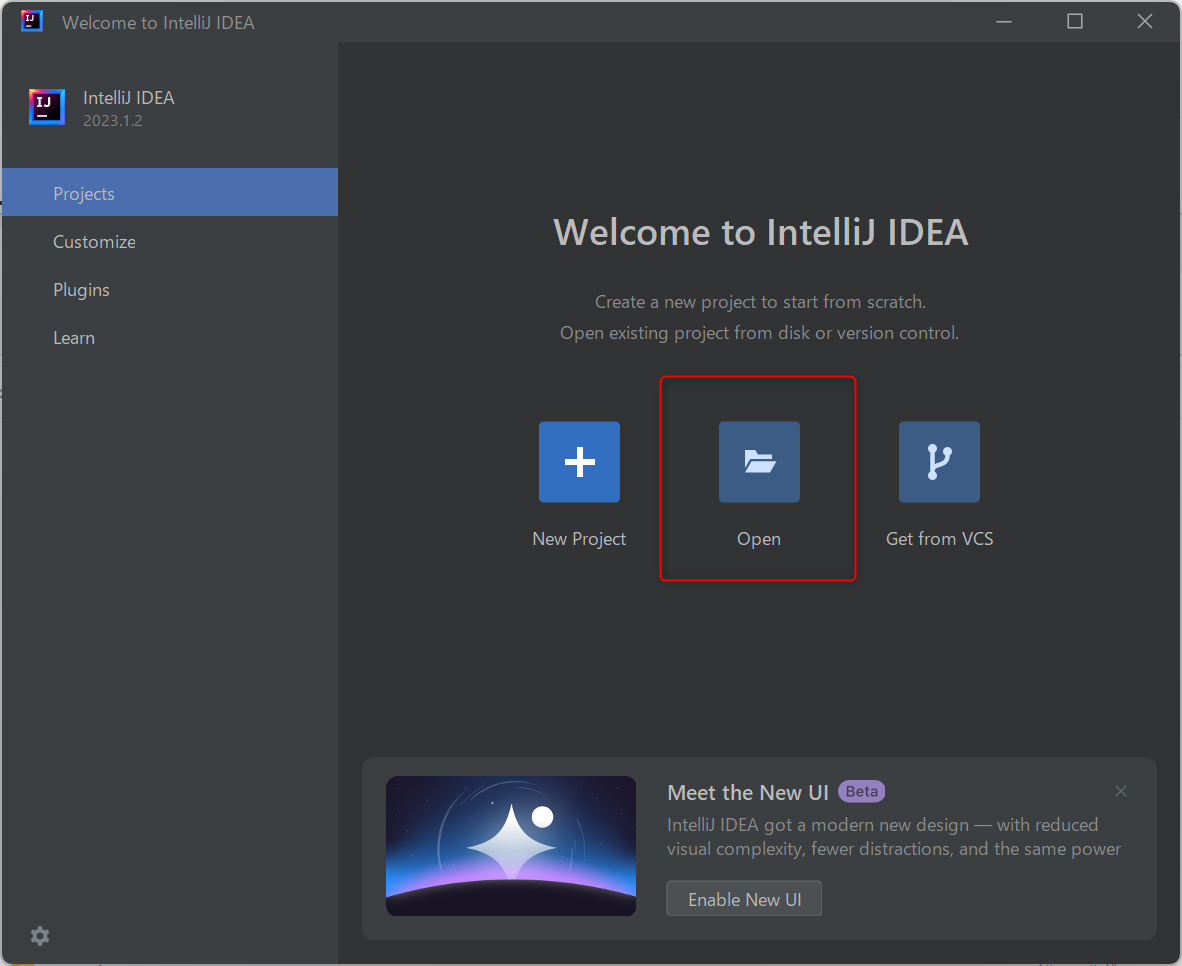
- Intellij IDEA Community Editionを開いて、
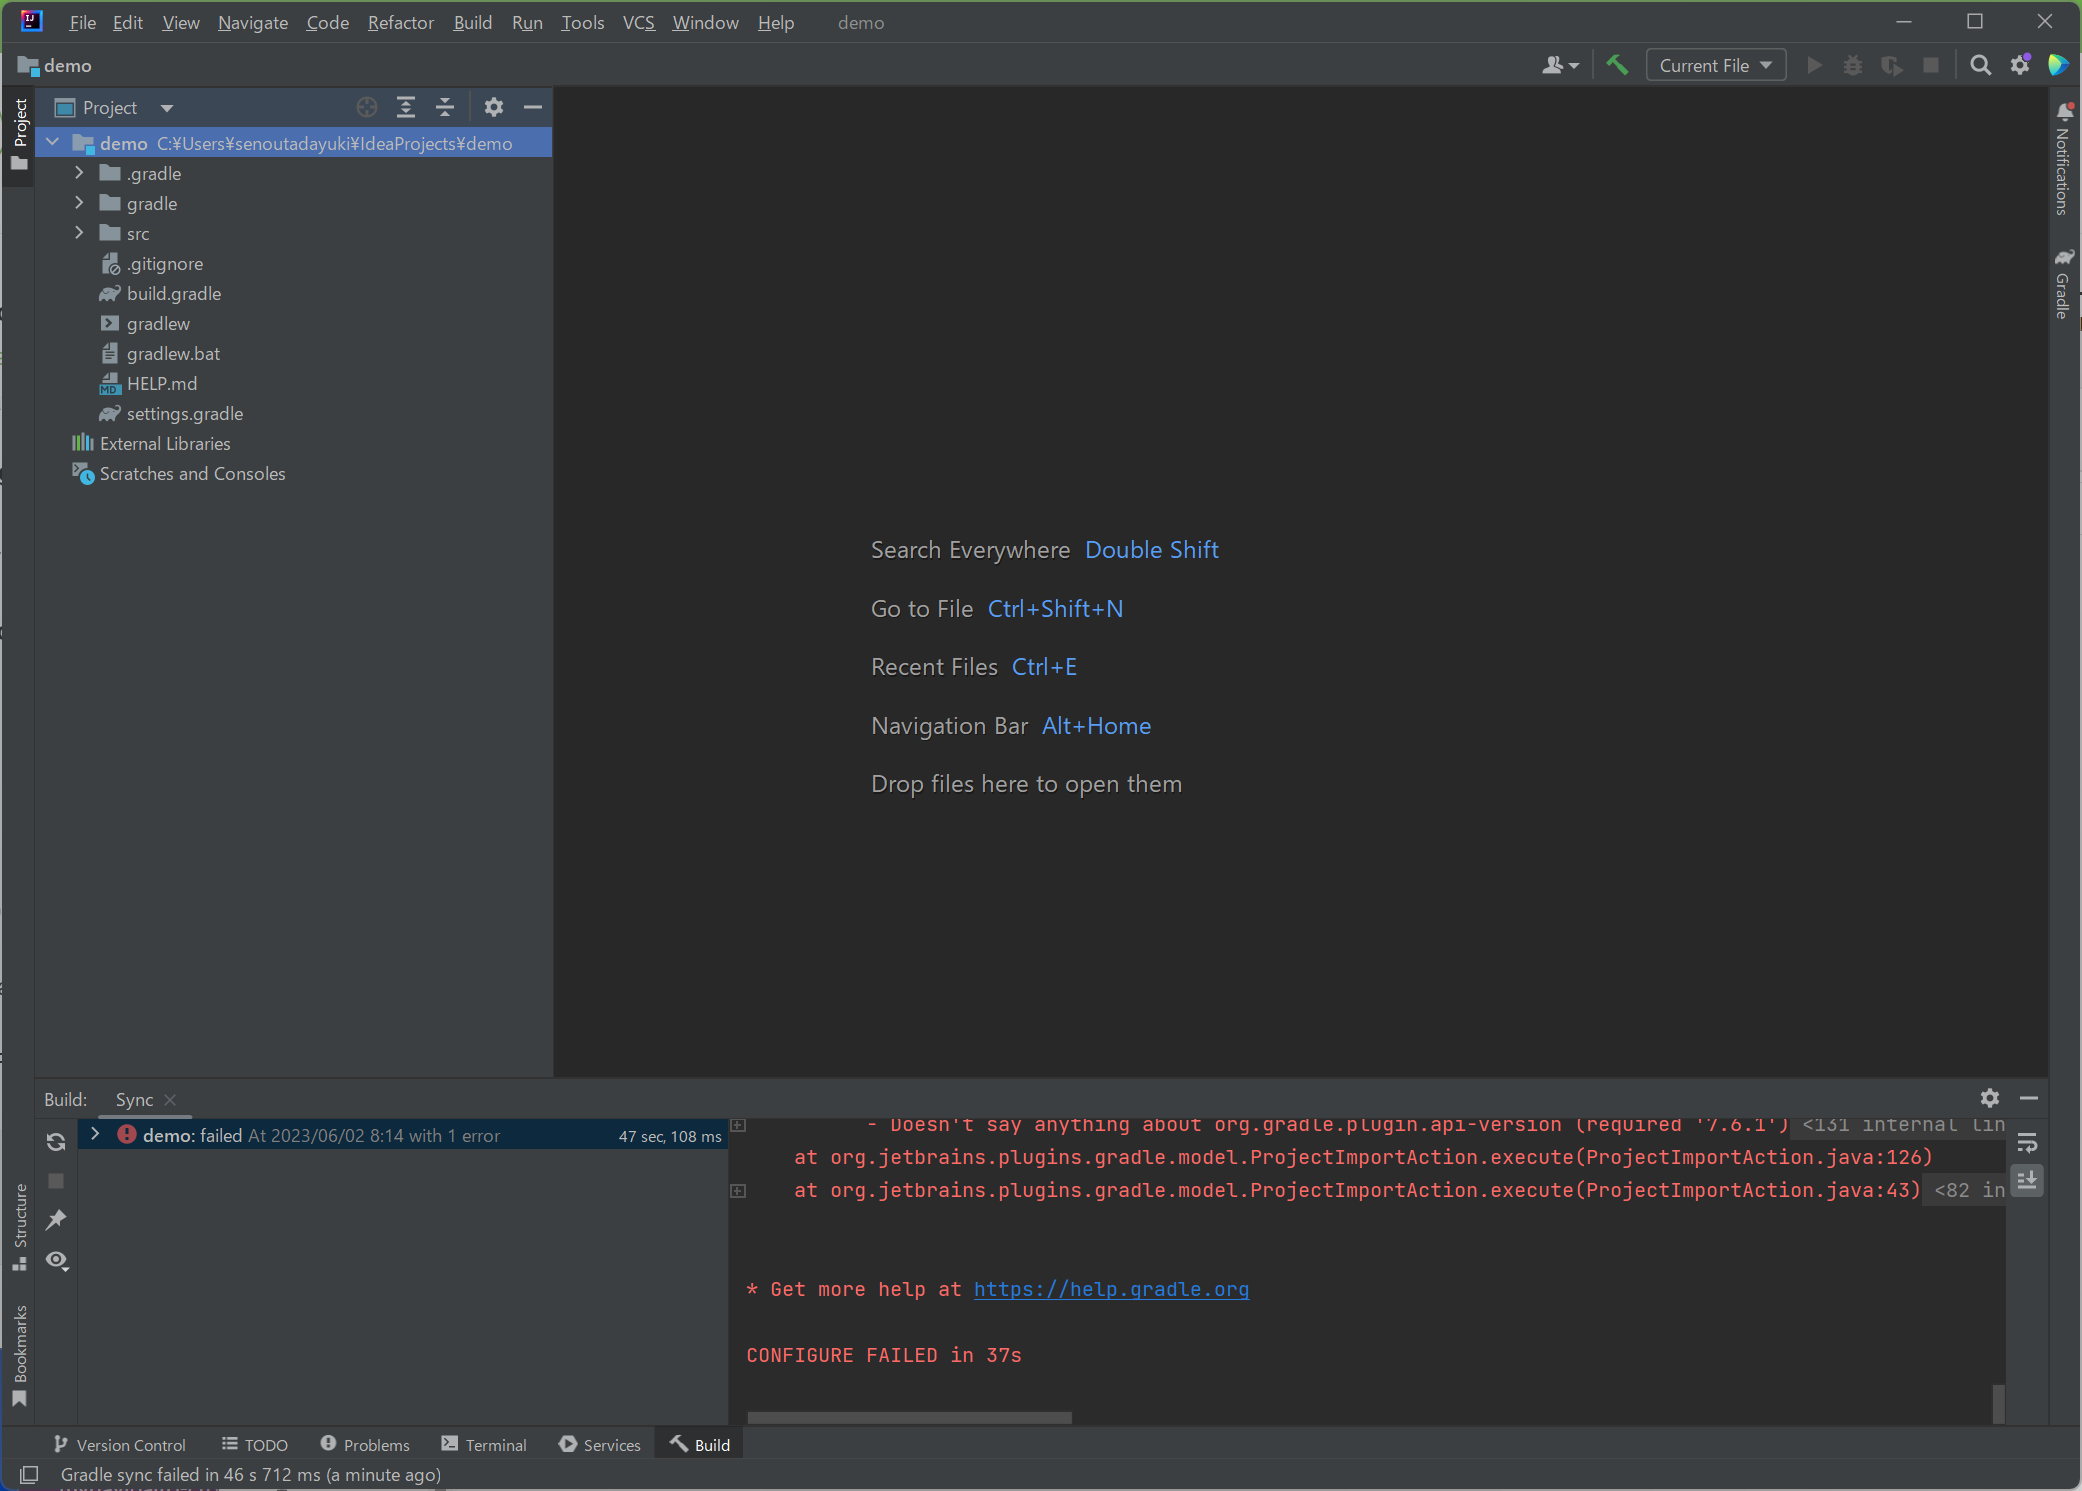
Openを押して、先ほどのdemoプロジェクトを開きます。 - プロジェクトの信頼の確認ダイアログが表示されたら、
Trust Projectを押します。
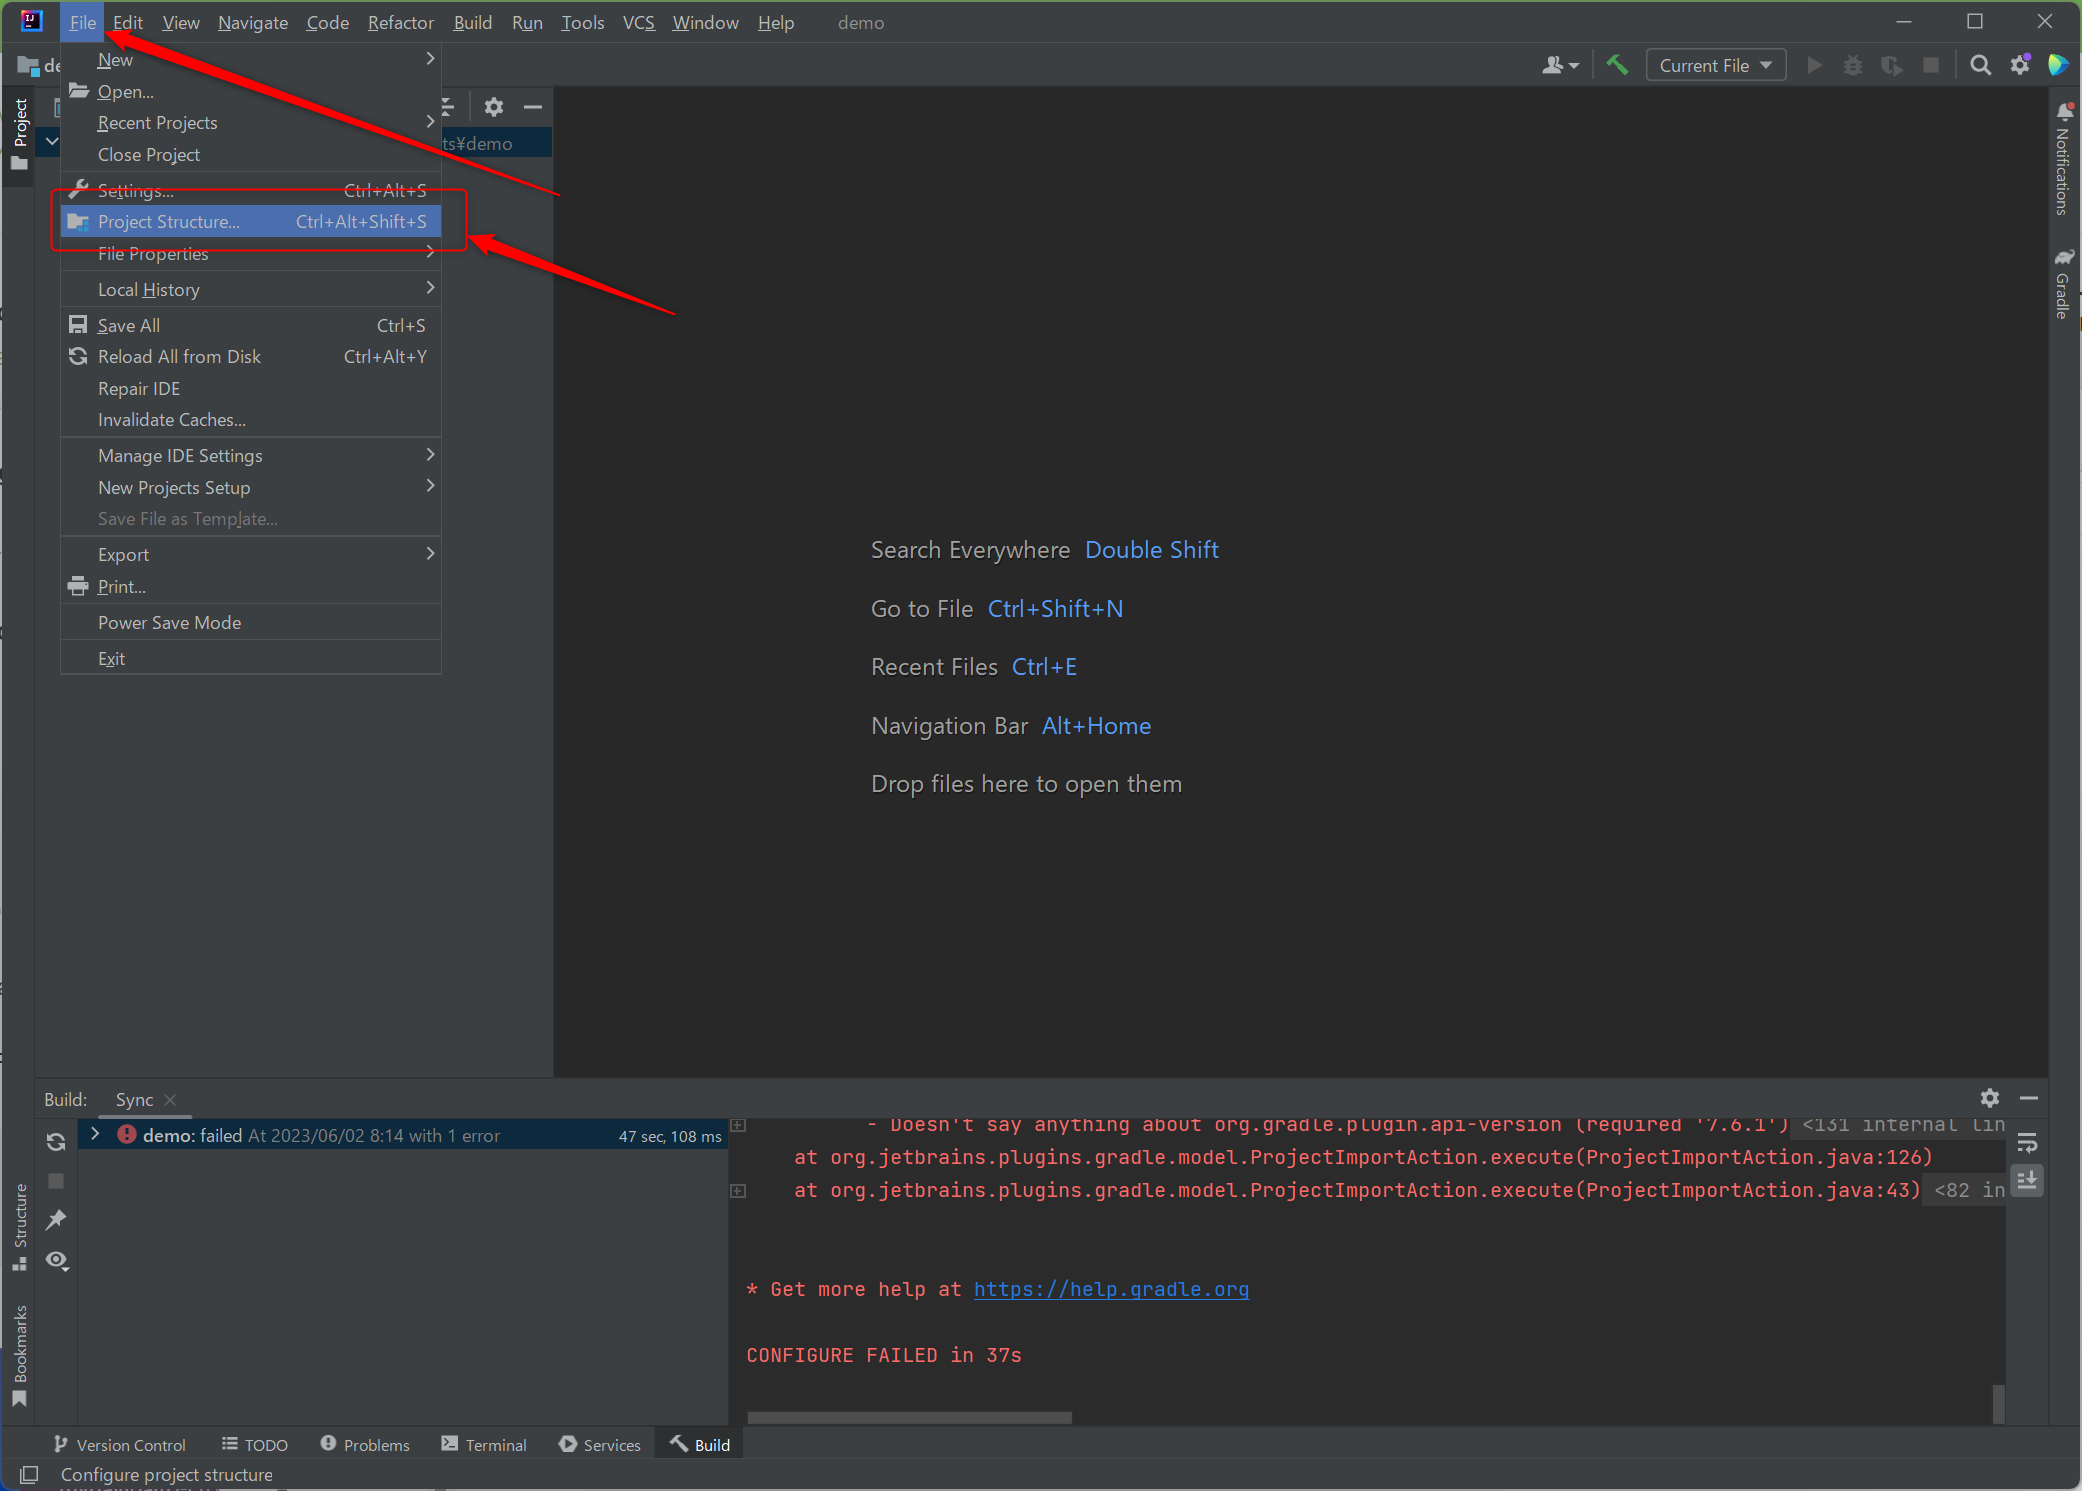
-
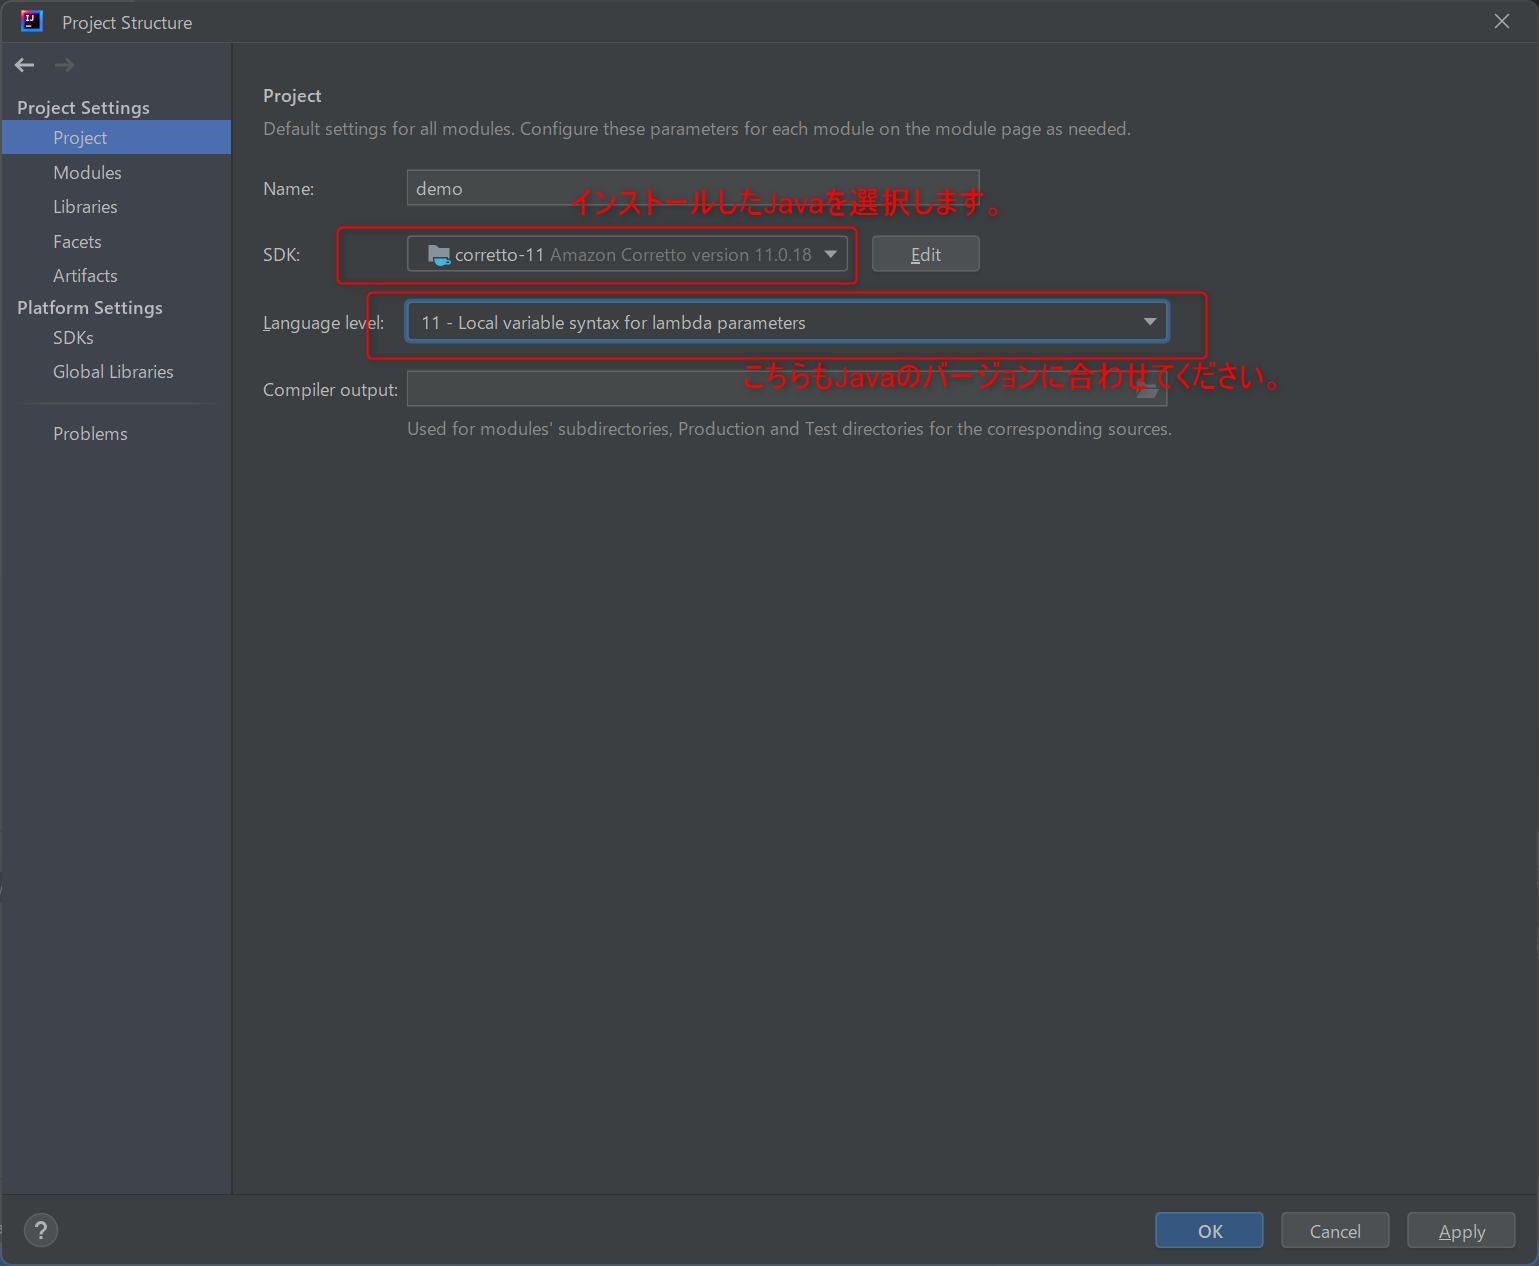
Project Structureを開いて、Java SDKとLanguage levelをインストールしたJavaに合わせて選択してOKを押してください。
1-5. テーマの変更(任意)
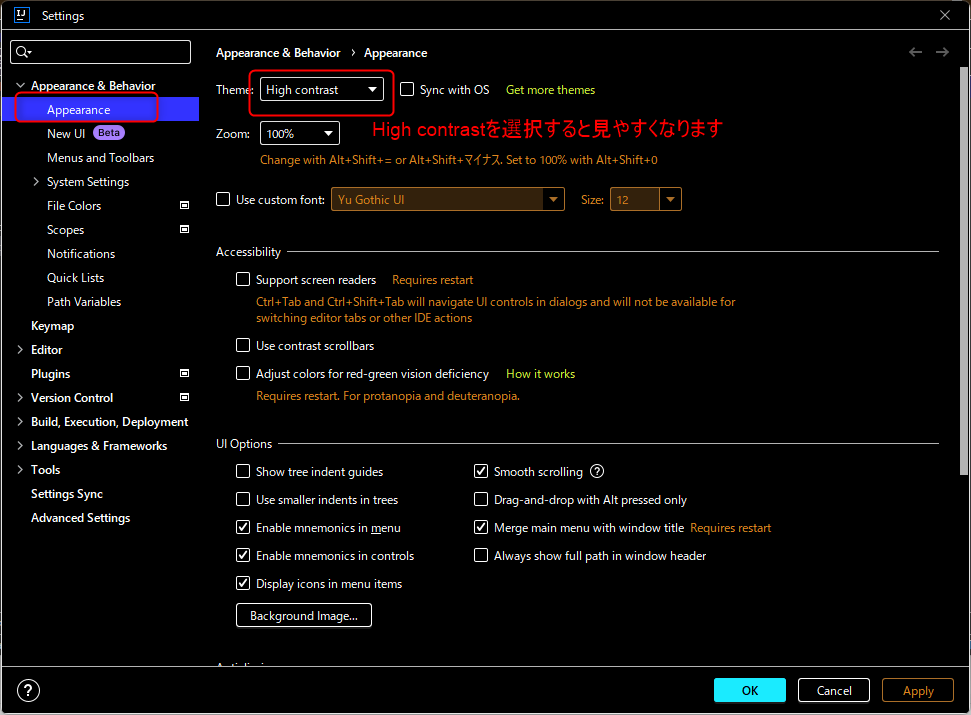
- ちなみに、
File→Settings→Appearance→High Contrastを選択してOKを押すと見やすくなります。
1-6. Dev Tools(自動ビルド)の設定
- 開発効率を上げるため、ソースを変更したときに自動的にビルドするホットデプロイの設定を行います。
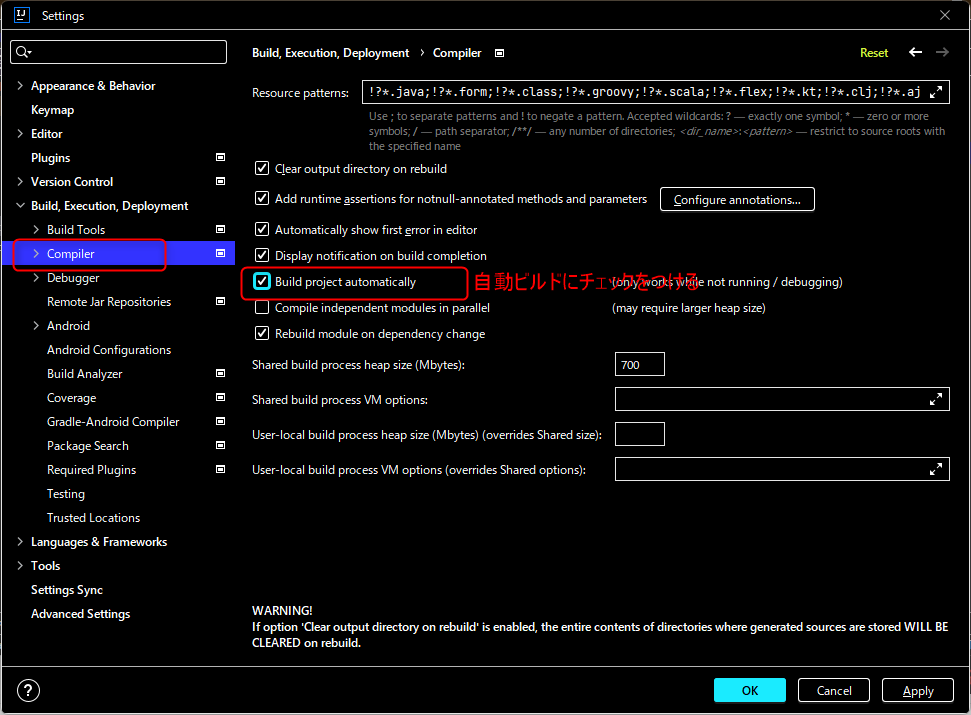
大きな変更がある場合や変更が反映されない場合は、サーバーの停止→開始をしてください。 - Intellijの
Settingsから、Build, Execution, Deployment→Compiler→Build project automaticallyにチェックを入れます。
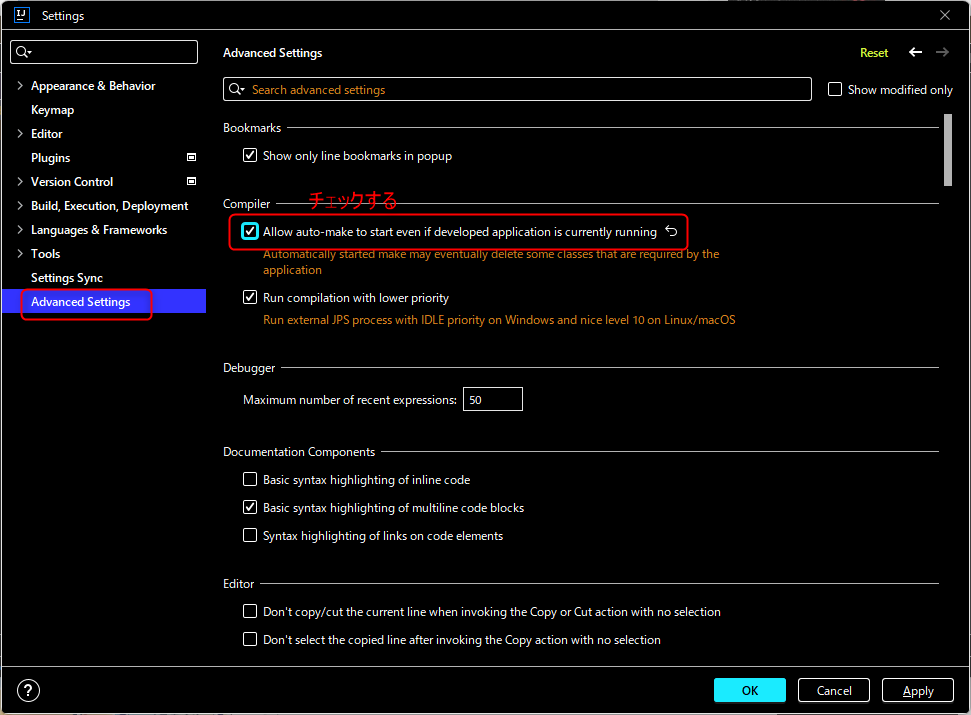
- 次に、Intellijの
Settingsから、Advanced Settings→Compiler→Allow auto-make to start even if developed application is currently runningにチェックを入れてOKを押します。
1-7. Hello Controllerの作成
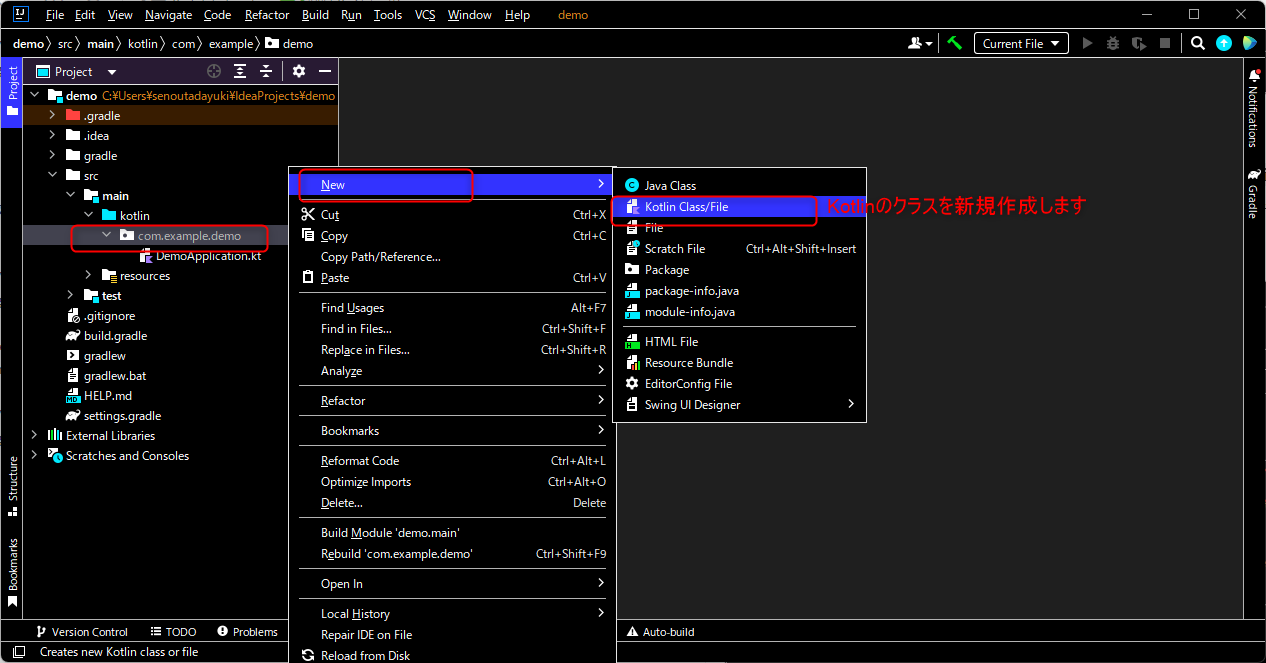
- Kotlinのファイルを新規作成します。
- 作成したいディレクトリで右クリック→
New→Kotlin Class/fileをクリックしてください。
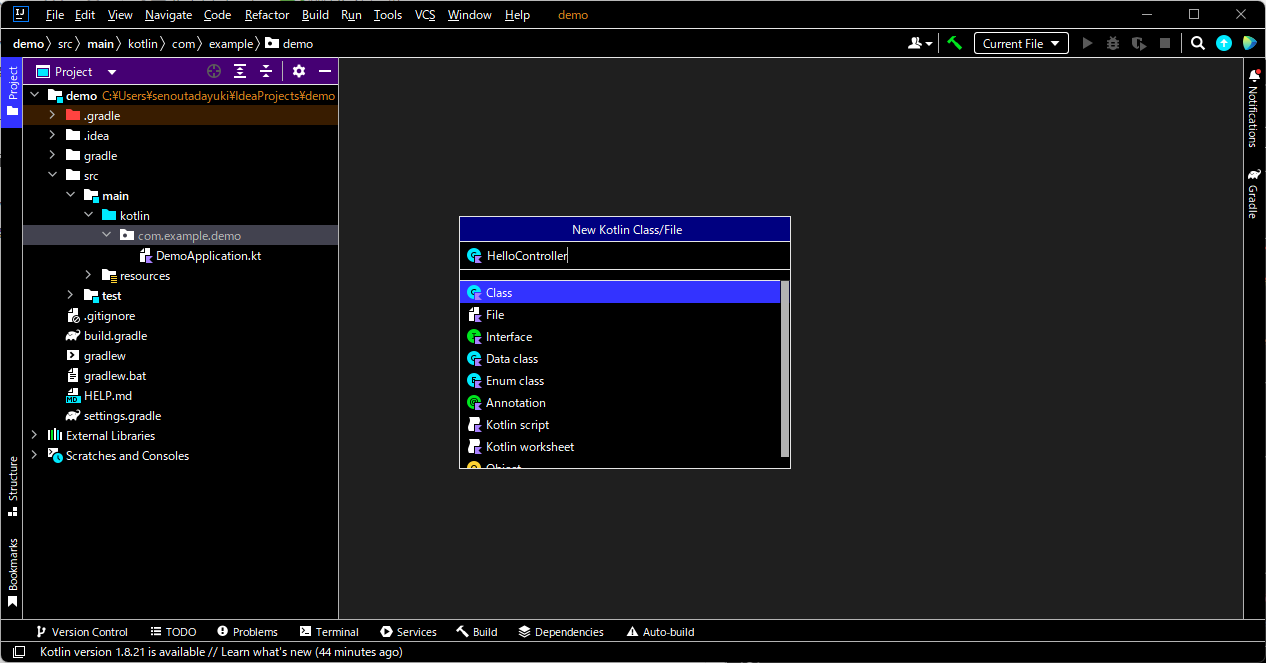
-
HelloControllerと入力して、Enterキーを押してください。
- 以下のように書いてください。
package com.example.demo

import org.springframework.web.bind.annotation.GetMapping
import org.springframework.web.bind.annotation.RestController

@RestController
class HelloController {

    @GetMapping("/hello")
    fun getHello(): String {
        return "Hello World!"
    }
}
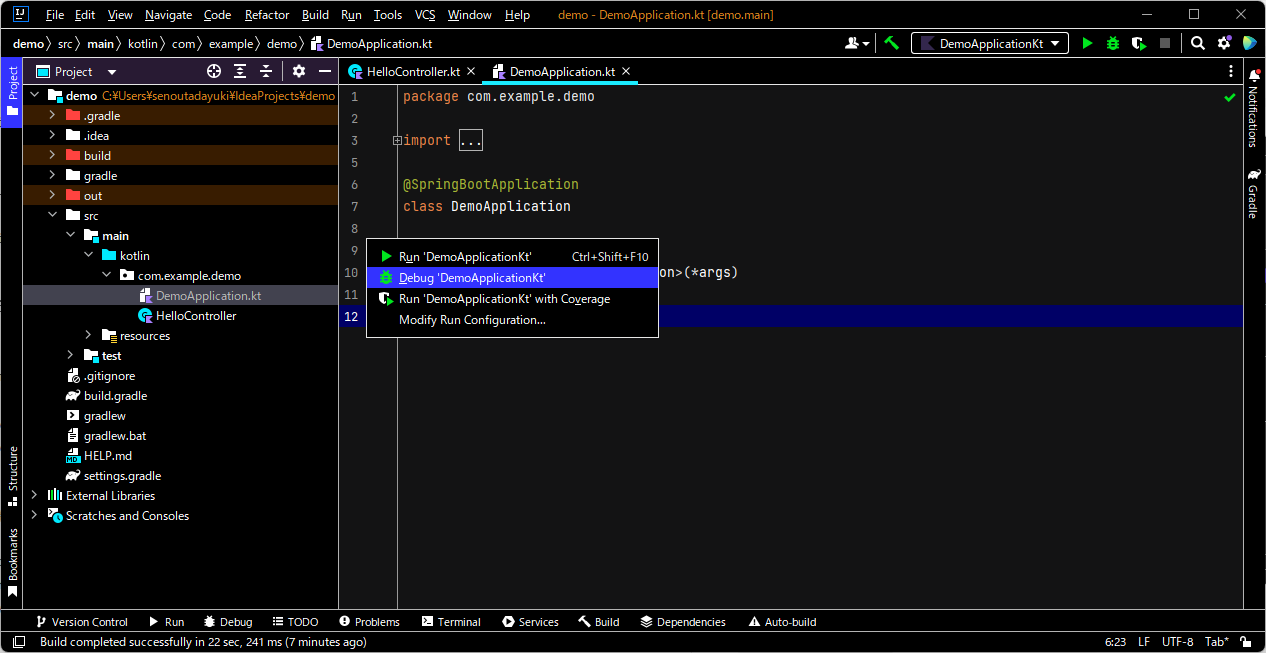
-
DemoApplication.ktを開いて、main()関数の左の▶をクリック、Debugをクリックするとプロジェクトが起動します。(次回からは、画面上の虫アイコンで起動します)
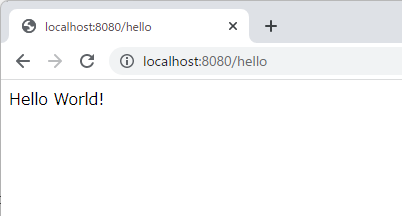
- ブラウザで、
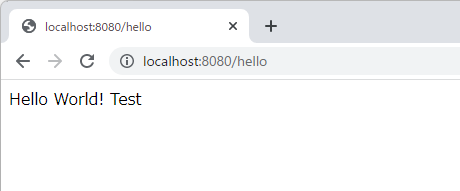
http://localhost:8080/helloにアクセスすると、Hello World!が返却されます。
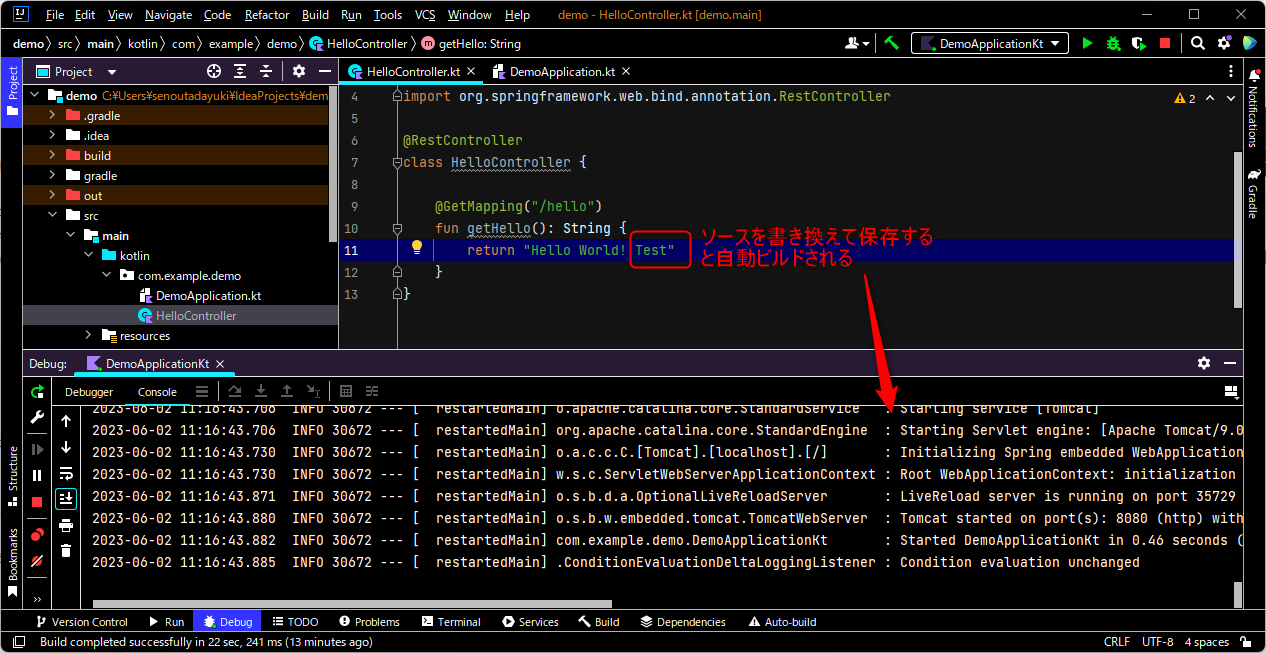
- ソースを書き換えて保存すると自動ビルドされます。
- ブラウザをリロードすると、結果が反映されています。
1-8. GitHub Copilotの導入(任意)
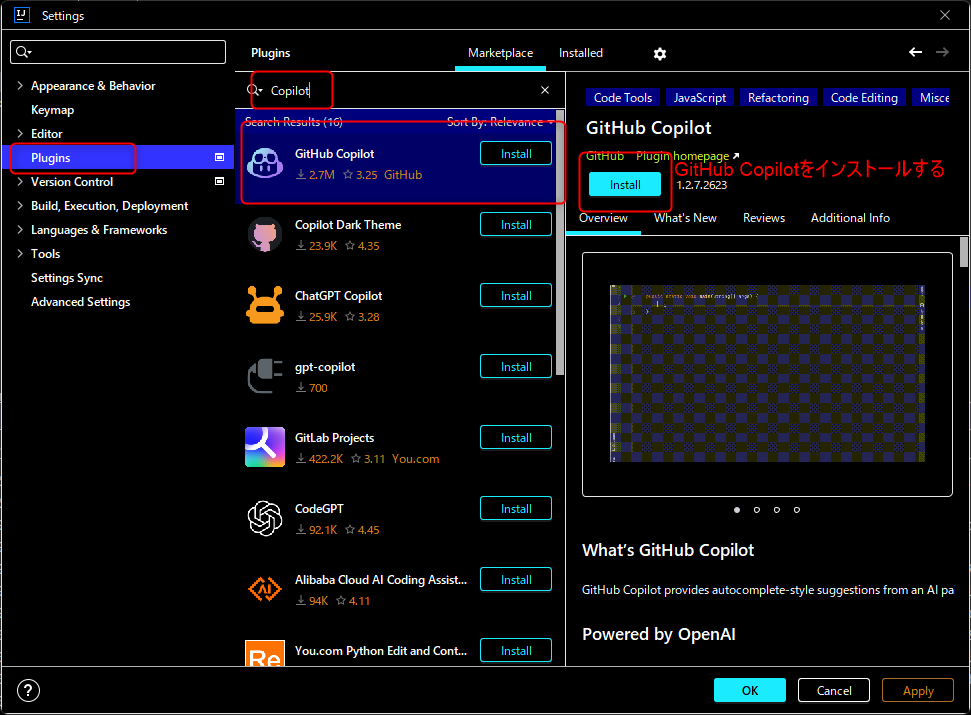
- Settingから、
Plugins→GitHub Copilotをインストールする - 詳しくは↓を読んでください。
- https://docs.github.com/ja/copilot/getting-started-with-github-copilot
おわり
