前回↓
次回↓
4. JUnitで単体テストを行う【基礎編】
4-1. テストの種類
手動テスト
JUnitを使用した自動テスト
- Controllerクラスのテストの例

- Serviceクラスのテストの例

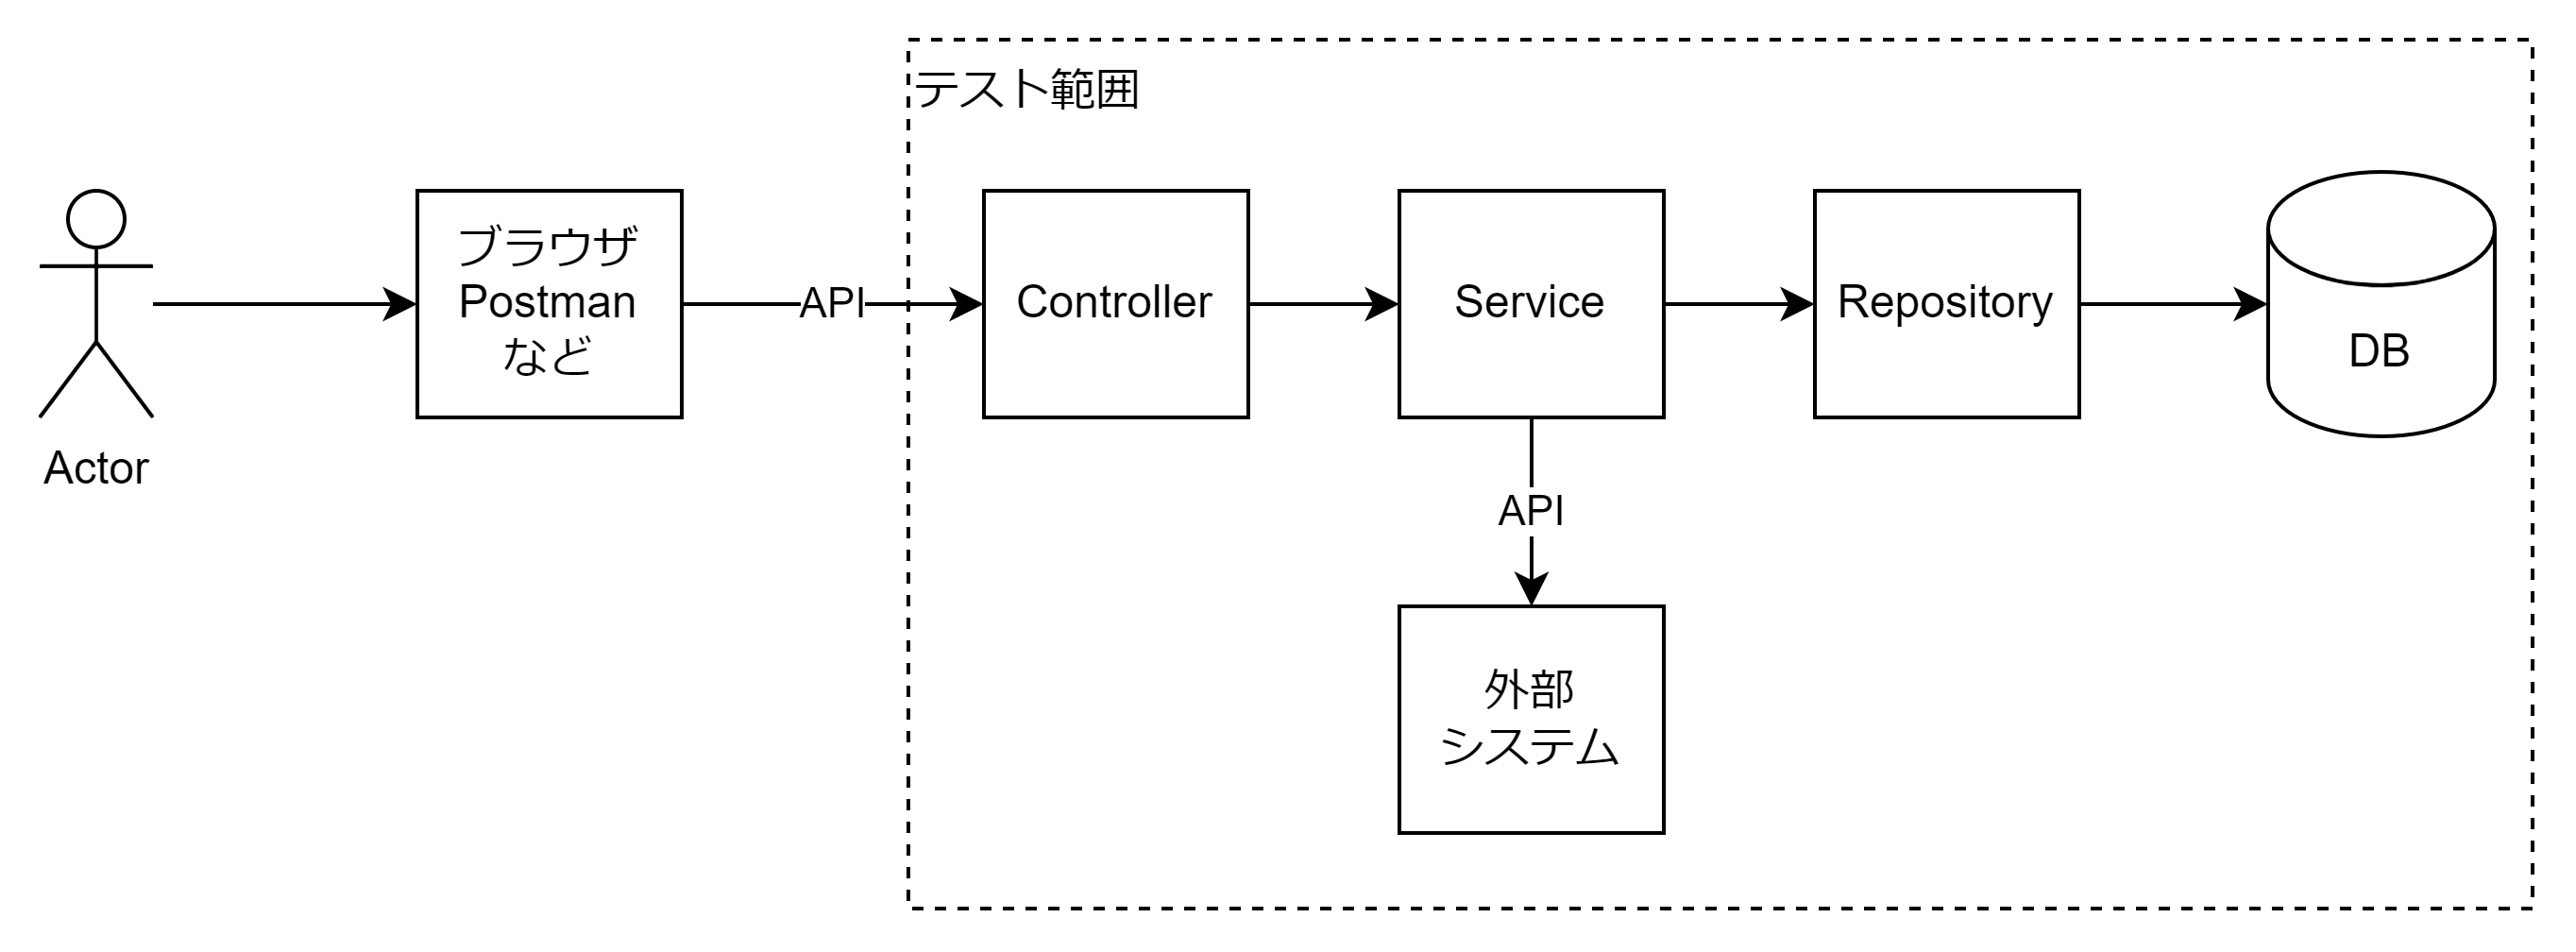
4-2. 今回作成するテスト
- 前回までに作成したTodoリストのアプリの構造
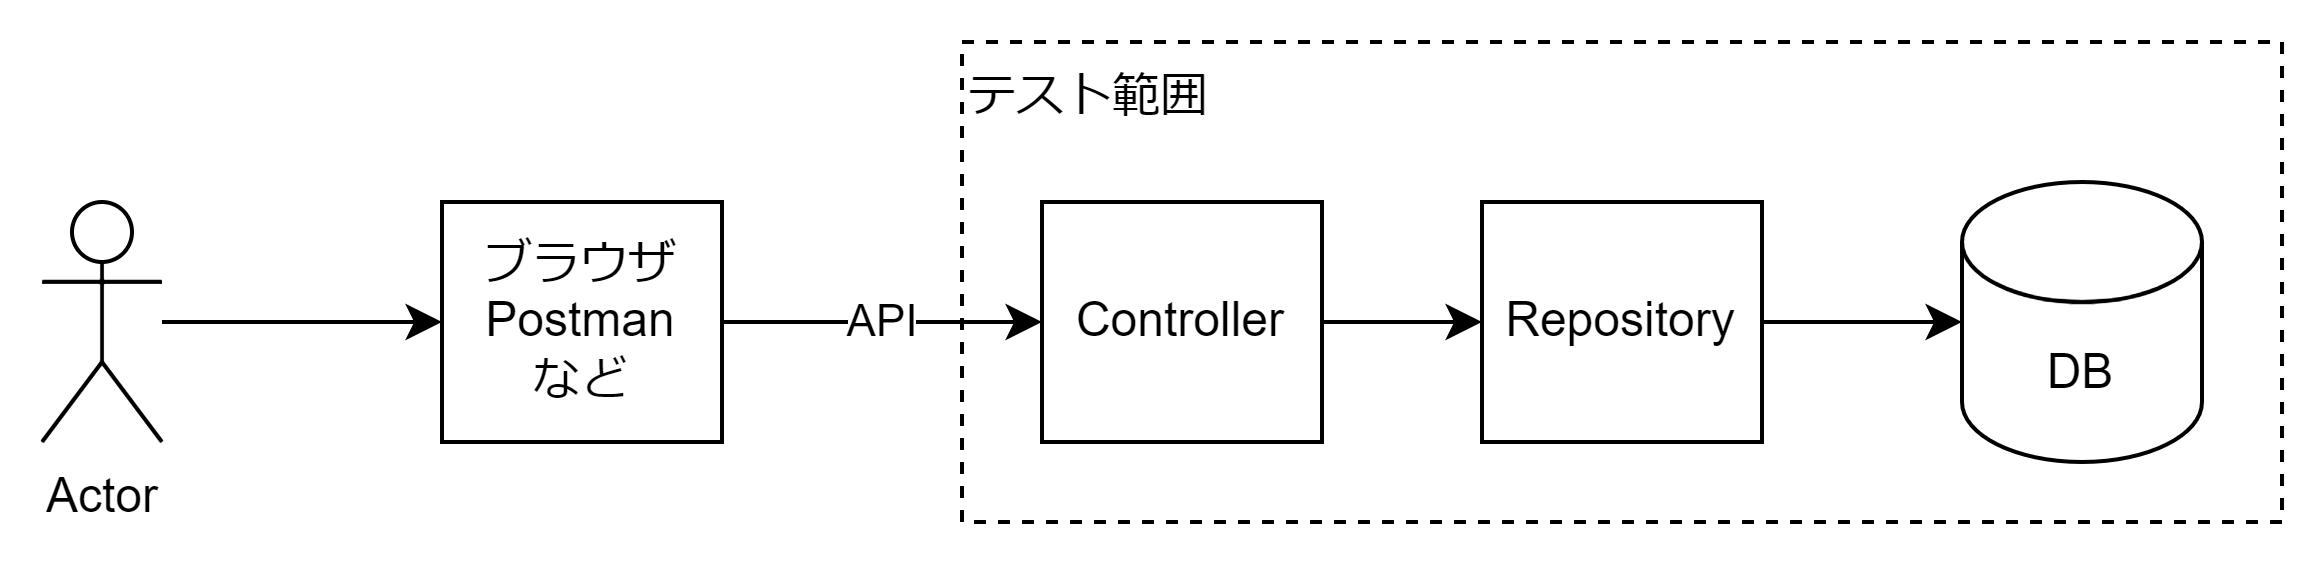
- テストは、Controllerクラスが対象になります

4-3. HelloControllerテストコードの作成
- テスト対象コード
HelloController.kt
package com.example.demo

import org.springframework.web.bind.annotation.GetMapping
import org.springframework.web.bind.annotation.RestController

@RestController
class HelloController {

    @GetMapping("/hello")
    fun getHello(): String {
        return "Hello World!"
    }
}
- テストで確認したいこと
-
/helloを呼び出した時、Hello World!がステータスコード200 OKで返却されること。
-
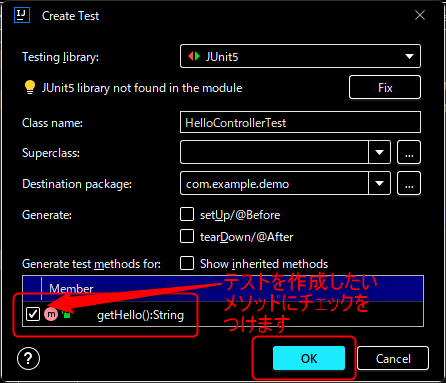
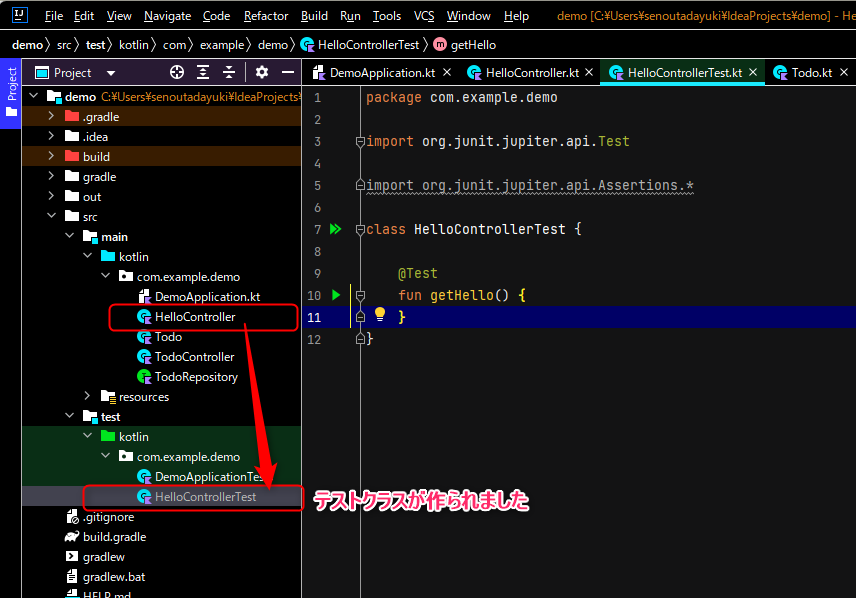
テストの作成方法
- ソース上で右クリック、Genereteをクリックして下さい。
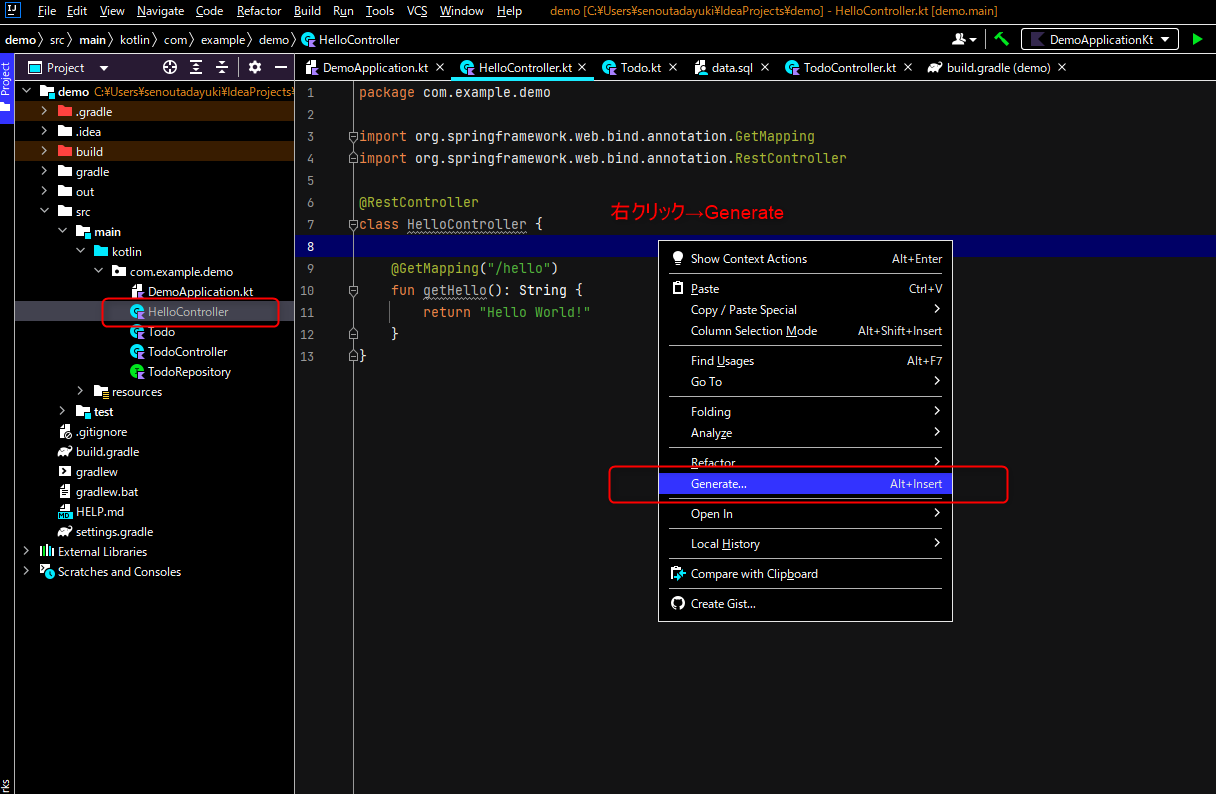
- Testをクリックして下さい。
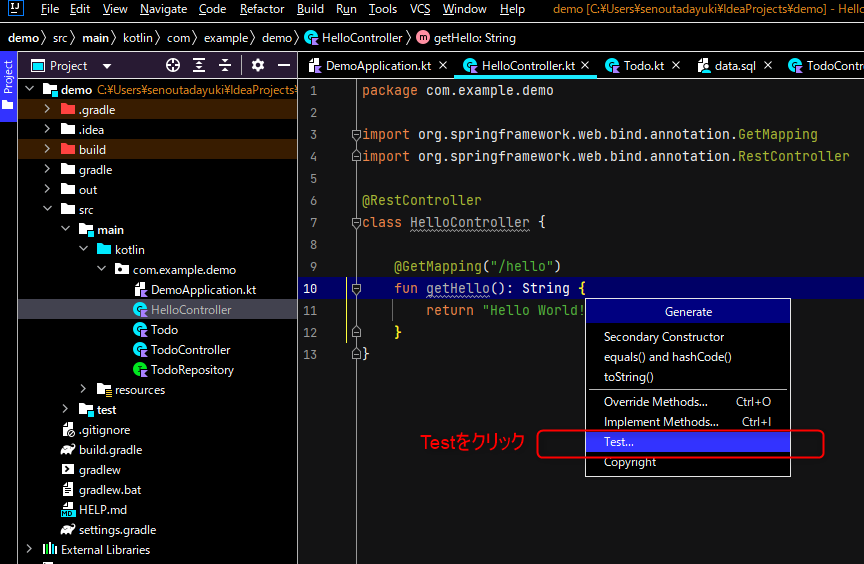
- テストを作成したいメソッドにチェックをつけて、OKボタンを押します。
テストコード
-
@ExtendWith(SpringExtension::class)は、Springの機能を使ったテストを実行するための拡張機能が読み込まれます -
@WebMvcTest(controllers = [HelloController::class])コントローラ層のみのユニットテストを実行します。
HelloControllerTest.kt
package com.example.demo

import org.junit.jupiter.api.Test
import org.junit.jupiter.api.extension.ExtendWith
import org.springframework.beans.factory.annotation.Autowired
import org.springframework.boot.test.autoconfigure.web.servlet.WebMvcTest
import org.springframework.test.context.junit.jupiter.SpringExtension
import org.springframework.test.web.servlet.MockMvc
import org.springframework.test.web.servlet.request.MockMvcRequestBuilders.get
import org.springframework.test.web.servlet.result.MockMvcResultMatchers.content
import org.springframework.test.web.servlet.result.MockMvcResultMatchers.status


@ExtendWith(SpringExtension::class)
@WebMvcTest(controllers = [HelloController::class])
class HelloControllerTest {

    @Autowired
    private lateinit var mockMvc: MockMvc

    @Test
    fun getHello() {
        mockMvc.perform(get("/hello"))
                .andExpect(status().isOk)
                .andExpect(content().string("Hello World!"))
    }
}
4-4. テストの実行
- 緑の▶をクリックしてテストを実行します。

- テストを失敗させてみます(確認後、ソースは元に戻しておいてください。)

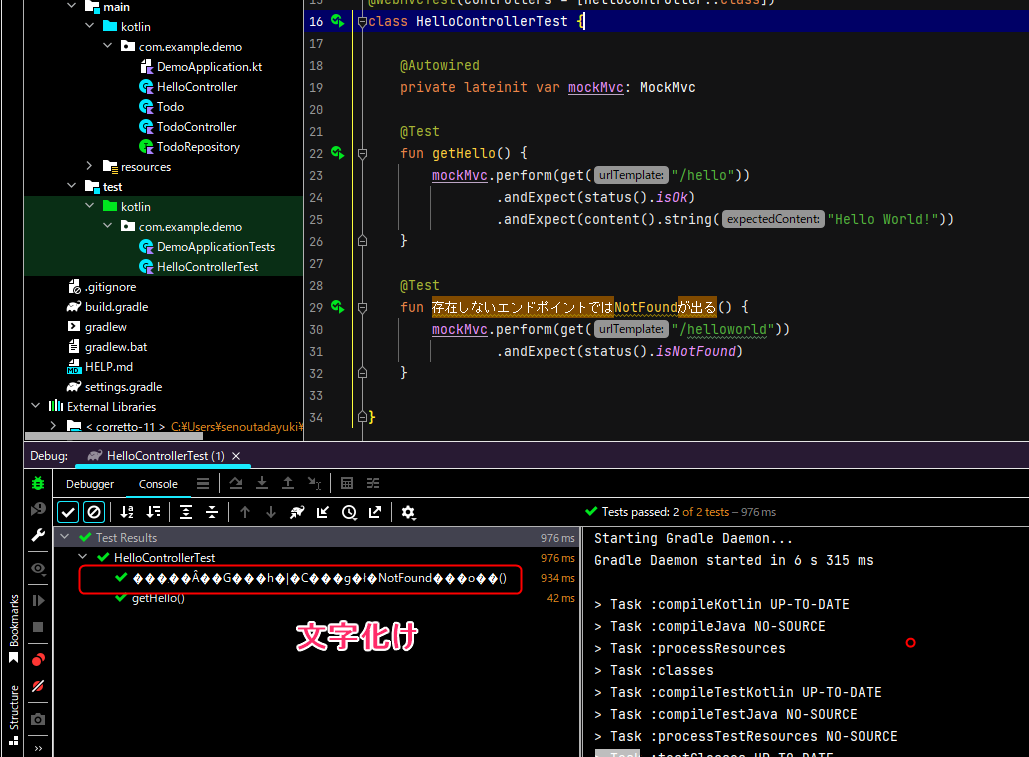
4-5. 404 Not Foundのテスト
- メソッドを日本語で書くと、結果一覧に日本語でテスト内容が出るのでわかりやすいです
HelloControllerTest.kt(一部)
    @Test
    fun 存在しないエンドポイントではNotFoundが出る() {
        mockMvc.perform(get("/helloworld"))  // 存在しないエンドポイント
                .andExpect(status().isNotFound)
    }
- 実行結果、文字化けしました。
4-6. 文字化けを直す
- Help→Edit Custom VM Options

-
-Dfile.encoding=UTF-8を追加して保存。 - Intellij を再起動します。

- テスト再実行すると、直りました。

おわり