初めに
この記事では、UE4でLinux用のパッケージ化できる状態から、Linux DedicatedServerをWSLを用いてLocalで起動して、Windows Clientアプリで接続するまでについて説明します。
クラウドや実際にホスティングをする前に、手元でデバックや挙動を確かめておきたいことがよくあると思います。ここでは、Windows上で、簡単にLinuxのサブシステムを動かすことができるWSLを用いて、サーバーでの挙動の確認を行っていきます。
前提
- ソースからUE4のビルドができている。
- Linux用のパッケージ化がEditorからできるようになっている。
開発環境
- Windows 10
- Visual Studio IDE / 2019
- Unreal Engine / 4.27.2 Built From Source Code
- Toolchain -v19 clang-11.0.1-based
- プロジェクトファイルは、C++を使用したプロジェクトを想定しています。
- WSL2の有効化 (以下の記事などを参考に利用できるようにしておきます)
Setup
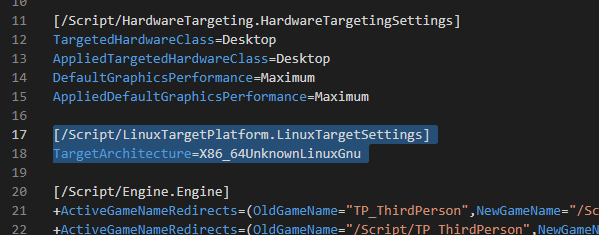
まず初めに、パッケージ化したいプロジェクトファイルのDefaultEngine.iniファイルに、Linuxのターゲット設定を追記します。
[/Script/LinuxTargetPlatform.LinuxTargetSettings]
TargetArchitecture=X86_64UnknownLinuxGnu

(この追加作業は、現場のUE4.27では必要ないかもしれません。)
DefaultEngine.iniファイルは、[ProjectRoot]/Config/DefaultEngine.iniにあります。
さらに、[ProjectRoot]/SourceにServerとClientのターゲットファイルを追加します。
例えば、Server用のターゲットファイルには、
using UnrealBuildTool;
using System.Collections.Generic;

public class LinuxSampleServerTarget : TargetRules
{
	public LinuxSampleServerTarget(TargetInfo Target) : base(Target)
	{
		Type = TargetType.Server;
		DefaultBuildSettings = BuildSettingsVersion.V2;
		ExtraModuleNames.Add("LinuxSample");
	}
}
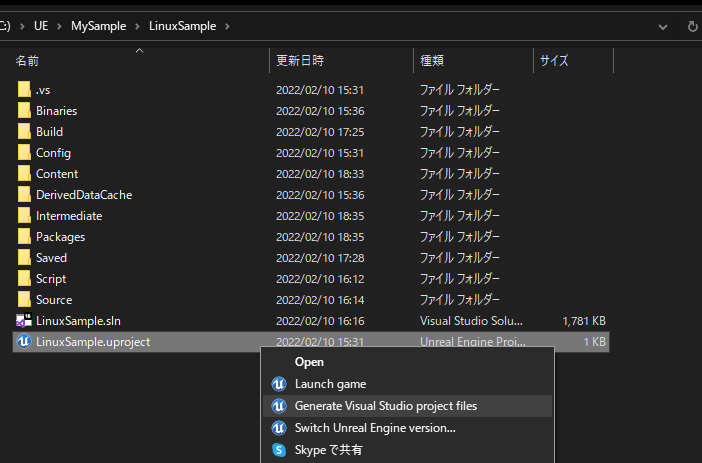
のように、プロジェクトファイル生成時に生成されるLinuxSmapleEditorファイルをコピーした内容から、Editor部分をServerやClientという文字列に置き換えたファイルを追加します。この設定を行い、再度プロジェクトファイルを右クリックから、Generate Visual Studio project filesをすると、
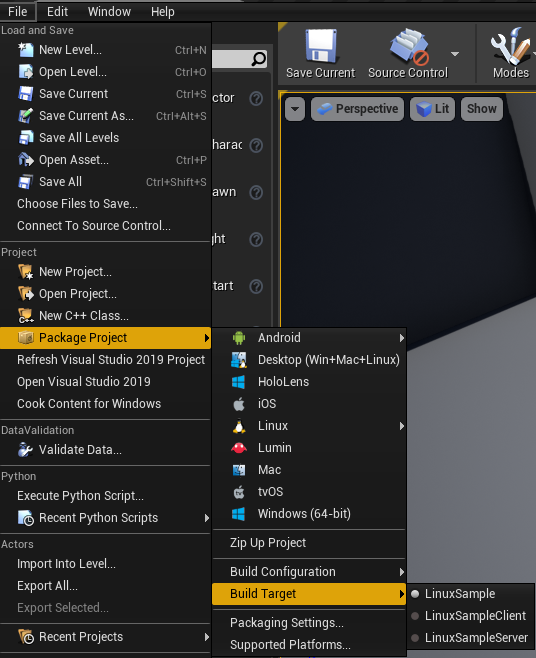
パッケージする設定から、どのビルドターゲットにするかを選択できるようになります。
Build
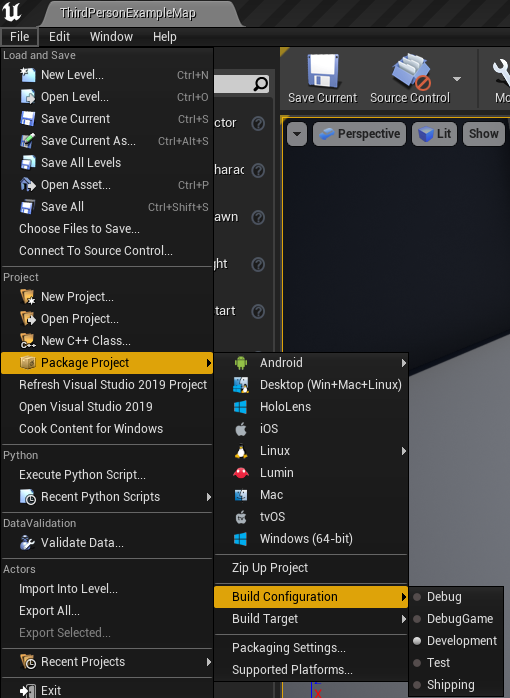
ここまでの設定が完了したら、プロジェクトファイルを開き、Package ProjectからBuild ConfigurationをDevelopmentに、先ほどのBuild TargetをServerにした状態で、Linuxのビルドを行います。
今回は、パッケージ化したファイルをプロジェクトフォルダー内のPackagesフォルダーに保存します。例えば、以下のようにプロジェクトファイル名 + Serverというファイルが、以下のパスにあることが確認できるともいます。
この作業は、VSからも以下のようにターゲットをServer、プラットフォームをLinuxに設定してビルドすることでも必要なファイルを手に入れることができます。
同じ手順で、windowsのclientアプリに関してもビルドしておきます。
Usage
これまでで必要なパーツが揃ったので、実際にWSLを用いてLinux 上で先ほどのビルドを立ち上げていきます。
今回は、Microsoft StoreにあるUbuntu 18.04 LTSを利用します。WSL2からlocal hostへのアクセスがそのままではできないので、WSL上のIPを
ip -4 addr show eth0
で取得します。
can't access 127.0.0.1:80 outside of WSL2 / Ubuntu 20.04
このIPにWindowsのClientアプリからアクセスすることで、サーバーにアクセスできるように、先ほどのビルドを起動します。
Linuxのビルドは、私の場合は、 /mnt/c/UE/MySample/LinuxSample/Packages/LinuxServer/LinuxSample/Binaries/Linux/
にあるので、
cd /mnt/c/UE/MySample/LinuxSample/Packages/LinuxServer/LinuxSample/Binaries/Linux/
./LinuxSampleServer xxx.xx.xxx.xxx -log
で起動します。-logをつけることで、Serverのlogを見ながら接続が可能になります。また、xxx.xx.xxx.xxxには、先ほどip addr showで取得したIPを入力してください。
この状態で、今度は、Windowsのcmdなどで、Clientアプリを起動します。起動は、
{Clientアプリ実行ファイルまでのpath}/LinuxSampleClient -log xxx.xx.xxx.xxx -windowed resx=720 resy=480
とすることで、適当なサイズのwindowでサーバーへ接続するwindowsのアプリケーションを立ち上げることができます。
#Reference


