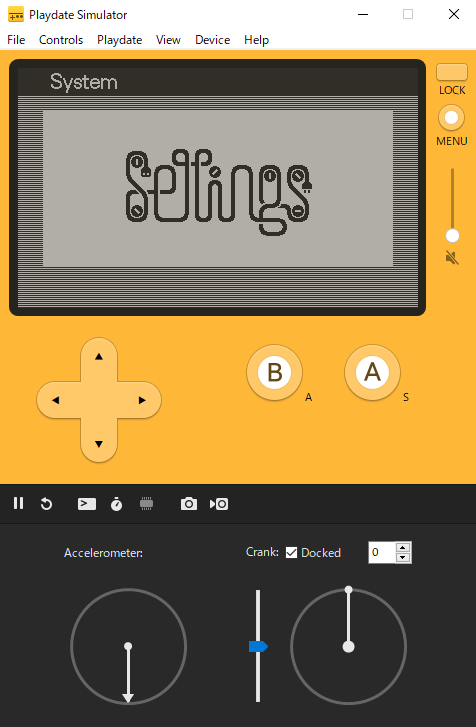
Playdate 向けのゲームを開発する際の基本的な流れについて整理しています。
Playdate とは?
Panic 社が開発した携帯ゲーム機です。
現在は予約注文を受け付け中です。
- 解像度 400×240 ピクセルの白黒画面
- 入力デバイス
- 十字キー
- A/Bボタン
- クランク
- 開発言語は C言語 か Lua
本記事では Windows 環境で Lua を用いて開発する想定で説明します。
SDK の入手
Playdate SDK は公式サイトからダウンロードできます。
Playdate SDK にはコンパイラのほか、PC上でゲームの動作確認を行うためのシミュレータが同梱されています。
下記URLからダウンロードしてインストールしましょう。
またリファレンスも公式サイト上にあり、開発に関する基本的な情報についてはここを見ればだいたい分かるようになっています。(ただし英語)
動かしてみる
それでは、リファレンスに載っているサンプルコードを使ってゲームを作って動かしてみましょう。
1. プロジェクト構成
公式リファレンスで推奨されている、プロジェクトのディレクトリ構成は以下のようになっています。
[myProjectName]/
    source/
        main.lua
        ...and other .lua files
        images/
            [myImageFile1].png
            [myImageFile2].png
            ...and so on
        sounds/
            [myAudioFile1].wav
            [myAudioFile2].mp3
            ...and other ADPCM- or MP3-formatted files
    support/
        Project files including Photoshop assets, project outlines, etc.
今回、ソースコードは main.lua のみで、かつサウンドは一つも鳴らさないので、以下のようにファイルを作成しました。
playdate_sample/
    source/
        main.lua
        images/
次は、ソースコードである main.lua の中身を見ていきましょう。
2. ソースコード
今回は公式リファレンスに載っている以下のコードを使います。
(コメントについては適宜和訳しています)
-- Playdate ライブラリのインポート
import "CoreLibs/object"
import "CoreLibs/graphics"
import "CoreLibs/sprites"
import "CoreLibs/timer"

-- `playdate.graphics` の省略形として `gfx` を定義する。
-- なお、これはローカル変数なので、複数の .lua ファイルでゲームを構成する場合は各ファイルに同じ記述が必要。
local gfx <const> = playdate.graphics

-- プレイヤーのスプライト用変数。
-- 今回は複数の関数から参照するのでグローバル変数として定義する。
local playerSprite = nil

-- 初期化処理を行う関数を定義する。
function myGameSetUp()

    -- プレイヤースプライトを初期化する。
    local playerImage = gfx.image.new("images/playerImage")
    assert( playerImage ) -- 正しく読み込めたかチェック

    playerSprite = gfx.sprite.new( playerImage )
    playerSprite:moveTo( 200, 120 ) -- スプライトを画面中心に移動させる
    playerSprite:add() -- 忘れないように!!

    -- 背景スプライトを初期化する。
    local backgroundImage = gfx.image.new( "images/background" )
    assert( backgroundImage ) -- 正しく読み込めたかチェック

    -- コールバックを用いて描画処理を設定する。
    gfx.sprite.setBackgroundDrawingCallback(
        function( x, y, width, height )
            backgroundImage:draw( 0, 0 )
        end
    )
end

-- 初期化処理を実行する。
myGameSetUp()

-- ゲームのメイン処理を定義する。
-- ゲーム実行中はこの関数が毎フレーム呼び出される。
function playdate.update()

    -- 十字キーでプレイヤーを上下左右に移動させる。
    if playdate.buttonIsPressed( playdate.kButtonUp ) then
        playerSprite:moveBy( 0, -2 )
    end
    if playdate.buttonIsPressed( playdate.kButtonRight ) then
        playerSprite:moveBy( 2, 0 )
    end
    if playdate.buttonIsPressed( playdate.kButtonDown ) then
        playerSprite:moveBy( 0, 2 )
    end
    if playdate.buttonIsPressed( playdate.kButtonLeft ) then
        playerSprite:moveBy( -2, 0 )
    end

    -- 各種更新処理の呼び出し。
    -- これらの関数は playdate.update() の最後に呼ぶことを推奨。
    gfx.sprite.update()
    playdate.timer.updateTimers()
end
3. スプライト画像
Playdate では PNG 形式および GIF 形式の 2bit 画像ファイルが利用可能です。
上記サンプルコードでは images/playerImage および image/background の二つのファイルが使われているので、今回は以下の画像を用意しました。
| ファイル名 | 画像 |
|---|---|
images/playerImage.png |
 |
images/background.png |
 |
4. コンパイル
作成したゲームをコンパイルするには Playdate 用のコンパイラである pdc (Windowsでは pdc.exe )を使用します。
pdc はPlaydate SDK の bin フォルダ内にあり、そのまま実行すると以下のようにヘルプが表示されます。
usage: pdc.exe [-sdkpath <path>] [-s] [-u] [-m] [--version] <input> [output]
  input: folder containing scripts and assets (or lua source, with -m flag)
  output: folder for compiled game resources (will be created, defaults to <input>.pdx)
  -sdkpath: use the SDK at the given path instead of the default
  -s/--strip: strip debug symbols
  -u/--no-compress: don't compress output files
  -m/--main: compile lua script at <input> as if it were main.lua
  -v/--verbose: verbose mode, gives info about what is happening
  -q/--quiet: quiet mode, suppresses non-error output
  -k/--skip-unknown: skip unrecognized files instead of copying them to the pdx folder
  --version: show pdxversion
色々オプションがありますが、基本的には以下のように実行すればOKです。
pdc.exe -sdkpath <PlaydateSDKのパス> <sourceフォルダのパス> <出力先のパス>
というわけで、サンプルプロジェクト上でコマンドプロンプトを起動して以下のコマンドを実行してみましょう。
C:\Users\xxx\Documents\PlaydateSDK\bin\pdc.exe -sdkpath C:\Users\xxx\Documents\PlaydateSDK ./source sampleGame
コンパイルが成功すると、コンパイル結果が sampleGame.pdx に生成されます。
5. シミュレータ上で実行
コンパイルできたら、早速シミュレータ上で動かしてみましょう。
シミュレータを起動するには Playdate SDK の bin/PlaydateSimulator.exe を実行します。
シミュレータ上でゲームを起動するには File -> Open から先ほど作成した .pdx ファイルを開いてみましょう。
これでゲームを動かすことができました!
やったね!
(おまけ)開発テンプレート
有志の方が Playdate のゲーム開発用テンプレート (Playlate) を作成してくれています。
公式が推奨しているディレクトリ構成で作られていたり、VSCodeで開発するための環境設定ファイルが入っていたり、なかなか有用なので、ぜひ使わせていただきましょう。
Windows 向けにカスタマイズする
上記テンプレートは Mac 向けに作られているので、Windows での開発に使うためには少し手を加える必要があります。
ビルドコマンド用のバッチファイルを作る
コンパイルのたびに毎回コマンドプロンプトから pdc.exe を呼ぶのは億劫なので、バッチファイルを作っておきましょう。
今回は以下のような感じでバッチファイルを作成しました。
@echo off

set SDK_DIR=C:\Users\XXX\Documents\PlaydateSDK
set TITLE=mygame

:loop
if "%~1" == "" goto end

if "%1" == "compile" ( %SDK_DIR%\bin\pdc.exe -sdkpath %SDK_DIR% source %TITLE%.pdx )
if "%1" == "open" ( %SDK_DIR%\bin\PlaydateSimulator.exe %TITLE%.pdx )
if "%1" == "clean" ( del /Q %TITLE%.pdx )

shift
goto loop

:end
SDK_DIR および TITLE には、ご自身の環境におけるSDKのパスと、ゲームのファイル名を入力してください。
このバッチファイルは以下のように使用します。
-
make.bat compile:: ゲームをコンパイルする -
make.bat open:: コンパイルしたゲームをエミュレータ上で実行する -
make.bat compile open:: ゲームをコンパイルしてからエミュレータ上でゲームを実行する -
make.bat clean:: 一時ファイルを削除する
VSCode での開発環境を整える
Playlate に同梱されている .vscode/tasks.json を開いて、上記バッチファイルを呼び出すように修正します。
...
            "label": "Build and Run",
            "type": "shell",
-           "command": "make build",
+           "command": "./make.bat",
+           "args": ["clean", "compile", "open"],
...
            "label": "Run",
            "type": "shell",
-           "command": "make run",
+           "command": "./make.bat",
+           "args": ["open"],
+           "options": {
+               "cwd": "${workspaceFolder}"
+           },
...
            "label": "Compile",
            "type": "shell",
-           "command": "make compile",
+           "command": "./make.bat",
+           "args": ["clean", "compile"],
+           "options": {
+               "cwd": "${workspaceFolder}"
+           },
...
            "label": "Clean",
            "type": "shell",
-           "command": "make clean",
+           "command": "./make.bat",
+           "args": ["clean"],
+           "options": {
+               "cwd": "${workspaceFolder}"
+           },
これで Windows 環境の VSCode 上でも、タスク実行からコンパイルやシミュレータ起動が行えるようになりました。
最後に
今回は Playdate 向けのゲームを開発するための環境整備について書きましたが、この Playdate というゲーム機、単純に携帯ゲーム機としても非常に魅力的で、高いポテンシャルを秘めていると思っています。
わたし自身の手元にもつい先月届いたばかりですが、ちょっとした休憩時間にちょこっと遊んだりとか、毎週どんなゲームが配信されるかを心待ちにしてみたりと、非常に楽しんでいます。
Pre-Order ということでまだまだしばらくは入手が困難な状況にありますが、今回の記事を読んで興味を持たれた方は、ぜひ注文を検討してみるとよいのではないでしょうか。


