概要
- HAMMER.JSを使用して、スマートフォンジェスチャーをJavaScriptで認識します
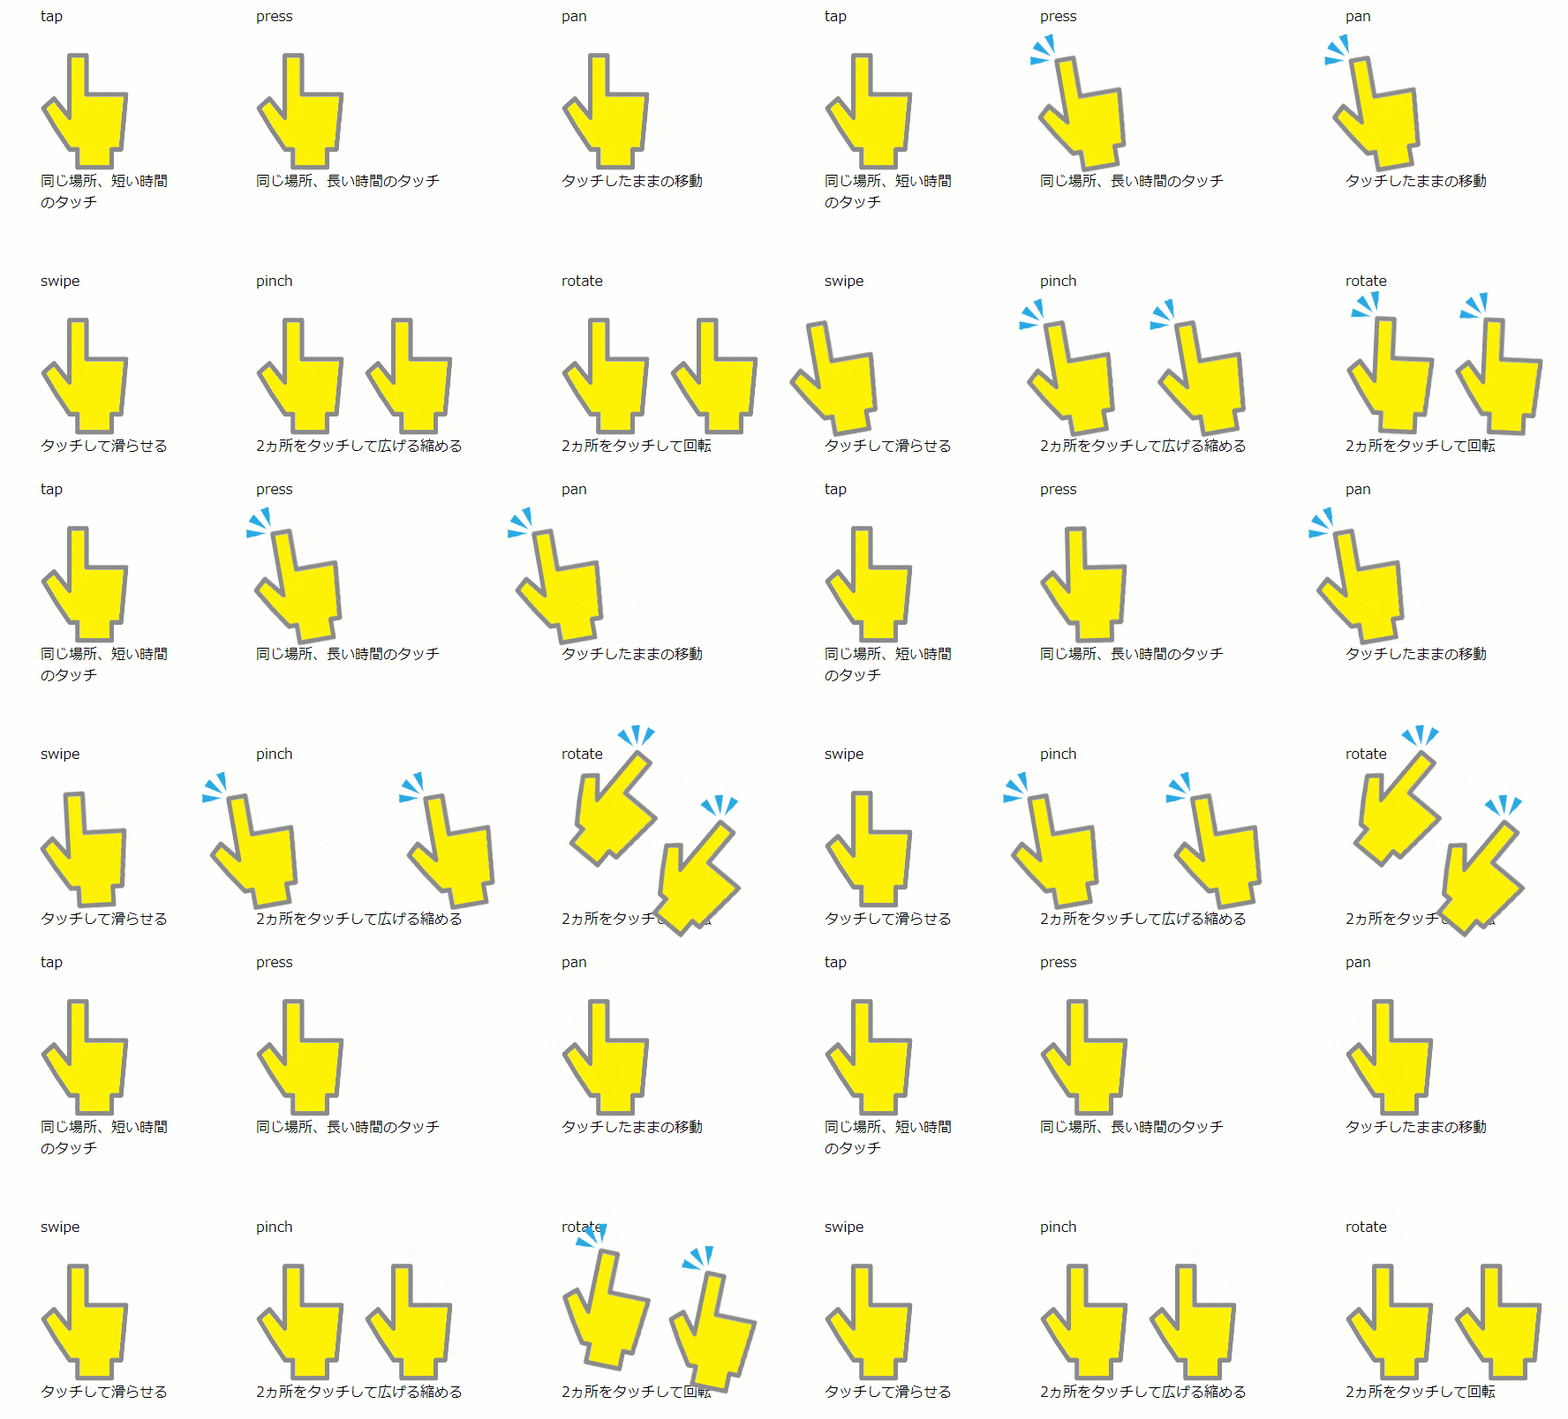
- 認識できるジェスチャーは次の6つです
スマートフォンジェスチャー(タップ、スワイプ、長押しとか)認識ライブラリ HAMMER.JS
以下はnpm trendsによるダウンロード数です。他にもいろいろとライブラリがあると思いますけど、ここら辺の情報から記事作成時点(2022年10月8日)でよく使われていると思われるhammer.jsを選びました。
公式ページは、HAMMER.JSです。
試してみた
htmlは、canvasというidのcanvasエレメントがあります。cssはないです。javascriptには、canvas上に表示されるボールのconst ball、画面全体における位置を指定されたエレメント上の相対位置に変換するconst offset、イベントハンドラを管理するconst handlers、そしてhammer.jsのオブジェクトであるconst hammerからできています。
hammer.jsにはpanstart, panmove, panendのイベントがあり、パソコンではmousedown, mousemove, mouseup、スマートフォンではtouchstart, touchmove, touchendに相当します。
<!DOCTYPE html>
<html>

<head>
    <meta http-equiv="Content-Type" content="text/html; charset=utf-8" />
    <meta name="viewport" content="width=device-width, initial-scale=1.0">

    <!-- このファイルと同階層に hammer.min.js ファイルを公式からダウンロードしてきている -->
    <script src="hammer.min.js"></script>
</head>

<body>
    <h2>テスト canvas</h2>
    <div>ボールをクリックまたはタップして移動する。</div>
    <canvas id="canvas" width="400px" height="400px"></canvas>
</body>

<script>
    // canvasの取得
    const canvas = document.getElementById("canvas");
    const ctx = canvas.getContext("2d");

    // canvasに描画するボールオブジェクト
    const ball = {
        // 中心位置と半径
        pt: undefined,
        r: 10,
        // 未選択時のボール色
        default_color: "rgba(0,250,0,1)",
        // 色を変更する場合は、この変数に色情報をセットする。
        color: undefined,
        // 移動中であるかどうか
        moving: false,

        // 色を未選択時のデフォルトに戻す。
        set_default_color: function () {
            this.color = undefined;
        },
        // ボール色を変更する。
        set_color: function (col) {
            this.color = col;
        },
        // 引数ptで表された位置がボールの内部にあるかどうかを判定する。
        is_in: function (pt) {
            return Math.sqrt(pt.reduce((a, e, i) => a + Math.pow(e - this.pt[i], 2), 0)) < this.r;
        },
        // 位置を変更する。
        set_pt: function (pt) {
            this.pt = pt;
        },
        // ボールを描画する。
        draw: function (ctx) {
            ctx.fillStyle = this.color ?? this.default_color;
            ctx.beginPath();
            ctx.ellipse(...this.pt, this.r, this.r, 0, 0, 2 * Math.PI);
            ctx.fill();
        },
        // 移動中であるかを設定する。
        set_moving: function (moving) {
            this.set_color(moving ? "rgba(0,0,255,1)" : undefined);
            this.moving = moving;
        },
    };
    // ボールの初期位置は、canvasの中央とする。
    ball.set_pt([canvas.width / 2, canvas.height / 2]);

    // hammer.jsイベントの位置が画面全体からの位置であるため、canvas上の位置に変換するためにoffsetという関数を作成する。
    const offset = (function (elem) {
        // 関数作成時点での指定エレメントの左上座標を保存する。
        const elem_pt = [elem.getBoundingClientRect().left, elem.getBoundingClientRect().top];
        // 引数のスクリーン座標から指定エレメント上の座標に変換する関数を返す。
        return function (pt) {
            return pt.map((e, i) => e - elem_pt[i]);
        };
    })(canvas);

    // hammer.jsのイベントハンドラを定義する。
    const handlers = {
        // パンが開始されたとき
        panstart: function (ev) {
            // パンの開始位置は、centerからdeltaを引いたものになる。
            ball.set_moving(ball.is_in(offset([ev.center.x - ev.deltaX, ev.center.y - ev.deltaY])));
        },
        // パンで指を移動中
        panmove: function (ev) {
            if (ball.moving) {
                ball.set_pt(offset([ev.center.x, ev.center.y]));
            }
        },
        // パンの終了
        panend: function (ev) {
            ball.set_moving(false);
        },
        // タップ処理
        tap: function (ev) {
            if (ball.is_in(offset([ev.center.x, ev.center.y]))) {
                ball.set_color("rgba(255,0,0,1)");
            } else {
                ball.set_default_color();
            }
        },
    };

    // hammerのオブジェクトをイベントを取得したいエレメントを指定して作成する。
    const hammer = new Hammer(canvas);
    // デフォルトでパンは左右のみを認識するので、全方向に変更する。
    hammer.get("pan").set({ direction: Hammer.DIRECTION_ALL });
    // 変数handlersで作成したハンドラをhammerに追加する。
    hammer.on(Object.keys(handlers).join(" "), ev => {
        handlers[ev.type](ev);
    });

    // htmlの描画
    const render = async () => {
        // canvasに背景を描画する。
        ctx.fillStyle = "rgba(200,200,200,1)";
        ctx.fillRect(0, 0, canvas.width, canvas.height);

        // ボールを描画する。
        ball.draw(ctx);
        requestAnimationFrame(render);
    };
    requestAnimationFrame(render);
</script>

</html>
実行結果
windowsのchromeで、スマートフォンモードにして表示した例です。スマートフォンモードには、ctrl-shift-iで表示されるデベロッパーツールの左上にあるスマートフォンボタンを押してください。以下のようにパソコンでスマートフォンの画面を表示することができます。
画面の真ん中にあるボールをクリックまたはタップで移動することができます。
以上、メモ用ですけど公開させていただきました。


