こんにちは!はっしーです!
この記事は、Postman Advent Calendar 2023 シリーズ1、18日目の記事です。
Postmanの日本法人設立、日本上陸おめでとうございます!
各地でイベントも多く開かれており、盛り上がりをとても感じています!
福岡に住んでいる私も以下のイベントにオンラインで参加しました!(参加者に配られたPostman Tシャツはめちゃくちゃ可愛くて、当日現地に行けなかったことを悔やみました...泣)
ぜひまた福岡に来てください!
以前よりAPIクライアントとしてPostmanは使用していました。
ただ、ほんとにAPIクライアントとしての機能のみですw
Meetupやワークショップで、ほかにもAPIカタログやAPIテスト、モックサーバーなど様々な機能があることを知りました。
今回は、APIテストの自動化について触ってみたので紹介したいと思います!
記事の流れとしては以下です。
- サンプルのアプリを作成する。
- GitHub Actionを使用してアプリをAzureにデプロイする。
- GitHub ActionにPostmanのAPIテストを組み込み自動化する。
サンプルのアプリを作成する
では早速サンプルのアプリを作成します。
使用技術:C#、ASP.NET CoreのMinimal API
開発環境:GitHub Codespaces
-
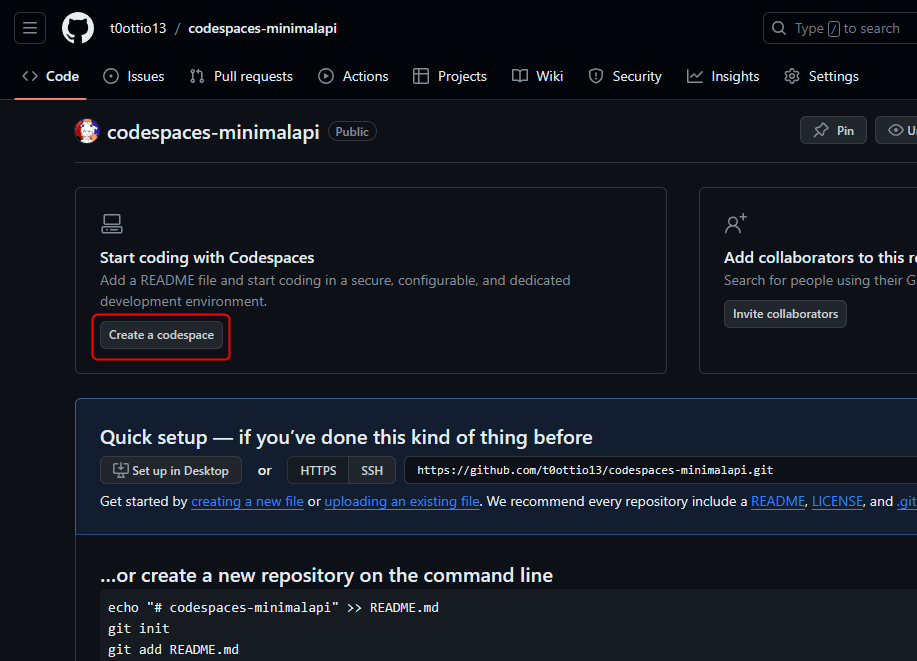
GitHubリポジトリを作成して、Codespaceを立ち上げます。


-
ターミナルで以下コマンドを入力します。
-
dotnet new web -o SampleApi

-
cd SampleApi -
dotnet run

-
-
ソリューションファイルを作り忘れていたので作成し、プロジェクトを追加します。
dotnet new sln-
dotnet sln add SampleApi

-
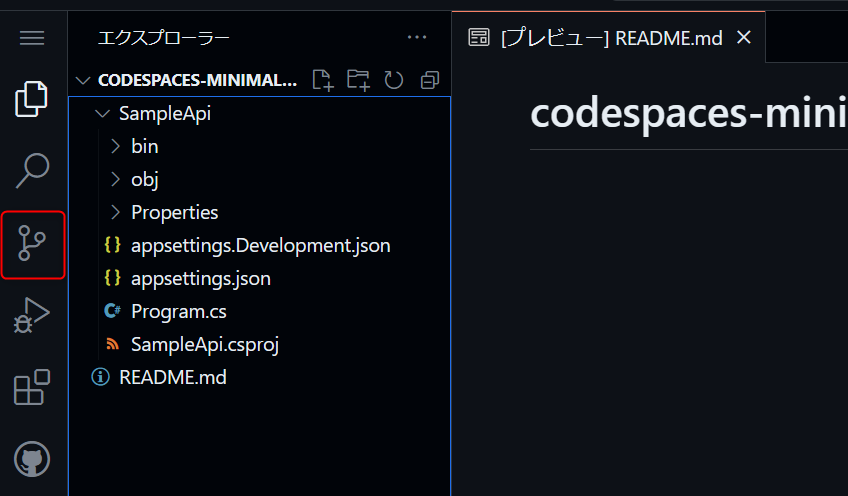
これでGETのHTTPリクエストに対して、「Hello World!」と返すアプリケーションができました。
Postmanを使用してリクエストを送信する
- まずは、Codespacesで実行中のAPIにアクセスできるように設定します。(今回は認証なしでアクセスできるようにします)
- Codespaces画面でポートタブを選択します。
- 実行中のポートで右クリックし、ポートの表示範囲をPublicに変更します。

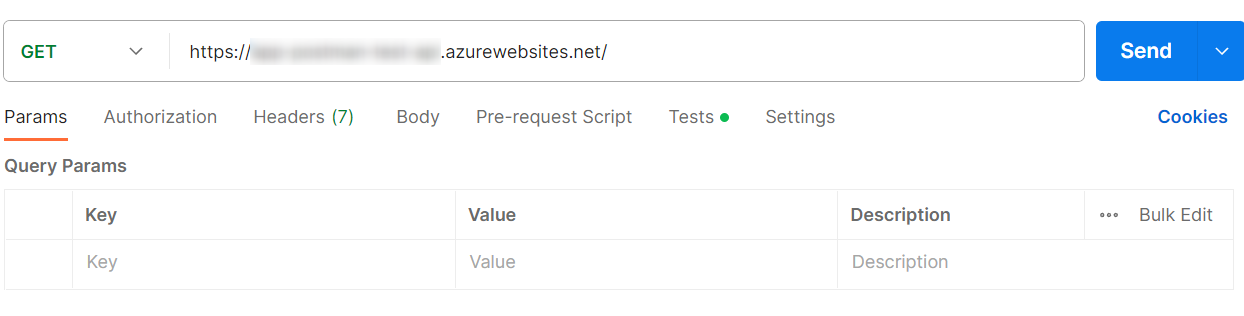
- 転送されたアドレス宛にPostmanからリクエストを行います。

- Hello Worldが返ってきました。
サンプルアプリをAzureにデプロイする
-
ここで一度変更をコミット、プッシュしましょう。
-
Azure Portalにアクセスします。
-
リソースの作成を選択します。

-
Webアプリの作成を選択します
(サービスが出てこない場合は検索窓で検索してください)

-
以下の内容でWebアプリの作成を行います。
-
基本タブ
- サブスクリプション:任意
- リソースグループ:任意の名前で作成
- 名前:任意の名前
- ランタイムスタック:.NET7
- オペレーティングシステム:Windows
- 地域:Japan East
- 価格プラン
- Windowsプラン:任意の名前で作成
- 価格プラン:Free F1を選択

-
デプロイタグ
- デプロイタグを選択します

- GitHub Actionsの設定を有効化します。
- サンプルアプリのリポジトリを設定します。

- デプロイタグを選択します
-
基本タブとデプロイタブの設定ができたら、確認及び作成を選択します。

-
内容を確認し、入力した情報と相違なければ作成します

-
-
デプロイが完了したら、リソースに移動します。

-
GitHubリポジトリ、Actionsタブからワークフローが実行されていることが確認できます。(※ソリューションファイルを作り忘れていたので1度失敗しました)

-
URLへアクセスすると、Codespacesのときと同じく「Hello World!」が確認できます。


これでデプロイが完了しました!
Postmanでテストを作成する
-
それではPostmanでAPIのテストを作成してみます。
-
まずリクエスト先のURLをCodeSpacesのURLからデプロイ先のURLに変更し、保存します。
-
リクエストのTestsタブを選択します。
-
今回、テストの作成にPostbotを使用してみます。
https://www.postman.com/product/postbot/ -
Postbotのアイコンを選択します。

-
Add Tests to this request を選択します。すると....

-
以下のようなテストが作成されました!めちゃくちゃ便利!
pm.test("Response status code is 200", function () { pm.expect(pm.response.code).to.equal(200); }); pm.test("Response has the correct Content-Type header", function () { pm.expect(pm.response.headers.get("Content-Type")).to.include("text/plain"); }); pm.test("Response body is not empty", function () { pm.expect(pm.response.text()).to.not.be.empty; }); pm.test("Response body contains the expected text 'Hello World!'", function () { pm.expect(pm.response.text()).to.include("Hello World!"); }); -
リクエストを実行して、レスポンスのTest Resultsタブを選択するとテスト結果が確認できます。

GitHub ActionsにAPIテストを組み込む
APIのテストを自動で行うようにActionsのワークフローに組み込んでみましょう!
-
リクエストが含まれるPostmanのコレクションを選択します。
-
Runsタブを選択します。

-
コレクションランナーの実行方法を選択し、「Configure command」を選択します。

-
実行するコレクションとCI/CDサービス、実行環境のOSを指定します。(今回はPostmanの環境変数は設定していなのでEnvironmentは空欄です、実際は環境変数を設定し選択します)

-
APIKeyを生成します。Keyには使用するアプリがわかるような任意の名前を付けます。
-
生成されたKeyはメモ帳などに控えておきます。
-
同様に「Copy Postman CLI Command」を選択し、控えておきます。

-
GitHubリポジトリ移動します。
-
GitHubリポジトリのシークレットにPostmanのAPIKeyを登録します。
-
リポジトリのSettingsタブに移動し、Secrets and bariables > Actionsを選択、New repository secretを選択します。

-
POSTMAN_API_KEYという名前で、さきほど控えておいたシークレットを登録します。


GitHubリポジトリのワークフローを更新
- Githubリポジトリのワークフローファイルに移動します。
- Editボタンを押して、Postmanのテストを実行するJobを追加します。
- デプロイ後に動作をテストするように設定しました。
# Docs for the Azure Web Apps Deploy action: https://github.com/Azure/webapps-deploy
# More GitHub Actions for Azure: https://github.com/Azure/actions

name: Build and deploy ASP.Net Core app to Azure Web App - app-postman-test-api

on:
  push:
    branches:
      - main
  workflow_dispatch:

jobs:
  build:
    runs-on: windows-latest

    steps:
      - uses: actions/checkout@v4

      - name: Set up .NET Core
        uses: actions/setup-dotnet@v1
        with:
          dotnet-version: '7.x'
          include-prerelease: true

      - name: Build with dotnet
        run: dotnet build --configuration Release

      - name: dotnet publish
        run: dotnet publish -c Release -o ${{env.DOTNET_ROOT}}/myapp

      - name: Upload artifact for deployment job
        uses: actions/upload-artifact@v3
        with:
          name: .net-app
          path: ${{env.DOTNET_ROOT}}/myapp

  deploy:
    runs-on: windows-latest
    needs: build
    environment:
      name: 'Production'
      url: ${{ steps.deploy-to-webapp.outputs.webapp-url }}

    steps:
      - name: Download artifact from build job
        uses: actions/download-artifact@v3
        with:
          name: .net-app

      - name: Deploy to Azure Web App
        id: deploy-to-webapp
        uses: azure/webapps-deploy@v2
        with:
          app-name: 'app-postman-test-api'
          slot-name: 'Production'
          publish-profile: ${{ secrets.AZUREAPPSERVICE_PUBLISHPROFILE_92F20BE71AB14367A2E112CFB370C9C2 }}
          package: .

  automated-api-tests:
    runs-on: windows-latest
    needs: deploy
    steps:
      - uses: actions/checkout@v3
      - name: Install Postman CLI
        run: |
          powershell.exe -NoProfile -InputFormat None -ExecutionPolicy AllSigned -Command "[System.Net.ServicePointManager]::SecurityProtocol = 3072; iex ((New-Object System.Net.WebClient).DownloadString('https://dl-cli.pstmn.io/install/win64.ps1'))"
      - name: Login to Postman CLI
        run: postman login --with-api-key ${{ secrets.POSTMAN_API_KEY }}
      - name: Run API tests
- 変更をコミットします。

- GitHubリポジトリのActionsタブに移動すると、ワークフローが実行されていることが確認できます。
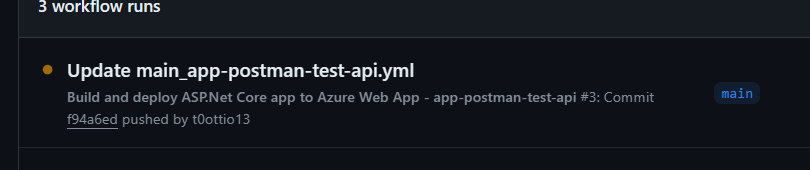

- ワークフローの実行が終わると以下のようになります。

APIテスト結果の確認
- automated-api-testsを選択します。

- Postmanで作成した4つのテストが実行されていることが確認できます。

まとめ
今回は、Postmanを使用したAPIテスト自動化のワークフローを構成しました。
テスト作成からワークフローファイルのスクリプトなどPostmanが自動で生成してくれてとても簡単に設定することができました。
パフォーマンステストや、結果のビジュアライズなど触れていない機能もあるみたいなのでどんどん触っていこうと思います。
最後まで読んでいただきありがとうございました!