M5Stack用大気圧センサーユニットを M5Stack Gray に接続して、サンプルプログラムをPlatformIOでビルドして動かしてみました。

準備
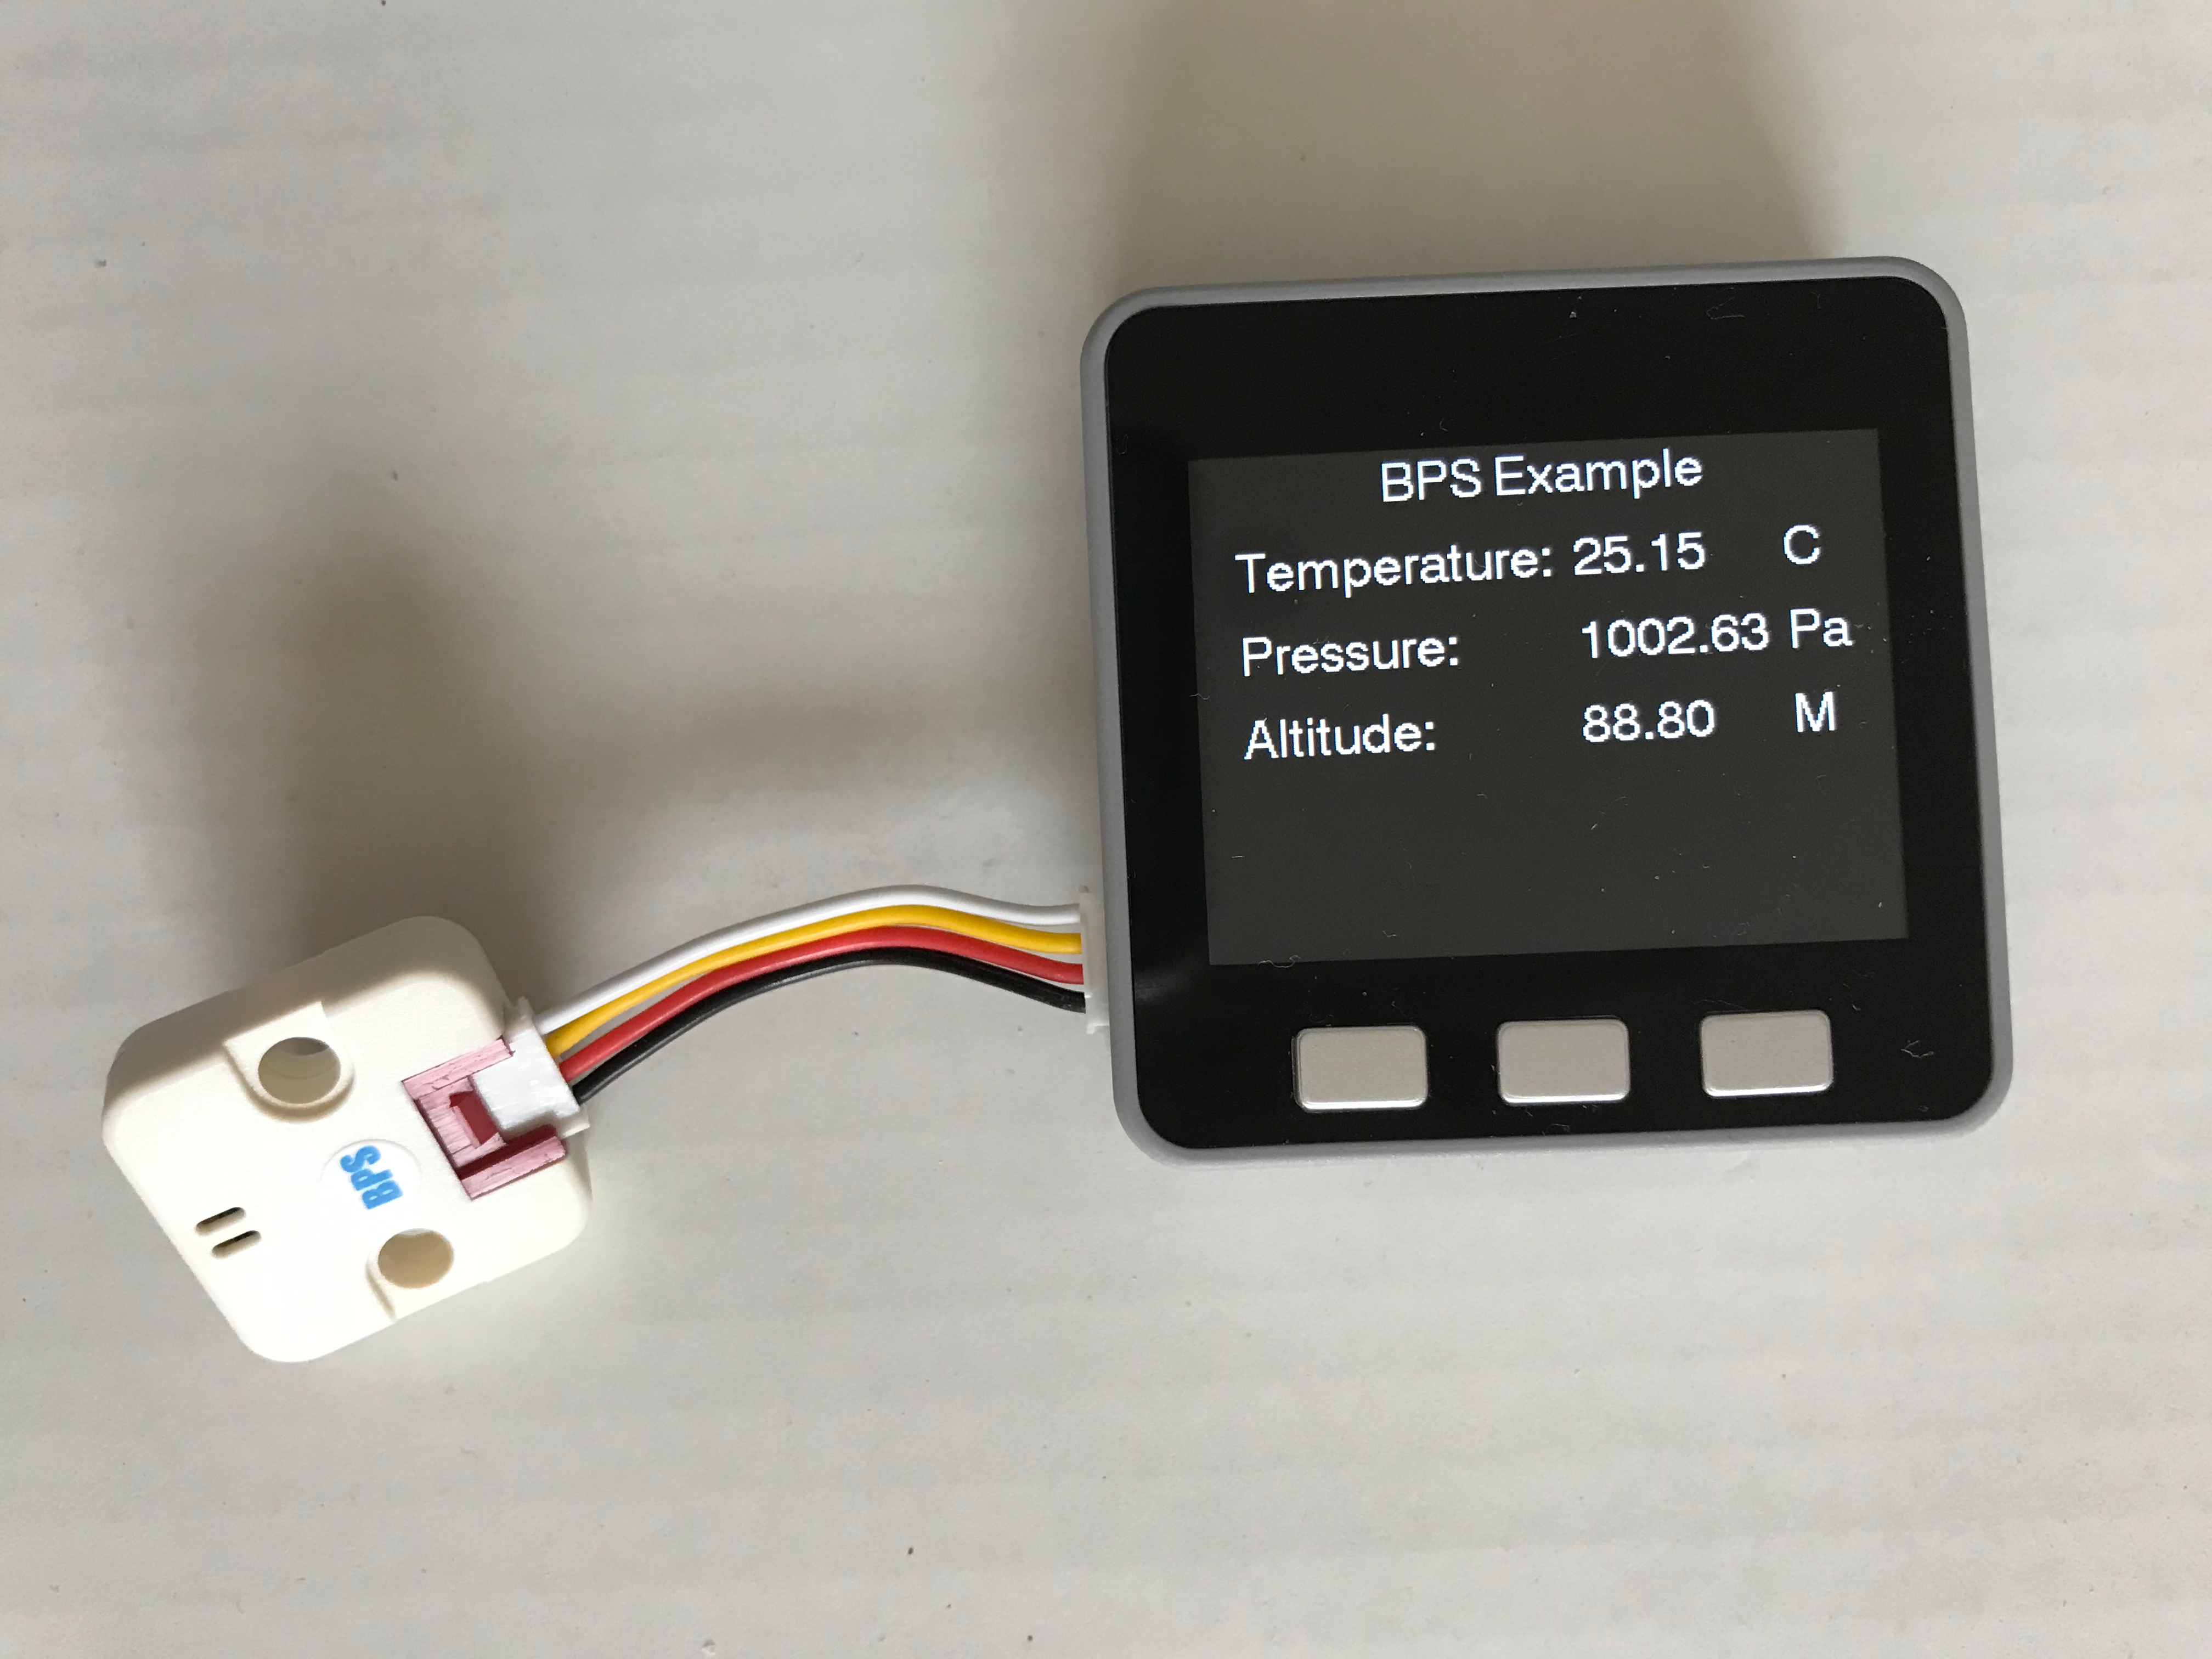
- 写真のように大気圧ユニットを付属のGROVE互換ケーブルで M5Stack Gray と接続します。
- Visual Studio Code と その拡張機能である PlatformIO をインストールします。(https://docs.platformio.org/en/latest//integration/ide/vscode.html#ide-vscode)
- M5Stack Gray への書き込み時に接続するための CP210x USB - UART ブリッジ VCP ドライバ は、お使いのコンピュータに合わせてインストールします。
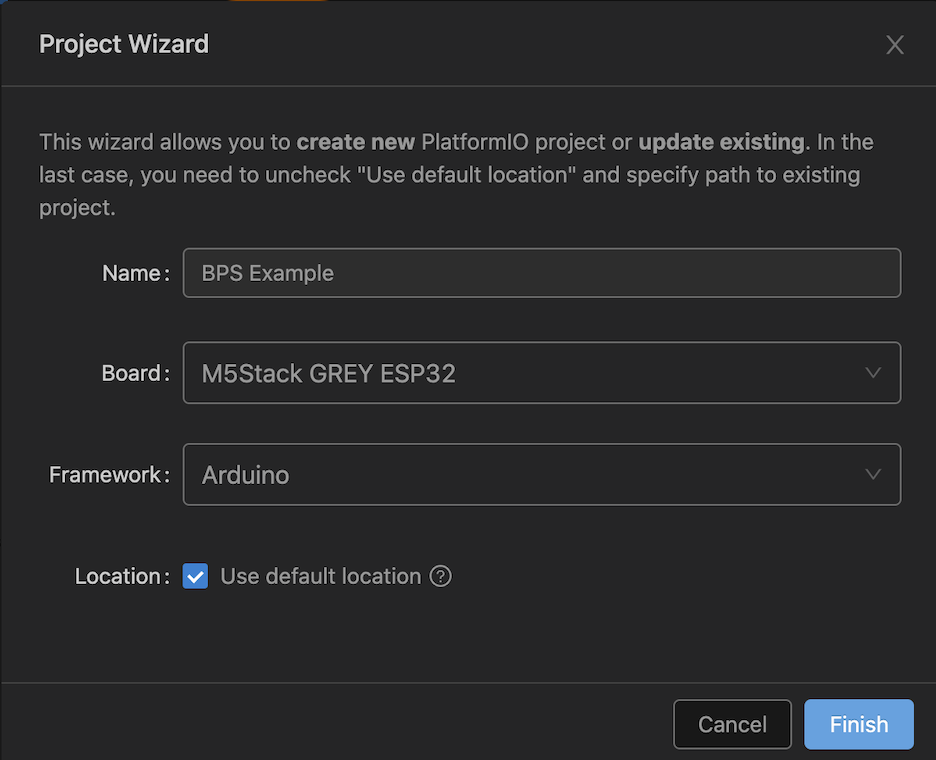
プロジェクトの作成
platformio.ini の編集
platformio.ini を以下のように編集します。upload_port と monitor_port には、 M5Stack Gray を接続したシリアルポートを指定します。
[env:m5stack-grey]
platform = espressif32
board = m5stack-grey
framework = arduino

; M5Stack ライブラリを使うための指定
lib_deps =
    m5stack/M5Stack @ ^0.3.1

; 書き込みとモニターのための指定
upload_port = /dev/cu.SLAB_USBtoUART
monitor_speed = 115200
monitor_port = /dev/cu.SLAB_USBtoUART
サンプルプログラムのコピー
https://github.com/m5stack/M5-ProductExampleCodes/tree/master/Unit/BPS_Unit/Arduino/BPS_Unit の3つのファイル:
- BPS_Unit.ino
- bmp280.cpp
- bmp280.h
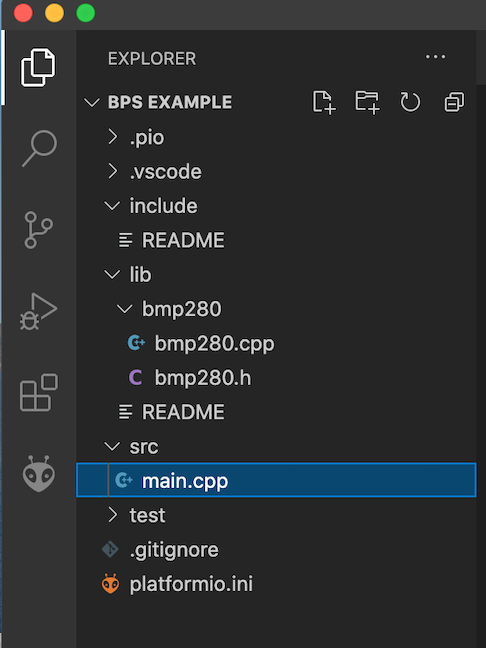
をダウンロードして、bmp280.cpp と bmp280.h を lib/bmp280 にコピーします。bmp280 フォルダは先に作っておきます。そして、BPS_Unit.inoの中身を main.cpp に上書きします。すると、フォルダ構成は以下のようになります。

ビルド
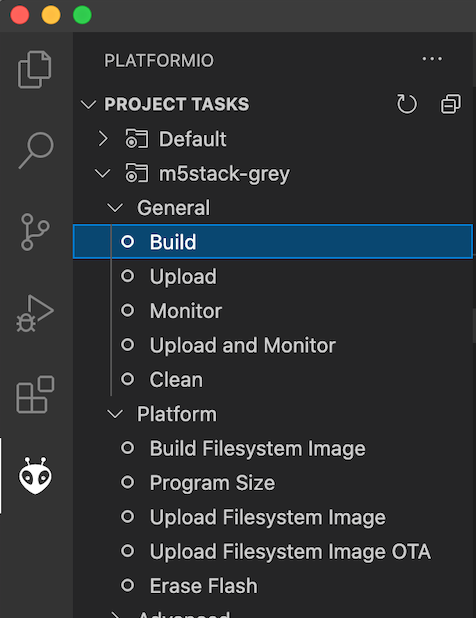
PROJECT TASKS から Build をクリックして、ビルドします。

ターミナルに次のように出たら、ビルド完了。
〜
Compiling .pio/build/m5stack-grey/FrameworkArduino/wiring_pulse.c.o
Compiling .pio/build/m5stack-grey/FrameworkArduino/wiring_shift.c.o
Archiving .pio/build/m5stack-grey/libFrameworkArduino.a
Indexing .pio/build/m5stack-grey/libFrameworkArduino.a
Linking .pio/build/m5stack-grey/firmware.elf
Retrieving maximum program size .pio/build/m5stack-grey/firmware.elf
Checking size .pio/build/m5stack-grey/firmware.elf
Advanced Memory Usage is available via "PlatformIO Home > Project Inspect"
RAM:   [          ]   2.9% (used 15444 bytes from 532480 bytes)
Flash: [===       ]  27.6% (used 361275 bytes from 1310720 bytes)
Building .pio/build/m5stack-grey/firmware.bin
esptool.py v3.0
=================== [SUCCESS] Took 31.08 seconds ===================

Terminal will be reused by tasks, press any key to close it.
書き込みとモニタ
続いて、M5 Stack Gray をコンピュータと接続して、Upload and Monitor をクリックして書き込みます。書き込みが終わると、シリアルモニタからの出力を確認することができます。
〜
Writing at 0x00034000... (90 %)
Writing at 0x00038000... (100 %)
Wrote 361392 bytes (169294 compressed) at 0x00010000 in 4.3 seconds (effective 669.2 kbit/s)...
Hash of data verified.
Leaving...
Hard resetting via RTS pin...
================================ [SUCCESS] Took 10.89 seconds ================================
--- Available filters and text transformations: colorize, debug, default, direct, esp32_exception_decoder, hexlify, lo
g2file, nocontrol, printable, send_on_enter, time
--- More details at http://bit.ly/pio-monitor-filters
--- Miniterm on /dev/cu.SLAB_USBtoUART 115200,8,N,1 ---
--- Quit: Ctrl+C | Menu: Ctrl+T | Help: Ctrl+T followed by Ctrl+H ---
M5Stack initializing...[E][sd_diskio.cpp:194] sdCommand(): Card Failed! cmd: 0x00
[E][sd_diskio.cpp:775] sdcard_mount(): f_mount failed: (3) The physical drive cannot work
[E][sd_diskio.cpp:194] sdCommand(): Card Failed! cmd: 0x00
OK
BMP init success!
T = 24.35 degC P = 1002.63 mBar A = 88.80 m
T = 24.35 degC P = 1002.64 mBar A = 88.72 m
M5Stack Gray のディスプレイには、冒頭の写真のように出力されます。
