はじめに
Linuxのデスクトップ環境にリモートからアクセスするためにVNC Serverを
構築する手順を記載します。
環境
サーバ側
- CentOS 6.3
- tigervnc-server 1.1.0
クライアント側
- Mac OS X 10.9.4
VNC Serverのインストール
$ sudo yum install tigervnc-server
デスクトップ環境のインストール
$ sudo yum groupinstall "X Window System"
$ sudo yum groupinstall "Desktop"
$ sudo yum groupinstall "General Purpose Desktop"
VNC Serverの起動
$ vncserver -geometry 800x600

New 'hostname:1 (username)' desktop is hostname:1

Creating default startup script /home/username/.vnc/xstartup
Starting applications specified in /home/username/.vnc/xstartup
Log file is /home/username/.vnc/hostname:1.log
$ vncserver -geometry 800x600
画面サイズを800x600として起動しています。
初回起動時は、VNC接続するときのパスワードの入力をもとめられるため、
適切なものを設定します。
後ほど、ここで設定したパスワードを使用して、VNC接続を行います。
New 'hostname:1 (username)' desktop is hostname:1
今回は、ディスプレイ番号 「:1」 で起動しているので、VNC接続する
ときは __「5901」(5900 + ディスプレイ番号)__を指定することになります。
動作確認
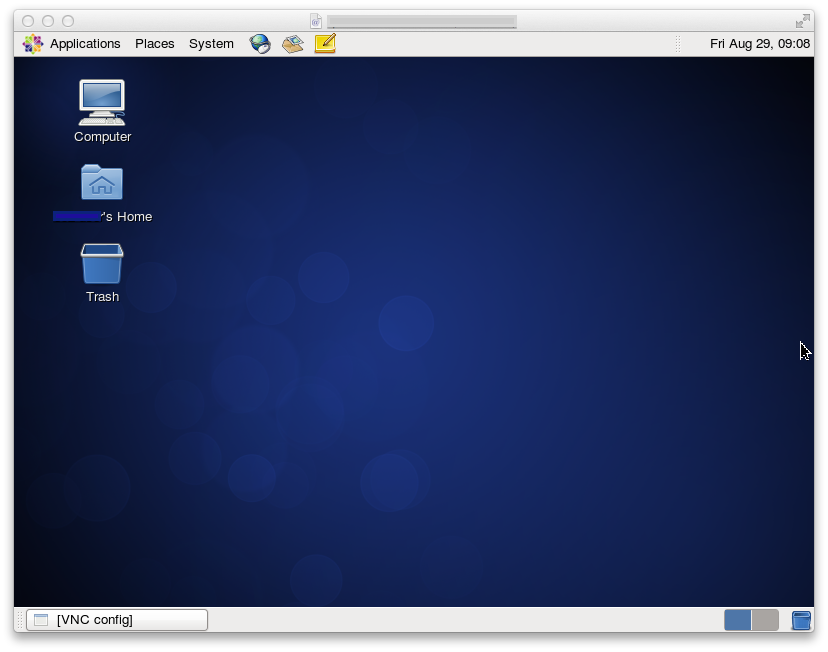
Macからアクセスしてみます。
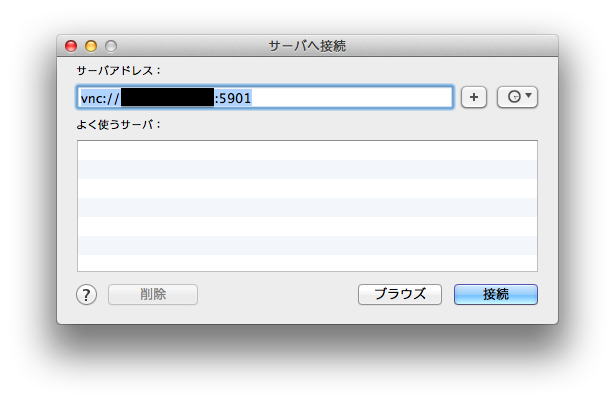
Finderの「移動」> 「サーバへ接続」で、VNCクライアントを起動します。
「サーバアドレス」は、以下を指定します。
vnc://${接続するサーバIPアドレス}:5901
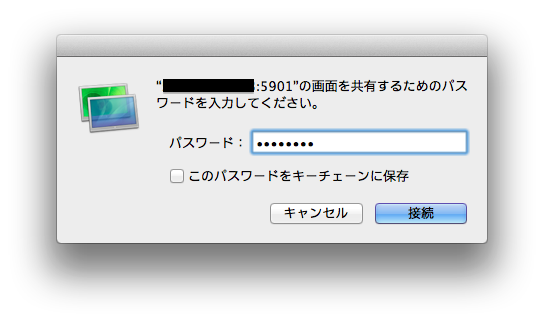
パスワードは、VNC Serverを起動したときに設定したパスワードを指定します。
参考
-
[【CentOS】vncserverを使ってリモートデスクトップ操作]
(http://blog.livedoor.jp/loopus/archives/50249671.html) -
[WindowsからCentOSのデスクトップにVNC接続できる環境を構築する方法]
(http://www.checksite.jp/centos64-desktop-connect-vnc/) -
[Linux の VNC サーバの設定]
(http://futuremix.org/2009/01/linux-vnc-server-install) -
[Virtual Network Computing]
(http://ja.wikipedia.org/wiki/Virtual_Network_Computing) -
[TigerVNC]
(http://sourceforge.jp/projects/sfnet_tigervnc/)


