独自で作成したFunctionComponentにスタイリングしようとした際に、うまく動作せずにハマったので、その時の調査結果をまとめます。
※今回の記事ではTypeScriptを使用しています。
結論から先に
下記のような形で、自分の作成したFunctionComponentにstyled-componentsを使用してスタイルを当てたいときには、
import styled from "styled-components";
import { OriginalButton } from "./OriginalButton";

const CustomButton = styled(OriginalButton)`
    height: 100px;
    width: 100px;
`
スタイルを当てる側のコンポーネントのPropsにclassNameを指定し、そのままコンポーネント内の一番親の要素のclassNameプロパティに渡してあげる必要があります。
import React, { FC } from "react";
import styled from "styled-components";

interface Props {
    onClick?: () => void;
    className: string;
}

export const OriginalButton: FC<Props> = ({ onClick, className }: Props) => {
    return (
        <Body
            onClick={() => {
                if (onClick) onClick();
            }}
            className={className}
        ></Body>
    );
};

const Body = styled.span`
    cursor: pointer;
    height: 44px;
    user-select: none;
    width: 44px;
`;
classNameプロパティを用意しないと
OriginalButtonというコンポーネントを作り
import React, { FC } from "react";
import styled from "styled-components";

interface Props {
    onClick?: () => void;
}

export const OriginalButton: FC<Props> = ({ onClick }: Props) => {
    return (
        <Body
            onClick={() => {
                if (onClick) onClick();
            }}
        ></Body>
    );
};

const Body = styled.span`
    cursor: pointer;
    height: 44px;
    user-select: none;
    width: 44px;
`;
これを別のコンポーネントでCustomButtonとして、widthとheightを100pxに指定して使用します。
import React, { FC } from "react";
import styled from "styled-components";
import { OriginalButton } from "./OriginalButton";

export const OriginalWrapper: FC = () => {
    return (
        <CustomButton
            onClick={() => {
                console.log("hoge");
            }}
        ></CustomButton>
    );
};

const CustomButton = styled(OriginalButton)`
    height: 100px;
    width: 100px;
`;
挙動としてはCustomButtonのwidthとheightは100pxになるはずなのですが、結果は下記の通り。
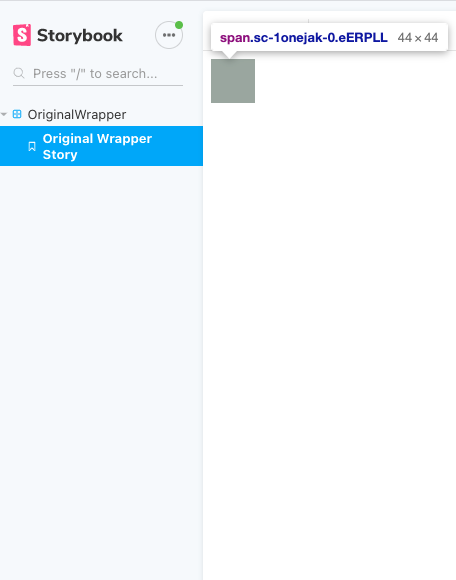
CustomButtonとしてのheightとwidthが反映されませんでした。
なぜこのような挙動になるのか
下記の記事が参考になります。
https://styled-components.com/docs/advanced#existing-css
styled-components generates an actual stylesheet with classes, and attaches those classes to the DOM nodes of styled components via the className prop. It injects the generated stylesheet at the end of the head of the document during runtime.
If you use the styled(MyComponent) notation and MyComponent does not render the passed-in className prop, then no styles will be applied. To avoid this issue, make sure your component attaches the passed-in className to a DOM node:
意訳はこちら。
styled-componentsは実体となるスタイルシートをクラスとともに生成し、そのクラスをDOMのノードにclassNameというプロパティを通じて割り当てています。styled-componentsの実行タイミングでHTMLのヘッダー部分に生成したスタイルシートを埋め込んでいます。
MyComponentがclassNameというプロパティを持たずに、styled(MyComponent)という記法を使うと、スタイルが反映されません。この問題を解決するには、コンポーネントがclassNameというプロパティをDOMのノードに渡していることを確認する必要があります。
つまり、styled-componentsは内部的にはclassNameというプロパティを通じてスタイリングをしているので、classNameの指定が特にない独自のFunctionComponentを使用した場合、styled(MyComponent)という書き方をしてもスタイリングされないよ、ということを意味しています。
先ほどのOriginalButtonを修正する
先ほどのOriginalButtonにclassNameのプロパティを追加します
import React, { FC } from "react";
import styled from "styled-components";

interface Props {
    onClick?: () => void;
    className: string;
}

export const OriginalButton: FC<Props> = ({ onClick, className }: Props) => {
    return (
        <Body
            onClick={() => {
                if (onClick) onClick();
            }}
            className={className}
        ></Body>
    );
};

const Body = styled.span`
    cursor: pointer;
    height: 44px;
    user-select: none;
    width: 44px;
`;
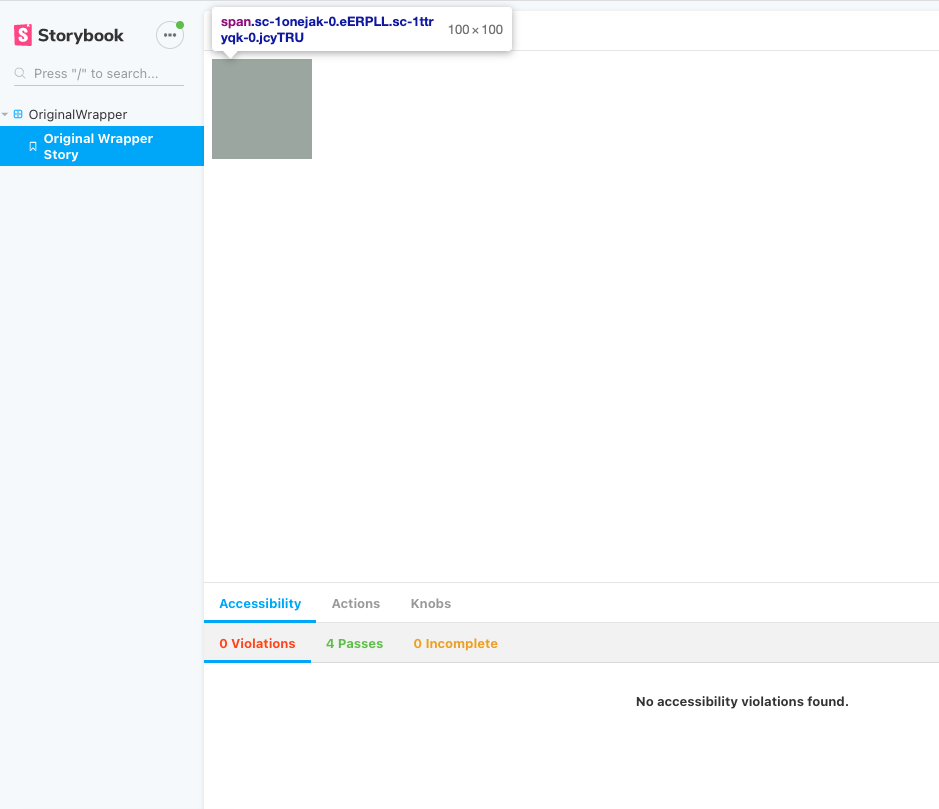
こうすることで、CustomButtonとして指定していたCSSが反映されるようになりました。
まとめ
styled-componentsはCSS-in-JSのスタイリングとしては、スッキリ書けるので自分好みなのですが、上記のように裏側のロジックを知らないと詰まってしまう箇所がいくつかあります。
また他にもstyled-components周りで困ったことがあれば記事で共有したいと思います。