はじめに
皆さんはずんだもんをご存知でしょうか。
ずんだもんとは、日本の音声合成ソフトウェア「VOICEVOX」のキャラクターで、親しみやすい声で対話が可能なAIキャラクターです。Youtubeの動画や配信で広く使用されています。
そんなずんだもんの優しい声に心を動かされ、もっと手軽に対話を楽しめるシステムを作りたいと感じました。マイクによる自然なコミュニケーション体験を実現し、いつでもずんだもんの言葉に癒される環境を構築する楽しさと技術的な挑戦に魅力を感じた結果、Pythonでローカル環境用のシステムを開発したいと思いました。
どんなものを作ったのか、イメージを掴んでいただくため、作成したものを御覧ください。
マイクから話しかけてずんだもんと対話してみました。 pic.twitter.com/HeRNxdb03f
— たいやき (@znzn0009) January 5, 2025
見かけはAlexaのようなアプリケーションですが、すべてローカル環境で実行しているところがポイントとなっております。
コードは以下の通りとなっております。
import requests
import json
import io
import time
import threading
import readchar
import pyaudio
from voicevox_core import VoicevoxCore, METAS
from pathlib import Path
import wave
import simpleaudio as sa
from faster_whisper import WhisperModel

model = WhisperModel("kotoba-tech/kotoba-whisper-v2.0-faster")
CHUNK = 2**10
FORMAT = pyaudio.paInt16
CHANNELS = 1
RATE = 16000
record_time = 5
output_path = "./output.wav"

PROTCOL = "http"
HOST = "localhost"
PORT = "11434"
HEADERS = {"content-type": "application/json"}
URL = f"{PROTCOL}://{HOST}:{PORT}/api/chat"
MODEL = "7shi/tanuki-dpo-v1.0"
SPREAKER_ID = 3 #ずんだもん
open_jtalk_dict_dir = Path("open_jtalk_dic_utf_8-1.11")
core = VoicevoxCore(open_jtalk_dict_dir=open_jtalk_dict_dir)

is_start = False  # 測定開始フラグ
is_end = False  # 測定終了フラグ
is_saved = False  # 音声ファイル保存フラグ

if not core.is_model_loaded(SPREAKER_ID):
    core.load_model(SPREAKER_ID)


def chat(messages):
    data = {"model": MODEL, "messages": messages, "stream": True}
    r = requests.post(
        URL,
        json=data,
        stream=True,
    )
    r.raise_for_status()
    output = ""

    for line in r.iter_lines():
        body = json.loads(line)
        if "error" in body:
            raise Exception(body["error"])
        if body.get("done") is False:
            message = body.get("message", "")
            content = message.get("content", "")
            output += content
            # the response streams one token at a time, print that as we receive it
            print(content, end="", flush=True)

        if body.get("done", False):
            message["content"] = output
            wave_bytes = core.tts(output, SPREAKER_ID)

            # バイナリーデータをバイトストリームとして読み込む
            audio_stream = io.BytesIO(wave_bytes)
            # バイトストリームを再生可能なオブジェクトに変換
            wave_read = wave.open(audio_stream, "rb")
            wave_obj = sa.WaveObject.from_wave_read(wave_read)

            # 再生
            play_obj = wave_obj.play()
            play_obj.wait_done()
            return message


def sampling_voice():
    global is_start, is_end, is_saved
    CHUNK = 2**10
    FORMAT = pyaudio.paInt16
    CHANNELS = 1
    RATE = 16000
    record_time = 0.5
    OUTPUT_PATH = "./output.wav"

    while True:
        p = pyaudio.PyAudio()
        stream = p.open(
            format=FORMAT,
            channels=CHANNELS,
            rate=RATE,
            input=True,
            frames_per_buffer=CHUNK,
        )
        frames = []
        while not is_start:
            time.sleep(0.2)
            # print("continue....")
            continue

        print("Start to record")
        while not is_end:
            for i in range(0, int(RATE / CHUNK * record_time)):
                data = stream.read(CHUNK, exception_on_overflow=False)
                # print(data)
                frames.append(data)

        print("Stop to record")

        stream.stop_stream()
        stream.close()
        p.terminate()

        wf = wave.open(OUTPUT_PATH, "wb")
        wf.setnchannels(CHANNELS)
        wf.setsampwidth(p.get_sample_size(FORMAT))
        wf.setframerate(RATE)
        wf.writeframes(b"".join(frames))
        wf.close()
        is_saved = True


def detect_key():
    global is_start, is_end
    while True:
        c = readchar.readkey()
        if c == "s":
            is_start = True
            print("Start!")
        if c == "q":
            is_end = True
            print("End!")


def main():
    global is_start, is_end, is_saved
    messages = []
    while True:
        if is_saved == False:
            continue
        is_start = False
        is_end = False
        is_saved = False
        segments, info = model.transcribe(
            "output.wav",
            language="ja",
            chunk_length=15,
            condition_on_previous_text=False,
        )
        user_input = "30字以内で答えてください。"
        for segment in segments:
            user_input += segment.text
        print(user_input)

        messages.append({"role": "user", "content": user_input})
        message = chat(messages)
        messages.append(message)
        print("\n\n")
        print(messages)
        time.sleep(0.1)


if __name__ == "__main__":
    # スレッドを作る
    thread1 = threading.Thread(target=sampling_voice)
    thread2 = threading.Thread(target=detect_key)
    thread3 = threading.Thread(target=main)

    print("Press s to start")
    print("Press q to end")

    # スレッドの処理を開始
    thread1.start()
    thread2.start()
    thread3.start()

    main()
あらかじめインストールすべきライブラリやアプリケーションが複数あるので、そのままでは動作しないことにご注意ください。
ローカル環境で対話システムを構築するにあたっての備忘録を記事にしたいと思います。
目次
- 実行PC環境
- 作りたいものとざっくりフロー
- 必要なライブラリ
- pyaudioを用いた音声録音
- kotoba-whisperを用いた日本語音声認識
- ollamaを用いた対話APIの設定
- voicevox_coreを用いたずんだもんによる音声発話
実行PC環境
実行したPC環境は以下のとおりです。
PC: MacBook Air 2020 M1
チップ: 16GB
macOS Sequoia 15.1.1
MacBook Airなのでそこまで高性能というわけではありません。
作りたいものとざっくりフロー
作りたいもの
Pythonを用いてマイク入力と音声認識でずんだもんとオフライン対話を実現する音声AIシステム。
ざっくりフロー
ボタンを押して、音声を録音し、録音した音声を日本語のテキストにして、ollamaで対話させ、返答をずんだもんに喋らせたいと思います。
- ボタン(sキー)を押す。
- pyaudioで録音開始。
- ボタン(qキー)を再度押す。
- pyaudioで録音停止。
- 録音したファイルを指定のディレクトリに保存。
- 保存されたファイルを読み込み。
- whisperのモデルでファイルの音声認識を行う。
- 音声認識結果をollamaに渡す。
- ollamaからの返答をvoicevox_coreを用いてずんだもんの声で喋らせる。
pyaudioを用いた音声録音(キー入力で録音開始・停止)
まず最初は、pythonを用いてキーボードの入力によって音声を録音したいと思います。
メインプログラム
import pyaudio
import wave
import threading
import readchar
import time

is_start = False  # 測定開始フラグ
is_end = False  # 測定終了フラグ

def sampling_voice():
    global is_start, is_end
    CHUNK = 2**10
    FORMAT = pyaudio.paInt16
    CHANNELS = 1
    RATE = 16000
    record_time = 0.5
    OUTPUT_PATH = "./output.wav"

    p = pyaudio.PyAudio()
    stream = p.open(
        format=FORMAT, channels=CHANNELS, rate=RATE, input=True, frames_per_buffer=CHUNK
    )
    frames = []
    while not is_start:
        time.sleep(0.2)
        # print("continue....")
        continue

    print("Start to record")
    while not is_end:
        for i in range(0, int(RATE / CHUNK * record_time)):
            data = stream.read(CHUNK, exception_on_overflow=False)
            # print(data)
            frames.append(data)

    print("Stop to record")

    stream.stop_stream()
    stream.close()
    p.terminate()

    wf = wave.open(OUTPUT_PATH, "wb")
    wf.setnchannels(CHANNELS)
    wf.setsampwidth(p.get_sample_size(FORMAT))
    wf.setframerate(RATE)
    wf.writeframes(b"".join(frames))
    wf.close()

def detect_key():
    global is_start, is_end
    while True:
        c = readchar.readkey()
        if c == "s":
            is_start = True
            print("Start!")
            break
    while True:
        c = readchar.readkey()
        if c == "q":
            is_end = True
            print("End!")
            break
    return

if __name__ == "__main__":
    # スレッドを作る
    thread1 = threading.Thread(target=sampling_voice)
    thread2 = threading.Thread(target=detect_key)

    print("Press s to start")
    print("Press q to end")

    # スレッドの処理を開始
    thread1.start()
    thread2.start()
音声録音
※https://moromisenpy.com/pyaudio/ を参考にpyaudioを用いた音声録音部分を書きました。
def sampling_voice():
    global is_start, is_end
    CHUNK = 2**10
    FORMAT = pyaudio.paInt16
    CHANNELS = 1
    RATE = 16000
    record_time = 0.5
    OUTPUT_PATH = "./output.wav"

    p = pyaudio.PyAudio()
    stream = p.open(
        format=FORMAT, channels=CHANNELS, rate=RATE, input=True, frames_per_buffer=CHUNK
    )
    frames = []
    while not is_start:
        time.sleep(0.2)
        # print("continue....")
        continue

    print("Start to record")
    while not is_end:
        for i in range(0, int(RATE / CHUNK * record_time)):
            data = stream.read(CHUNK, exception_on_overflow=False)
            # print(data)
            frames.append(data)

    print("Stop to record")

    stream.stop_stream()
    stream.close()
    p.terminate()

    wf = wave.open(OUTPUT_PATH, "wb")
    wf.setnchannels(CHANNELS)
    wf.setsampwidth(p.get_sample_size(FORMAT))
    wf.setframerate(RATE)
    wf.writeframes(b"".join(frames))
    wf.close()
is_start、is_globalをグローバルで定義しています。後述するキー検知により、is_start、is_globalを制御して、キー入力による音声録音を行っています。
キー検知
def detect_key():
    global is_start, is_end
    while True:
        c = readchar.readkey()
        if c == "s":
            is_start = True
            print("Start!")
            break
    while True:
        c = readchar.readkey()
        if c == "q":
            is_end = True
            print("End!")
            break
    return
sキーが押されたら、is_startをTrueに、qキーが押されたら、is_endをTrueにしております。
is_startとis_endはグローバルで定義されているため、キー入力により音声録音のスレッドの制御が可能となります。
kotoba-whisperを用いた日本語音声認識
Kotoba-Whisperとは
Kotoba-Whisperは、日本語に特化した音声認識モデルです。OpenAIのWhisperモデルを基に、モデルの軽量化と高速化を実現しています。
pythonで、output.wavの音声ファイルを音声認識するサンプルコードは以下のとおりです。
from faster_whisper import WhisperModel

model = WhisperModel("kotoba-tech/kotoba-whisper-v2.0-faster")

segments, info = model.transcribe(
    "output.wav",
    language="ja",
    chunk_length=15,
    condition_on_previous_text=False,
)
for segment in segments:
    print(segment.text, end="")
pip install faster-whisper
でfaster-whisperをあらかじめインストールしておいてください。
ollamaを用いた対話APIの設定
ollamaとは
Ollamaは、ローカル環境で大規模言語モデル(LLM)を手軽に実行・管理できるオープンソースのツールです。
今回は、日本国内の生成AI基盤モデルである、「Tanuki-8B」を使用します。tanuki-8bはApache License 2.0のライセンスに基づいております。
ollama run 7shi/tanuki-dpo-v1.0
で、ollamaを起動します。
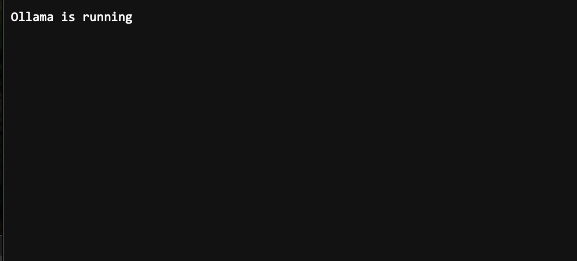
http://localhost:11434/
にアクセスして、

と表示されていたらOKです。
起動が確認できたら、
https://github.com/ollama/ollama/blob/main/examples/python-simplechat/client.py
を参考に、
テキストをollamaにわたして、対話を出力するスクリプトを書いていきます。
PROTCOL = "http"
HOST = "localhost"
PORT = "11434"
HEADERS = {"content-type": "application/json"}
URL = f"{PROTCOL}://{HOST}:{PORT}/api/chat"


def chat(messages):
    data = {"model": MODEL, "messages": messages, "stream": True}
    r = requests.post(
        URL,
        json=data,
        stream=True,
    )
    r.raise_for_status()
    output = ""

    for line in r.iter_lines():
        body = json.loads(line)
        if "error" in body:
            raise Exception(body["error"])
        if body.get("done") is False:
            message = body.get("message", "")
            content = message.get("content", "")
            output += content
            # the response streams one token at a time, print that as we receive it
            print(content, end="", flush=True)

        if body.get("done", False):
            message["content"] = output
            return message
voicevox_coreを用いたずんだもんによる音声発話
VOICEVOXとは
VOICEVOXは、無料で利用できるオープンソースの日本語音声合成ソフトウェアです。テキストを入力するだけで、自然な日本語音声を生成できるツールです。
まず、
https://zenn.dev/kadoyan/articles/a03cc6d7e3d337
を参考にOpen Jtalkの辞書ファイルをダウンロードした後、
https://zenn.dev/karaage0703/articles/0187d1d1f4d139
を参考にONNX Runtimeのダウンロードを行います。
これで、voicevox_coreの動作環境が整いました。
先程の
def chat(messages):
の
if body.get("done", False):
に
wave_bytes = core.tts(output, SPREAKER_ID)
# バイナリーデータをバイトストリームとして読み込む
audio_stream = io.BytesIO(wave_bytes)
# バイトストリームを再生可能なオブジェクトに変換
wave_read = wave.open(audio_stream, "rb")
wave_obj = sa.WaveObject.from_wave_read(wave_read)

# 再生
play_obj = wave_obj.play()
play_obj.wait_done()
を付け加えることで、ollamaの返答を音声出力することができます。
以上のコードを合わせると、
このようなアプリケーションが作成されます。マイクから話しかけてずんだもんと対話してみました。 pic.twitter.com/HeRNxdb03f
— たいやき (@znzn0009) January 5, 2025
さいごに
今回はローカルで、ずんだもんと対話できるシステムを構築してみました。
これを活用して、オリジナルのずんだもん相談室とか作ってみると面白いかもです。
参考
以下の記事を参考にさせていただきました。