Terraformがどんな感じで使えるか確認するためにWordPress環境を構築してみたのでそのときのメモ
前提
- Terraformはインストール済み
- Terraformのバージョンは0.50
- AWSのcredential設定済み(環境変数にAWS_ACCESS_KEY_ID及びAWS_SECRET_ACCESS_KEYを指定)
その他基本的な使い方などはTerraform簡易チュートリアル on AWSなどがとても参考になりました
構築するもの
- VPC(ap-northeast)
- サブネット4つ(パブリックサブネット及びプライベートサブネットをそれぞれのAZに)
- インターネットゲートウェイ
- ルートテーブル
- セキュリティグループ2つ(EC2用とRDS用)
- DBサブネットグループ
- RDS
- EC2(AmazonLinux前提)
EC2はパブリックサブネットワークに配置し、RDSはプライベートサブネットに配置するよくある構成です。
上記インフラ環境ははAmazon Web Services パターン別構築・運用ガイドを参考にしました。
変数(パラメーター)で指定するもの
- DB名
- DBパスワード
- AMIのID
- KeyPair名
- SSH認証鍵のファイル配置場所
GitHub
上記のwordpressディレクトリに最終的な設定内容など配置しています。なお、変数を指定する terraform.tfvars は各自用意、設定して下さい
インフラの定義
上記を参考にインフラを定義します。
provider "aws" {
  region = "${var.region}"
}

resource "aws_vpc" "main" {
  cidr_block = "10.1.0.0/16"
  enable_dns_hostnames = true

  tags {
    Name = "vpc-WordPress"
  }
}

resource "aws_subnet" "public-a" {
  availability_zone = "ap-northeast-1a"
  vpc_id = "${aws_vpc.main.id}"
  cidr_block = "10.1.11.0/24"
  map_public_ip_on_launch = true

  tags {
    Name = "WP-PublicSubnet-A"
  }
}

resource "aws_subnet" "private-a" {
  availability_zone = "ap-northeast-1a"
  vpc_id = "${aws_vpc.main.id}"
  cidr_block = "10.1.15.0/24"

  tags {
    Name = "WP-PrivateSubnet-A"
  }
}

resource "aws_subnet" "public-c" {
  availability_zone = "ap-northeast-1c"
  vpc_id = "${aws_vpc.main.id}"
  cidr_block = "10.1.51.0/24"
  map_public_ip_on_launch = true

  tags {
    Name = "WP-PublicSubnet-C"
  }
}

resource "aws_subnet" "private-c" {
  availability_zone = "ap-northeast-1c"
  vpc_id = "${aws_vpc.main.id}"
  cidr_block = "10.1.55.0/24"

  tags {
    Name = "WP-PrivateSubnet-C"
  }
}

resource "aws_internet_gateway" "gw" {
  vpc_id = "${aws_vpc.main.id}"

  tags {
    Name = "WP-InternetGateway"
  }
}

resource "aws_route_table" "r" {
  vpc_id = "${aws_vpc.main.id}"

  route {
    cidr_block = "0.0.0.0/0"
    gateway_id = "${aws_internet_gateway.gw.id}"
  }

  tags {
    Name = "vpc-WordPress"
  }
}

resource "aws_main_route_table_association" "a" {
    vpc_id = "${aws_vpc.main.id}"
    route_table_id = "${aws_route_table.r.id}"
}

resource "aws_security_group" "app" {
  name = "WP-Web-DMZ"
  description = "WordPress Web APP Security Group"
  vpc_id = "${aws_vpc.main.id}"

  tags {
    Name = "WP-Web-DMZ"
  }
}

resource "aws_security_group" "db" {
  name = "WP-DB"
  description = "WordPress MySQL Security Group"
  vpc_id = "${aws_vpc.main.id}"

  tags {
    Name = "WP-DB"
  }
}

resource "aws_security_group_rule" "ssh" {
  type = "ingress"
  from_port = 22
  to_port = 22
  protocol = "tcp"
  cidr_blocks = ["0.0.0.0/0"]

  security_group_id = "${aws_security_group.app.id}"
}

resource "aws_security_group_rule" "web" {
  type = "ingress"
  from_port = 80
  to_port = 80
  protocol = "tcp"
  cidr_blocks = ["0.0.0.0/0"]

  security_group_id = "${aws_security_group.app.id}"
}

resource "aws_security_group_rule" "all" {
  type = "egress"
  from_port = 0
  to_port = 65535
  protocol = "tcp"
  cidr_blocks = ["0.0.0.0/0"]

  security_group_id = "${aws_security_group.app.id}"
}

resource "aws_security_group_rule" "db" {
  type = "ingress"
  from_port = 3306
  to_port = 3306
  protocol = "tcp"
  source_security_group_id = "${aws_security_group.app.id}"

  security_group_id = "${aws_security_group.db.id}"
}

resource "aws_db_subnet_group" "main" {
  name = "wp-dbsubnet"
  description = "WordPress DB Subnet"
  subnet_ids = ["${aws_subnet.private-a.id}", "${aws_subnet.private-c.id}"]
}

resource "aws_db_instance" "default" {
  identifier = "wp-mysql"
  allocated_storage = 5
  engine = "mysql"
  engine_version = "5.6.22"
  instance_class = "db.t2.micro"
  # general purpose SSD
  storage_type = "gp2"
  username = "${var.db_username}"
  password = "${var.db_password}"
  backup_retention_period = 0
  vpc_security_group_ids = ["${aws_security_group.db.id}"]
  db_subnet_group_name = "${aws_db_subnet_group.main.name}"
}

resource "aws_instance" "web" {
  ami = "${var.ami}"
  instance_type = "t2.micro"
  subnet_id = "${aws_subnet.public-a.id}"
  associate_public_ip_address = true
  vpc_security_group_ids = ["${aws_security_group.app.id}"]
  key_name = "${var.key_name}"
  tags {
    Name = "WP-WebAPP"
  }
}
後述する方法で指定する変数は "${var.パラメーター名}" と記載することでmain.tf内で参照できます。
- "${var.region}"
- "${var.db_username}"
また、main.tf内で作成したリソースにのIDなどを参照することが出来ます。例えば、セキュリティグループ作成し、そのあとで作成するEC2に適用させるなどが可能です。
セキュリティグループを作成するリソースで
resource "aws_security_group" "app" {
・・・
}
とした場合、上記セキュリティグループのIDは ${aws_security_group.app.id} とすることで取得できます。各リソースで取得できる値は各リソースドキュメントの Attributes Reference の欄に記載があります。
変数の値を指定する
上記に詳細が記載されていますが、以下の指定方法があります。
- 実行時に対話形式で入力
- ファイルで指定
- CLIの引数として指定
- 環境変数を利用
今回はファイルで指定します。
まず、どんな変数を使うかを variables.tf に書いていきます。
変数の宣言というイメージかと思います。
variable "region" {
  default = "ap-northeast-1"
}

# rds
variable "db_username" {}
variable "db_password" {}

# ec2
variable "ami" {}
variable "key_name" {}
variable "ssh_key_file" {}
デフォルト値の設定も可能となっており、上記ではregionにデフォルト値を設定しています。他のものはデフォルト値を設定していないので、実行時に値を設定していないとエラーとなります。今回は使いませんが、Mapppingも可能です。(このリージョンであればこのAMIを使うなど)
variable "amis" {
    default = {
        us-east-1 = "ami-aa7ab6c2"
        us-west-2 = "ami-23f78e13"
    }
}
上記で変数の宣言をしたので、次に変数に設定する値を terraform.tfvars に記載します。
region = "ap-northeast-1"
db_username = "root"
db_password = "hogefuga"
key_name = "UserKeyPair"
ami = "ami-cbf90ecb"
ssh_key_file = "/Users/toshihirock/aws/UserKeyPair.pem"
ファイル名を terraform.tfvars とし、カレントディレクトリに配置すると自動で読み込みますが、任意のファイル名で -var-file と実行時に指定することも可能なようです。
planコマンドを使って設定した内容を確認する。
plan コマンドを使って設定した内容を確認します。
$terraform plan
+ aws_subnet.public-c
    availability_zone:       "" => "ap-northeast-1c"
    cidr_block:              "" => "10.1.51.0/24"
    map_public_ip_on_launch: "" => "1"
    tags.#:                  "" => "1"
    tags.Name:               "" => "WP-PublicSubnet-C"
    vpc_id:                  "" => "${aws_vpc.main.id}"

+ aws_vpc.main
    cidr_block:                "" => "10.1.0.0/16"
    default_network_acl_id:    "" => "<computed>"
    default_security_group_id: "" => "<computed>"
    dhcp_options_id:           "" => "<computed>"
    enable_dns_hostnames:      "" => "1"
    enable_dns_support:        "" => "<computed>"
    main_route_table_id:       "" => "<computed>"
    tags.#:                    "" => "1"
    tags.Name:                 "" => "vpc-WordPress"
・・・(省略)
明示的に指定した部分は値が内容が設定され、そうでないか箇所は computed となっています。なお、このタイミングで先ほど設定した変数の内容も確認できます。
applyコマンドを使って実際の環境に反映する
planコマンドの結果を確認し、問題ないようであれば terraform apply コマンドを使って設定した内容を実際に反映させます。
$terraform apply
・・・
aws_security_group_rule.ssh: Creation complete
aws_security_group_rule.all: Creation complete
aws_security_group_rule.web: Creation complete
aws_security_group_rule.db: Creation complete
aws_db_subnet_group.main: Creation complete
aws_db_instance.default: Creating...
  address:                           "" => "<computed>"
  allocated_storage:                 "" => "5"
  apply_immediately:                 "" => "<computed>"
  availability_zone:                 "" => "<computed>"
  backup_retention_period:           "" => "0"
  backup_window:                     "" => "<computed>"
  db_subnet_group_name:              "" => "wp-dbsubnet"
  endpoint:                          "" => "<computed>"
  engine:                            "" => "mysql"
  engine_version:                    "" => "5.6.22"
  identifier:                        "" => "wp-mysql"
  instance_class:                    "" => "db.t2.micro"
  maintenance_window:                "" => "<computed>"
  multi_az:                          "" => "<computed>"
  parameter_group_name:              "" => "<computed>"
  password:                          "" => "hogefuga"
  port:                              "" => "<computed>"
  status:                            "" => "<computed>"
  storage_type:                      "" => "gp2"
  username:                          "" => "root"
  vpc_security_group_ids.#:          "" => "1"
  vpc_security_group_ids.1312607593: "" => "sg-c93ba9ac"
aws_main_route_table_association.a: Creation complete
・・・(省略)
Apply complete! Resources: 17 added, 0 changed, 0 destroyed.

The state of your infrastructure has been saved to the path
below. This state is required to modify and destroy your
infrastructure, so keep it safe. To inspect the complete state
use the `terraform show` command.

State path: terraform.tfstate
RDSの作成に時間が多少かかります。
現在、どのリソースの処理をしているかについてはコマンドライン上で確認できます。また、最終的に何個のリソースが変更されたか(今回の場合には17個のリソース追加)が確認できます。
showコマンドを使って結果を確認する
show コマンドを使うことで設定した内容の確認もできます。
$terraform show
aws_subnet.public-c:
  id = subnet-4a78bb13
  availability_zone = ap-northeast-1c
  cidr_block = 10.1.51.0/24
  map_public_ip_on_launch = true
  tags.# = 1
  tags.Name = WP-PublicSubnet-C
  vpc_id = vpc-20924a45
aws_vpc.main:
  id = vpc-20924a45
  cidr_block = 10.1.0.0/16
  default_network_acl_id = acl-6e8e2d0b
  default_security_group_id = sg-9a34a6ff
  dhcp_options_id = dopt-52889f30
  enable_dns_hostnames = true
  main_route_table_id = rtb-ee75d88b
  tags.# = 1
  tags.Name = vpc-WordPress

・・・(省略)
destroyコマンドで破棄してみる
設定したリソースをまとめて破棄するためには destroy コマンドを利用します。本当に削除してよいかを確認されるので問題なければyesと入力します。
$terraform destory
Do you really want to destroy?
  Terraform will delete all your managed infrastructure.
  There is no undo. Only 'yes' will be accepted to confirm.

  Enter a value:yes

aws_vpc.main: Refreshing state... (ID: vpc-20924a45)
aws_security_group.app: Refreshing state... (ID: sg-6735a702)
aws_security_group.db: Refreshing state... (ID: sg-6435a701)
aws_subnet.private-a: Refreshing state... (ID: subnet-9a369fed)
aws_subnet.private-c: Refreshing state... (ID: subnet-4d78bb14)
aws_internet_gateway.gw: Refreshing state... (ID: igw-cc9861a9)
aws_subnet.public-a: Refreshing state... (ID: subnet-9b369fec)
aws_subnet.public-c: Refreshing state... (ID: subnet-4a78bb13)
・・・(省略)
Apply complete! Resources: 0 added, 0 changed, 17 destroyed.
17個のリソースが削除されたことが確認できます。
リソース実行結果を表示する
EC2のパブリックIPアドレスなどTerraformでの処理が終わったあとに決定する内容について標準出力することがでます。
上記設定のために output.tf を作成します。
output "wordpress-endpoint" {
  value = "http://${aws_instance.web.public_dns}/wordpress/wp-admin/install.php"
}

output "web-ip" {
  value = "${aws_instance.web.public_ip}"
}

output "db-address" {
  value = "${aws_db_instance.default.address}"
}
上記例ではwordpressを設定するためのURL、EC2のパブリックIPアドレス、DBのエンドポイントを表示するようにしています。
provisionersを使って、ミドルウェアの設定やDBの設定も行う
上記でWordPressを実行するリソースの定義はできましたが、WordPressのダウンロードや必要なミドルウェアの設定、DB初期化設定などができていません。
そこでTerraformのprovisioners機能を使って、上記部分についても実行するようにします。
0.5で利用可能なprovisionersは以下のとおりです。
- Chef->Chefによるプロビジョニング
- file->ローカル環境から対象EC2環境へのファイルの転送
- local-exec->ローカル環境での処理実行
- remote-exec->対象EC2環境での処理実行
今後はPackerと同じようにPuppetやAnsibleが使えるProvisionerも出てきそうですが、とりあえず使いたいという場合にはlocal-exec,remote-execを使うことで実現可能かと思います。
今回はfileとremote-execを使って設定を行うようにします。
まず、サーバーで実行したいSQLをまとめたファイルを作成します。
CREATE USER'wordpress-user'@'%' IDENTIFIED BY 'wordpress';
CREATE DATABASE `wordpress`;
GRANT ALL PRIVILEGES ON `wordpress`.*TO"wordpress-user"@"%";
FLUSH PRIVILEGES;
次にmain.tfのEC2のリソースを定義してる部分にProvisionersの記述を追加shます。
resource "aws_instance" "web" {
  ami = "${var.ami}"
  instance_type = "t2.micro"
  subnet_id = "${aws_subnet.public-a.id}"
  associate_public_ip_address = true
  vpc_security_group_ids = ["${aws_security_group.app.id}"]
  key_name = "${var.key_name}"
  tags {
    Name = "WP-WebAPP"
  }

  provisioner "file" {
    source = "prepareWordPress.sql"
    destination = "/home/ec2-user/prepareWordPress.sql"
    connection {
      user = "ec2-user"
      key_file = "${var.ssh_key_file}"
    }
  }

  provisioner "remote-exec" {
    inline = [
    "sudo yum install php php-mysql php-gd php-mbstring -y",
    "sudo yum install mysql -y",
    "wget -O /tmp/wordpress-4.1-ja.tar.gz https://ja.wordpress.org/wordpress-4.1-ja.tar.gz",
    "sudo tar zxf /tmp/wordpress-4.1-ja.tar.gz -C /opt",
    "sudo ln -s /opt/wordpress /var/www/html/",
    "sudo chown -R apache:apache /opt/wordpress",
    "sudo chkconfig httpd on",
    "sudo killall -9 httpd",
    "sudo rm -f /var/lock/subsys/httpd",
    "sudo service httpd start",
    "sudo service httpd status",
    "mysql -u root -p${var.db_password} -h ${aws_db_instance.default.address} < /home/ec2-user/prepareWordPress.sql"
    ]
    connection {
      user = "ec2-user"
      key_file = "${var.ssh_key_file}"
    }
  }
fileでSQLファイルをEC2に転送し、その後remote-execでEC2サーバーでコマンドを実行しています。sshで接続するときの情報はconnectionという所で指定しています。
TerraformのみでWordPress構築
準備ができたので、実施してみます。
# 確認
$terraform plan
(省略)

# 実行
$terraform apply
(省略)
aws_instance.web (remote-exec): /tmp/wordpr 100%   6.31M  5.51MB/s   in 1.1s

aws_instance.web (remote-exec): 2015-05-20 03:57:39 (5.51 MB/s) - ‘/tmp/wordpress-4.1-ja.tar.gz’ saved [6620693/6620693]

aws_instance.web (remote-exec): httpd: no process found
aws_instance.web (remote-exec): Starting httpd:            [  OK  ]
aws_instance.web (remote-exec): httpd (pid  2285) is running...
aws_instance.web: Creation complete

Apply complete! Resources: 17 added, 0 changed, 0 destroyed.

The state of your infrastructure has been saved to the path
below. This state is required to modify and destroy your
infrastructure, so keep it safe. To inspect the complete state
use the `terraform show` command.

State path: terraform.tfstate

Outputs:

  db-address         = wp-mysql.c0cdb3a3yekt.ap-northeast-1.rds.amazonaws.com
  web-ip             = 52.68.246.157
  wordpress-endpoint = http://ec2-52-68-246-157.ap-northeast-1.compute.amazonaws.com/wordpress/wp-admin/install.php
先ほど実行した時と違い、Provisionerでの実行情報が標準出力に表示されるかと思います。また、最後に output.tf で設定した内容が確認できます。(showコマンドを使えば、再表示できます)
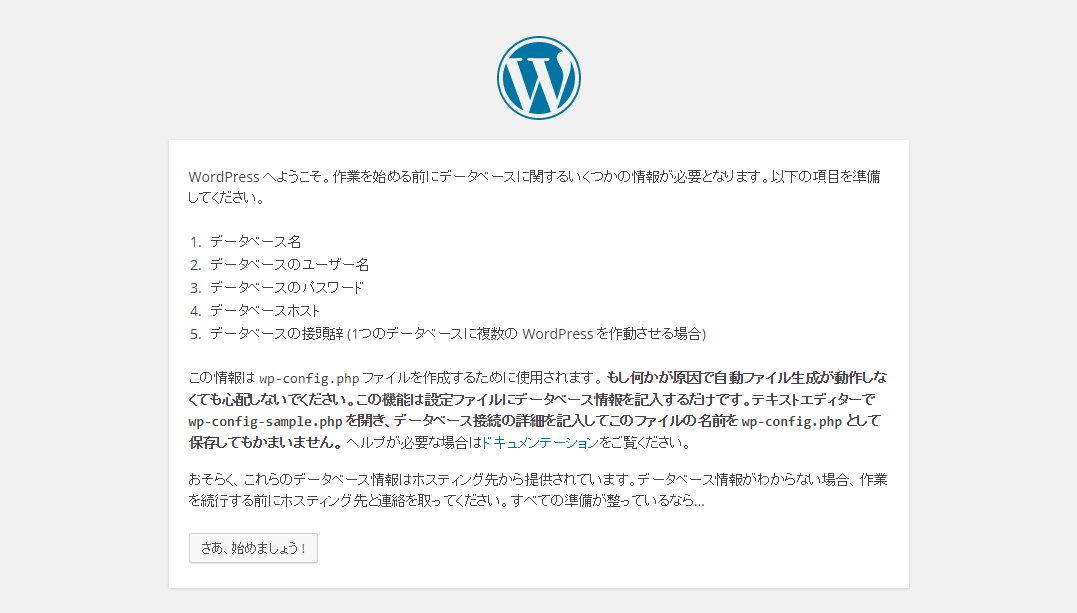
wordpress-endpointと表示されたURLにアクセスしすることでWordPress設定画面が表示されます。
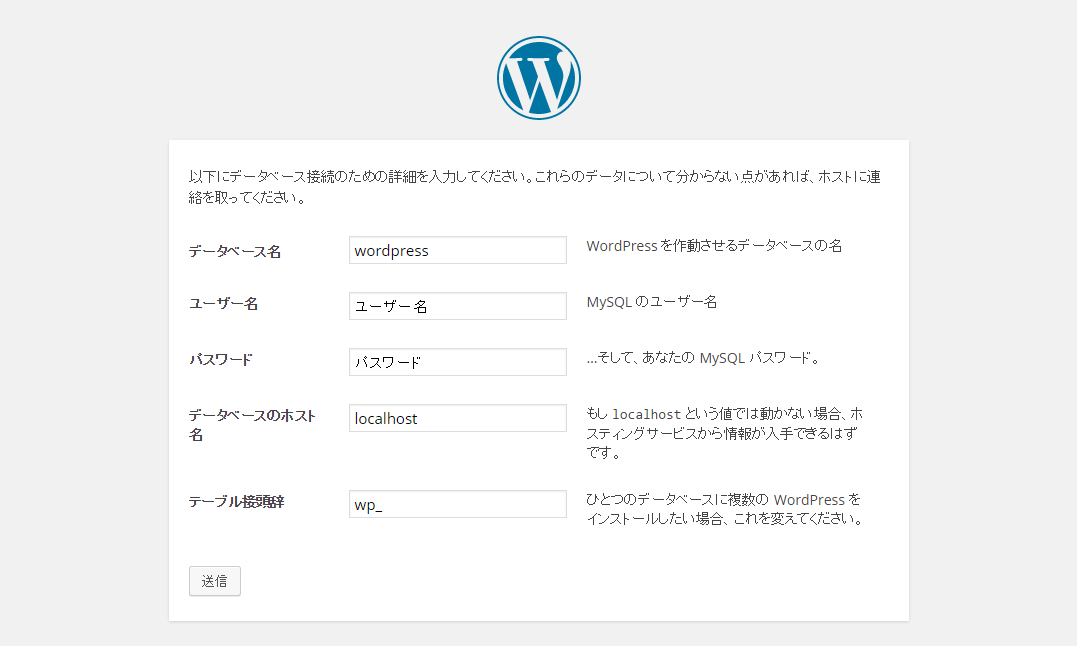
また、情報を入力していきます。
- データベース名->wordpress
- ユーザー名->terraform.tfvarsで指定したDBユーザー名
- パスワード->terraform.tfvarsで指定したDBパスワード
- データベースのホスト名->出力されたdb-address
- テーブル接頭辞->wp_
以降は各自サイトのタイトルやログイン情報など設定していけば構築が完了です。
最後に
終わったら、terraform destory をして環境は破棄しておくのをお忘れなく

