概要
Ethereumのエコシステムにはいくつか欠かせないツールが存在しますが、その中でもThe Graphの使い方をご紹介いたします。
The Graphは、Ethereumの情報にアクセスするためのAPIを、GraphQLを使って誰もが簡単に構築できるサービスです。
Who are the owners of the CryptoKitties born between January and February of 2018?
例えば、2018年の1月~2月の間にCryptoKittiesのオーナーだった人は誰か?という情報をEthereumのメインネットから取得しサービス上に表示してあげたいとします。
この場合、サービス事業者はEthereumのノードを立てて、ログを参照しながら独自のDBに情報を保存しつつ、APIを作り、フロント側に渡すみたいなことをしないといけません。
ここで、The Graphを使うことで、indexしておきたいデータをcontractのEventを軸に設定でき、簡単にGraphQLを使ったAPIを構築できます。
そこで今回は、ERC20のトークンをデプロイし、そのEvent情報をThe Graphを用いて取得し、Reactで構築されたフロント側に表示したいと思います。
環境やツール
- MacOS Catalina
- Node v14.5.0
- graph-cli
- Remix
- OpenZeppelin
- Github
- CreateEthApp
ERC20のデプロイ
今回ERC20は OpenZeppelin を使って開発します。
OpenZeppelinは厳格にテストされたスマートコントラクトのライブラリを提供してくれるサービスです。
その中でも今回は、ERC20.sol を使っていきます。
https://github.com/OpenZeppelin/openzeppelin-contracts/blob/master/contracts/token/ERC20/ERC20.sol
ERC20のコードはこちら
pragma solidity ^0.6.0;

import "https://github.com/OpenZeppelin/openzeppelin-contracts/contracts/token/ERC20/ERC20.sol";

contract AdventCalendarToken is ERC20 {

    string private _name = "AdventCalendarToken";
    string private _symbol = "ACT";
    uint8 private _decimals = 18;

    address account = msg.sender;
    uint value = 10000000000000000000000;

    constructor() ERC20( _name, _symbol) public {
        _mint(account, value);
    }
}
トークンの名前を AdventCalendarToken
初期発行量を 10000000000000000000000
初期発行分の受け取りアドレスはコントラクトをデプロイしたアドレスです。
コントラクト開発やトークンのデプロイなどをまだやったことがないという方はこちらから具体的なトークン発行のフローを確認してください。
https://note.com/toshitoissho/n/n93eadf07fd47
今回ERC20は Rinkeby 環境にデプロイしています。
また、デプロイしたERC20トークンのコントラクトアドレスがこちらです。
0x45882688e3Ef40Aa727F4EEB1cba11D1b29E228D
Etherscanを参照:
https://rinkeby.etherscan.io/address/0x45882688e3Ef40Aa727F4EEB1cba11D1b29E228D
ERC20には2種類のEventが設定されています。
https://eips.ethereum.org/EIPS/eip-20#events
event Transfer(address indexed _from, address indexed _to, uint256 _value)
event Approval(address indexed _owner, address indexed _spender, uint256 _value)
Subgraphでは、このEvent情報を軸にデータを構築していきます。
ちなみに Transfer はトークンの送金を行った際に発火するEventで、 Approval は第三者アドレスに対してトークンのTransfer権限を与えた時(approveした時)に発火するEventです。
今回はTransferイベントの情報を表示したいと思いますので、事前に自分のウォレットから複数回他のウォレットアドレスに対してTransfer(送金)しておきましょう。
Subgraphの構築
コントラクトの準備ができたら、Subgraphを作っていきます。
アカウント登録
まずはThe Graph上でアカウントを登録します。
アカウント登録にはGithubアカウントが必要です。
https://thegraph.com/
アカウント登録できたら、次にgraph-cliをインストールします。
Subgraphのセットアップ
# NPM
$ npm install -g @graphprotocol/graph-cli

# Yarn
$ yarn global add @graphprotocol/graph-cli
次に作業用のディレクトリを作ります。
$ mkdir subgraph
$ cd subgraph
その後、Subgraphのプロジェクトを作成します。
$ graph init
以下のような問いが出てきますので、設定していきましょう。
✔ Subgraph name · toshiakitakase/advent-calendar-token
✔ Directory to create the subgraph in · advent-calendar-token
✔ Ethereum network · rinkeby
✔ Contract address · 0x45882688e3Ef40Aa727F4EEB1cba11D1b29E228D
✖ Failed to fetch ABI from Etherscan: ABI not found, try loading it from a local file
✔ ABI file (path) · ./abi.json
✔ Contract Name · AdventCalendarToken
Subgraph name は <GITHUB_USERNAME>/<SUBGRAPH_NAME> で、ご自身の情報を設定していきます。
Ethereumのnetworkはコントラクトをデプロイした環境と同一の Rinkeby を使います。
Contract addressは先ほどERC20をデプロイしたコントラクトを使います。
ABIはローカルでコントラクトを開発してる場合はそのパスを指定します。
今回はRemixでコントラクトを開発したので、Remixからabiを取得し、 subgraph ディレクトリ内に保存し(abi.json)、そのパスを指定しました。
Contract nameは実装したコントラクトの名前を指定します。
これでプロジェクトができました。 lsすると advent-calendar-token ができていることが確認できます。
$ ls
abi.json		advent-calendar-token
Subgraphの実装
ここからSubgraphの実装を進めていきます。 dataSources 内に startBlock 追加します。
specVersion: 0.0.2
schema:
  file: ./schema.graphql
dataSources:
  - kind: ethereum/contract
    name: AdventCalendarToken
    network: rinkeby
    source:
      address: "0x45882688e3Ef40Aa727F4EEB1cba11D1b29E228D"
      abi: AdventCalendarToken
      startBlock: 7751082 #ここを追加
    mapping:
      kind: ethereum/events
      apiVersion: 0.0.4
      language: wasm/assemblyscript
      entities:
        - Approval
        - Transfer
      abis:
        - name: AdventCalendarToken
          file: ./abis/AdventCalendarToken.json
      eventHandlers:
        - event: Approval(indexed address,indexed address,uint256)
          handler: handleApproval
        - event: Transfer(indexed address,indexed address,uint256)
          handler: handleTransfer
      file: ./src/mapping.ts
これはどのBlockから同期を開始するかを指定するものです。
未指定の場合、同期に時間がかかってしまうので、コントラクトをデプロイしたBlockから同期するようにしましょう。
次にSchemaを設定していきます。
今回は、トークンの所有者一覧を表示したいので、ウォレットのアドレス・トークンのアドレス・ウォレットの残高を含んだEntityを実装します。
初期状態で記載されているものは削除し、下記に置き換えます。
type AccountTokenBalance @entity {
  id: ID! #wallet address
  token: String! #token address
  balance: BigInt! #現在のトークン残高
}
その後下記のコマンドを実行することで、/generated にschemaが生成されます。
$ graph codegen
そしてここからEventに応じたロジックを実装していきます。
import { BigInt } from "@graphprotocol/graph-ts";
import { Transfer } from "../generated/AdventCalendarToken/AdventCalendarToken";
import { AccountTokenBalance } from "../generated/schema";

// Transferのイベントが発火された時に実行されるfunction
export function handleTransfer(event: Transfer): void {
  let tokenId = event.address.toHex();
  let toAddress = event.params.to.toHex();
  let toAccount = AccountTokenBalance.load(toAddress);
  if (toAccount == null) {
    toAccount = new AccountTokenBalance(toAddress);
    toAccount.balance = BigInt.fromI32(0);
  }
  toAccount.balance = toAccount.balance.plus(event.params.value);
  toAccount.token = tokenId;
  toAccount.save();

  let fromAddress = event.params.from.toHex();
  if (fromAddress == "0x0000000000000000000000000000000000000000") {
    return;
  }

  let fromAccount = AccountTokenBalance.load(fromAddress);
  if (fromAccount == null) {
    fromAccount = new AccountTokenBalance(fromAddress);
    fromAccount.balance = BigInt.fromI32(0);
  }
  fromAccount.balance = fromAccount.balance.minus(event.params.value);
  fromAccount.token = tokenId;
  fromAccount.save();
}
ここでは、TransferのEventが発火するたびに、トークンのfromアドレスとtoアドレスの残高を書き換えています。
トークンが最初にmintされた時から全てのEventをチェックして計算してくれるので、現在の残高を取得できます。
これを利用して、トークンの保有者一覧を生成していきます。
ここまででSubgraphの実装は完了です。
Subgraphのデプロイ
次にアカウントの認証を実行します。
$ graph auth https://api.thegraph.com/deploy/ <access-token>
access-token は, https://thegraph.com/explorer/dashboard/ でログインすると dashboard から確認できます。
次に advent-calendar-token に入り、プロジェクトをデプロイします。
$ cd advent-calendar-token
$ yarn deploy
しかし、ここでおそらくエラーになります。
✖ Failed to deploy to Graph node https://api.thegraph.com/deploy/: subgraph name not found: toshiakitakase/advent-calendar-token

You may need to created it at https://thegraph.com/explorer/dashboard.
SubgraphのデプロイにはThe GraphのDashboardでもプロジェクトの作成が必要です。
https://thegraph.com/explorer/dashboard/ にアクセスし、プロジェクトの設定を行います。
Dashboard上から新規にSubgraphを作成します。
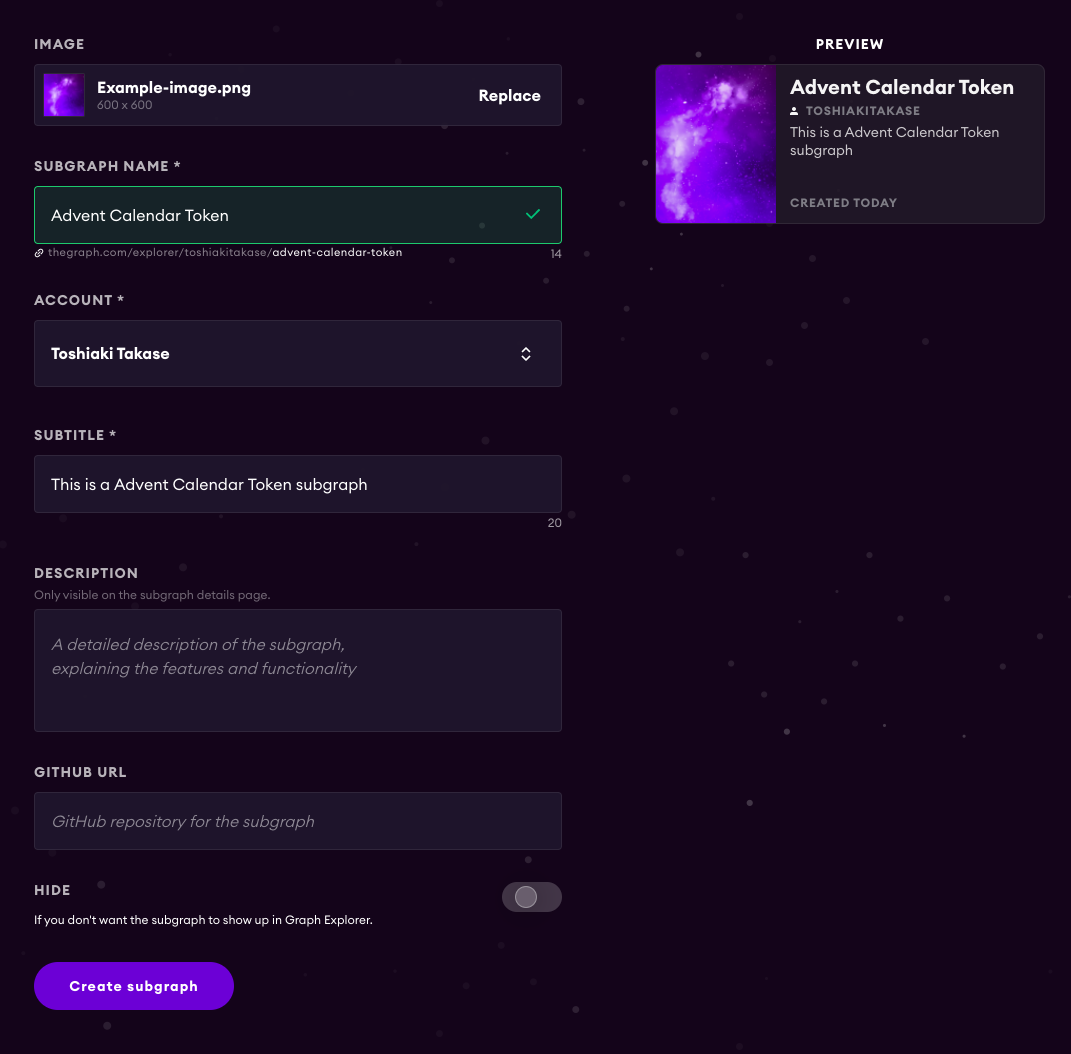
SUBGRAPH NAMEは事前に作ったSubgraph nameを advent-calendar-token としているため、 Advent Calendar Tokenとします。
(この名前をみてデプロイしているので、正しい名前をつけましょう)
一般公開したくないSubgraphの場合、 HIDE をONにします。
その後、再度Deployを実行します。
$ cd advent-calendar-token
$ yarn deploy
以下のように表示されれば成功です。
Build completed: Qmdhv61aXCnsyMUmdAikDxWRXvn81M54RfEgYmnafHFNpu

Deployed to https://thegraph.com/explorer/subgraph/toshiakitakase/advent-calendar-token

Subgraph endpoints:
Queries (HTTP):     https://api.thegraph.com/subgraphs/name/toshiakitakase/advent-calendar-token
Subscriptions (WS): wss://api.thegraph.com/subgraphs/name/toshiakitakase/advent-calendar-token
※注意点※
なお、SubgraphはEthereumのブロックと同期し、Event情報を取得しているため、デプロイしてすぐに使えるわけではありません。
下の画像の通り、Sync(同期)までには一定の時間がかかりますのでお気をつけください。
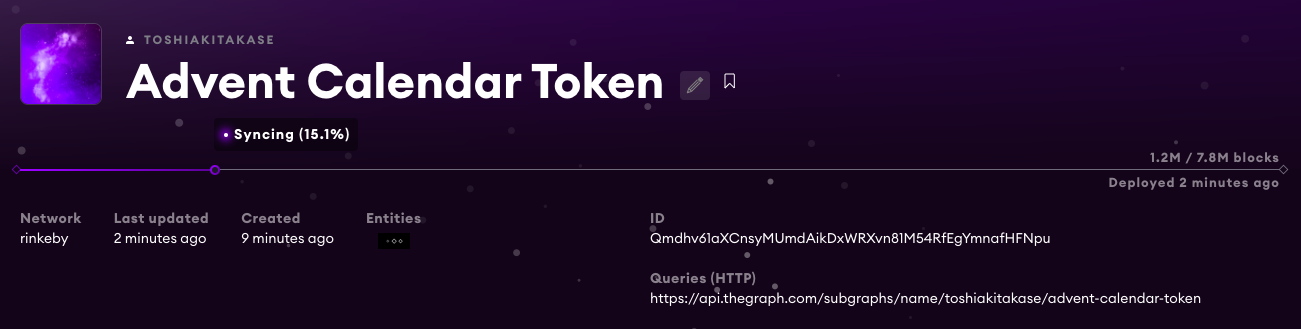
同期が完了したらSubgraphの作成成功です。
Reactを使ったフロント構築
ここからはフロントエンドの実装を進めていきます。
フロントの実装にはCreate React Appのように簡単にEthereumのDappを作れるCreate Eth Appを使っていきます。
Create Eth App
https://github.com/paulrberg/create-eth-app
まずは token_tracker という名でプロジェクトを作ります。
$ yarn create eth-app token_tracker
$ cd token_tracker
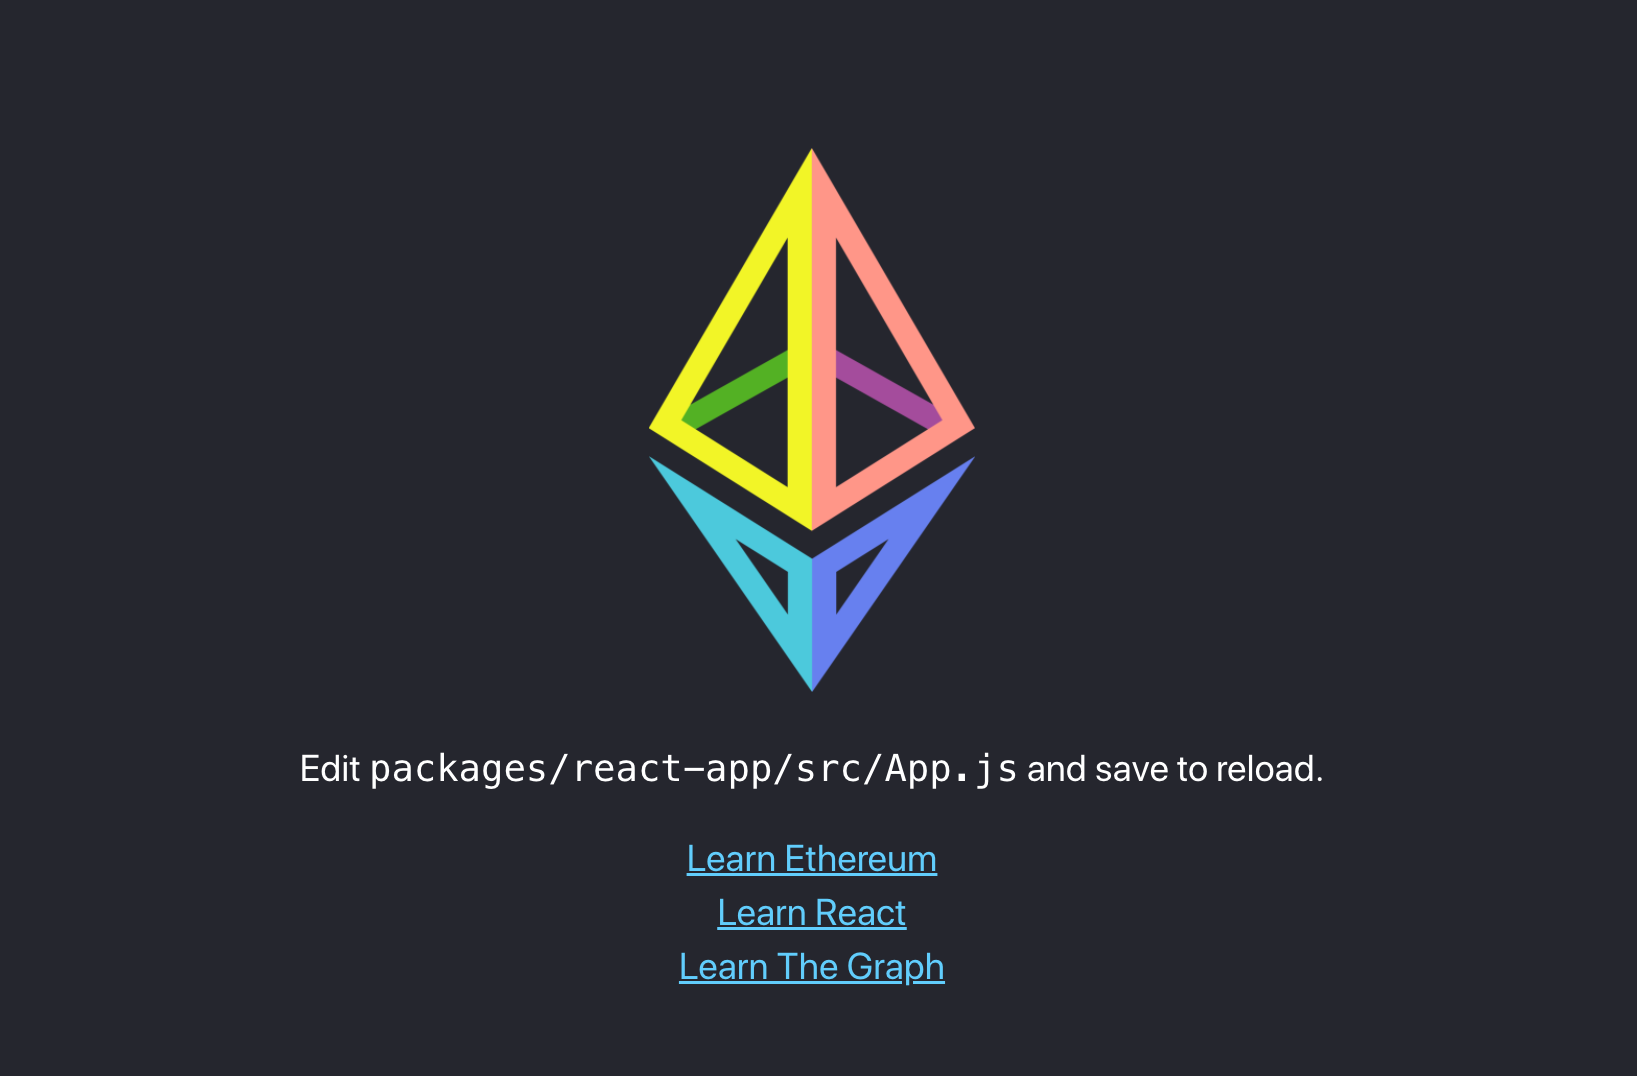
$ yarn react-app:start
http://localhost:3000/ にアクセスしい以下が表示されればOKです。
Create Eth Appにはweb3Modal( https://github.com/Web3Modal/web3modal )が組み込まれており、Connect Wallet でMetamaskに簡単接続されるなど、DApp開発で便利な実装が最初から含まれています。
今回はSubgraphの呼び出しのみを行うので、それらに関する実装を進めていきましょう。
まずは subgraph.js 内でクエリを書いていきます。
import { gql } from "apollo-boost";

const GET_TRANSFERS = gql`
  {
    accountTokenBalances(orderBy: balance) {
      id
      token
      balance
    }
  }
`;

export default GET_TRANSFERS;
次に、/src/index.js にSubgraphのAPIのURLをセットします。
const client = new ApolloClient({
  uri:
    "https://api.thegraph.com/subgraphs/name/toshiakitakase/advent-calendar-token",
});
これで設定は完了です。
あとは App.js内で呼び出していきましょう。
初期に記載されている内容は今回ほとんど利用しないため、一旦削除し、下記のように実装します。
import React, { useEffect, useState } from "react";
import { useQuery } from "@apollo/react-hooks";
import GET_TRANSFERS from "./graphql/subgraph";

function App() {
  const { loading, error, data } = useQuery(GET_TRANSFERS);
  const [tokenHolders, setTokenHolders] = useState([]);

  useEffect(() => {
    if (!loading && !error && data) {
      setTokenHolders(data.accountTokenBalances);
    }
  }, [loading, error, data]);

  return (
    <div>
      {tokenHolders.map((tokenHolder) => (
        <div key={tokenHolder.id} style={{ margin: "20px" }}>
          <div>アドレス: {tokenHolder.id}</div>
          <div>残高: {tokenHolder.balance}</div>
        </div>
      ))}
    </div>
  );
}

export default App;
これで完成!
画面をみると4つのアドレスがトークンを保有していることがわかります。

このようなトークン保有者一覧や、いつの時点でいくつ持っていたのか?といった情報を管理するにはノードの運用やDBの構築などで開発者にとってはコストになっていきます。
これを簡単な実装のみでSubgraphにデータのIndexを任せて、フロントから簡単にデータを取得できるのは開発者にとってはとっても楽ですね。
これからDAppを作る予定の方は是非TheGraphを試してみてください。