アップルさんのサンプルコードを調べているときに、CustomStringConvertibleというProtocolを使っていました。
見たことあるけどどういうものだったかな? と疑問に感じたので、調べてみました。
CustomStringConvertibleとは
Types that conform to the
CustomStringConvertibleprotocol can provide their own representation to be used when converting an instance to a string. TheString(describing:)initializer is the preferred way to convert an instance of any type to a string. If the passed instance conforms toCustomStringConvertible, theString(describing:)initializer and theprint(_:)function use the instance’s customdescriptionproperty.
Accessing a type’sdescriptionproperty directly or usingCustomStringConvertibleas a generic constraint is discouraged.
CustomStringConvertibleプロトコルに準拠したタイプは、インスタンスを文字列に変換するときに使用する独自の表現を提供できます。String(describing:)イニシャライザは、任意の型のインスタンスを文字列に変換する好ましい方法です。渡されたインスタンスがCustomStringConvertibleに準拠している場合、String(describing:)初期化子とprint(_:)関数は、インスタンスのカスタム記述プロパティを使用します。
型の説明プロパティに直接アクセスしたり、CustomStringConvertibleを一般的な制約として使用したりすることはお勧めできません。
(公式ドキュメントより抜粋。日本語訳はmacOSの翻訳機能にお願いしました)
サンプルコード
Point構造体をprint関数で文字列にした場合にどうなるかみてみましょう。
struct Point {
    let x: Int, y: Int
}

let p = Point(x: 21, y: 30)
print(p) // "Point(x: 21, y: 30)"
Point(x: 21, y: 30) という文字列に変換されました。
これでも内容はわかりますが、Pointはいらないなということがあるかと思います。
そんな場合に、CustomStringConvertibleの登場です。
struct Point: CustomStringConvertible {
    let x: Int, y: Int

    var description: String {
        return "(\(x), \(y))"
    }
}

let p = Point(x: 21, y: 30)
let s = String(describing: p)
print(s) // (21, 30)
Pointが消えて、見事に (21, 30) という文字列に変換できました。
名前のとおり、カスタムできるというわけですね。
注意点
下記のコードのように直接descriptionプロパティにアクセスすることはできるし、取得する値も String(describing:) を使った場合と同じになります。
しかし、上記の公式ドキュメントによるとお勧めできないそうです。理由が書かれていませんが、将来的に仕様が変わる(プロパティにアクセスできないようになる等)可能性もあるので、素直に String(describing:) を使いましょう。
print(p.description) // (21, 30)
使用例
アップルさんのサンプルコード Backyard Birds から、CustomStringConvertibleの使用例を見てみましょう。
サブスクリプションの種類を表すenumのPassStatusを宣言して、extensionでCustomStringConvertibleに準拠しています。そして、descriptionでは、caseごとの説明を返すようにしています。
enum PassStatus: Comparable, Hashable {
    case notSubscribed
    case individual
    case family
    case premium
}

extension PassStatus: CustomStringConvertible {
    var description: String {
        switch self {
        case .notSubscribed: String(localized: "Not Subscribed")
        case .individual: String(localized: "Individual")
        case .family: String(localized: "Family")
        case .premium: String(localized: "Premium")
        }
    }
}
次に、PassStatusのdescriptionを使用しているところを見てみます。
    @ViewBuilder
    private var manageSubscriptionLabel: some View {
        Label {
            Text("Your Backyard Birds Pass: \(String(describing: passStatus))",
                 comment: "The variable is the type of Backyard Birds Pass (such as Premium, Family, and so on.)")
        } icon: {
            Image(systemName: "wallet.pass")
        }
        #if os(macOS)
        .labelStyle(.titleOnly)
        #endif
    }
LabelのTextで使用しています。
Your Backyard Birds Pass: の後ろの \(String(describing: passStatus)) で PassStatus に定義した description を取得して表示しています。
それでは、実際の画面を見てみましょう。
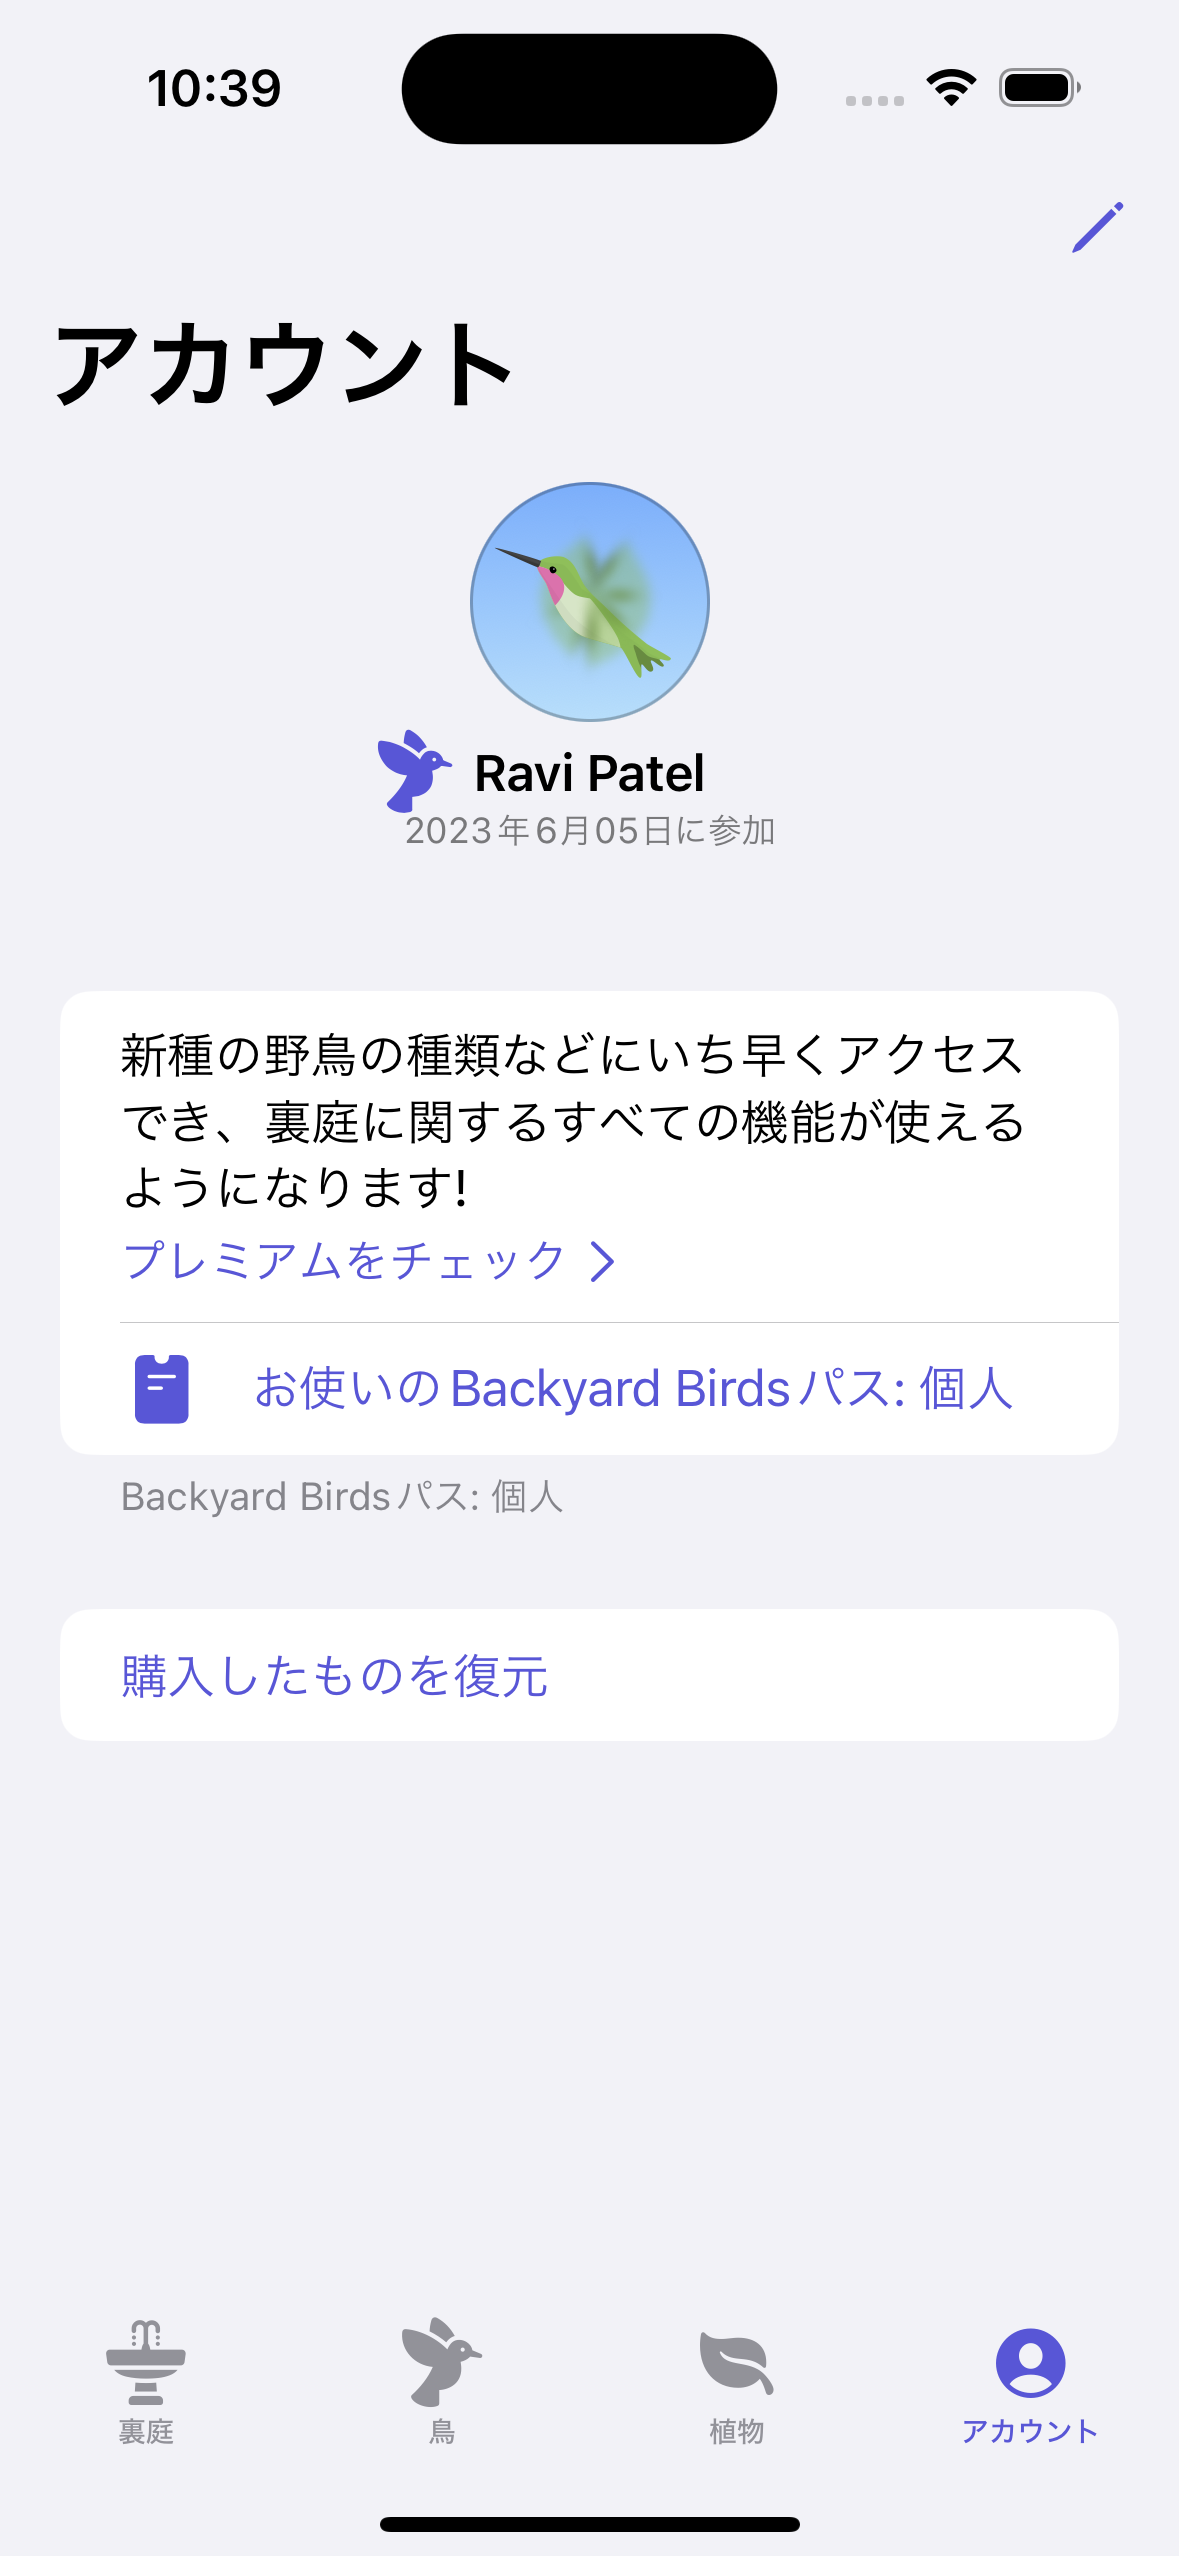
お使いのBackyard Birds パス: の後ろに 個人 と表示されています(あらかじめサブスクリプション画面で Individual を選択してあります)。
CustomStringConvertible の description で case .individual: String(localized: "Individual") が選択されて "Individual" が返ってきていることがわかります。
余談ですが、 "Individual" が 個人 になっているのはLocalizableが設定されているからです。

終わりに
自分でコードを書くときには、下記のようにnameを定義していました。
enum PassStatus: Comparable, Hashable {
    case notSubscribed
    case individual
    case family
    case premium

    var name: String {
        switch self {
        case .notSubscribed: String(localized: "Not Subscribed")
        case .individual: String(localized: "Individual")
        case .family: String(localized: "Family")
        case .premium: String(localized: "Premium")
        }
    }
}
標準のprotocolがあるならそちらを使ったほうがわかりやすくていいなと思うので、これからはCustomStringConvertibleを活用します。
それでは、Have a good Swift life! Have a good CustomStringConvertible iife!