はじめに
torimaroといいます。よろしくお願いします。
好きなものはExcelです。
みなさんはExcelを使っていますか?
PowerQuery便利ですよね。PowerBIなんて新参ですよ
最近だとDataStreamerも追加され、モニタリング・可視化ツールとして、
今も尚進化を続けるExcelの可能性は無限大ですよね。
またExcelに付属するVBAは、プログラマ以外の多くの会社員にとって、
唯一のプログラミング環境であることも多いと思います。
ですがUserFormあれはいけない。とてもダサい。
古い環境なのでしょうがないですが、いかにも昔のパソコンソフト然とした見た目で、
華やかさに欠けると思いませんか?
イマドキのアプリはコマンドボタン=アイコンになっており、とても見栄えが良いので、
UserFormでもそんな感じにしていきたいですよね?
ボタンにいい感じのアイコンをつける方法は、既にいくつか方法がありますが、
基本的に画像をどこからか取得して、コントロールのPictureに設定することが必要で、
割と面倒くさいです。
代表的?な例(GetImageMso)
Private Sub UserForm_Initialize()
    Me.CommandButton1.Picture = Application.CommandBars.GetImageMso("FileOpen", 64, 64)
End Sub
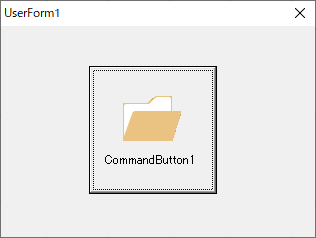
上記実行結果(事前にUserForm中央にコマンドボタン配置 & Width・Height=96に設定)

こんな感じですね
多分一番普通の方法です。
RibbonUIと共通のアイコンを参照します。
参照キー(例では"FileOpen")は頑張って調べます。
具体的には、ここにExcelバージョン毎の参照キーが列挙されています。
https://github.com/OfficeDev/office-fluent-ui-command-identifiers
アイコン画像は一覧になっていないので、入手した参照キーを
RibbonUIのImageMsoへ入力するか(超しんどい)、GetImageMsoを実行して、
アイコンの見た目を確認していくことになります。
また、Excelのバージョンによって画像が異なります。
つまり面倒くさいってことです。
なお、初心者備忘録さんがこのアイコン一覧を画像にして、公開してくださっています。
この記事の続きの必要性はありませんが続きます。
https://www.ka-net.org/blog/ 👈 超おススメ!!
Segoe MDL2 Assetsに関して
https://docs.microsoft.com/ja-jp/windows/uwp/design/style/segoe-ui-symbol-font
Windows10で利用可能なUWP用のアイコンです。
文字列なので、Excelのシート上で簡単に表示できちゃいます。
・つまり確認が楽!
・文字なので、Excelバージョンの依存なし!!(OS依存あり)
・これからも増えていくかもしれない!!!(知らんけど)
というわけで、たぶんいいモノです。そう実感しています。
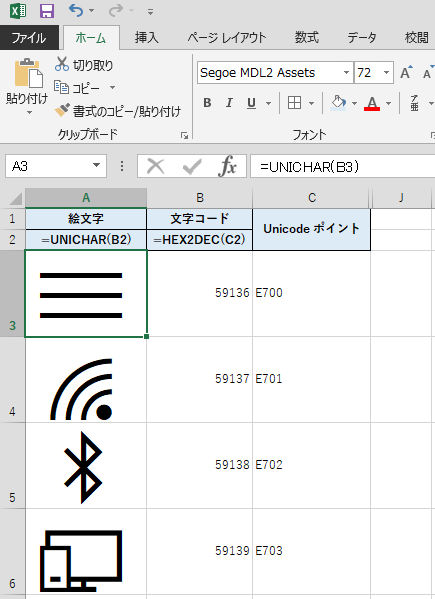
ちなみにシート上での表示に関しては、上記サイトのunicodeポイントを指定して、
絵文字表示セルのフォントをSegoe MDL2 Assetsにするだけです。確認が簡単!!
(文字コードの変換は下記画像2行目参照)

こいつをVBAのボタンアイコンに設定するのが今回の内容です。
本題
このかわいそうなラベルコントロールたちにアイコンを追加し、
しかもクリック時に色が変化するひとつ上のコントロールへ進化させます。
ただ、フォント設定等を各ラベルに実施するのは非常に面倒なので、
テンプレート適用クラスを実装して実現します。
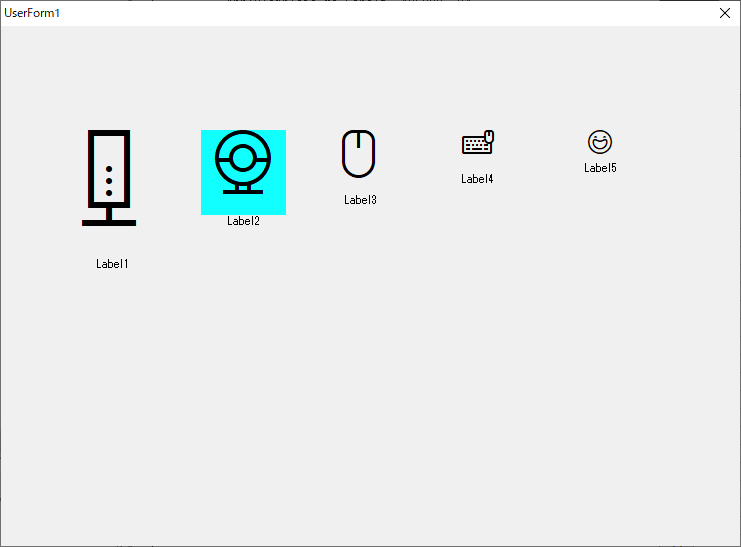
テンプレート適用処理 実行例:
Private TemplateSetter As New SymbolButtonTemplate
Private Sub UserForm_Initialize()
    With TemplateSetter
        .ApplyTemplate Me.Label1, &HE965, 96
        .ApplyTemplate Me.Label2, &HE960, 64
        .ApplyTemplate Me.Label3, &HE962, 48
        .ApplyTemplate Me.Label4, &HE961, 32
        .ApplyTemplate Me.Label5, &HE899, 24
    End With
End Sub
かっこいい・・・(恍惚)
あとはいつも通りクリックイベントとかに適当に処理を書いてマクロを作るだけです。
この機能を利用するには、
以下の二つのクラスをブックに追加し、ラベルコントロールに対して
ApplyTemplateを実行するだけです。
Public Sub ApplyTemplate
(ByRef TargetLabel As MSForms.Label, ByRef unicode As Long, Optional ByRef buttonSize As Integer = 64)
TargetLabel:適用先のラベルコントロールを指定します。
unicode:アイコンページのunicodeポイントを入力"E965"の場合、&HE965と入力(&Hは16進数の型文字)
buttonSize:アイコンの大きさ(デフォルト:64)
Private Dict As Object
Private Const FONT_NAME = "Segoe MDL2 Assets"
Private Const DICSTR As String = "Scripting.Dictionary"
Private Const LABEL_SUMMON As String = "Forms.Label.1"
Public Sub ApplyTemplate(ByRef TargetLabel As MSForms.Label, ByRef unicode As Long, Optional ByRef buttonSize As Integer = 64)
    Dim caption As String
    With TargetLabel
        caption = .caption
        With .Font
            .name = FONT_NAME
            .Size = buttonSize * 0.75
        End With
        .BackColor = &HFFFF11
        .ForeColor = 0
        .caption = ChrW(unicode)
        .textAlign = fmTextAlignCenter
        .BackStyle = fmBackStyleTransparent
        .Height = buttonSize
        .width = buttonSize
        With .Parent.Controls.Add(LABEL_SUMMON)
            .WordWrap = False
            .AutoSize = True
            .caption = caption
            .Top = TargetLabel.Top + buttonSize
            .textAlign = fmTextAlignCenter
            .Height = .Font.Size
            .Left = (TargetLabel.Left * 2 + TargetLabel.width) * 0.5 - .width * 0.5
        End With
    End With
    Dim Child As SymbolButtonEventhandler: Set Child = New SymbolButtonEventhandler
    Child.Init TargetLabel
    Dict.Add TargetLabel.name, Child
End Sub
Private Sub Class_Initialize()
    Set Dict = CreateObject(DICSTR)
End Sub
SymbolButtonTemplateでは、書式を適用した後に、
適用されたコントロール毎のSymbolButtonEventHandlerをDictionary内に保持しています。
また、Captionが絵文字になってしまう為、Parentオブジェクト(UserForm本体)にアクセスし、
Caption用のラベルを生成して、絵文字の下に貼り付けるようにしています。
Private WithEvents Label As MSForms.Label
Public Sub Init(ByRef TargetLabel As MSForms.Label)
    Set Label = TargetLabel
End Sub
Private Sub Label_MouseDown(ByVal Button As Integer, ByVal Shift As Integer, ByVal x As Single, ByVal y As Single)
    With Label
        .BackStyle = fmBackStyleOpaque
    End With
End Sub
Private Sub Label_MouseUp(ByVal Button As Integer, ByVal Shift As Integer, ByVal x As Single, ByVal y As Single)
    With Label
        .BackStyle = fmBackStyleTransparent
    End With
End Sub
SymbolButtonEventHandlerはWithEventsでラベルコントロールのイベントを拾い、
マウスクリック時の見た目を変更しています。
なお、テンプレートの適用先はコマンドボタンの方がいいかもしれませんが、
最近は平べったくてシンプルなコントロールが流行りなので、とりあえずラベルコントロールにしておきました。
これで、UserFormはUWPやWPFと同等のアイコンパワーを得ました
UserFormの見た目がストアアプリを凌駕する。そういう時代が来ると思います。


