環境
・OS: macOS Catalina バージョン10.15.7
・Swift 5.3.1
・Xcode Version12.2
・Firebase(Firebase Realtime Database)
前提知識
・Swift5
・CRUDの知識 ※主にFirebase
・XCodeの使い方
・TableView, TableViewCell,TextField,Buttonの知識
概要
上の動画のように、TableViewからTableViewに画面遷移をする際に、押下されたセルによって画面遷移後の内容を変更したいことはありませんか?
私はあります!!
根元のViewControllerから派生していく感じ、、、なんかいいですよね。
今回は私が考えたこと、リサーチしたことや実装していくまでの過程を実践ベースで記したいと思います。
仕様概要
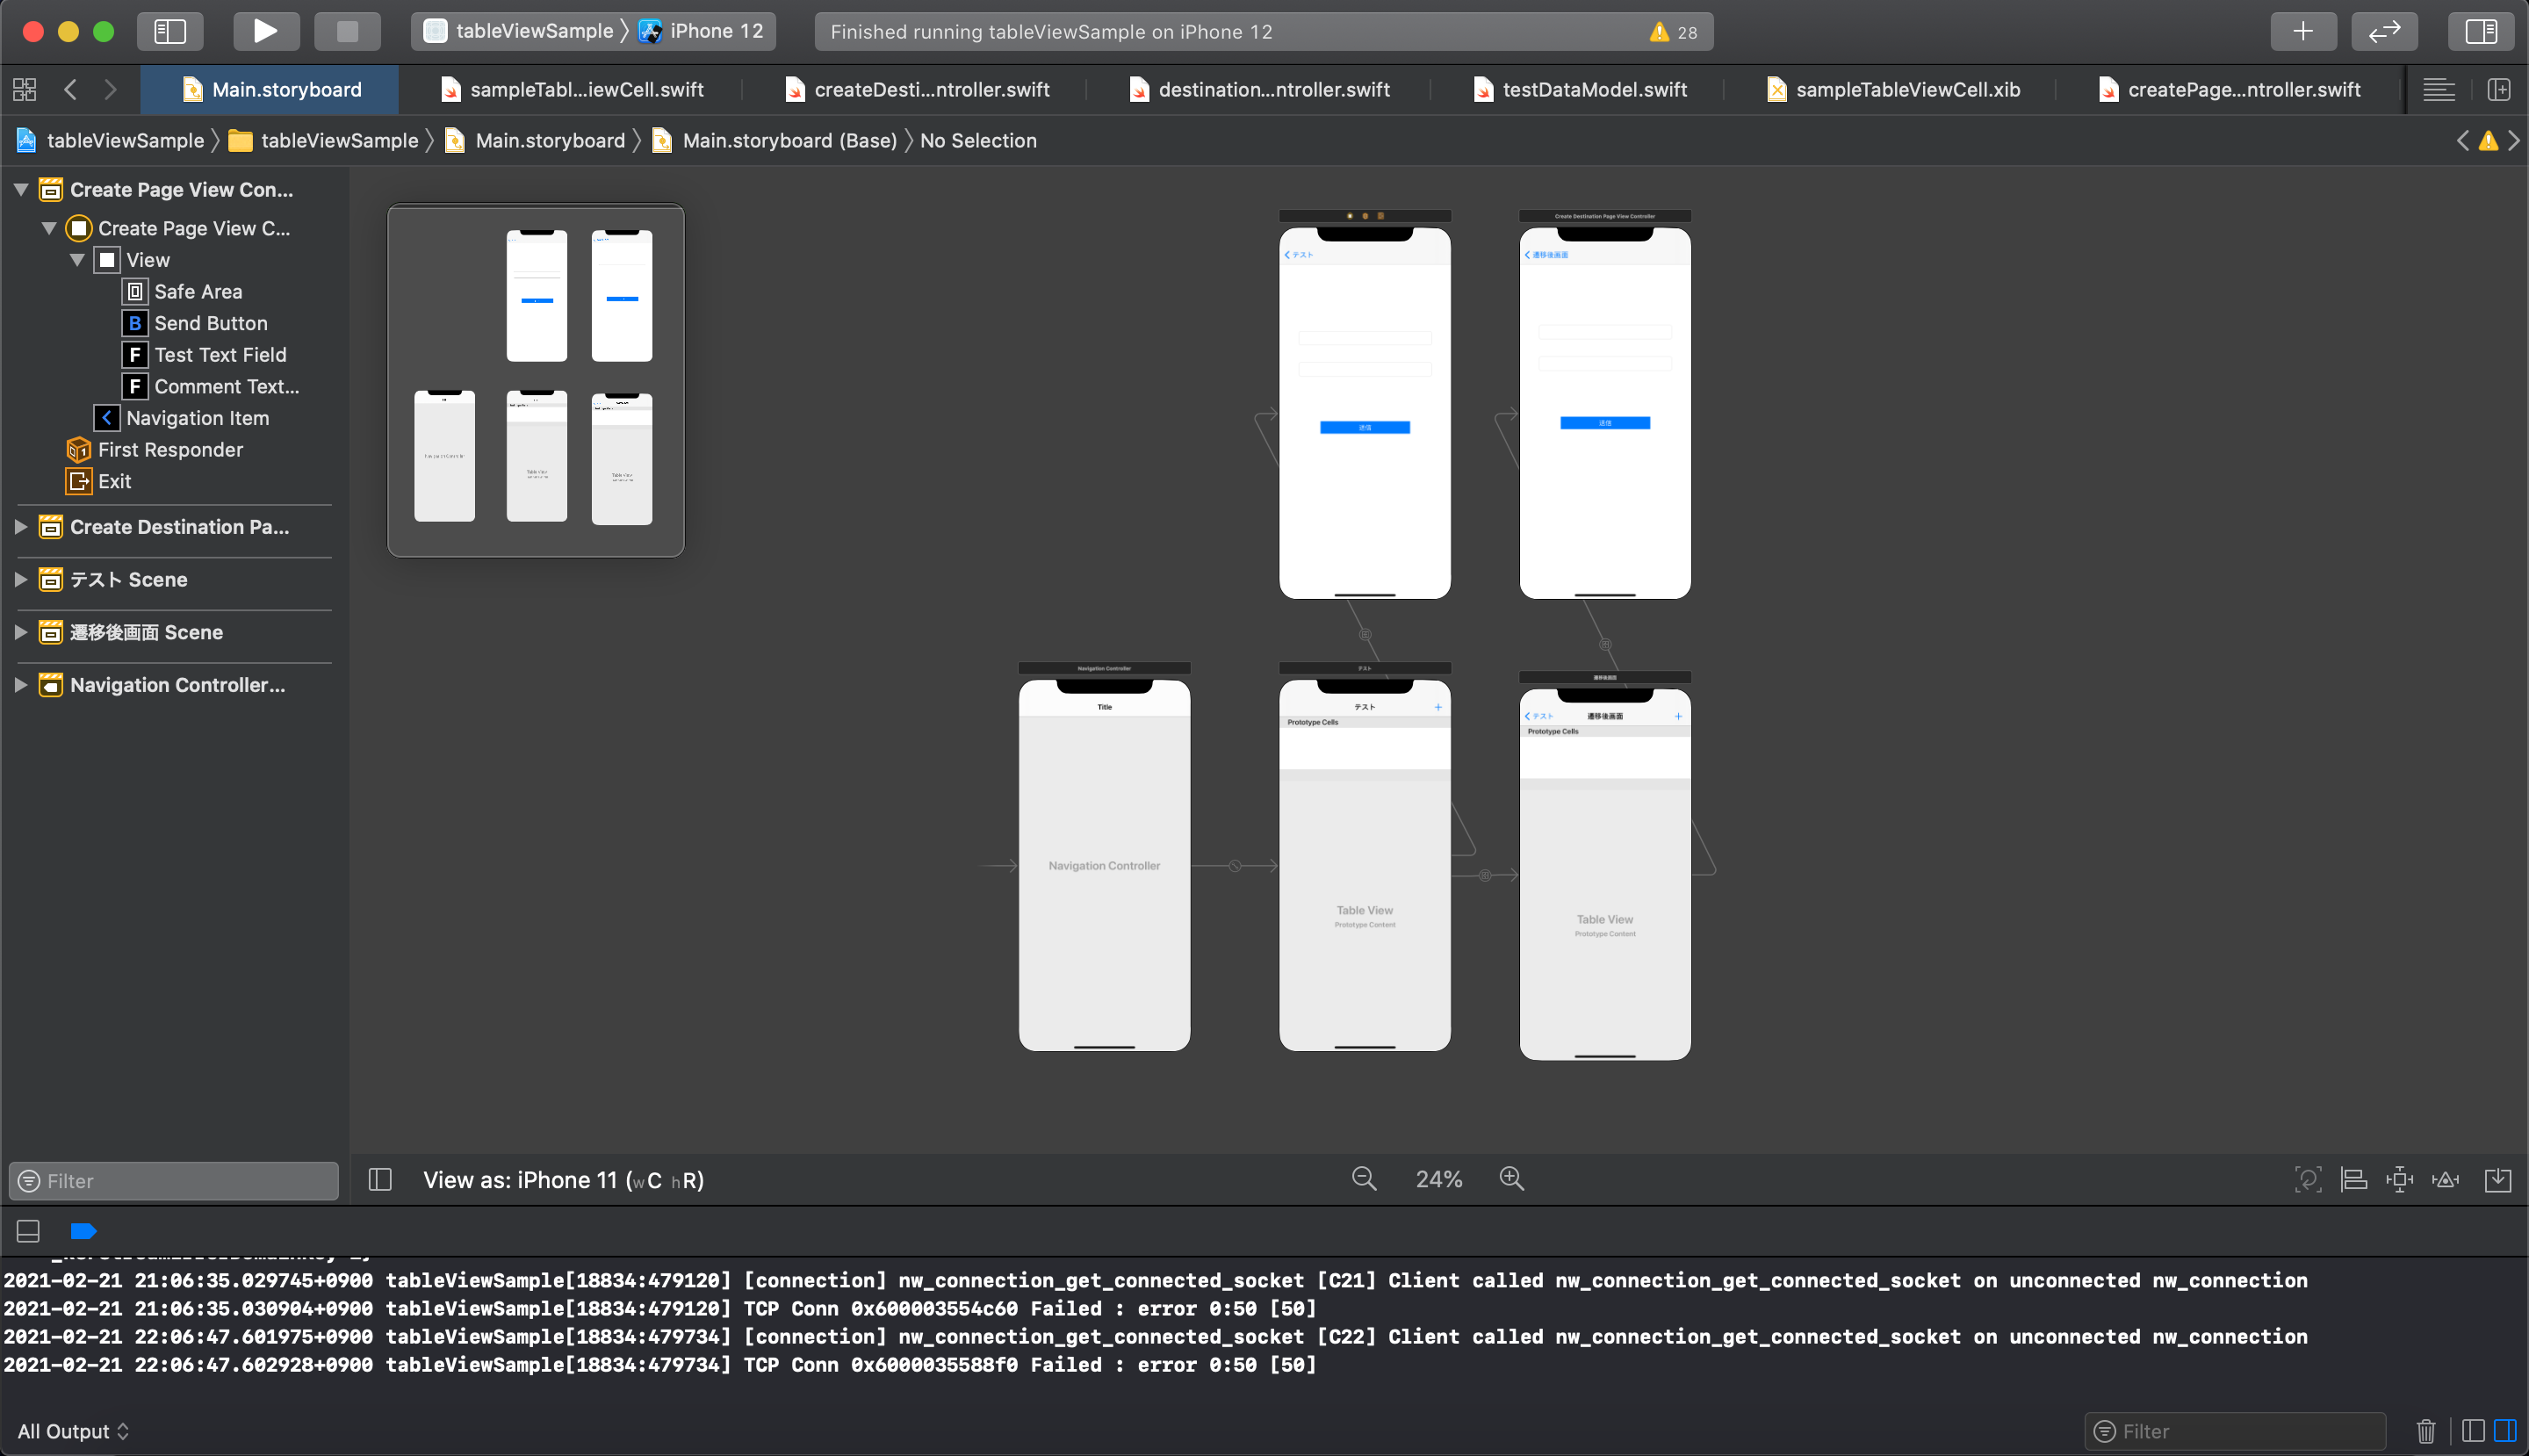
↑今回のStoryboardです。
①画面遷移前のTableViewにあるcellのindexPathを取得し、投稿内容と同時にFirebaseのRealtime Databaseに保存する
↓
②Firebaseから情報をReadしてくる際に、①で保存したindexPathの値と、画面遷移後のcellのindexPathを比較する。
↓
③もし②で比較したindexPathの値が同値であったら、配列に保存する。
雑な説明ですみません。ここで上記の内容がわかった人は、今すぐXCodeを開いて試してみましょう!
「この説明、よくわからんわ!!」って人は一緒に以下で実装方法を考えてみましょう!
完成形
この記事を読み終わった時には、このような仕様が実装できるようになります。
今回使用したコード(初期段階)
そのコードが以下です。見るのが面倒な人は、飛ばしてください。
import UIKit
import Firebase

@main
class AppDelegate: UIResponder, UIApplicationDelegate {


    func application(_ application: UIApplication, didFinishLaunchingWithOptions launchOptions: [UIApplication.LaunchOptionsKey: Any]?) -> Bool {
        // Override point for customization after application launch.
        FirebaseApp.configure()
        return true
    }

    // MARK: UISceneSession Lifecycle

    func application(_ application: UIApplication, configurationForConnecting connectingSceneSession: UISceneSession, options: UIScene.ConnectionOptions) -> UISceneConfiguration {
        // Called when a new scene session is being created.
        // Use this method to select a configuration to create the new scene with.
        return UISceneConfiguration(name: "Default Configuration", sessionRole: connectingSceneSession.role)
    }

    func application(_ application: UIApplication, didDiscardSceneSessions sceneSessions: Set<UISceneSession>) {
        // Called when the user discards a scene session.
        // If any sessions were discarded while the application was not running, this will be called shortly after application:didFinishLaunchingWithOptions.
        // Use this method to release any resources that were specific to the discarded scenes, as they will not return.
    }


}
import UIKit

class SceneDelegate: UIResponder, UIWindowSceneDelegate {

    var window: UIWindow?


    func scene(_ scene: UIScene, willConnectTo session: UISceneSession, options connectionOptions: UIScene.ConnectionOptions) {
        // Use this method to optionally configure and attach the UIWindow `window` to the provided UIWindowScene `scene`.
        // If using a storyboard, the `window` property will automatically be initialized and attached to the scene.
        // This delegate does not imply the connecting scene or session are new (see `application:configurationForConnectingSceneSession` instead).
        guard let _ = (scene as? UIWindowScene) else { return }
    }

    func sceneDidDisconnect(_ scene: UIScene) {
        // Called as the scene is being released by the system.
        // This occurs shortly after the scene enters the background, or when its session is discarded.
        // Release any resources associated with this scene that can be re-created the next time the scene connects.
        // The scene may re-connect later, as its session was not necessarily discarded (see `application:didDiscardSceneSessions` instead).
    }

    func sceneDidBecomeActive(_ scene: UIScene) {
        // Called when the scene has moved from an inactive state to an active state.
        // Use this method to restart any tasks that were paused (or not yet started) when the scene was inactive.
    }

    func sceneWillResignActive(_ scene: UIScene) {
        // Called when the scene will move from an active state to an inactive state.
        // This may occur due to temporary interruptions (ex. an incoming phone call).
    }

    func sceneWillEnterForeground(_ scene: UIScene) {
        // Called as the scene transitions from the background to the foreground.
        // Use this method to undo the changes made on entering the background.
    }

    func sceneDidEnterBackground(_ scene: UIScene) {
        // Called as the scene transitions from the foreground to the background.
        // Use this method to save data, release shared resources, and store enough scene-specific state information
        // to restore the scene back to its current state.
    }


}
import UIKit
import Firebase

class ViewController: UIViewController {

    //    tableview定義
    @IBOutlet var sampleTableView: UITableView!
    //    tableViewに表示する内容を配列に格納
    var testArray = [testDataModel]()

    override func viewDidLoad() {
        super.viewDidLoad()
        sampleTableView.delegate = self
        sampleTableView.dataSource = self
        //        カスタムセルの登録
        let nib = UINib(nibName: "sampleTableViewCell", bundle: Bundle.main)
        sampleTableView.register(nib, forCellReuseIdentifier: "cell")
        //        不要な線を消す
        sampleTableView.tableFooterView = UIView()
        //        セルの高さを指定
        sampleTableView.rowHeight = 100
        observeInfoFromFirebase()
    }

    private func observeInfoFromFirebase(){
        let ref = Database.database().reference()
        ref.child("testComment").observe(.value) { (snapshot) in
            //            配列を初期化
            self.testArray = []
            for data in snapshot.children{
                let snapData = data as! DataSnapshot
                let dicData = snapData.value as! [String:Any]

                let testData = testDataModel(dic: dicData)
                self.testArray.append(testData)
            }
            self.sampleTableView.reloadData()
        }

    }


}

extension ViewController: UITableViewDelegate, UITableViewDataSource{
    func tableView(_ tableView: UITableView, numberOfRowsInSection section: Int) -> Int {
        return testArray.count
    }

    func tableView(_ tableView: UITableView, cellForRowAt indexPath: IndexPath) -> UITableViewCell {
        let cell = tableView.dequeueReusableCell(withIdentifier: "cell") as! sampleTableViewCell
        let testPost = testArray[indexPath.row]
        //        cellの内容
        let testText = cell.viewWithTag(1) as! UILabel
        testText.text = testPost.testText

        let commentText = cell.viewWithTag(2) as! UILabel
        commentText.text = testPost.commentText


        return cell
    }

    func tableView(_ tableView: UITableView, didSelectRowAt indexPath: IndexPath) {
        //        セルを選択した後に選択状態を解除する
        tableView.deselectRow(at: indexPath as IndexPath, animated: true)
        self.performSegue(withIdentifier: "toDetail", sender: nil)
    }
}
import UIKit
import Firebase

class destinationViewController: UIViewController {

    @IBOutlet var destinationTableView: UITableView!
    var sampleArray = [testDataModel]()

    override func viewDidLoad() {
        super.viewDidLoad()
        //カスタムセルの登録
        let nib = UINib(nibName: "sampleTableViewCell", bundle: Bundle.main)
        destinationTableView.dataSource = self
        destinationTableView.delegate = self
        destinationTableView.register(nib, forCellReuseIdentifier: "cell")
        //        不要な線を消す
        destinationTableView.tableFooterView = UIView()
        //        セルの高さを指定
        destinationTableView.rowHeight = 100
        observeInfoFromFirebase()
    }

    private func observeInfoFromFirebase(){
        let ref = Database.database().reference()
        ref.child("sampleComment").observe(.value) { (snapshot) in
            //            配列を初期化
            self.sampleArray = []
            for data in snapshot.children{
                let snapData = data as! DataSnapshot
                let dicData = snapData.value as! [String:Any]

                let testData = testDataModel(dic: dicData)
                self.sampleArray.append(testData)
            }
            self.destinationTableView.reloadData()
        }
    }
}

extension destinationViewController:UITableViewDelegate,UITableViewDataSource{
    func tableView(_ tableView: UITableView, numberOfRowsInSection section: Int) -> Int {
        return sampleArray.count
    }

    func tableView(_ tableView: UITableView, cellForRowAt indexPath: IndexPath) -> UITableViewCell {
        let cell = tableView.dequeueReusableCell(withIdentifier: "cell") as! sampleTableViewCell
        let samplePost = sampleArray[indexPath.row]
        //        cellの内容
        let testText = cell.viewWithTag(1) as! UILabel
        testText.text = samplePost.testText

        let commentText = cell.viewWithTag(2) as! UILabel
        commentText.text = samplePost.commentText

        return cell
    }


}
import Foundation
import UIKit

class testDataModel{
    //    cellに包含する内容の定義
    var testText: String
    var commentText: String

    //    testDataModelを初期化
    init(dic:[String:Any]) {
        self.testText = dic["text"] as! String
        self.commentText = dic["comment"] as! String
    }

}
import UIKit

class sampleTableViewCell: UITableViewCell {

    override func awakeFromNib() {
        super.awakeFromNib()
        // Initialization code
    }

    override func setSelected(_ selected: Bool, animated: Bool) {
        super.setSelected(selected, animated: animated)

        // Configure the view for the selected state
    }

}
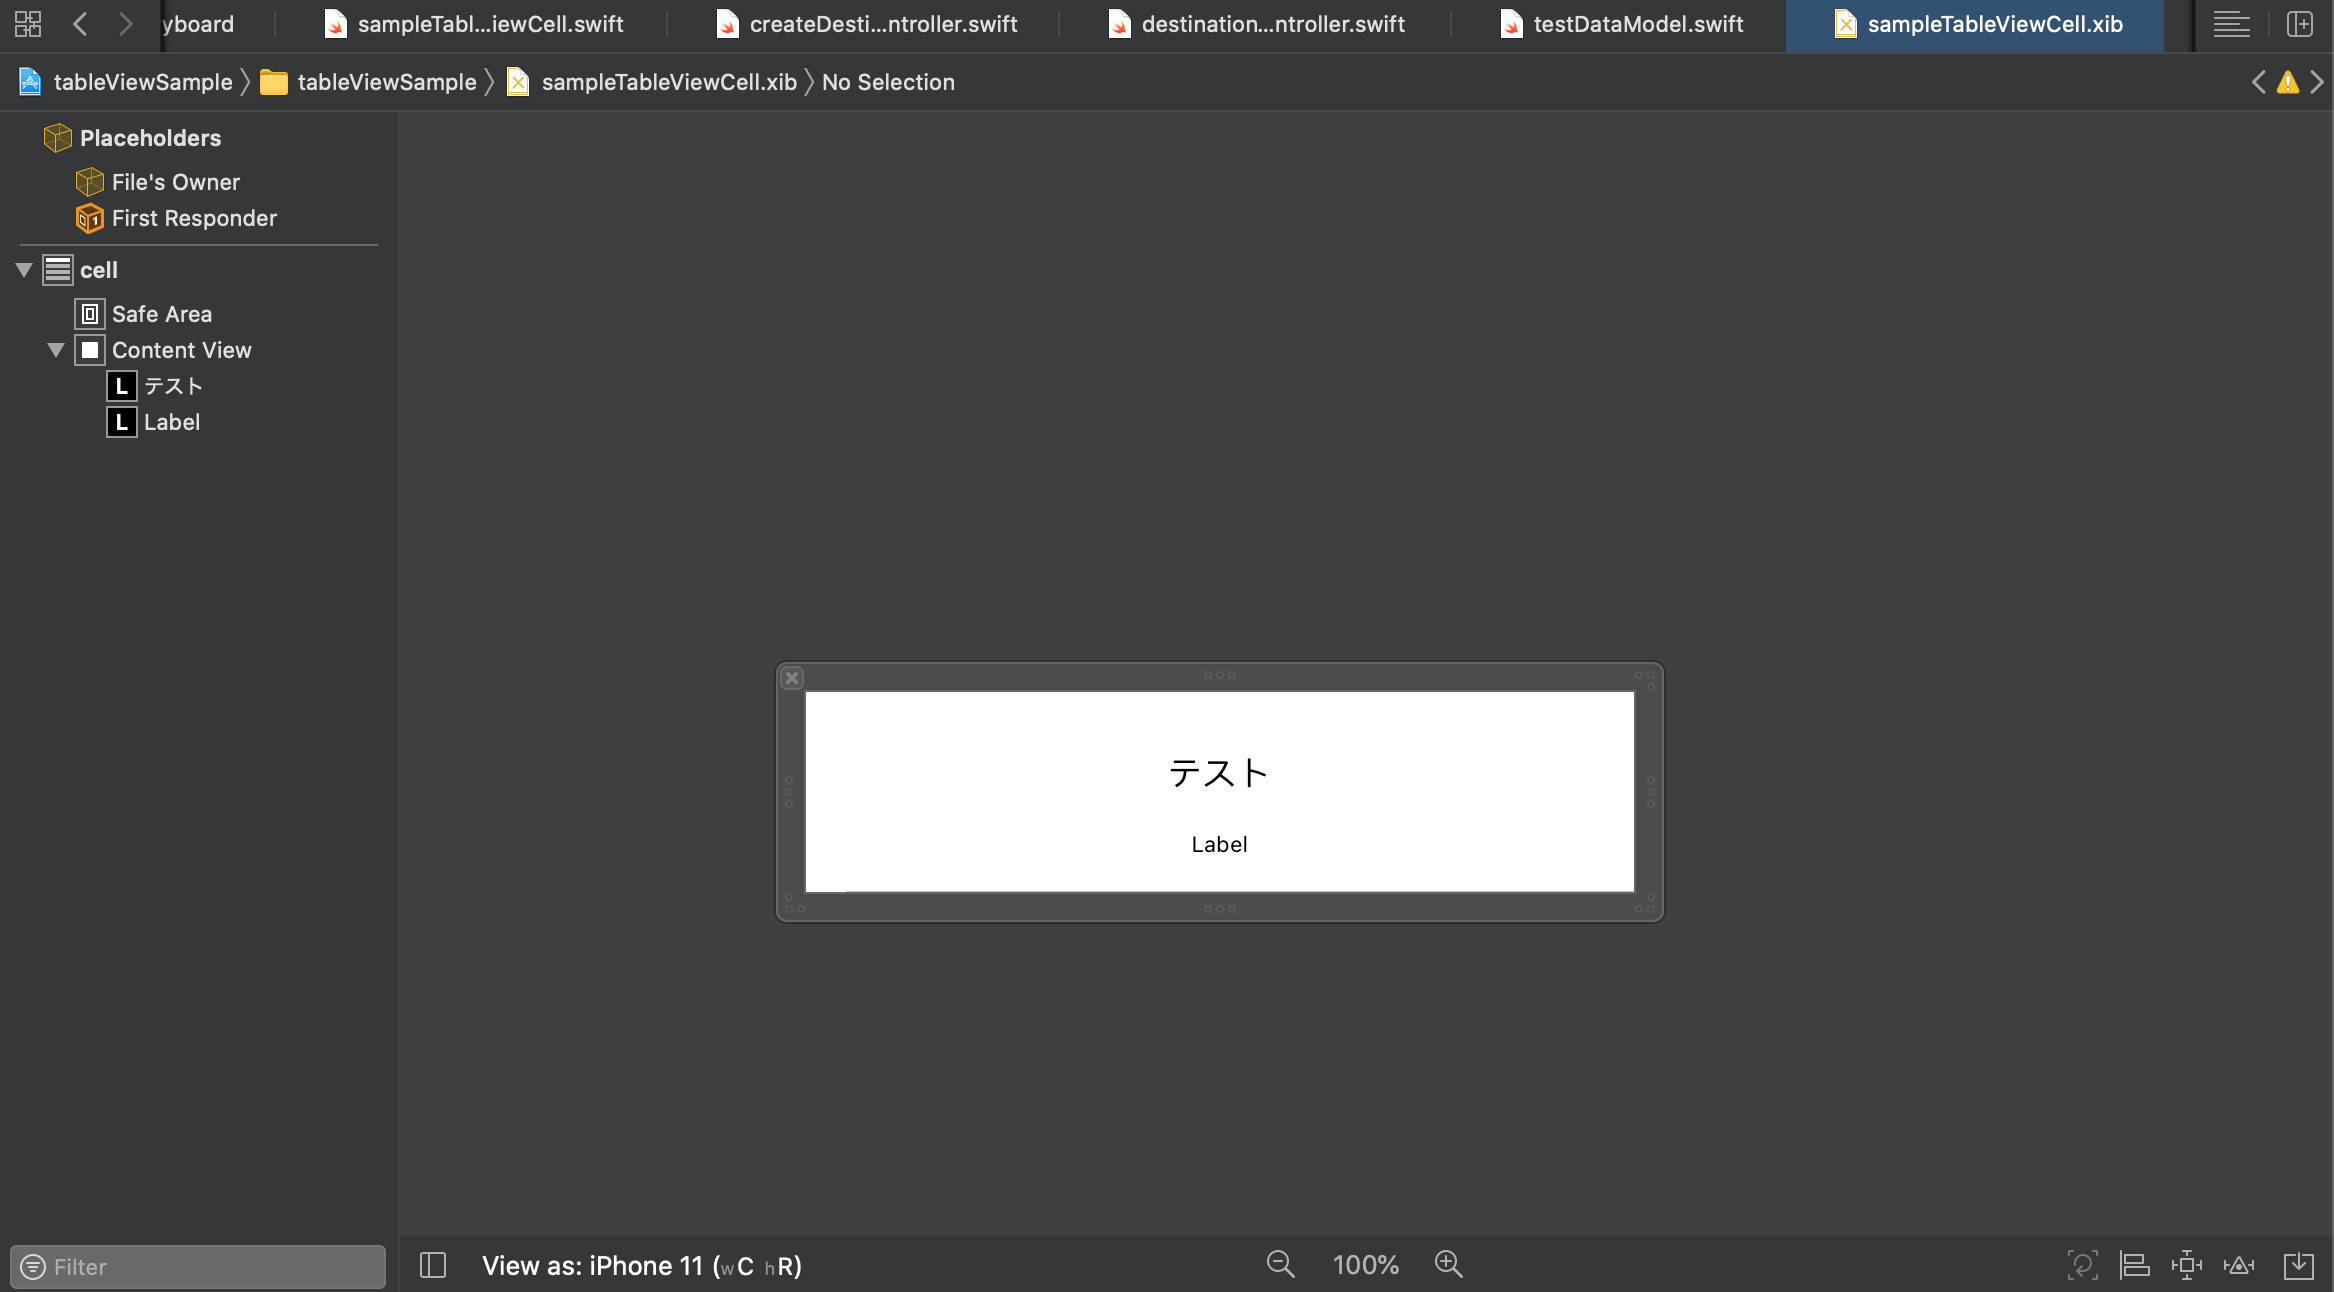
↑ sampleTableViewCell.swiftに対応するtableViewCellです。
import UIKit
import Firebase

class createDestinationPageViewController: UIViewController {

    @IBOutlet var testTextField: UITextField!
    @IBOutlet var commentTextField: UITextField!

    @IBOutlet var sendButton: UIButton!

    override func viewDidLoad() {
        super.viewDidLoad()

    }

    @IBAction func sendButtonAction(_ sender: Any) {
        setFirebase()
        self.navigationController?.popViewController(animated: true)
    }

    private func setFirebase(){
        let ref = Database.database().reference()
        let postModel:[String:Any] = [
            "text": testTextField.text,
            "comment": commentTextField.text
        ]
        ref.child("sampleComment").childByAutoId().setValue(postModel)
    }
}

extension createDestinationPageViewController: UITextFieldDelegate{
    func textFieldShouldReturn(_ textField: UITextField) -> Bool {
        textField.resignFirstResponder()
    }
}
import UIKit
import Firebase

class createPageViewController: UIViewController {

    @IBOutlet var testTextField: UITextField!
    @IBOutlet var commentTextField: UITextField!

    @IBOutlet var sendButton: UIButton!

    override func viewDidLoad() {
        super.viewDidLoad()

    }

    @IBAction func sendButtonAction(_ sender: Any) {
        setFirebase()
        self.navigationController?.popViewController(animated: true)
    }

    private func setFirebase(){
        let ref = Database.database().reference()
        let postModel:[String:Any] = [
            "text": testTextField.text,
            "comment": commentTextField.text
        ]
        ref.child("testComment").childByAutoId().setValue(postModel)
    }
}

extension createPageViewController: UITextFieldDelegate{
    func textFieldShouldReturn(_ textField: UITextField) -> Bool {
        textField.resignFirstResponder()
    }
}
今回使用したコード(最終段階)
完成形のコードは以下です。
https://github.com/Sho-max/tableViewSample
今回の問題点
①どのcellを押下して画面遷移をしても、画面遷移後の表示内容が同一。
②対策法をググる
でも、この問題を解決するものが見当たらない。
③解決すべくあらゆる手段を思案
・配列をたくさん作る → 配列の数は有限であるから、実用的ではない。
・Storyboardをたくさん作る → これも配列同様、実用的ではない。
・indexPathを使用して識別 → 採用💮
④では、今回採用のindexPathを使用したコードをゴリゴリ書いていきましょう!!
解決策
今回、変更したコードは以下です。
//遷移後に使用するデータモデルを "testDataModel.swift"から"destinationTestDataModel.swift"に変更しました。
import Foundation
import UIKit

class destinationTestDataModel{
    //    cellに包含する内容の定義
    var testText: String
    var commentText: String

    //    追加した変数:取得したindexPathを格納する
    var passedIndexPath: Int

    //    testDataModelを初期化
    init(dic:[String:Any]) {
        self.testText = dic["text"] as! String
        self.commentText = dic["comment"] as! String
        //        追加した変数を初期化する
        self.passedIndexPath = dic["passedIndexPath"] as! Int
    }

}
import UIKit
import Firebase

class ViewController: UIViewController {

  //    tableview定義
    @IBOutlet var sampleTableView: UITableView!

    //    indexpathを取得するための変数定義
    var passedIndexPath: Int!

                            <省略>

 private func observeInfoFromFirebase(){
        let ref = Database.database().reference()
        ref.child("testComment").observe(.value) { (snapshot) in
            //            配列を初期化
            self.testArray = []
            for data in snapshot.children{
                let snapData = data as! DataSnapshot
                let dicData = snapData.value as! [String:Any]

                let testData = testDataModel(dic: dicData)
                //                didselectRowAtから送られ、passedIndexPathに格納された値とtestData内のpassedIndexPathを比較。同値だったらtestArrayに追加する。
                if self.passedIndexPath == testData.passedIndexPath{
                    self.testArray.append(testData)
                }
            }
            self.sampleTableView.reloadData()
        }

    }
                             <省略>

extension ViewController: UITableViewDelegate, UITableViewDataSource{

                             <省略>

 func tableView(_ tableView: UITableView, didSelectRowAt indexPath: IndexPath) {
        //        追加したコード。didselectRowAtが起動した時(cellが押された時)に、上で定義した変数にindexPathを格納する。
        passedIndexPath = Int(indexPath.row)
        //        セルを選択した後に選択状態を解除する
        sampleTableView.deselectRow(at: indexPath as IndexPath, animated: true)
        self.performSegue(withIdentifier: "toDetail", sender: nil)
    }
  override func prepare(for segue: UIStoryboardSegue, sender: Any?) {
        //        segueが成功した時に起動
        if segue.identifier == "toDetail"{
            let DestinationVC = segue.destination as! destinationViewController
            //    遷移後画面の変数のrecievedIndexPathにこの画面で格納したpassedIndexPathを値渡しする
            DestinationVC.recievedIndexPath = passedIndexPath
        }
    }
}
import UIKit
import Firebase

class destinationViewController: UIViewController {

    @IBOutlet var destinationTableView: UITableView!

    //    遷移前の画面から渡されたindexPath
    var recievedIndexPath: Int!
    //  配列をdestinationTestDataModel型に変更
    var sampleArray = [destinationTestDataModel]()

                    <省略>

private func observeInfoFromFirebase(){
        let ref = Database.database().reference()
        ref.child("sampleComment").observe(.value) { (snapshot) in
            //      配列を初期化
            self.sampleArray = []
            for data in snapshot.children{
                let snapData = data as! DataSnapshot
                let dicData = snapData.value as! [String:Any]

                let testData = destinationTestDataModel(dic: dicData)
            //   遷移前画面から渡されたindexPathとtestDataに含まれるindexPathを比較し、同値であったらsampleArray配列にappendする。
                if testData.passedIndexPath == self.recievedIndexPath{
                    self.sampleArray.append(testData)
                }
            }
            self.destinationTableView.reloadData()
        }
    }
}
extension destinationViewController:UITableViewDelegate,UITableViewDataSource{

                    <省略>

    override func prepare(for segue: UIStoryboardSegue, sender: Any?) {
             if segue.identifier == "toCreatePage"{
                let createDestinationPageVC = segue.destination as! createDestinationPageViewController
            //   画面遷移後の変数であるrecievedIndexPathにこの画面のrecievedIndexPathを入れる、
                createDestinationPageVC.recievedIndexPath = recievedIndexPath
          }
      }
}
このように変更してみると、思ったように動きました!!
まとめ
この仕様は使えるものだと思いますが、意外と実践ベースのソースがないので記してみました。
ファイルの名前の付け方など初心者丸出しの部分は多々ありますが、温かい目で読んでくれると幸いです。
また気づいた点などがあれば投稿したいと思います。