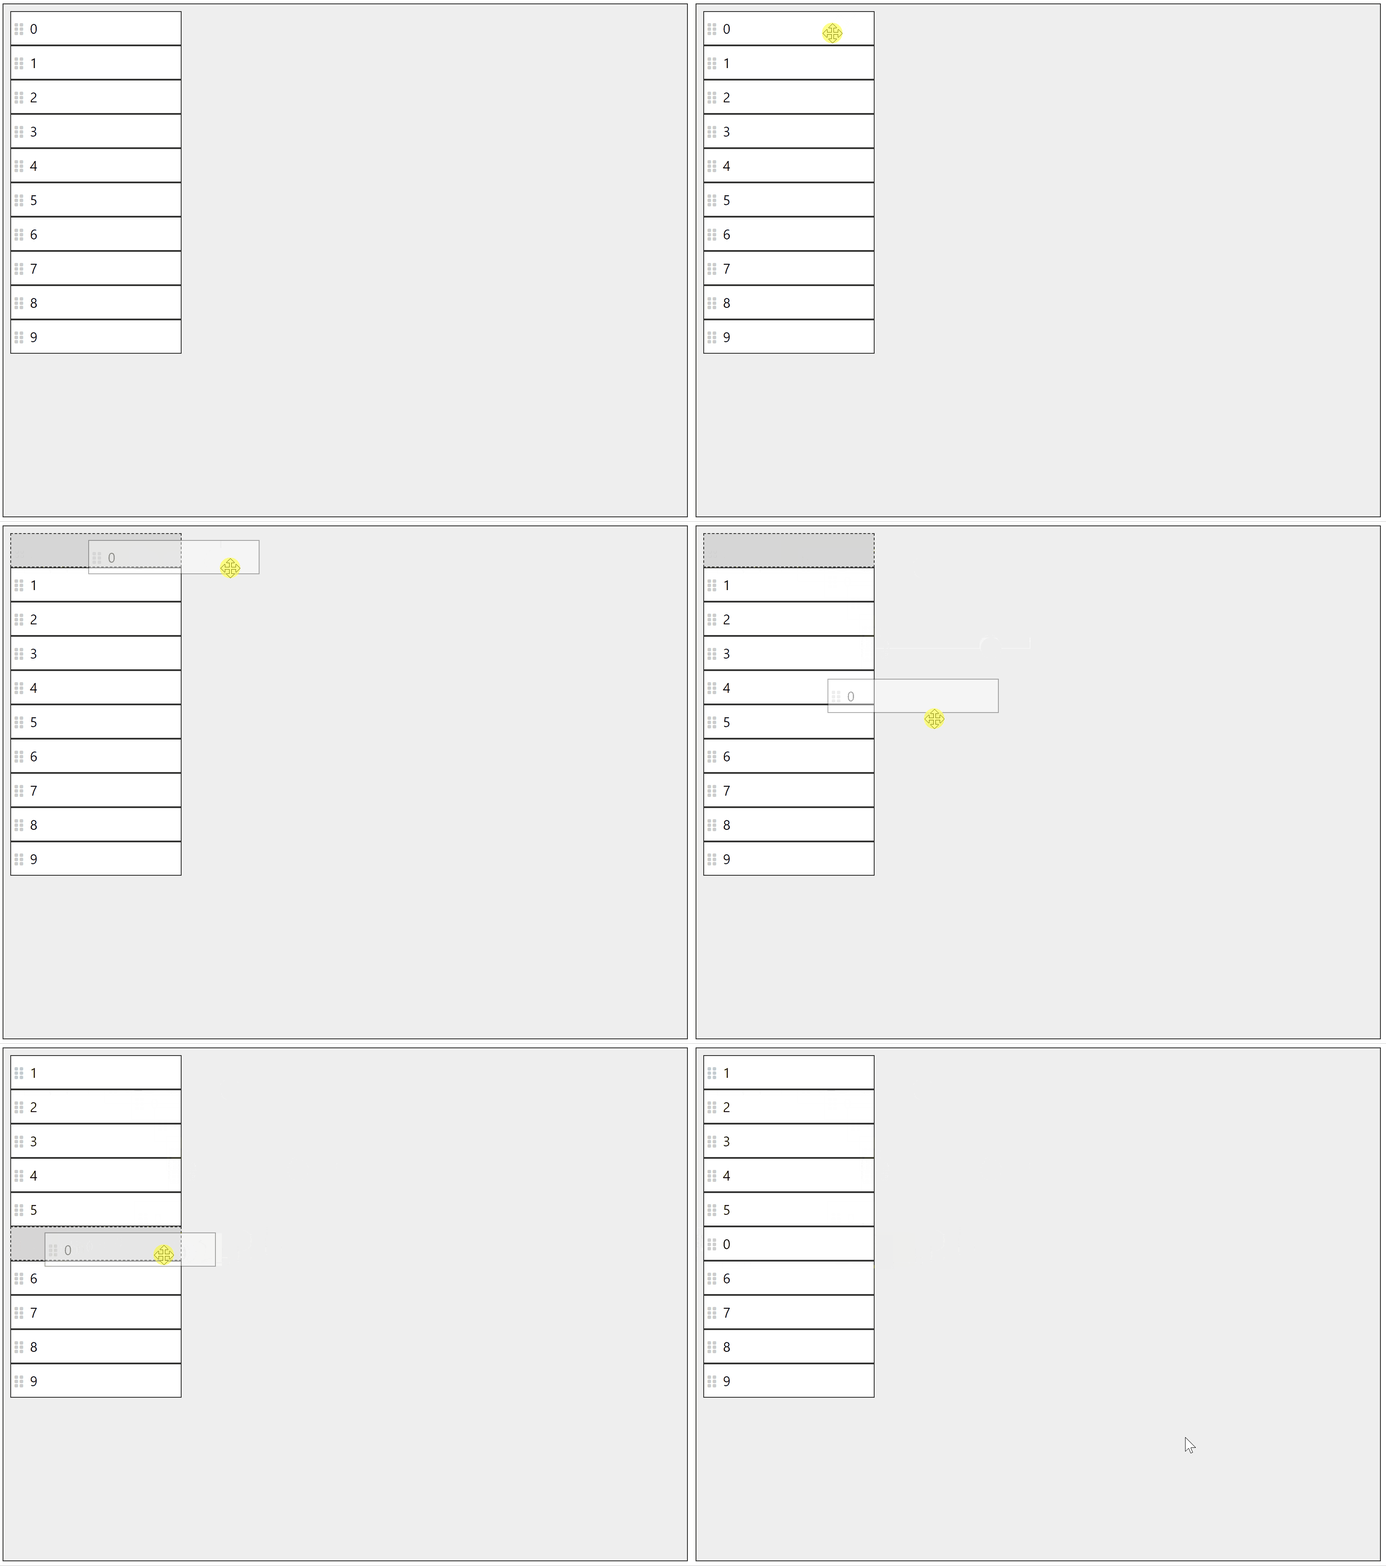
はじめに
ドラッグ&ドロップ(DnD)機能を実装したことありますか?
例えばリストのアイテムの順番を入れ替える機能を作りたいときに、ユーザーがドラッグして移動できるインターフェイスだと便利ですよね。
使ってみると非常に便利なDnD機能ですが、いざ実装してみるとなかなか難しいものです。
最近WEBアプリにドラッグ&ドロップの機能を実装した際に気を付けた点、こだわった点を備忘録として残します。
ReactDnDなど、DnDを簡単に組み込めるようなライブラリは存在しますが、
個人的な感覚として既存の機能にジャストな形でこの手のライブラリを組み込めた経験がないです。(何かしらを妥協する)
要件にジャストでハマらないケースが多いため、今回はフレームワーク(React、SolidJS)の機能のみを使ってゼロベースで実装しました。
SolidJSを使う理由は後述しますが、DnDの実装の中で高頻度でstateを更新する必要があり、そのような実装にはReactよりもSolidJSの方が向いていると判断しました。
(とはいえReactでも工夫することで同様の実装ができます。少しややこしさが増しますが、、)
ReactやVueなどでも基本的な考え方は変わらないので、ぜひ参考にしてもらえればうれしいです。
モダンなフレームワークではあまり意識しないDOM操作などが程よく必要になってくるので、
よりインタラクティブなUIを作るのにちょうどいい練習問題になるかと思います。
実装
イメージしやすいように、実際に開発した内容と合わせて紹介しようと思います。
細かい実装面の話だけでなく、こうするとUI的にもより優れているという観点も含めて極意を紹介します。
前提
実装の前に前提と用語についての整理です。
DnDにもいくつか利用シーンに応じて使い分けがあるかと思います。
ケース1: Google Driveのようにファイルを別のフォルダに配置するためのDnD
ケース2: リストのアイテム同士の順番を入れ替えるためのDnD
今回私が作ったのは、ケース2に当てはまるのでこちらの実装について紹介します。
ただ大まかな実装や極意は共通する部分があるので応用して使ってもらえればと思います。
ReactDnDにおけるSortableの位置づけになるかと思います。
用語の定義は以下の通りです。
アイテム:リスト内のアイテム。アイテム同士の入れ替えを行いたい。
ドラッグエリア:アイテムを動かせる範囲です。マウスの座標を記録する範囲ともいえます。
シャドウ:DnDの移動先に配置しておく仮のアイテム。「今マウスを離したらここに配置されるよ」というのが分かるもの
前提部分の実装
//
interface DragContext {
    // 掴んだアイテムのindex
    index: number;
    // 移動先のindex
    targetIndex: number;
    // 掴んだアイテムのサイズ
    width: number;
    height: number;
    // アイテムの左上位置からのポジション
    itemX: number;
    itemY: number;
}

// DnDに必要な情報を一つのstateに格納
const [$dragContext, setDragContext] = createSignal<DragContext | null>();
const [$mousePosition, setMousePosition] = createSignal<{
    x: number;
    y: number;
}>({ x: 0, y: 0 });

...

// ドラッグエリア内のマウスの座標を記録しておく
<div
    ref={container}
    classList={{
        [styles.container]: true,
    }}
    onMouseMove={(e) => {
        if (!container) {
            return;
        }
        const rect = container.getBoundingClientRect();
        setMousePosition({
            x: e.clientX - rect.x,
            y: e.clientY - rect.y,
        });
    }}
></div>
掴めそうな雰囲気を出す
せっかくDnD機能を作っても、ユーザーに気付いてもらえないと意味がありません。
ドラッグできそうな雰囲気はカーソルやアイコンで示すことができます。
カーソルではcursor: moveを使用するとよいでしょう。
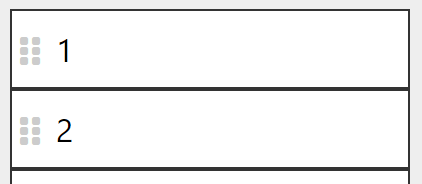
Font Awesomeだと以下のようなアイコンでドラッグできる雰囲気を出せるかと思います。

余談
こちらを実装時に見つけたのがcursor:grabとcursor: grabbingだったのですが、
掴んだらカーソルを変えるというのがどうしても実装できず、断念しました。
何かいい方法を知っている人がいたら教えてください。
実装メモ
/* アイテムのCSS * /
.item {
    display: flex;
    width: 200px;
    height: 40px;
    padding: 4px;
    background: #fff;
    border: 1px solid #333;
    user-select: none;
    cursor: move;
}
ドラッグ時は掴んだ状態をキープして半透明
掴んだら、掴んだアイテムを半透明にして浮かせます。
自分がどのアイテムを掴んでいるのかと背景に何があるのかがちょうどよく分かるのが半透明(opacity: 0.4)です。
掴んでいる状態では、カーソルに連動して半透明のアイテムも移動させるようにします。
これはドラッグエリア内のマウス座標をステートに記録しておくことで実現可能です。(実装メモ参照)
またアイテムのどこを掴んでも(端っことか中央とか)違和感がないように、ユーザーがアイテムのどの部分を掴んだかという具体的な座標もdragContextのitemX, itemYに記録します。(重要)
// アイテムのmousedownイベント
onMouseDown={(e) => {
    e.preventDefault();

    const el = e.currentTarget as
        | HTMLDivElement
        | undefined;

    if (el) {
        const rect = el.getBoundingClientRect();

        setDragContext({
            index,
            targetIndex: index,
            width: rect.width,
            height: rect.height,
            itemX: e.clientX - rect.x,
            itemY: e.clientY - rect.y,
        });
    }
}}
掴んだ位置を記録しないと掴んだ際の半透明アイテムの挙動に違和感が出ます。
ドロップ位置判定
マウスの座標からどこに移動させたいかを判定する大事な部分です。
細かい仕様は要件に合わせて作るのがいいかと思いますが、今回は以下のように考えました。
・接触判定はドラッグ中のアイテムの中央で行う
・他のアイテムの上半分に接触したらその要素の上に置く、下半分に接触したら下に置く
接触判定の位置は一点にした方がいいです。(面積で考えるとややこしい)
アイテムの中央の方がユーザーにとっては直感的です。(社内でも色々試しました)
よく見るのがマウス位置を接触点にしているケースですが、ちょっと違和感を感じることが多いです。
アイテムの中心点が他のアイテムに接触しているかどうかはdocument.elementsFromPointを活用します。
この関数は座標から要素を特定することができます。
実装メモ
createEffect(() => {
    const mousePosition = $mousePosition();
    setDragContext((dragContext) => {
        if (dragContext && container && itemEl) {
            const rect = container.getBoundingClientRect();
            const itemRect = itemEl.getBoundingClientRect();
            // アイテムの中心点を算出
            const itemCenterX =
                rect.x +
                mousePosition.x -
                dragContext.itemX +
                itemRect.width / 2;

            const itemCenterY =
                rect.y +
                mousePosition.y -
                dragContext.itemY +
                itemRect.height / 2;

            // 中心点の座標にあるDOM要素を抽出
            const els = document.elementsFromPoint(itemCenterX, itemCenterY);

            if (els.includes(itemEl)) {
                if (index < dragContext.targetIndex) {
                    return {
                        ...dragContext,
                        targetIndex: index,
                    };
                } else if (index + 1 > dragContext.targetIndex) {
                    return {
                        ...dragContext,
                        targetIndex: index + 1,
                    };
                }
            }
            return dragContext;
        }
        return null;
    });
});
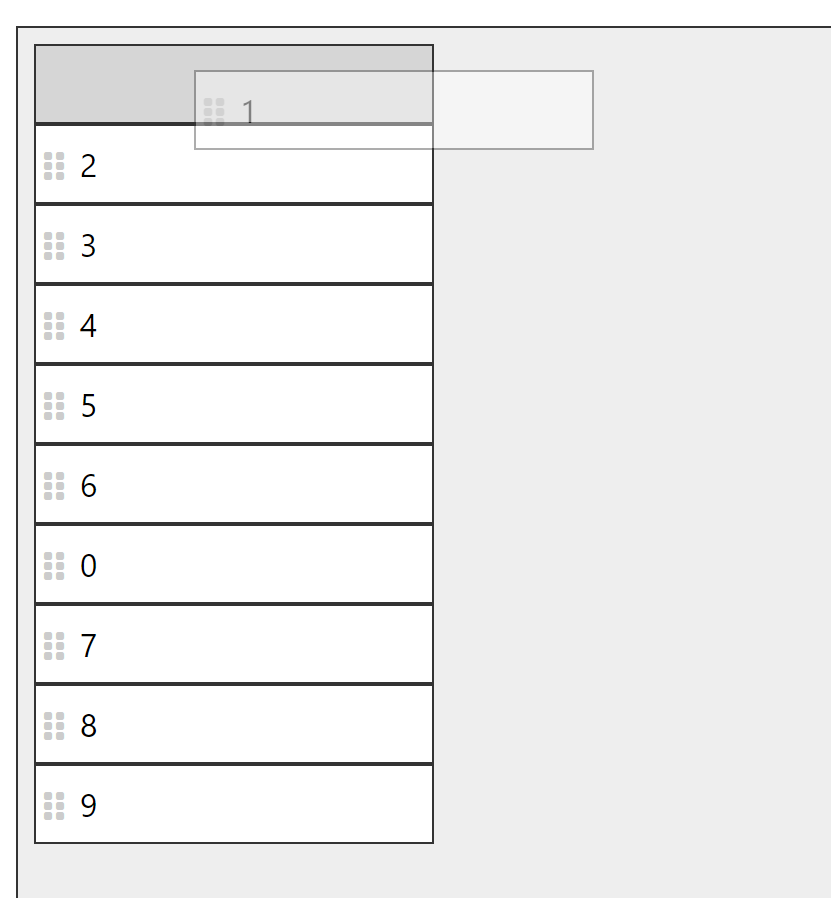
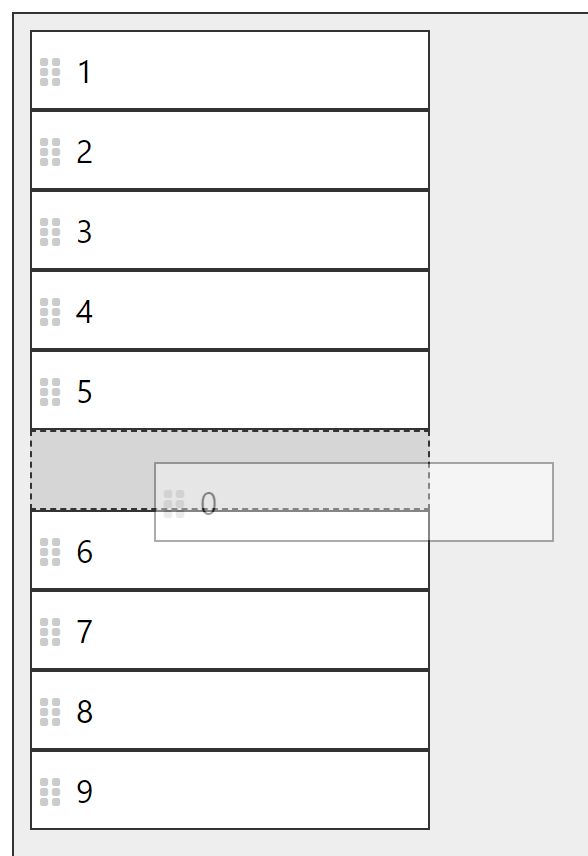
シャドウを置く
上記の方法でドロップ先を算出したら、ドラッグ後のイメージが湧きやすいようにシャドウを置きます。
なんとなくボーダーを点線にするのがそれっぽく見えます。
実装メモ
/* シャドウのCSS */
.item.shadow {
    background: rgba(0, 0, 0, 0.1);
    border: 1px dashed #333;
}
最終的な実装
App.tsx
import {
    Accessor,
    Component,
    createEffect,
    createMemo,
    createSignal,
    Index,
    Show,
} from "solid-js";

import styles from "./App.module.css";

interface DragContext {
    // 掴んだアイテムのindex
    index: number;
    // 移動先のindex
    targetIndex: number;
    // 掴んだアイテムのサイズ
    width: number;
    height: number;
    // アイテムの左上位置からのポジション
    itemX: number;
    itemY: number;
}

const Shadow: Component = () => {
    return (
        <div
            classList={{
                [styles.item]: true,
                [styles.shadow]: true,
            }}
        ></div>
    );
};

const App: Component = () => {
    let container: HTMLDivElement | undefined = undefined;
    const [$items, setItems] = createSignal(
        new Array(10).fill(0).map((_, i) => `${i}`)
    );

    const [$dragContext, setDragContext] = createSignal<DragContext | null>();
    const [$mousePosition, setMousePosition] = createSignal<{
        x: number;
        y: number;
    }>({ x: 0, y: 0 });

    const item = ($id: Accessor<string>, index: number) => {
        let itemEl: HTMLDivElement | undefined = undefined;

        createEffect(() => {
            const mousePosition = $mousePosition();
            setDragContext((dragContext) => {
                if (dragContext && container && itemEl) {
                    const rect = container.getBoundingClientRect();
                    const itemRect = itemEl.getBoundingClientRect();
                    const itemCenterX =
                        rect.x +
                        mousePosition.x -
                        dragContext.itemX +
                        itemRect.width / 2;

                    const itemCenterY =
                        rect.y +
                        mousePosition.y -
                        dragContext.itemY +
                        itemRect.height / 2;

                    const els = document.elementsFromPoint(
                        itemCenterX,
                        itemCenterY
                    );

                    if (els.includes(itemEl)) {
                        if (index < dragContext.targetIndex) {
                            return {
                                ...dragContext,
                                targetIndex: index,
                            };
                        } else if (index + 1 > dragContext.targetIndex) {
                            return {
                                ...dragContext,
                                targetIndex: index + 1,
                            };
                        }
                    }
                    return dragContext;
                }
                return null;
            });
        });

        return (
            <>
                <Show when={$dragContext()?.targetIndex === index}>
                    <Shadow />
                </Show>

                <div
                    ref={itemEl}
                    classList={{
                        [styles.item]: true,
                        [styles.hidden]: $dragContext()?.index === index,
                    }}
                    onMouseDown={(e) => {
                        e.preventDefault();

                        const el = e.currentTarget as
                            | HTMLDivElement
                            | undefined;

                        if (el) {
                            const rect = el.getBoundingClientRect();

                            setDragContext({
                                index,
                                targetIndex: index,
                                width: rect.width,
                                height: rect.height,
                                itemX: e.clientX - rect.x,
                                itemY: e.clientY - rect.y,
                            });
                        }
                    }}
                >
                    <span style={{ margin: "auto 0", color: "#ccc" }}>
                        <i class="fa-solid fa-grip-vertical"></i>
                    </span>
                    <span
                        style={{
                            margin: "auto 8px",
                            "line-height": 1,
                        }}
                    >
                        {$id()}
                    </span>
                </div>
            </>
        );
    };

    return (
        <div
            ref={container}
            classList={{
                [styles.container]: true,
            }}
            onMouseUp={() => {
                const dragContext = $dragContext();
                const items = $items();

                if (dragContext) {
                    const _items: (string | null)[] = [...items];
                    const item = _items.splice(dragContext.index, 1, null);
                    _items.splice(dragContext.targetIndex, 0, item[0]);
                    setItems(_items.filter((n): n is string => !!n));
                }

                setDragContext(null);
            }}
            onMouseMove={(e) => {
                if (!container) {
                    return;
                }
                const rect = container.getBoundingClientRect();
                setMousePosition({
                    x: e.clientX - rect.x,
                    y: e.clientY - rect.y,
                });
            }}
        >
            <Index each={$items()}>{item}</Index>

            <Show when={$dragContext()?.targetIndex === $items().length}>
                <Shadow />
            </Show>

            <Show keyed when={$dragContext()}>
                {(dragContext) => {
                    const $id = createMemo(() => $items()[dragContext.index]);

                    return (
                        <div
                            classList={{
                                [styles.item]: true,
                                [styles.float]: true,
                            }}
                            style={{
                                left: `${
                                    $mousePosition().x - dragContext.itemX
                                }px`,
                                top: `${
                                    $mousePosition().y - dragContext.itemY
                                }px`,
                                width: `${dragContext.width}px`,
                                height: `${dragContext.height}px`,
                            }}
                        >
                            <span style={{ margin: "auto 0", color: "#ccc" }}>
                                <i class="fa-solid fa-grip-vertical"></i>
                            </span>
                            <span
                                style={{ margin: "auto 8px", "line-height": 1 }}
                            >
                                {$id()}
                            </span>
                        </div>
                    );
                }}
            </Show>
        </div>
    );
};

export default App;
App.module.css
.container {
    position: relative;
    margin: 20px;
    padding: 8px;
    width: 800px;
    height: 600px;
    display: inline-block;
    background: #eee;
    border: 1px solid #333;
    overflow: auto;
}

.item {
    display: flex;
    width: 200px;
    height: 40px;
    padding: 4px;
    background: #fff;
    border: 1px solid #333;
    user-select: none;
    cursor: move;
}

.item .inner {
    margin: auto 0;
}

.item.float {
    position: absolute;
    z-index: 10000;
    opacity: 0.4;
}

.item.hidden {
    display: none;
}

.item.shadow {
    background: rgba(0, 0, 0, 0.1);
    border: 1px dashed #333;
}
細かい部分
Reactの場合、stateでやると危険(refがおすすめ)
マウスの座標は高頻度(ミリ秒単位)でstateを更新することになり毎回render関数が走ってしまいます。
(SolidJSやSvelteはstateの変更に応じて直接DOMを操作するのでその心配がありません。)
Reactの場合は、mousePositionをuseRefなどでReactiveにならないような形で保存するのがおすすめです。
ReactiveにならないのでsetIntervalやrequestAnimationFrameなどで定期実行することで実現できます。
スマホの時はtouchstartを使う
スマホの場合は、mousedownの代わりにtouchstartを使うことでタッチによるDnD操作ができます。
実装が少し変わるので応用が必要になります。
さいごに
今回はReact DnDのSortableのような仕組みをSolidJSを使って実装しました。
DnD機能を実装するのに重要な要素をいくつかピックアップして紹介しました。
配列の入れ替えだけでなく、徳衛の範囲にドラッグしたりなどと色々応用が効くかと思います。
この手のインタラクティブなUIはReactよりもSolidJSの方が作りやすいと感じました。
こういったマニアックなものを自前で作っていくシリーズを今後もやりたいです。


