はじめに
AppDelegateクラスから、任意のタイミングで画面遷移する処理の実装方法についてまとめます。
AppDelegateクラスでローカル通知を受け取った際に、画面遷移させたいといった場合などを想定しています。
Controller間の画面遷移は、以下の記事等をご参考にしてください。(いずれもSwift4系です)
環境
- macOS Mojavaのバーション:10.14
- Xcodeのバーション:10.1
- Swiftのバーション:4.2.1
画面遷移方法
では、本題に入ります。
これから、2つの方法について紹介していきます。
どちらの方法も、画面遷移させたいControllerを指定するためStoryboard IDを設定する必要がありますが、それ以外は、コードで完結します。
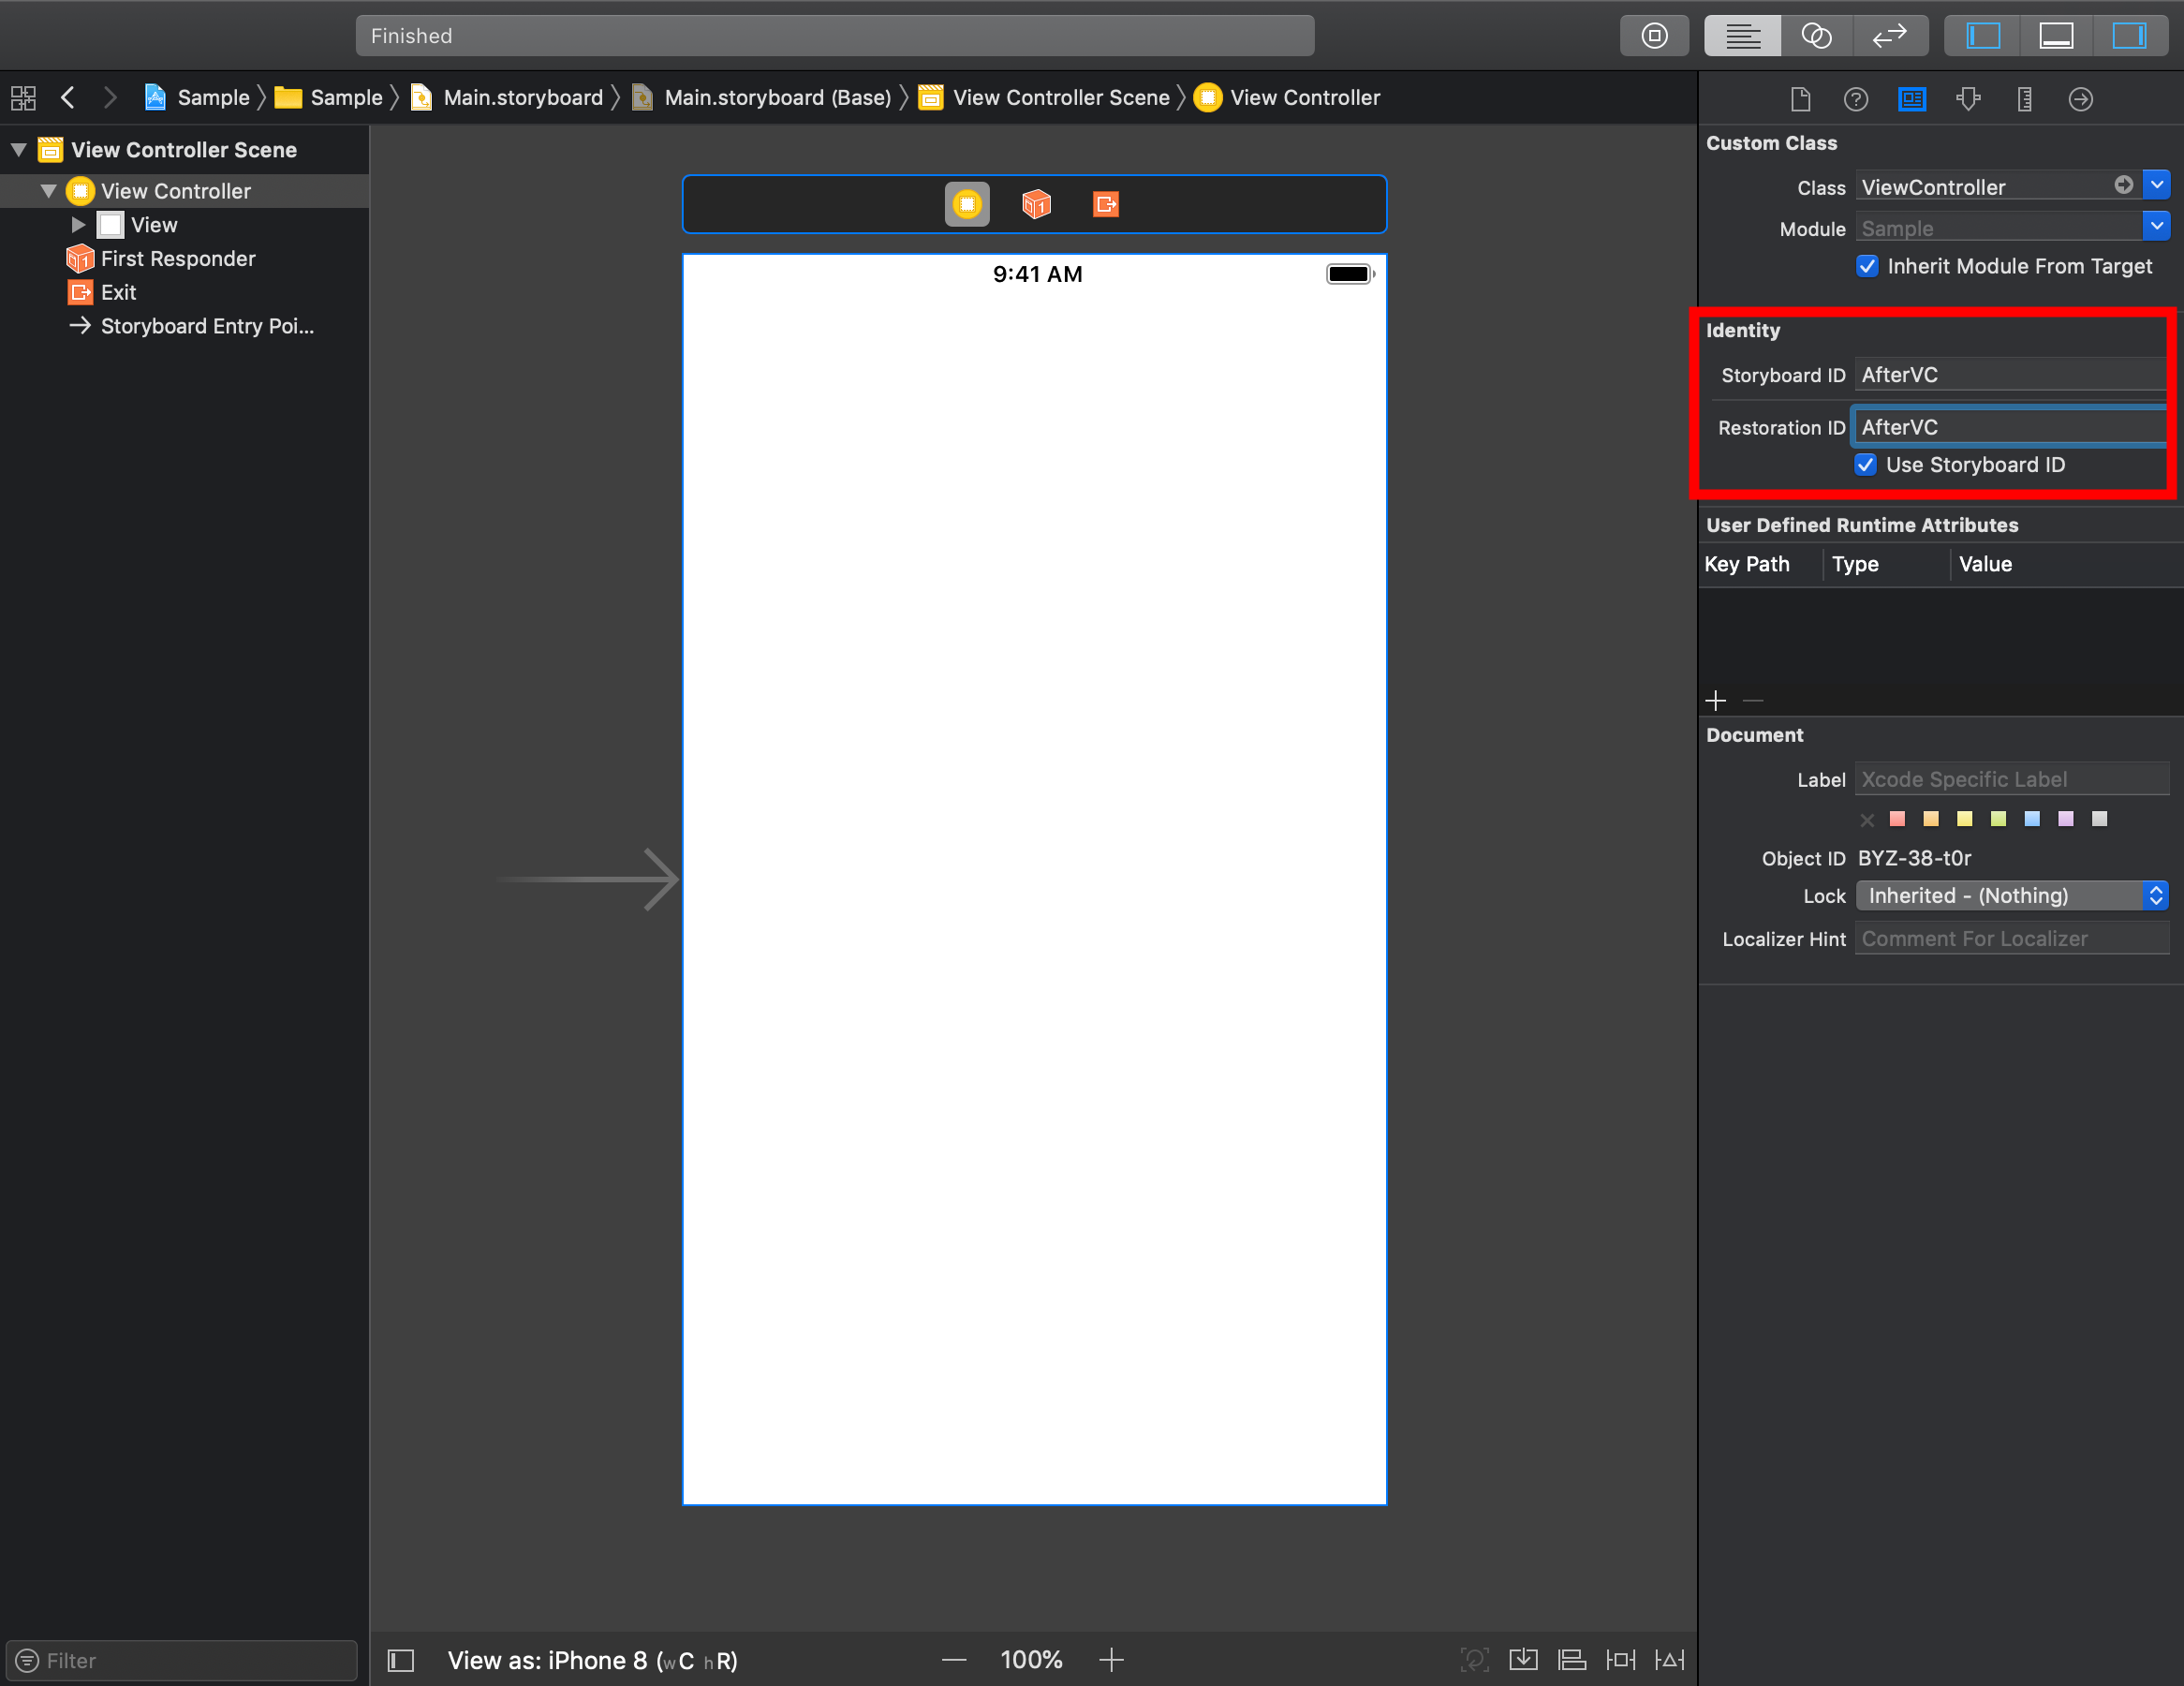
まず、遷移させたいControllerのStoryboard IDを設定します

上の画像の赤く囲った部分を、以下のように変更します。値は任意で、適したように設定してください。
1つ目の方法
AppDelegateでWindowを生成して、生成したWindowにControllerを設定し遷移させる
以下の処理を、AppDelegateクラスの画面遷移させたい部分に記述します。
class AppDelegate: UIResponder, UIApplicationDelegate{


    // 中略


    //画面遷移させたい部分に以下の処理を記述
    // windowを生成
    self.window = UIWindow(frame: UIScreen.main.bounds)
    // Storyboardを指定
    let storyboard = UIStoryboard(name: "Main", bundle: nil)
    // Viewcontrollerを指定
    let initialViewController = storyboard.instantiateViewController(withIdentifier:     "AfterVC")
    // rootViewControllerに入れる
    self.window?.rootViewController = initialViewController
    // 表示
    self.window?.makeKeyAndVisible()


    // 中略


}
let storyboard = UIStoryboard(name: "Main", bundle: nil)のnameには、
画面遷移させたいControllerがあるStoryboardの名称を入れます。
let vc = storyboard.instantiateViewController(withIdentifier: "AfterVC")
のwithIdentifierには、先ほどStoryboardで設定した値を入れます。
2つ目の方法
遷移元となるControllerで画面遷移するメソッドを定義し、AppDelegate.swiftで呼び出す
また、画面遷移元とどちらの方法も呼び出し元となる画面は、どの画面でも
現在表示している画面が現在定義したControllerでなくても問題ない。
そのため、どのControllerでメソッドを定義しても画面遷移の処理は、動作します。
こちらの方法では、Controller.swiftで定義した現在画面を取得するメソッドをAppDelegate.swiftで実行し、取得した値を使いpresentメソッドで画面遷移します。
class ViewController: UIViewController{


    // 中略


    // 現在表示されている最前面の画面を取得するメソッド
    func getTopMostViewController()->UIViewController{
        TC = UIApplication.shared.keyWindow?.rootViewController;
        while ((TC!.presentedViewController) != nil) {
            TC = TC!.presentedViewController;
        }
        return TC!;
    }

    // 画面遷移させるメソッド
    func ChangeVC() {
        let storyboard = UIStoryboard(name: "Main", bundle: nil)
        let AfterVC = storyboard.instantiateViewController(withIdentifier: "AfterVC")

        TC?.present(AfterVC, animated: true, completion: nil)


    // 中略


}
以下の処理を、AppDelegateクラスの画面遷移させたい部分に記述します。
class AppDelegate: UIResponder, UIApplicationDelegate{

    // グローバル宣言
    var CurrentVC = UIApplication.shared.keyWindow?.rootViewController


    // 中略


    //画面遷移させたい部分に以下の処理を記述
    ViewController().getTopMostViewController()
    ViewController().ChangeVC()


    // 中略


}
2つの遷移方法の違いについて
1つ目の画面遷移方法のメリット
- 画面遷移する処理のコードが、AppDelegateクラスのみで完結する
1つ目の画面遷移方法のデメリット
- 画面遷移させるたびに、AppDelegateクラスにWindowを生成する処理を記述することになるため、何度も画面遷移する場合は、コードが肥大化する
2つ目の画面遷移方法のメリット
AppDelegate.swiftでの記述が短い
- AppDelegateでは、Controllerで定義したメソッドの呼び出しタイミングのみ明記することになる。
- メソッドを切り出しているため、柔軟に処理を変更可能
- AppDelegateクラスの肥大化を避けることができる。
まとめ
- 何度もAppDelegateクラスから画面遷移しない場合は、コードがAppDelegateクラスのみで完結する1つ目の方法でも問題ない
- 基本は、AppDelegateクラスの肥大化を避けることができ、1つ目の方法より柔軟な変更に強い、2つ目の方法を使うべき
極力、AppDelegateクラスの肥大化は、処理の複雑化を避けるために、避けたいところです。
おわりに
AppDelegateクラスからの画面遷移処理にも様々な記述方法があり、それぞれ学びがありました!
他にもこんなやり方もあるよ・この書き方の方がいいよ、等ありましたら、コメントをしていただけると嬉しいです!